


DIY Tic-Tac-Toe: How to Make a Yard Game For Outdoor Fun

My sister-in-law, Bree, is getting married this fall so we are in full wedding planning mode over here.
She is having a gorgeous outdoor wedding and thought it would be fun to make a DIY tic-tac-toe that we could put in the garden. She asked me to help her create it for the reception.
There was definitely some sweat equity that went into making this (literally) but I'm pleased with how it came out.
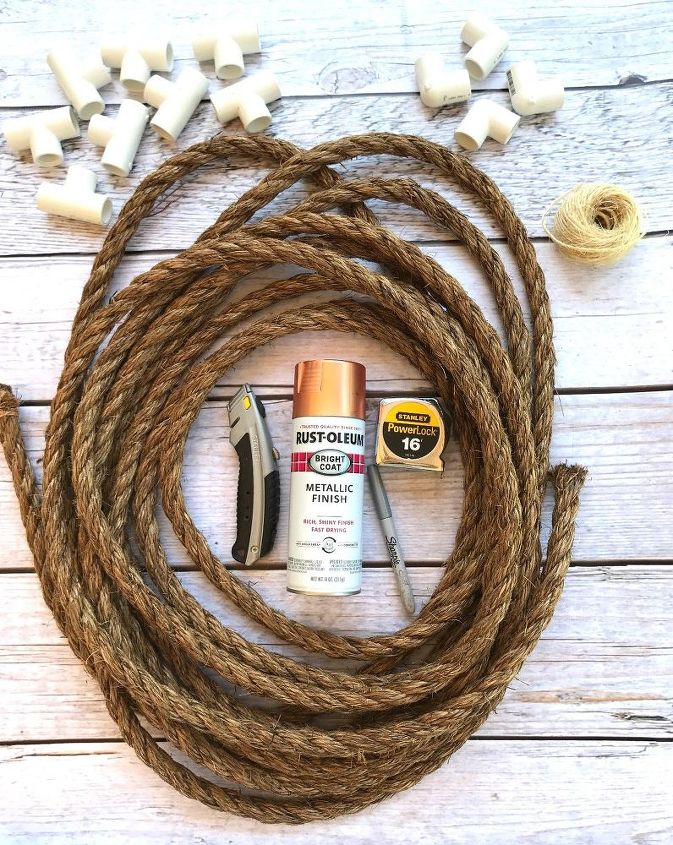
Tools and Materials:
- Manila natural rope 3/4"x1" (I purchased 40' of rope for this project)
- 1/2" PVC 90° elbows (4)
- 1/2" PVC Tees (8)
- 4x4 plywood underlayment
- Twine
- Stanley box cutter
- Stanley PowerLock measuring tape
- Sharpie
- Rustoleum copper metallic finish spray paint
- E6000
- Large stencils • I made 14" stencils for the X's and ♥️'s using my Silhouette Cameo 2 machine.
- Rough grit sandpaper
Hometalk may receive a small affiliate commission from purchases made via Amazon links in this article but at no cost to you.
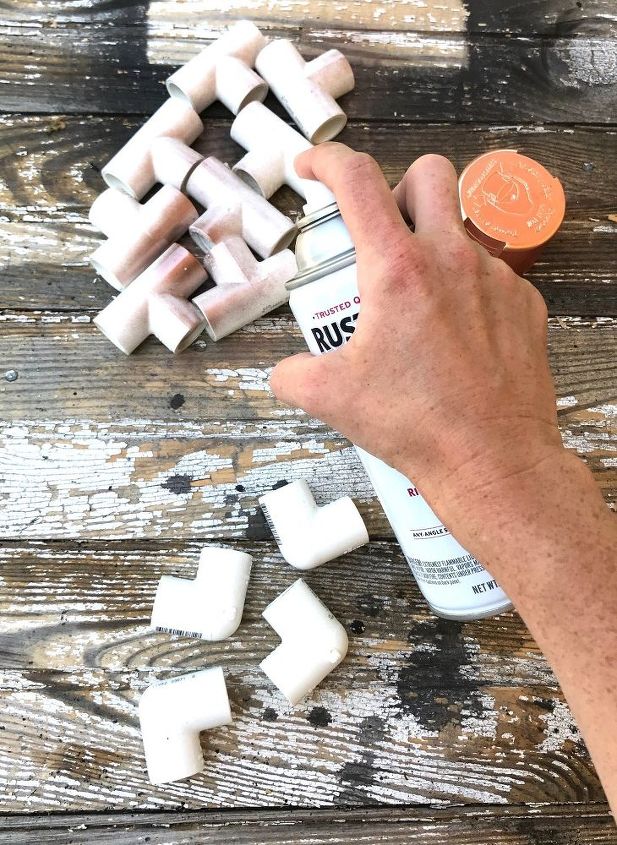
1. Spray PVC pieces
Begin by spray painting the PVC pieces with Rustoleum Metallic Copper finish. Make sure to paint both sides, allowing one side to dry completely before flipping them over to spray the other side.
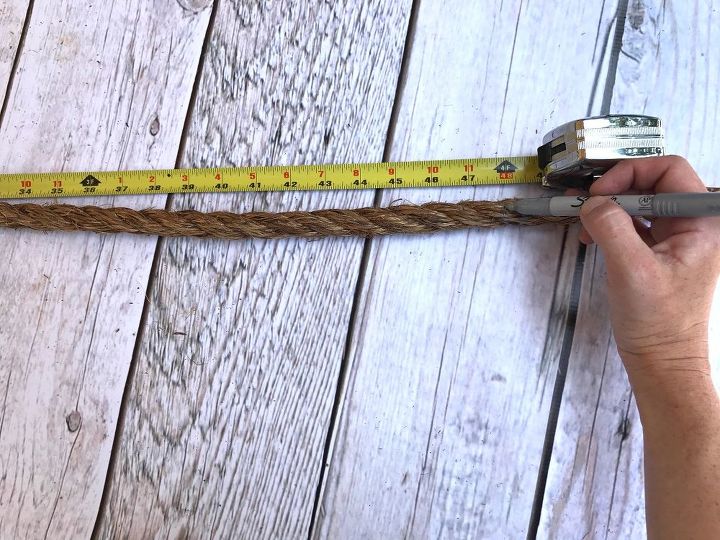
2. Measure, Tie and Cut Rope
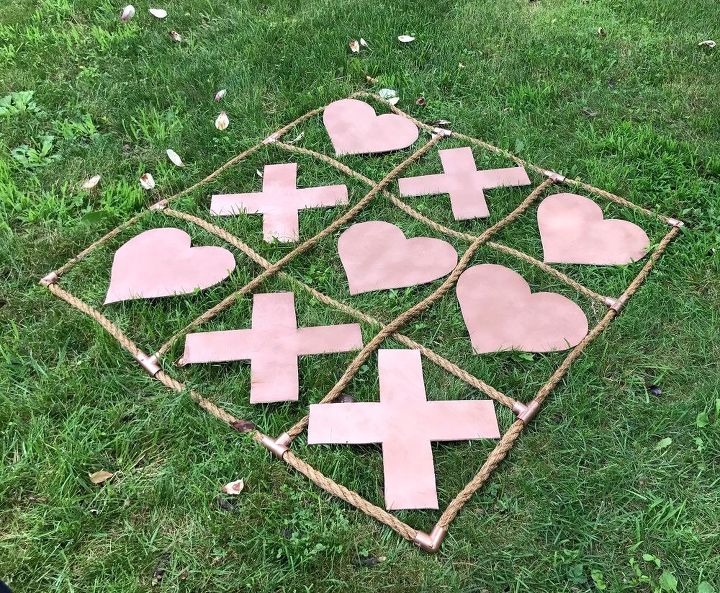
Seeing as those this game was going outdoors, I decided to make a giant tic-tac-toe board.
I chose to make mine 4'x4' so I measured out eight (8) 4' sections of the rope.
To create your tic-tac-toe board, you'll need four 4-foot sections of rope. Measure and mark these sections, then tie twine at each mark. This will prevent the rope from fraying and coming apart.
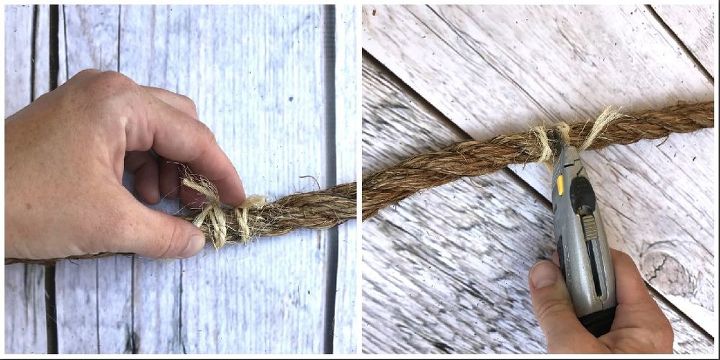
Then, I tied twine on my 4' marks. You'll want to include this part of the step so that your rope doesn't fray and pull apart.
After I finished tying the twine, I used a box cutter to cut through the rope.
I had to bear down hard and use a short, quick sawing motion (and caution, of course!)--I wasn't sure if this method of cutting would work with such thick rope but it surprisingly cut right through.
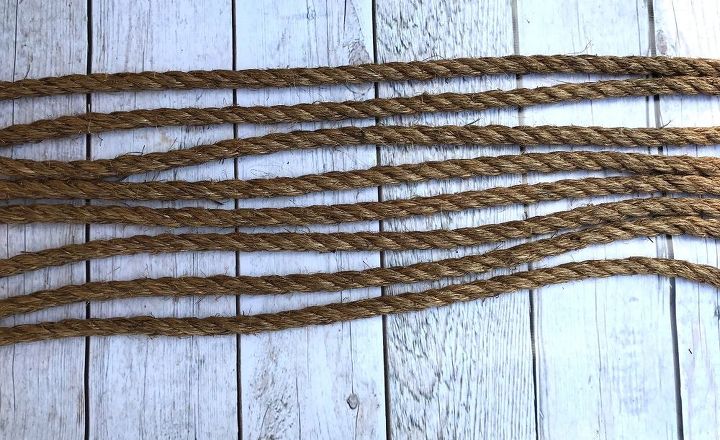
Lay out your eight 4-foot rope pieces to form a tic-tac-toe board, so you can visualize how it will look.
3. Assemble the Tic-Tac-Toe "Board"
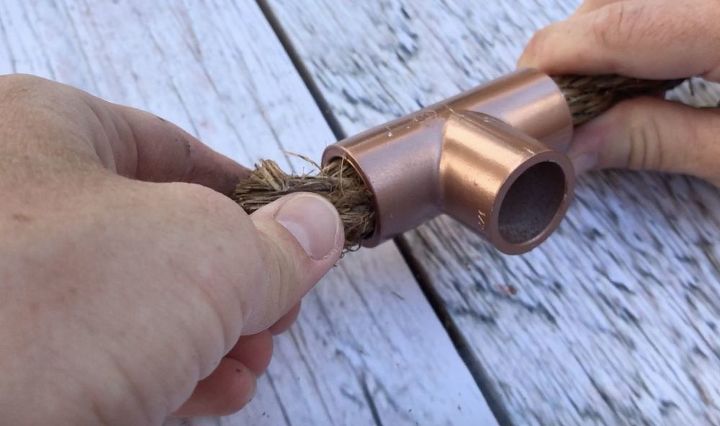
Slide two PVC Tees onto each rope section.
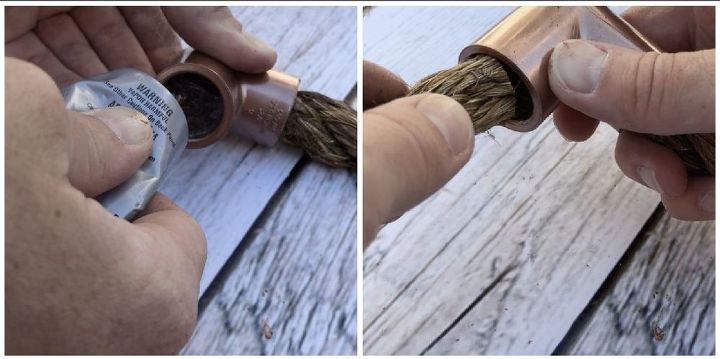
Then, I applied E6000 glue to each end of the 90 elbows and pushed the rope into either end of the elbows.
A FEW NOTES:
- When choosing your PVC elbows at the store, be sure to get the ones without threads. I didn't pay attention to this when I purchased mine so the elbows with threads made it more difficult to push the rope into with the glue.
- When using the E6000 glue, you have to be very careful not to get any on the painted PVC as the glue has solvent in it which will rub your paint right off and make a mess on your hands. An option would be to assemble your tic-tac-toe "board" first, then tape off the rope close to the PVC pieces and spray last.
- Make sure to let the assembled "board" set overnight in order for the glue to bond.

4. Create game pieces
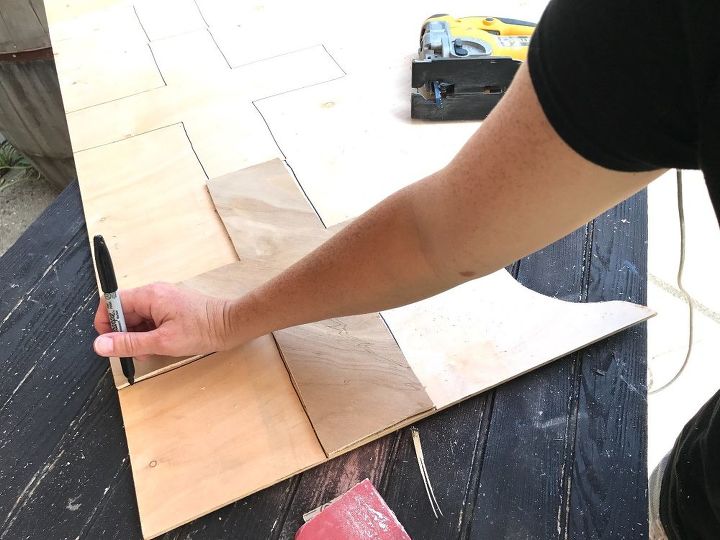
For your game pieces, you can get creative. If you're using this for a wedding reception like Bree did, you might want X's and ♥️'s. Rob used our Silhouette Cameo machine to create stencils for these shapes.
The machine can only cut shapes that are 12 inches wide. To work around this limitation, he made half of an X and a ♥️, allowing me to cut two of each shape. I then placed these mirrored shapes on the 4x4 plywood board.
I stuck the vinyl to the wood board and traced the outlines using a Sharpie and then removed the vinyl.
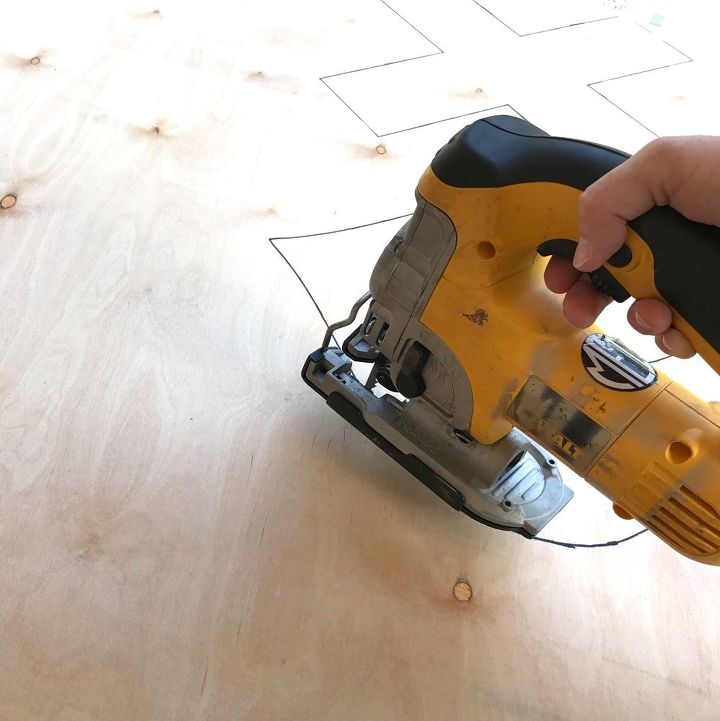
I used a DeWalt jig saw to cut out the X and ♥️ that I had traced.
Then, I used the X and ♥️ that I cut out to use as stencils for the remaining game pieces.
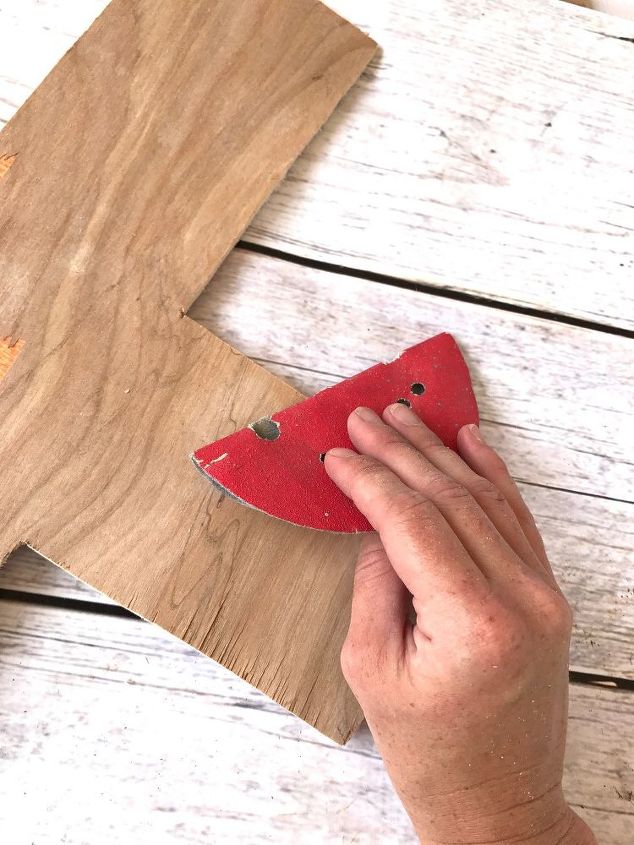
After I cut out all of my game pieces, I used a piece of rough grit sandpaper to knock down the edges and get rid of any splinters.
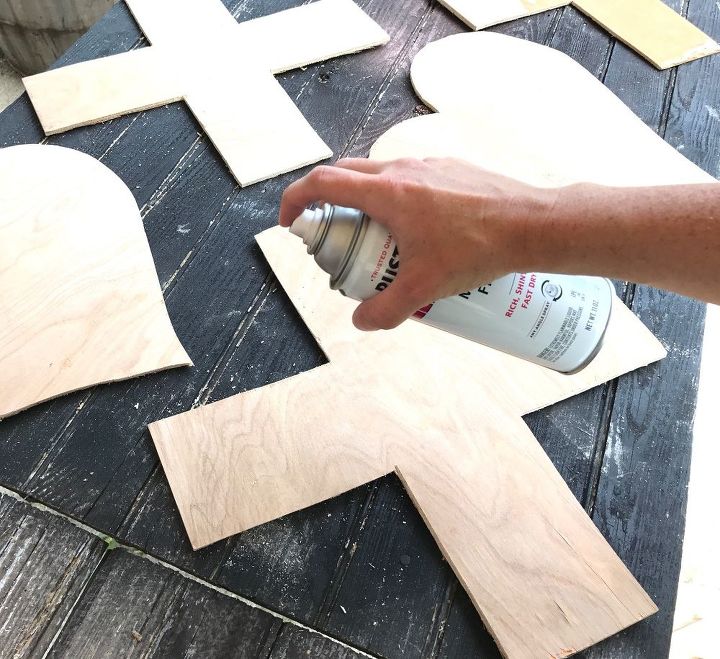
And finally, I sprayed the game pieces with the same copper spray I used for the PVC pieces.
You can choose to leave your wood natural but this particular type of plywood started flaking off and I didn't like the way it looked which is why I chose to paint it.
Find inspiration for your Thanksgiving celebration
DIY Tic-Tac-Toe Tutorial
With your homemade Tic-Tac-Toe game complete, you're ready to enjoy hours of outdoor entertainment.
Get your friends and family together and challenge them to a friendly match. Whether it's for a wedding or a Thanksgiving celebration, this giant tic-tac-toe game will be a hit.
If you decide to try this project, share your experience in the comments below!
Comments
Join the conversation
-
WOW This is so clever. Very creative.
-
LOVE the rope!!! This is one cool idea - wish my Grandbabies weren't leaving Monday :'( BUT --- on the bright side - I can have this completed before they come back next summer! TY!


Frequently asked questions
Have a question about this project?
Why not just use PVC pupe instead of rope ? U can just NOT glue two connections do u can take apart and store when not in use