


Take Your Art Outside!
3 Materials
$40
3 Hours
Easy
sponsored post
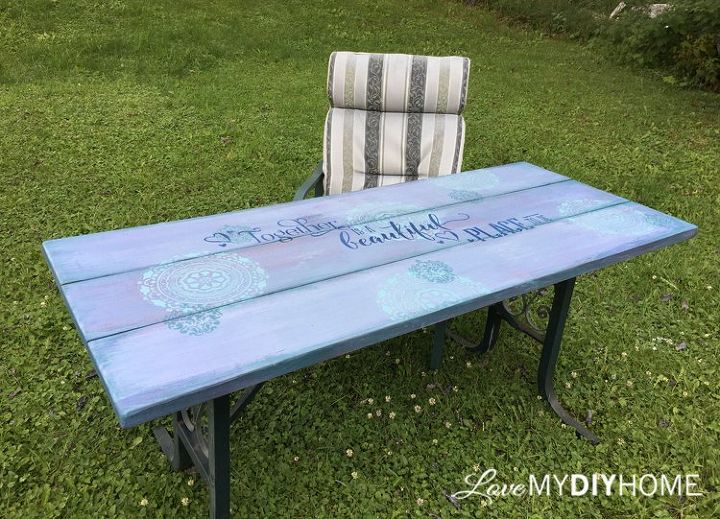
I've wanted a picnic table every since we moved from Michigan to Wisconsin but never found one I was willing to pay for. They're kinda expensive. Or maybe I'm just cheap. But either way…I FOUND ONE!

I walked right past it not even noticing it on the way in.
We looked around for a few minutes and then got in line o pay for a few little things we found, an ax for Adam, a jack knife for Isaac, a few this's and thats. Then Jillian said, "Hey, did you see that?"
She pointed out a picnic table – with a $20 price tag. I walked over and grabbed the tag and got back in line. Not 5 minutes later a lady asked me if I took the tag to the picnic table and I showed her getting an, "Ugh" from her.
STEP 1: Sand it down to get rid of the flaking paint and give you a smoother surface. Wipe it down with a damp rag to get the dust off.
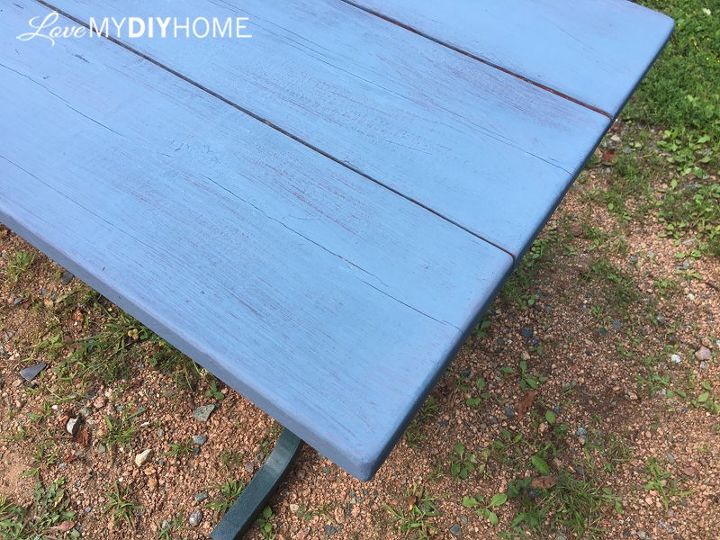
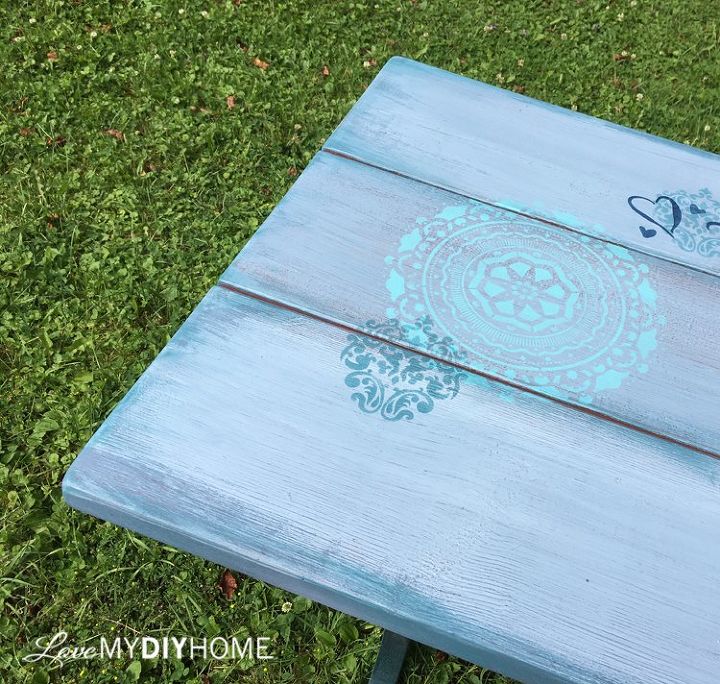
STEP 2: Mix up Old Fashioned Milk Paint – one jar of Soldier Blue and another of the lighter blue, Slate. Paint one layer of Soldier Blue and let dry. Let a little of the original red show through. We're going for a layered look.
STEP 3: Paint on top of the Soldier Blue the lighter shade, Slate.
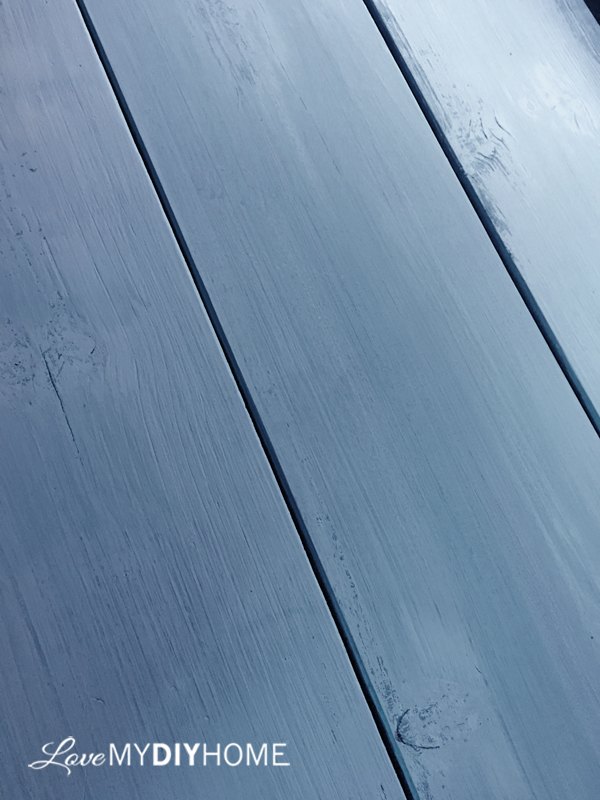
STEP 4: Distress down to the medium blue and even more to bring out a little bit of the original red.
STEP 5: Topcoat with varnish one thin layer to seal the paint before stenciling. This will provide you with a barrier between the stencil paint and your base coat, protecting it from mistakes. I like to sandwich my stenciled motifs between layers of topcoat.
STEP 6: Stencil a couple of different motifs all over in coordinating teals, overlapping just a bit.
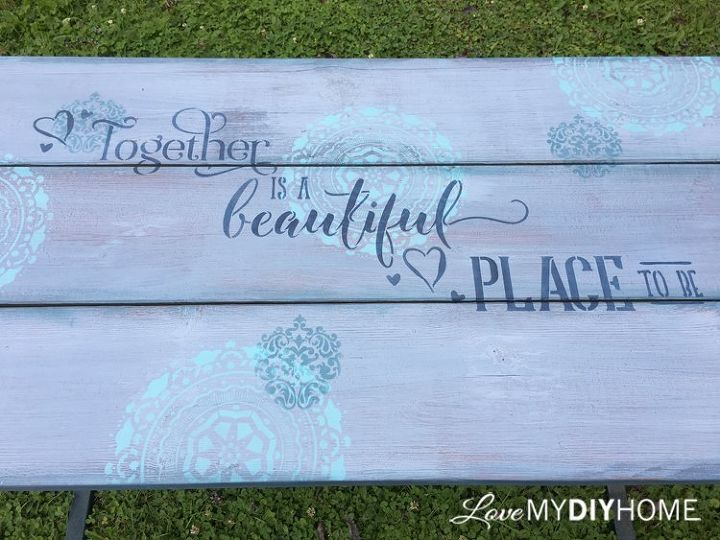

STEP 7: Take a high grit sanding sponge and distress both motifs by brushing the sanding sponge over the motifs only one way, lightly. Doing this will give you an instant aged look.
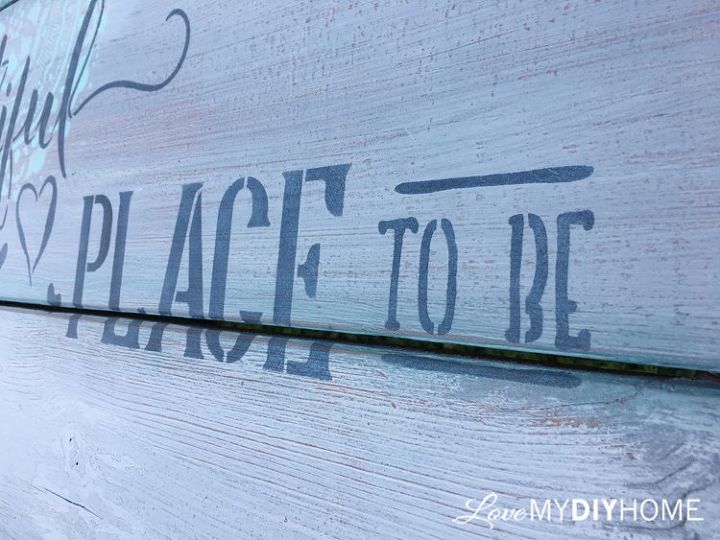
STEP 8: Stencil "Together" in the middle, spreading it out to cover more of the table than the original layout. After stenciling the smaller motif, take the brush around the edges of the boards to highlighting all edges to add to the layering.
STEP 9: Spray or wipe on on three more coats of varnish sanding lightly every coat after it dries before applying the next layer. I sprayed one and wiped on two more using my detailer's sponge.
Often I see carefully laid out designs on a piece and think, "I would never try to do that." Though perfection is an unrealistic goal, some of us try to reach it. Too often. But sometimes a controlled randomness is much more desirable. In this case, perfection was imperfection. Randomness actually ends up being my perfection.
For more info, photos and other tutorials, come visit Love My DIY Home at the link below. We also have a great Facebook group, Furniture Flipping Forum if you're looking for your tribe!
My paint was supplied for this project by the Old Fashioned Milk Paint Company. Great stuff!

Want more details about this and other DIY projects? Check out my blog post!


Frequently asked questions
Have a question about this project?