


Beach Inspired Windchimes
A simple beach inspired project for those of us who love the beach.
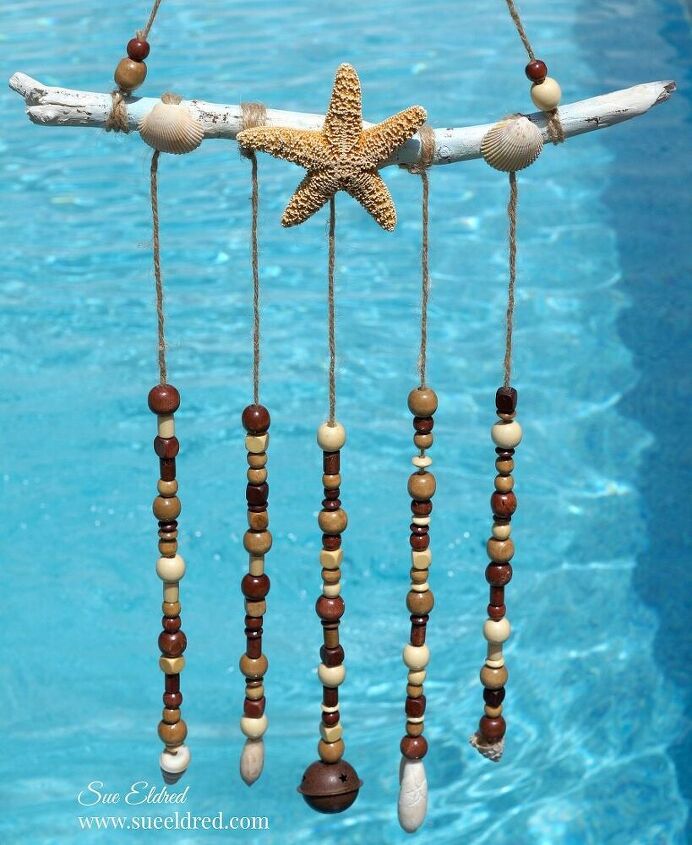
If you’re one of the lucky ones that live on the ocean or have a Beach House. Here is a simple project to make that you can hang on the back porch. Or if you don’t live on the beach or have a beach house, the Windchime is a fun reminder of trips to the ocean, and a great way to use some of those shells you collected.
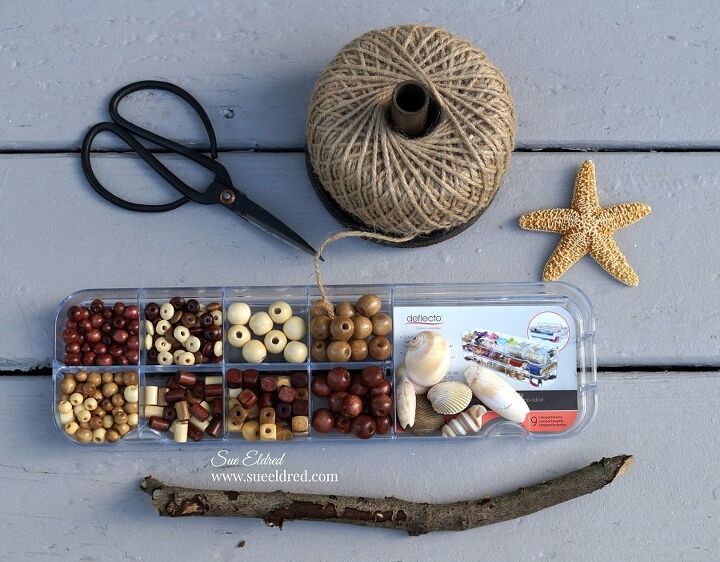
Supplies Used: (*affiliate link)
- Beach Seashells*
- Driftwood Stick or Stick from your yard
- Wood Beads
- Twine and Scissors
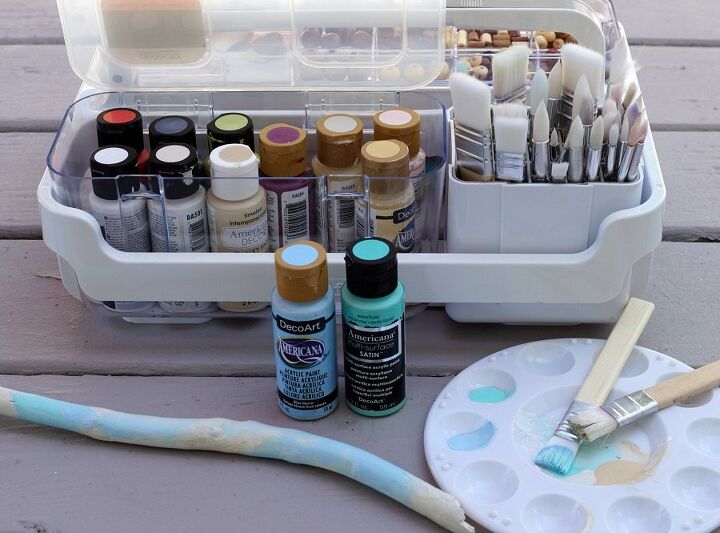
- DecoArt Acrylic Paint: Cotton Ball, Blue Haven, Aqua
- Paint Brush
- Fine Grit Sandpaper
- Blue Removable Painter’s Tape
- DAP Rapid Fuse Adhesive*
Faux Driftwood…
Because I didn’t have an actual driftwood stick from the beach. I used a stick found in the yard and broke it down to size.
- Scrape the bark off the stick. (I used an old table knife.)
- Paint the stick with white acrylic paint and a couple of stripes of pale blue and aqua.
- Give the stick a light sanding with fine-grit sandpaper to rough it up and make it look more natural.
Make sure to click on the blog post link (at the bottom) for more information about the storage pieces I used while creating my windchime.
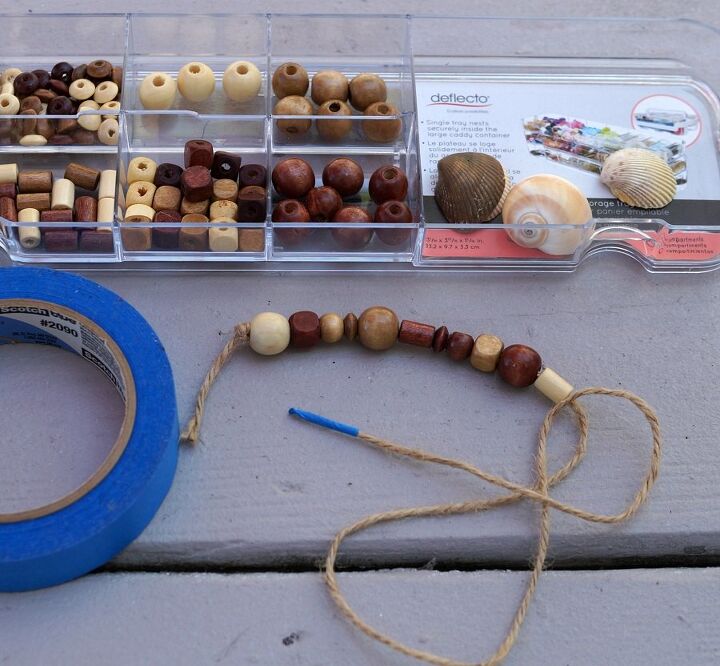
- Cut five pieces of twine approximately 24″ long.
- Tie a knot on one end of the twine.
- Wrap a small piece of blue removable painters tape on the other end of the twine to keep the twine from fraying.
- String Wood Beads onto the twine.
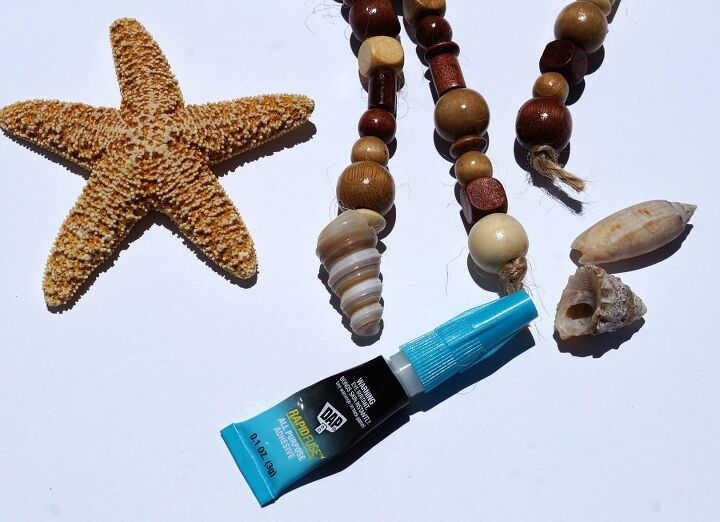
- Use a super-fast grab adhesive like DAP Rapid Fuse Adhesive (my favorite, see link above)
to glue the shells onto the end of the knots.
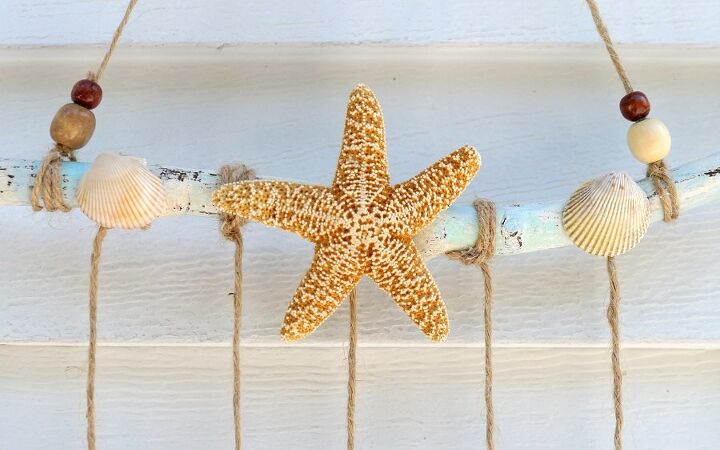
- Tie beaded twine to the painted stick.
- On the center of the stick, I glued a medium-sized Starfish purchased at a Beach Gift Shop.
- Add a couple of beads to a piece of twine. Tie twine to each end of the stick to use as a hanger.
- Stick the loose ends of the twine through the beads to hide.
For more fun creative projects make sure to check out my blog. Sue's Creative Workshop www.sueeldred.com


Comments
Join the conversation
-
Really looks good. Love it. Good share
-
I love wind Chimes and so do my grand daughter's and we love the Beach so we we be doing this. Thank you. Sue


Frequently asked questions
Have a question about this project?