


Dollar Store Marble Garden Gazing Stones
Create beautiful garden gazing stones from dollar store finds. Use glass marbles, Styrofoam balls, chop sticks and silicone to create lovely focal points for your garden.
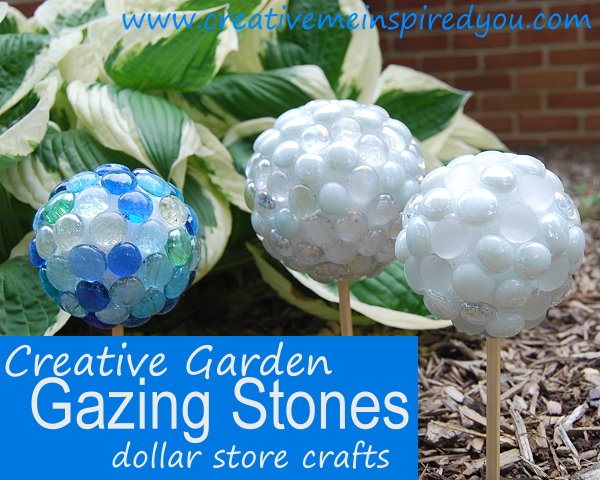
Recently I purchased a few bags of marble glass vase fillers at the dollar store. I don’t really have a bunch of vases to put them in, so after making this Mable Glass Vase, I just knew I could come up with another use for the stones, and I got inspired by those penny covered balls that you can find on Pinterest. They are quite pretty, and I thought to myself that I could make a nice version of them for my garden. We’ve lived in this house several years now. When we first moved in, the rhododendron were over 12 feet high and blocking all our windows and even the sidewalk. We cut them all down, and have been slowly adding plants to the front gardens. Now there is plenty of room for pretty little marble garden gazing stones to accent our plants. I love how they look next to my variegated hosta, and although they may look a little funny up on those stakes, I think that once the hosta reaches full height, there will be enough height for them to still stick up and be noticed. Of course, in my photos, I have them in the ground, but decided that they needed to be closer into the plant.

I am sharing how I designed these. But if you decide that you simply want to put these on the ground and you don’t want to add the chopsticks. Hey, it’s your piece! Make it fit for your style.
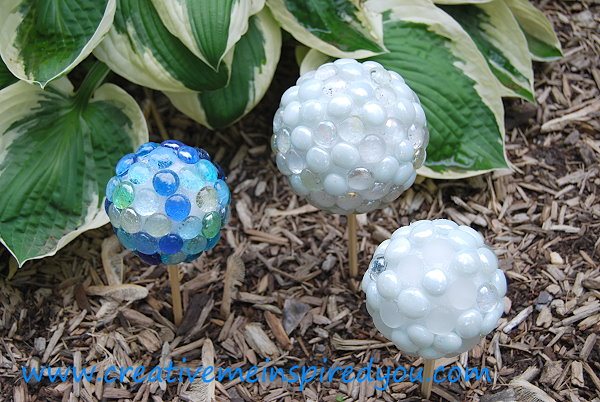
I think that once they have been outside for a while, and exposed to the weather, they will start to form a gorgeous patina. Greens will grow and fill in where the glue is not, and be even more beautiful, and not as stark white as two of the balls are, and even more stunning for the blue marble ball.
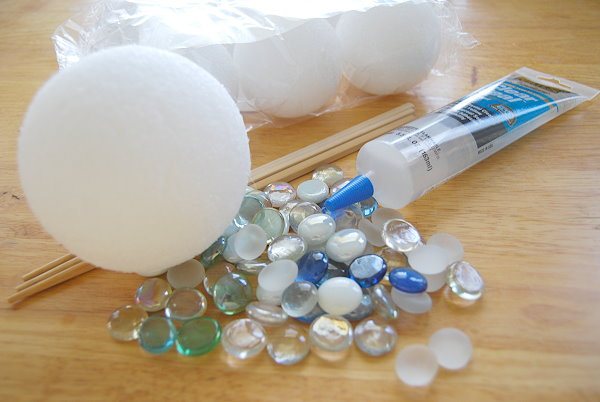
You’ll need Styrofoam balls, (I had two sizes, and chose to make three balls), clear silicone, and glass marbles. Depending on how big the ball is, will determine about how many beads you will need. You will also need chopsticks (if you decide to use them).
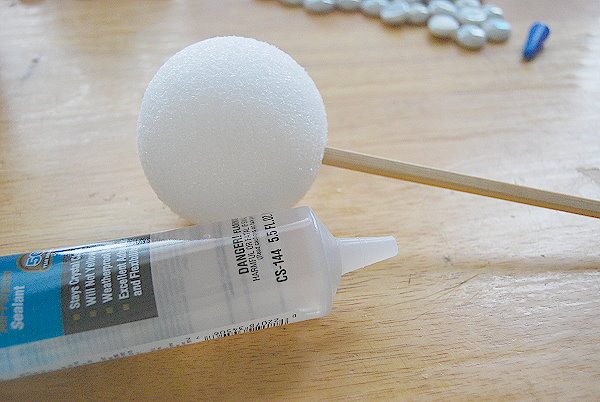
Begin by inserting chopstick in ball using thicker end. Remove and add silicone, then allow to dry.
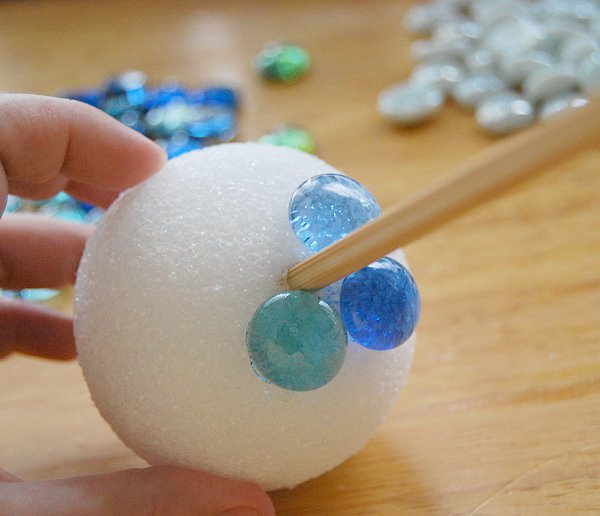
I started by gluing the marbles around the base of the stick, and worked out from there.
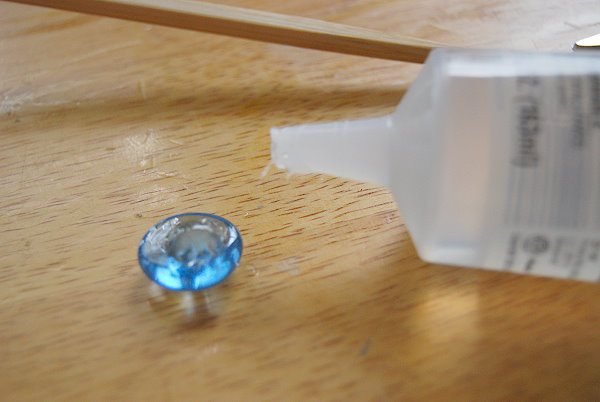
Add dots of glue to the marble and stick onto the styrofoam. You’ll be able to do several at a time, but I recommend leaving it after about 5 marbles are glued on, to allow it to set for about an hour. Otherwise, you will have marbles sliding off and not sticking where you set them.
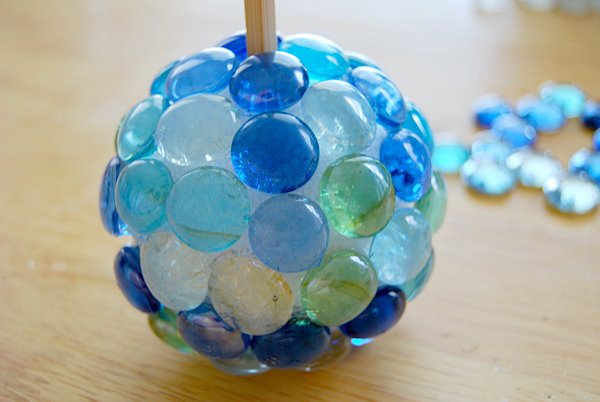
Continue adding marbles until the ball is covered. Allow to dry overnight. I like the empty spaces between as I imagine that is where the green will first show up as it weathers outside.
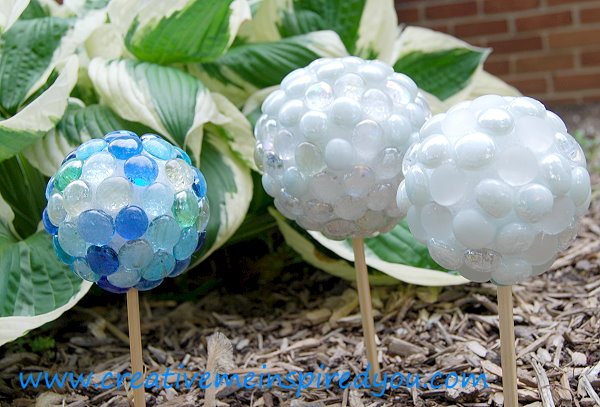
Take your gazing balls and plant them.

Want more details about this and other DIY projects? Check out my blog post!
Comments
Join the conversation
5 of 139 comments
-
The round styrofoam balls I have found to be almost non existent as far as The Dollar Tree (which is frustrating because it has become one of the ways I can afford to do my crafts.) They have every shape and size except in the round. They have balls cut in half, I believe, which could be glued together which would save you the outrageous prices they charge at bigger craft stores, including Walmart, where the medium size I believe are still at least $5/ball. It’s the one thing that I have not completed any crafts that require the round styrofoam because I honestly can’t afford to buy them.
-
I use E6000 glue with a dab of hot glue so it holds right away otherwise the E6000 takes 24 hrs. to dry


Frequently asked questions
Have a question about this project?
i put a light coat of elmers glue and some glitter first then the stone looks pretty good
Could I paint the balls with latex outside paint before I put the marble stones on n what kind of glue are you using, will it hold up in South Texas heat,,? Thanks
What happens to them when it rains or sprinklers come on?