Easy DIY Fan Trellis to Spruce up Your Vines & Creepers

by
Elena K, Hometalk Team
(IC: homeowner)
9 Materials
$20-30
2-4 Hours
Medium
This year I decided to finally spruce up our lil' yard.
After fixing neglected areas and making a much longed-for window box, it's time to tackle one last project:
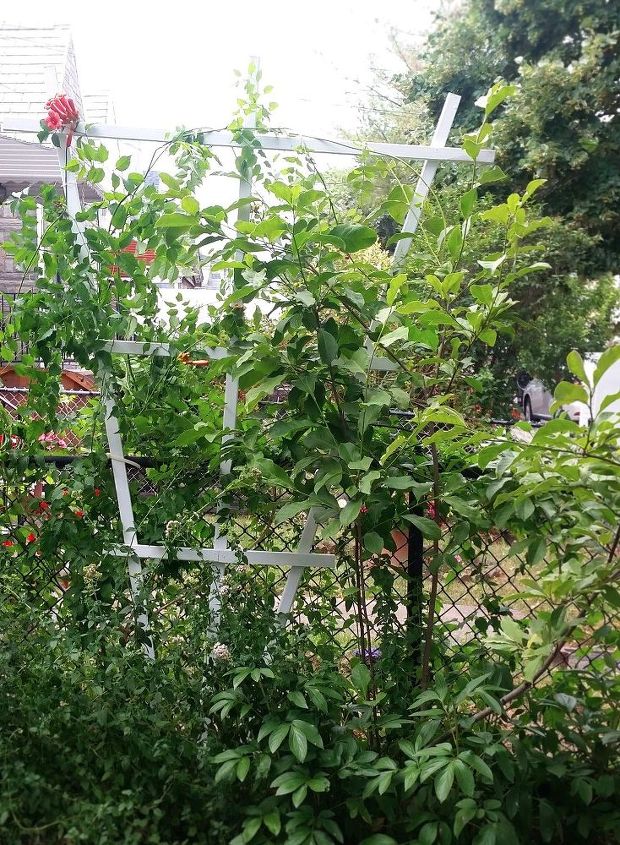
A fan trellis that will both separate our front from the neighbor's and add interest to the fence -- all while holding our trumpet vine in place!
After fixing neglected areas and making a much longed-for window box, it's time to tackle one last project:
A fan trellis that will both separate our front from the neighbor's and add interest to the fence -- all while holding our trumpet vine in place!
So, now you want a new trellis, right?
STEP 1: DECIDE ON YOUR TRELLIS HEIGHT/SIZE/PLACEMENT
Time for a trip to your Home or Gardening center! Here's what you'll need:
STEP 2: SELECT BOARDS
STEP 3: MARK CUTS
STEP 4: MARK THE TRELLIS HEIGHT
STEP 5: TRANSFER LENGTH TO ALL YOUR VERTICAL BOARDS
STEP 6: CUT. CUT. AND CUT.
STEP 7: MAKE THE CROSSPIECES
STEP 8: ASSEMBLE TRELLIS
STEP 9: NEXT IS THE TOP. THEN FINISH WITH THE MIDDLE CROSSPIECES!
STEP 10: FINISH IT!
STEP 11 (OPTIONAL): PAINT OR SEAL YOUR TRELLIS
STEP 12: FLIP AGAIN & REPEAT (OPTIONAL)
STEP 13: PUT THE TRELLIS UP
Enjoyed the project?
Suggested materials:
- (3-5) 1" x 2"x 8' pressure treated board (Home or Garden Center)
- T-square or Tape measure (Home Center)
- Pencil (Craft Store or Home Center)
- Miter saw or Hand saw (Home Center)
- Nail Gun or Hammer (Home Center)
- 1" (preferred) - 1 1/4" galvanized finish nails (Home Center)
- Mask - recommended (Home Center)
- Paint or sealer (optional) (Home Center)
- Brush or Foam paint sponge (optional) (Home Center)
Published June 28th, 2016 8:17 PM
Comments
Join the conversation
2 of 21 comments










Frequently asked questions
Have a question about this project?