


How to Make a Faux Boulder

This post was transcribed by a member of the Hometalk editorial team from the original HometalkTV episode.
Do you have an outdoor eyesore that you wish you could make disappear? Check this out!
See more DIY ideas on my YouTube channel here!
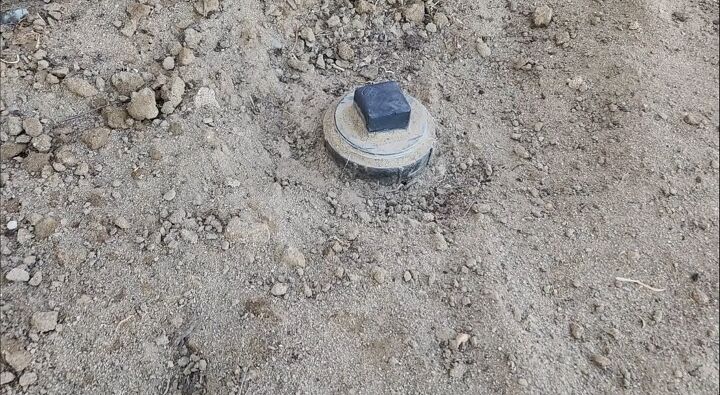
I have this area in the front of my house that I want to beautify, but I've got a clean out valve that I kind of want to cover up. So I came up with this cool way to hide my outdoor eyesore!
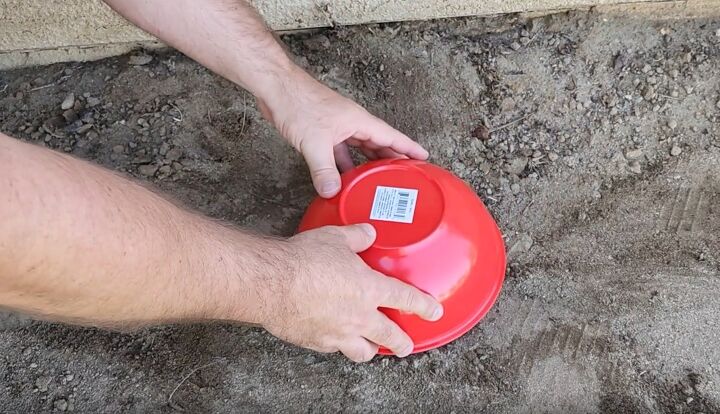
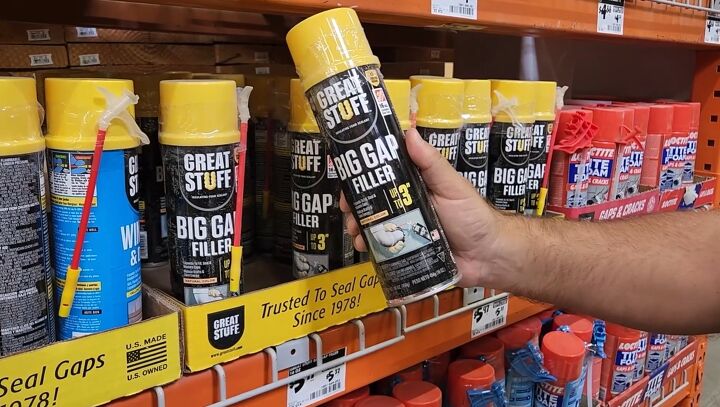
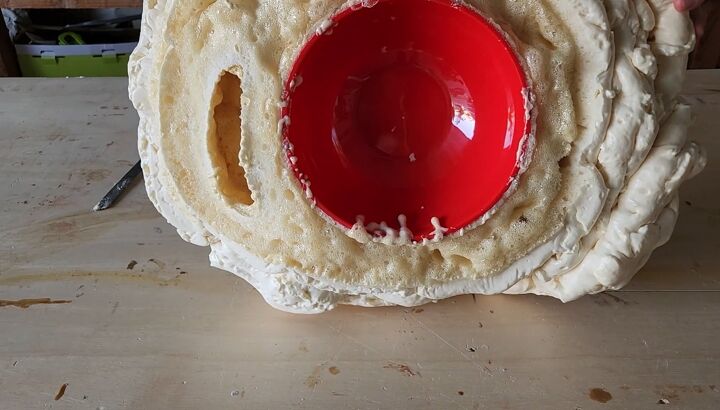
I grabbed a bowl from Dollar Tree and put it over to make sure it fits. Then, I went to Home Depot and grabbed some spray foam. Next, what I'm going to do is spray foam and start covering all the bowl up, every square inch.
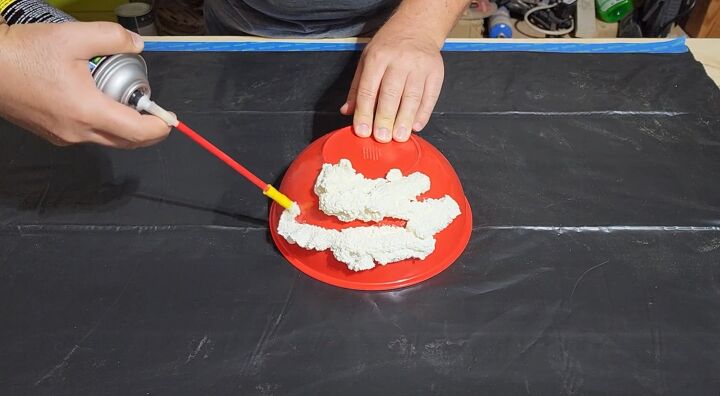
Now, spray foam is very sticky, so don't worry, once you spray it on there, it's not coming off. You want to cover every bit of that bowl. Doing this will create a cavity in our boulder that we can place over anything that we want to hide in the yard.
We're going to go layer over layer. This took about three cans, but I want to make sure before I put the next layer on, that's a little bit dry to the touch. The foam does take a little bit to dry, so once you get it on, you want to give it about 24 hours.
Here's what it should look like once it's dry.
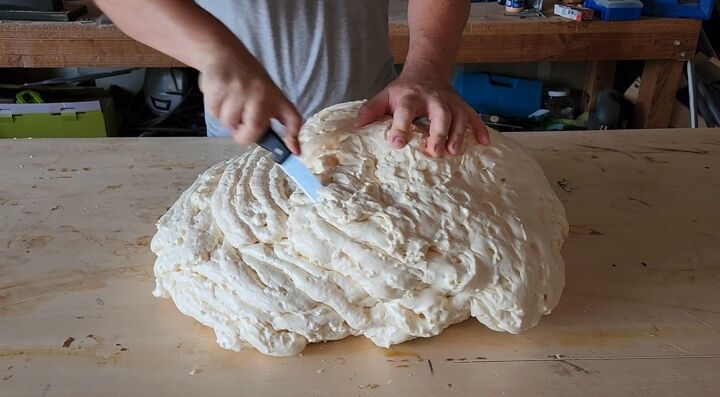
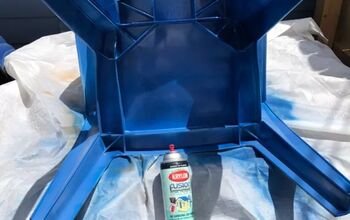
The next step is to carve the foam. In nature, it's not going to just be one big round ball for a boulder, so you're going to want to add some edging to it. I like to cut little wedges out of the foam that gives a little bit of sharp edges, something you can help adhere the concrete to.
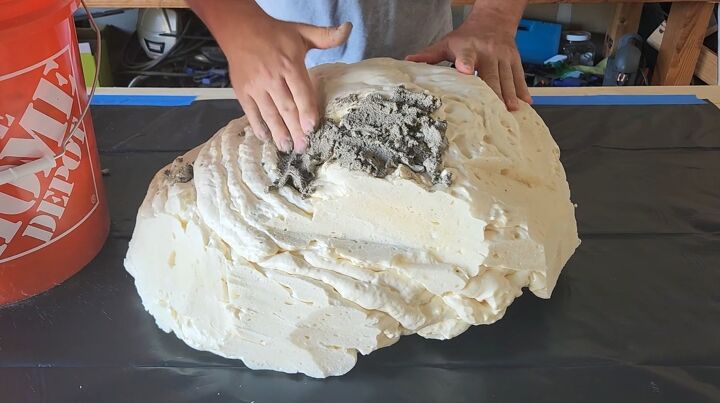
Next step, I'm going to mix up some concrete and add it to my boulder. You're looking for not too runny, but not too hard. You want to be able to shape it and use it almost like a clay on top of the foam.
Once you got it mixed up, go ahead and just start adding it to the foam. Fill in all the little gaps and everything. Your first layer can be a little rough.
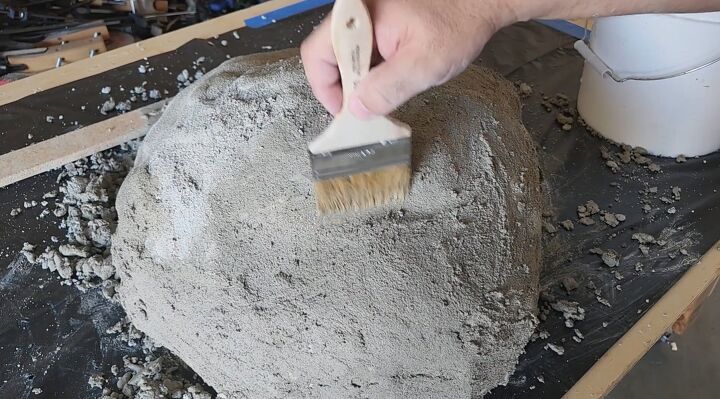
For the second layer, I made it a little more runny because what I want to do is fill in a little bit of the gaps and make the concrete a little bit thicker. Just go ahead and smooth it in and fix any little imperfections that you think you can feel. If it looks a little rough, you can grab a chip brush, dip it in some water, and then you can start smoothing out the concrete that you put on. That way you can have some smooth spots and rough spots.
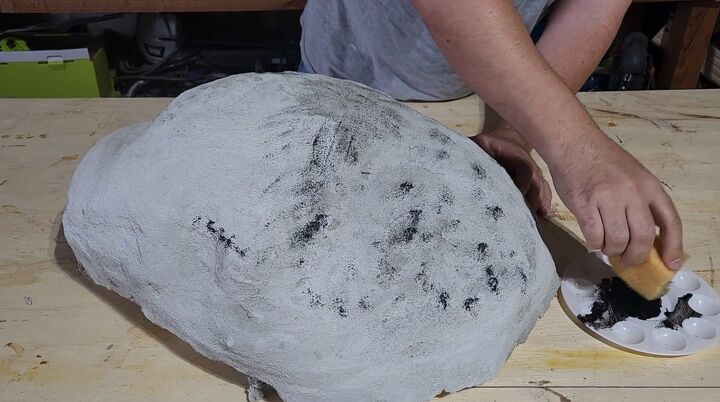
Once it's dry, take some black paint, water it down, and add a little bit of color to the rock. You can go with any color you want. I live in a desert area, so the rocks are not just going to be all gray.
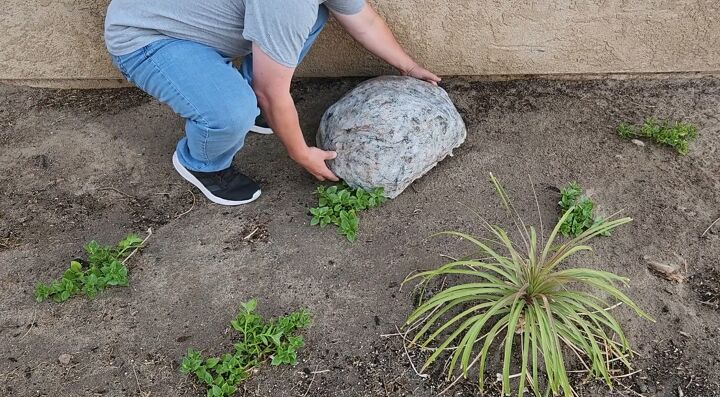
Once it's all colored up, it's time to place it in the yard.
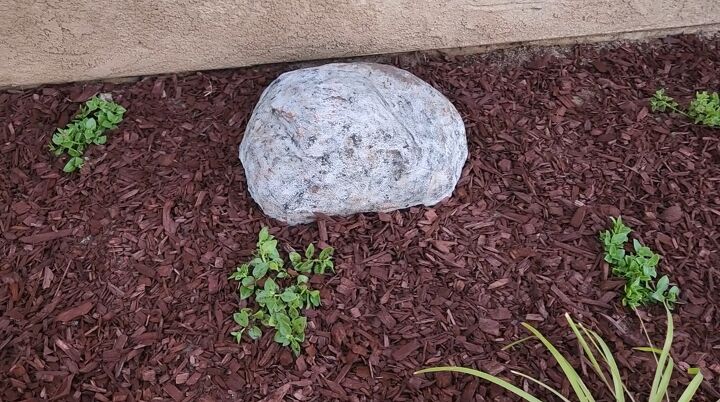
Once I had my boulder in place, I added some ground cover. What a beauty! Just makes the front yard look better, and it looks like an actual boulder, but it's so lightweight, I can move it around anywhere I want.
Let me know in the comments if you're going to give this a try! And feel free to check out more DIY ideas on my YouTube channel here!
Resources for this project:
See all materials


Comments
Join the conversation
-
Love this idea! Good job!
-
Also, would be a great place to hide a key in the recess of the bowl


Frequently asked questions
Have a question about this project?
What is the approx weight of the final "rock"? I am curious if it could blow away in a storm with high wind. You did a great job on it!
Love the idea - glad it is covered over with concrete. Just remember the spray foam is very toxic to dogs. Don’t leave any shavings or drips available to be chewed on.
Won't it blow away in the wind? I have heavy planters filled with soil and they get knocked over in storms.
very clever idea. will it hold up in lots of rain or cold? or does the concrete take over and maintain the shape in weather??