


DIY Hand-Painted Chair

by
Emy Meowski
5 Materials
$50
10 Hours
Medium
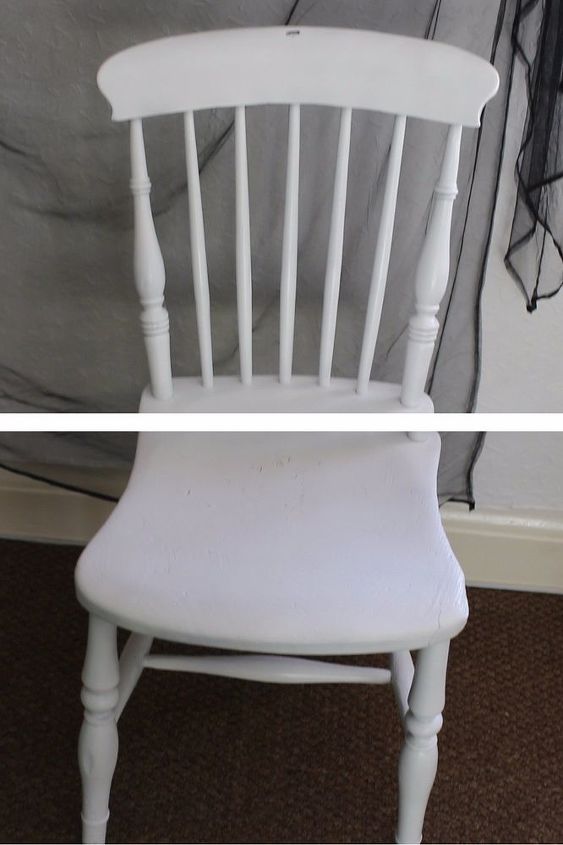
I painted this chair for a little girls nursery.
It was originally just a plain wooden, slightly worn out chair but I sanded it down and painted it white to give myself a 'fresh canvas' to work on. (Excuse the half-and-half photo, I didn't take a full photo of the chair before I started!)
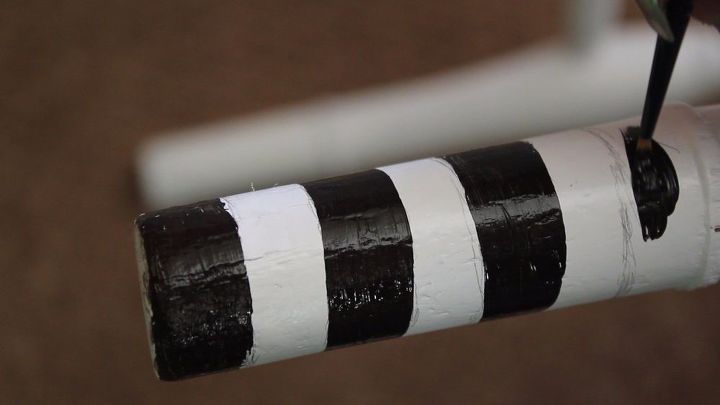
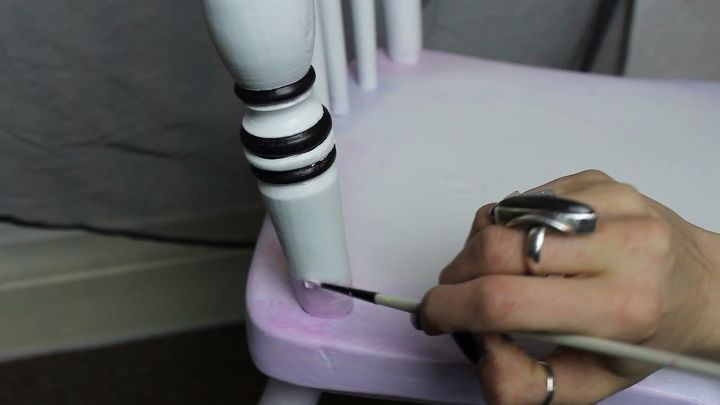
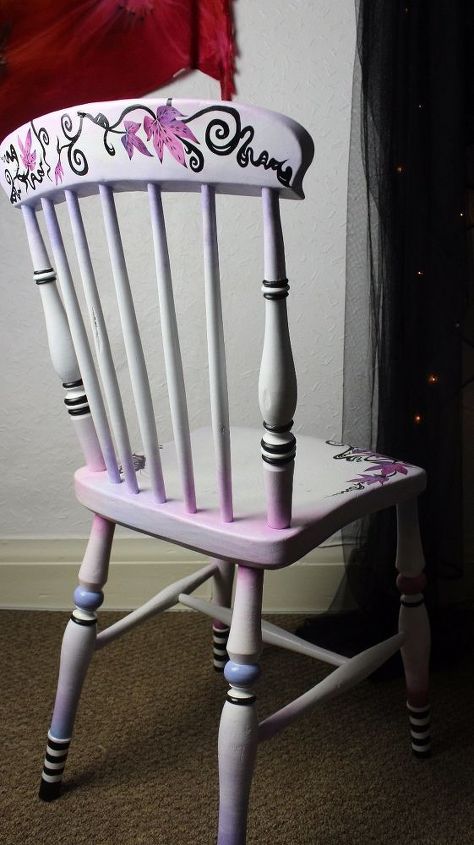
I then began painting at the bottom of the chair with some little black and white stripes. It was useful to paint the chair upside down at this point to save the paint from getting smudged on the floor
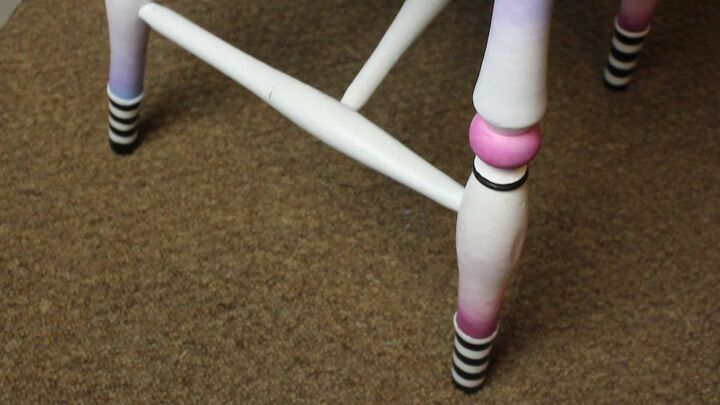
Once the black and white section was painted, I decided that I wanted the main colours of the chair to be a dusty pink and lilac, while keeping the majority of the chair white with accents of black here and there.

I alternated between the pink and lilac for each leg of the chair and worked my way up very lightly with the pink and lilac, being mindful to keep plenty of the white showing so as not to make it too dark
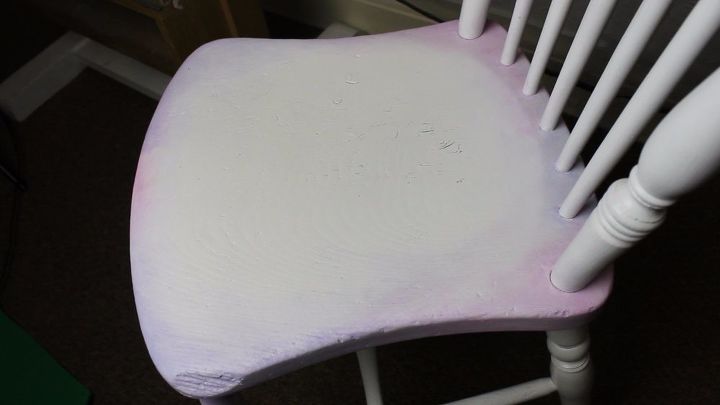
When I got to the seat, I first painted on parts around the edges in lilac and pink and used a sponge with a little white paint on it to blend it out into the centre.
I assumed that the new owners may want to put a cushion on the seat and so didn't want to put a design directly onto the part which you sit on.
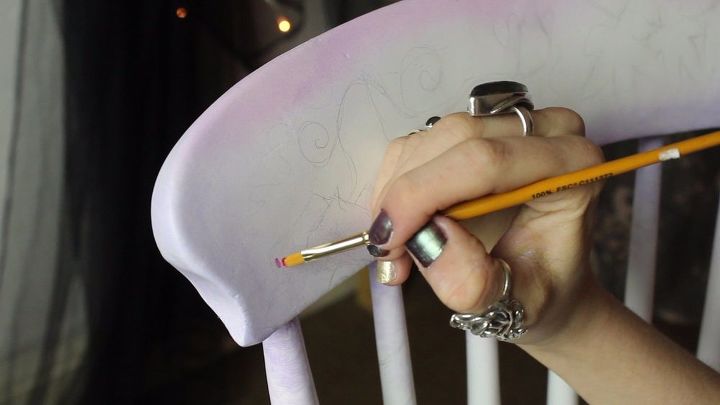
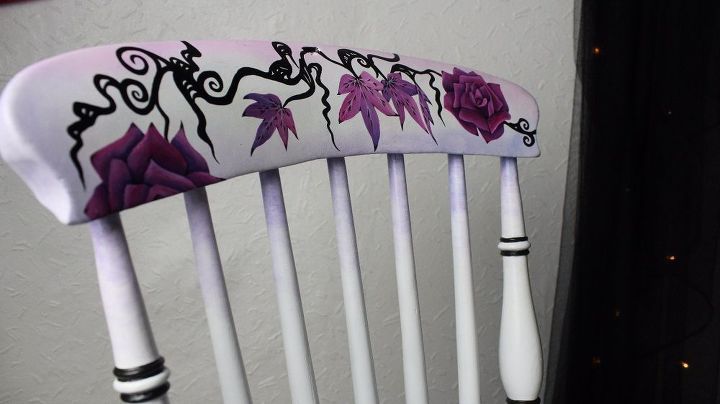
I then did the same as I did to the legs to the back/top part of the chair to tie it all together
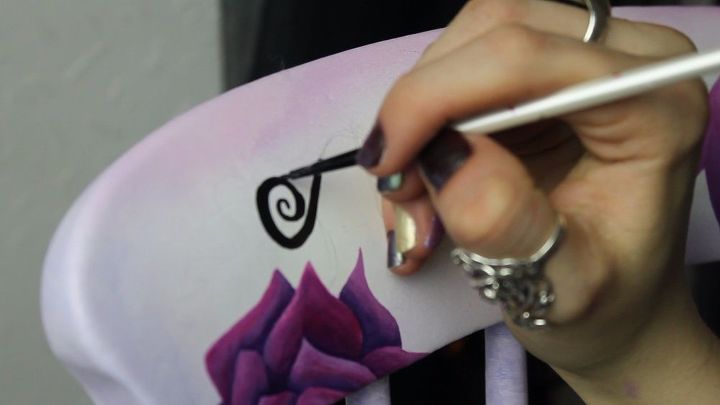
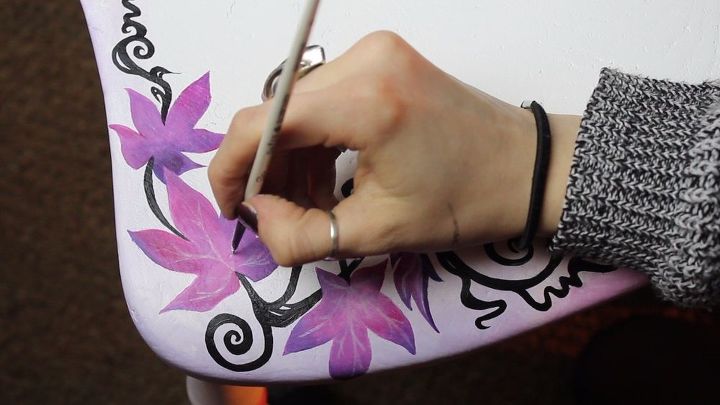
Once the background colours were dry I pencilled out some rough designs to begin painting. I settled on the ideas of roses and leaves in brighter shades of the pink and lilac that I used for the rest of the chair, with black branches in between
I also did the same for the seat (and also added a little butterfly!)
To watch the full process in more detail and see the full finished product, you can watch the quick tutorial video that I made here!!
{
"id": "4460417",
"alt": "",
"title": "",
"video_link": "https://www.youtube.com/embed/q9XLJ92BXnM",
"youtube_video_id": "q9XLJ92BXnM"
}
{
"width": 634,
"height": 357,
"showRelated": true
}
Once all the paint was dry, I touched up the details of the painted leaves and flowers with a fine black pen
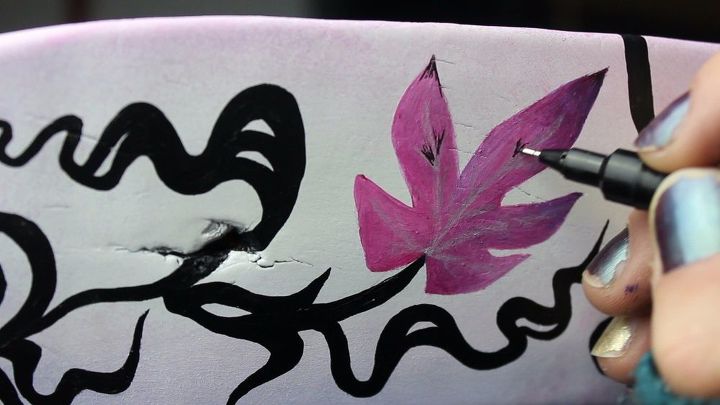
I also used the hole in the top of the chair to make the ivy seem like it was growing through to the back of the chair (where there is a similar design)
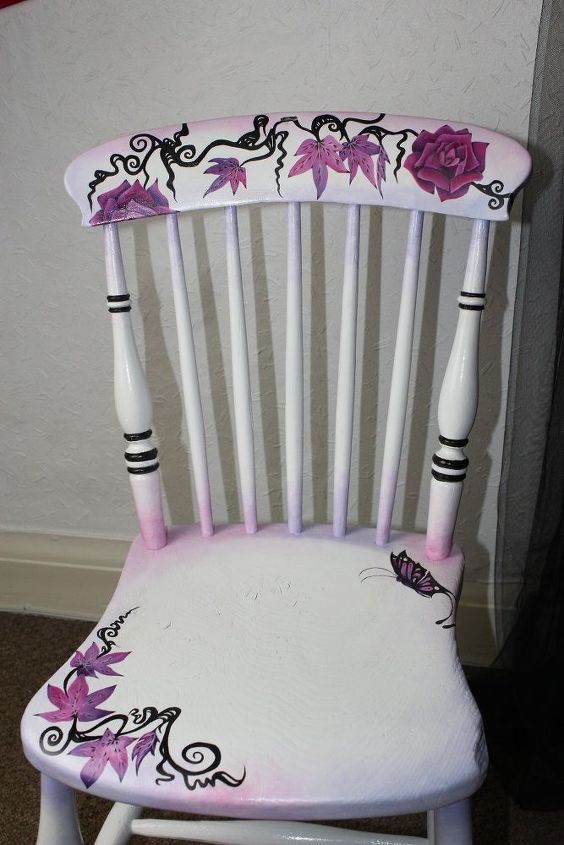
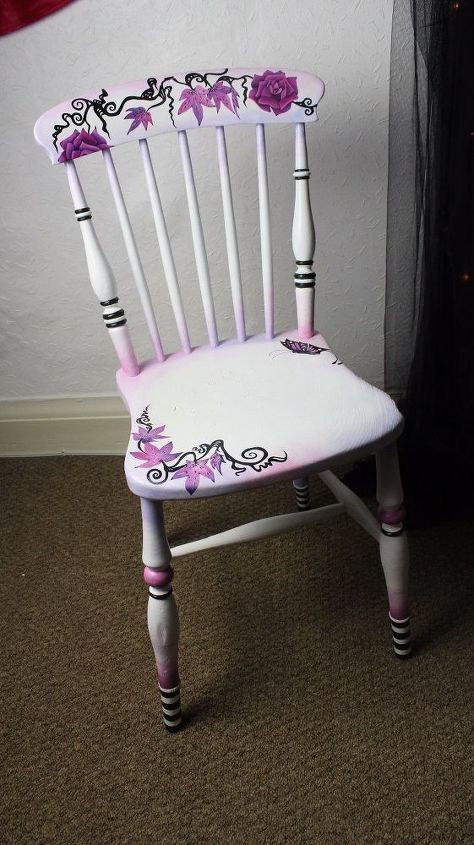
The final step was to spray the whole chair with a couple of coats of clear matte varnish to prevent any wear and tear to the paintwork!
Resources for this project:
See all materials


Any price and availability information displayed on [relevant Amazon Site(s), as applicable] at the time of purchase will apply to the purchase of this product.
Hometalk may collect a small share of sales from the links on this page.More info
Comments
Join the conversation
2 comments
-
It's very beautiful! Perfect for a little girl to grow with it.


Frequently asked questions
Have a question about this project?