


How To Finish Painted Table Tops | Varnish / Tough Coat Tutorial

In this video tutorial we’ll show you how to apply Tough Coat to achieve a smooth, durable finish!

In this brand new video tutorial company co-founder, Rosanne will show you how to apply Tough Coat to achieve a smooth, beautiful finish that will protect your work against daily traffic.
{
"id": "3048702",
"alt": "https:\/\/youtu.be\/v5ySMe0VrhQ",
"title": "https:\/\/youtu.be\/v5ySMe0VrhQ",
"video_link": "https://www.youtube.com/embed/v5ySMe0VrhQ",
"youtube_video_id": "v5ySMe0VrhQ"
}
{
"width": 634,
"height": 357,
"showRelated": true
}
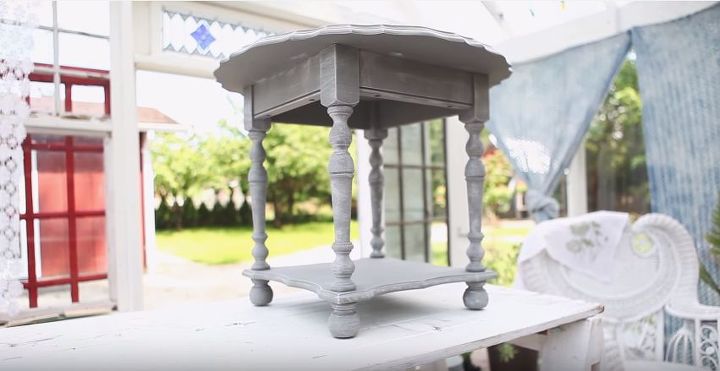
Step 1) Paint your piece
Tough Coat can be applied to almost any water-based surface, but it’s generally used to seal in the finish of our paint.
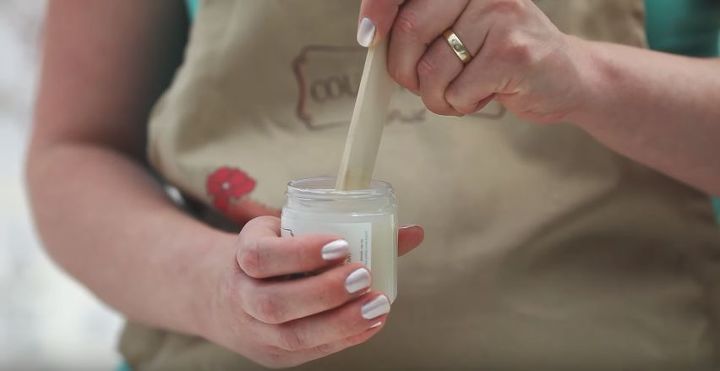
Step 2) Stir the Tough Coat
Tough Coat should never be shaken. If you do shake it, you can incorporate bubbles which may appear on the finish of your piece. We recommend stirring the contents of your jar for about two minutes, an occasionally during application if you’re working on a large piece. You don’t want important ingredients to settle at the bottom!
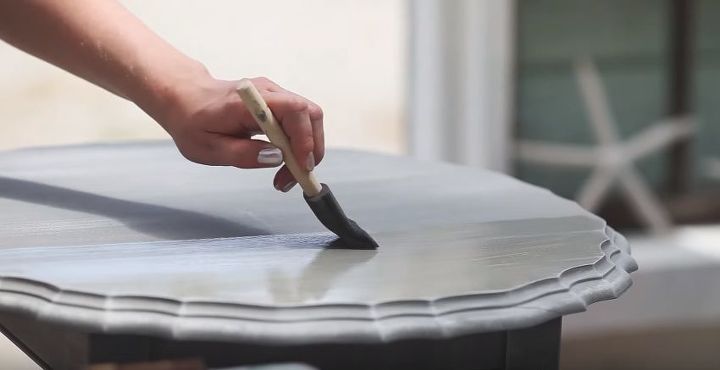
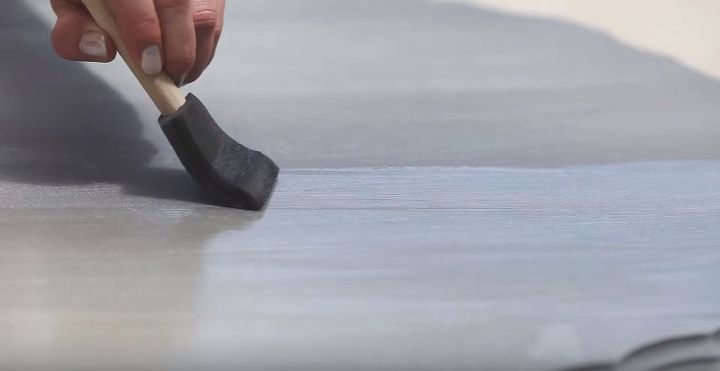
Step 3) Apply Tough Coat
Using a foam brush, apply Tough Coat in long, smooth strokes in one direction. Tough Coat dries quite quickly, so you’ll want to keep a wet edge and avoid going over the same area twice. If you see a patch you’ve missed, resist the urge to go back and fix it. It’s better to wait until the first coat is fully dry before you do touch ups or you can add texture to the finish.
Step 4) Add a second coat
We recommend using two coats of Tough Coat for optimal protection. Your second coat can be apply after approximately 2 hours.


Frequently asked questions
Have a question about this project?