DIY – How to Fix a Cast-Iron Toilet Flange

Cynthiadavisus
by Cynthiadavisus
8 Materials
$40
2 Hours
Medium
The best toilet flange is made of hard plastic or metallic alloys. The flange holds the base of your raised toilet to the main drain. If the flange breaks, your toilet will rock unsteadily and poop might also spill all over the bathroom floor. The good news is toilet flange is replaceable. However, the process isn’t easy and requires you to be very dedicated.

To repair your toilet flange you could buy the repair rings (covering the entire flange setup) or you can buy the repair plates. Nonetheless in this post I will show you how to repair a toilet flange made out of cast-iron. Usually found on the best flushing toilet in toiletrated blog. Follow the steps keenly for super results.

Step 1


Identify the shut off valve (usually located behind the toilet) and turn it off. This will stop the water flow into your toilet system.


Step 2


Remove the lid on the toilet tank. Flush out the water in the tank by holding the toilet handle down for a while. Make sure you drain every drop of water – use a sponge to mop the tank.


Step 3


If there is any remaining water in the tank – you can use a large sponge ball to sop up the water and leave the tank as dry as possible.


Step 4


Now remove the closet bolts (bolts holding the base of the toilet to the main drain)/ flange. In case the nuts are rusted use a hack saw to cut them off.


Step 5


Unscrew the main water supply line usually designed under the toilet. Then rock the toilet until it loosens up the wax seal that holds it to the flange.


Step 6


Once the toilet is free, remove it and set it aside on some rags. Use a putty knife to scrap off any wax that remains on the gasket of the flange.


Step 7


Remove any extension rings and leave the cast iron exposed. In case the flange is too rusted use a cols chisel and a harmmer to remove the flange.


Step 8


Then use a pair of pliers to remove the loosed flange form the cast iron holding. After which you can use a vacuum cleaner to clean all the loose debris around the drain.


Step 9


Now into the cast iron drain pipe, install a plastic expansion toilet flange – then use an adjustable wrench / hexing key wrench and tighten the screws into the flange till it’s wedged tightly to the drain pipe.


Step 10


Set two closet bolts. Place your new toilet gasket made of rubber and set back the toilet in place. You can then tighten back the toilet in place.


Step 11


Put a plastic or stainless steel washer over every nut before hexing. You can also use an adjustable wrench to tighten every not – apply moderate force. Do not to crack the base of your toilet.


Step 12


If the bolts are too long, you can trim off the extensions before snapping on them safety plastic caps to conceal the sharp ends.


Step 13


Reconnect your water supply line before opening the shut off valve to restore the in-flow.


Conclusion 


It is very important to choose a toilet that will last long. Many top toilets reviews will have some of the best flushing toilets that will work with a variety of toilet flange. You can use such sites to sample the best.


If you want to repair your toilet flange, a simple DIY plan will work miracles. However, you should follow every step and also work with the manufacturer’s user manual too. When combined many users attest to wonderful results.
Suggested materials:
  • Repair ring   (Local Hardware)
  • Dropcloth   (Collected from Unused Rags)
  • Paint scraper   (Local Hardware)
See all materials
Frequently asked questions
Have a question about this project?
Comments
Join the conversation
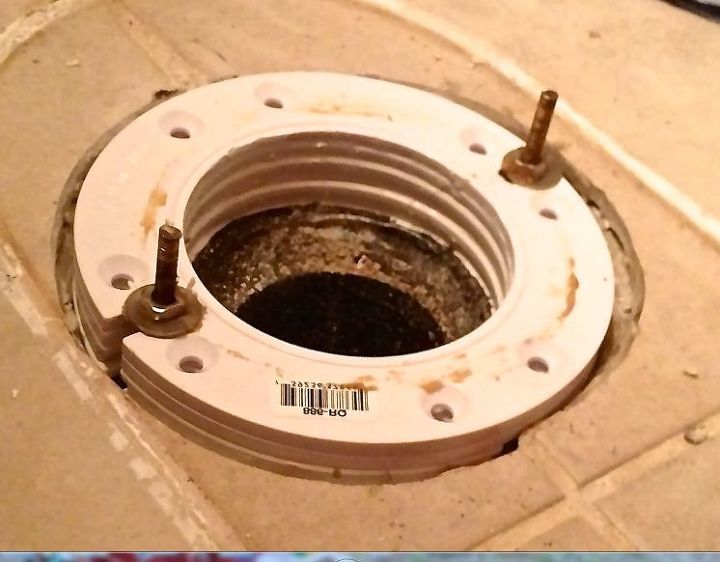
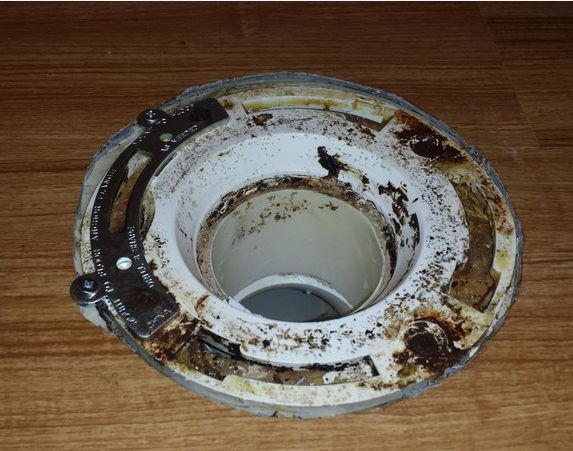
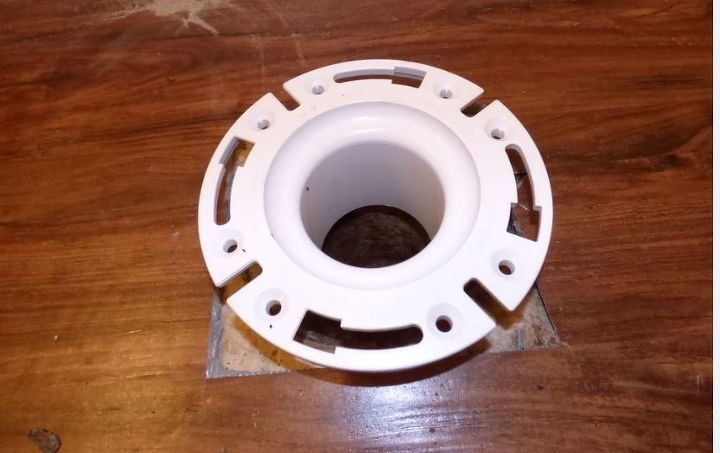
 1 comment
Next