


3 DIY Pool Noodle Tricks: Raft, Cup Holder & Floating Candles
There are so many cool things you can do with pool noodles and I want to show you three of my favorites today: a mini DIY pool noodle raft for drinks, a DIY floating cup holder, plus floating candles.
This post was transcribed by a member of the Hometalk editorial team from the original HometalkTV episode.
More Pool Noodle Ideas
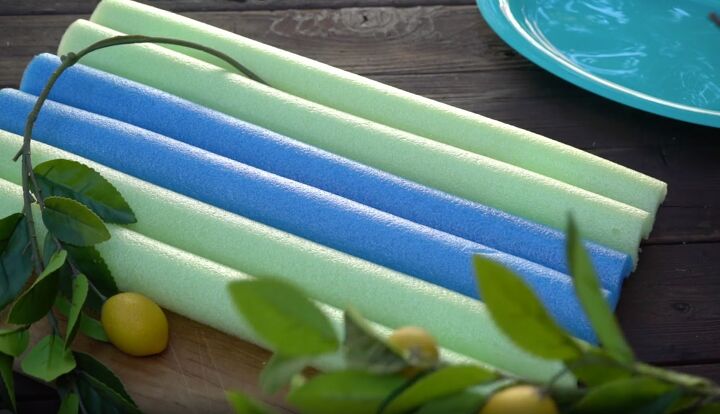
Tools and materials
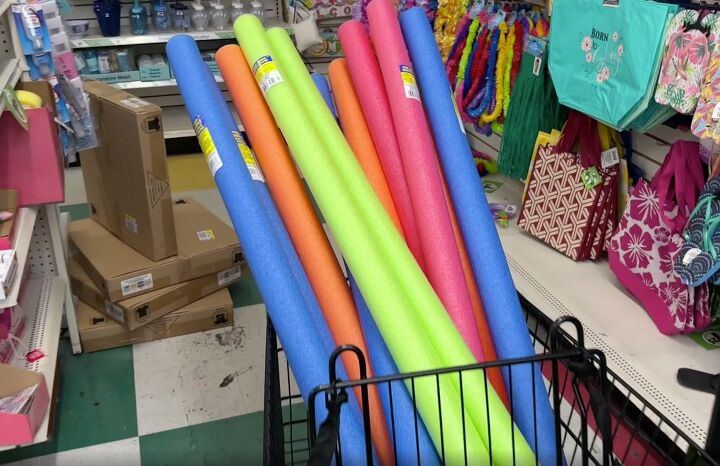
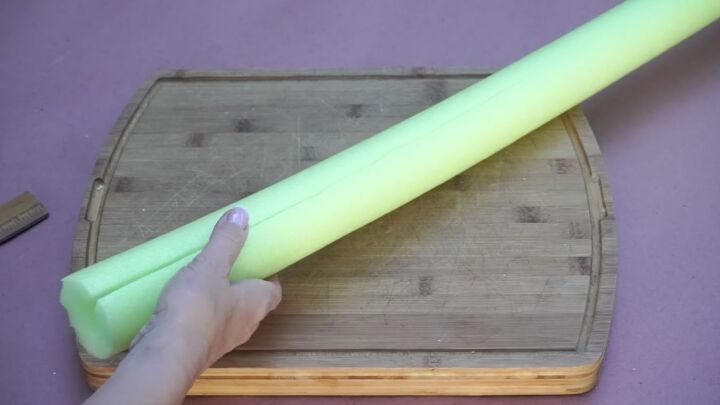
Today we're working with pool noodles so head to your local Dollar Store and grab a few.
1. Mini pool noodle raft
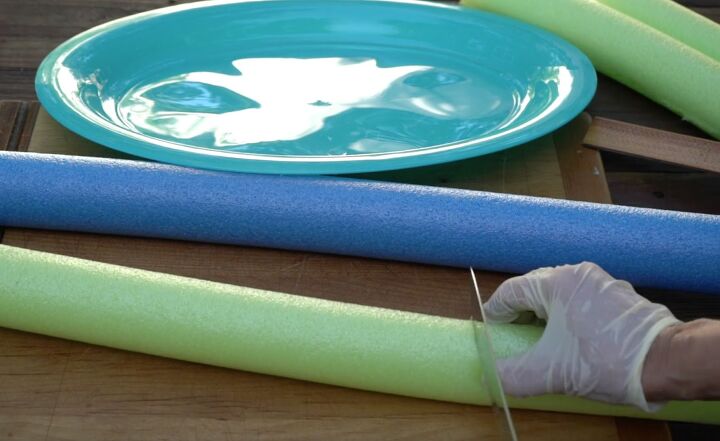
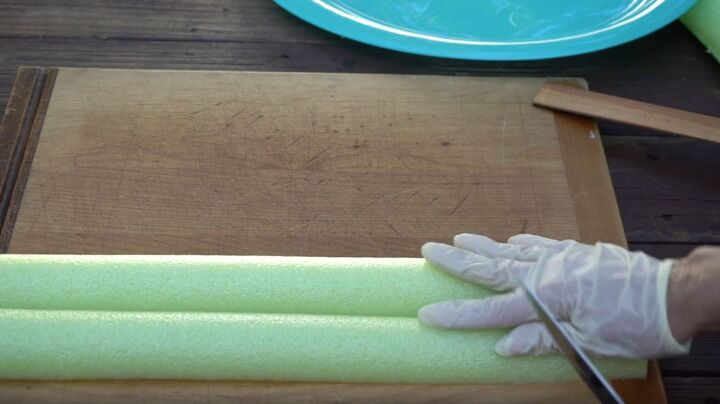
Cut the pool noodles in half
First, you want to cut the pool noodle in half. Right here is the middle.
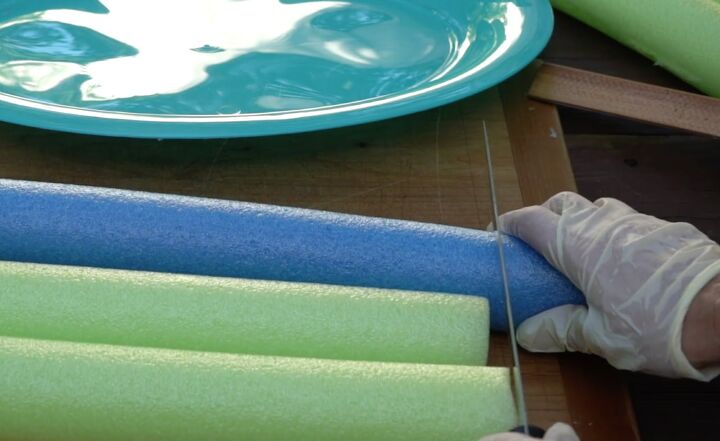
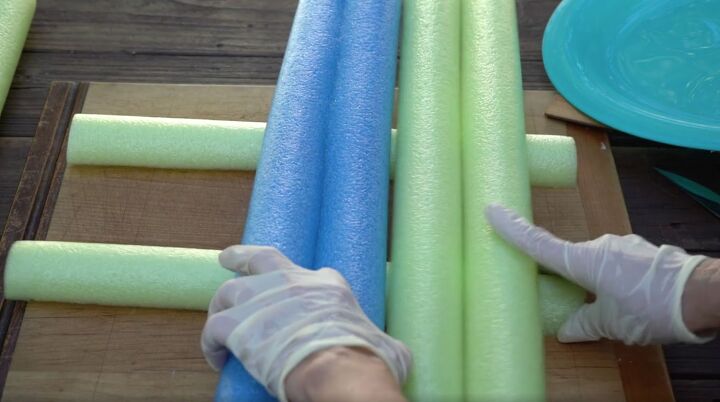
Now you've got two, and then we're going to do the same thing to the blue one as well.
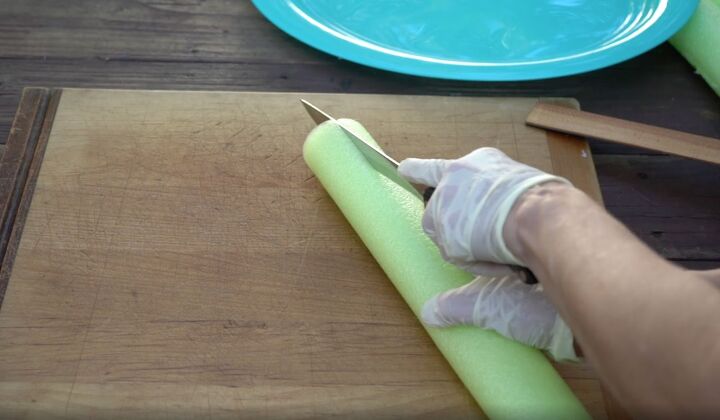
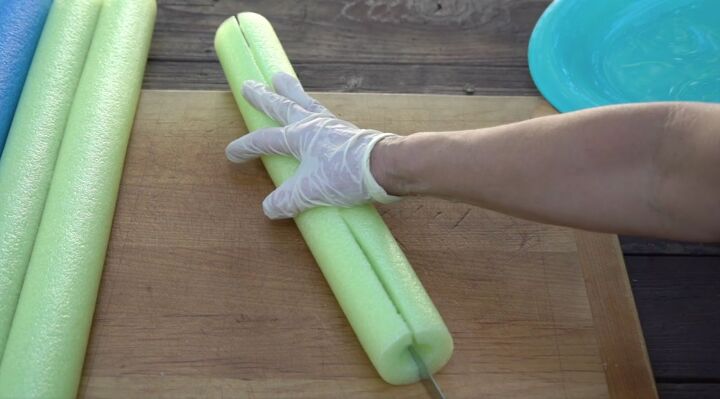
Slice the pool noodles down the center
Next, you want to slit them right down the center. You want to cut all the way through, right to the center.
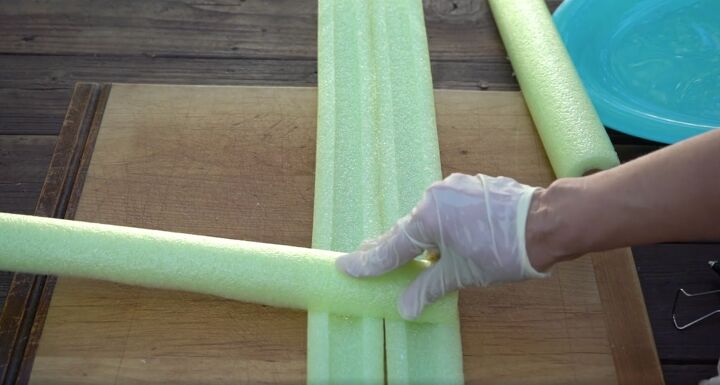
Fold the noodle open
Fold the noodles open like this.
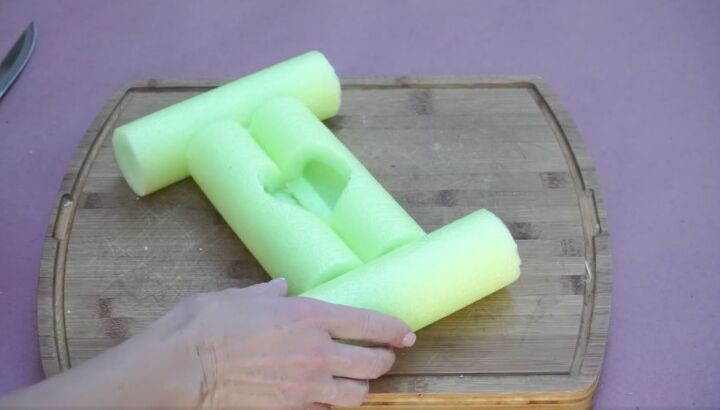
Make the raft base
I have a shorter piece of the pool noodle that I'm going to cut in half, and I'm going to use it as my base to create my raft. I'm going to cut it all the way through.
Assemble the raft
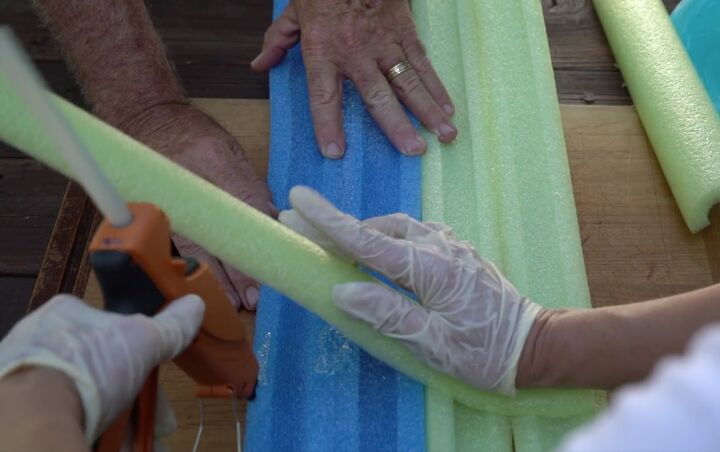
Then I'm going to turn this upside down and attach the first ones just like that to create my raft.
I want to have my flat surface against this, the open side.
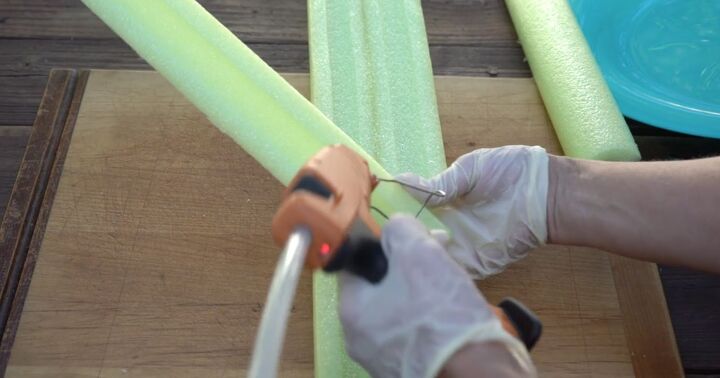
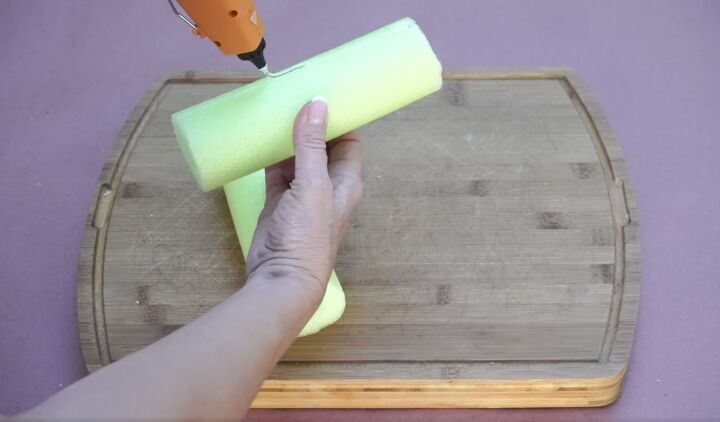
Glue the pool noodles
I'm going to put my glue and again, this is cool melt glue so it's not super hot. Put the glue on your noodle, and then you're going to place that just like that.
Now I'm attaching the second piece. I'm going to go and make sure that I've got enough glue.
It's a little harder for the glue to come out when it's cool melt. Again though, you don't want it on high, because if it's on high, it will melt the noodle. You don't want to do that.

Next, we will insert our third piece and do the same thing. I am just repeating the same process of putting the glue on the back side of the noodles and attaching my support.

Now we're going to do this, and we're going to hold this until it dries.
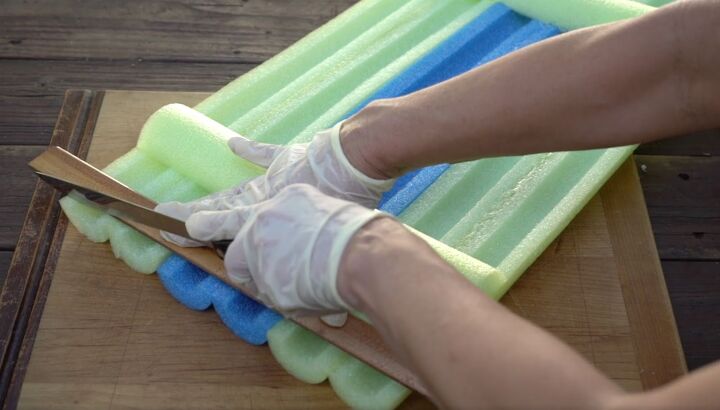
Trim the ends
Once the glue is dry I'm going to trim off the end of my support pieces, and then I'm going to trim the ends.
I think the best way to do this is to turn it over and use some kind of straight edge. I'm using a ruler to get a straight cut to trim the ends of the raft.
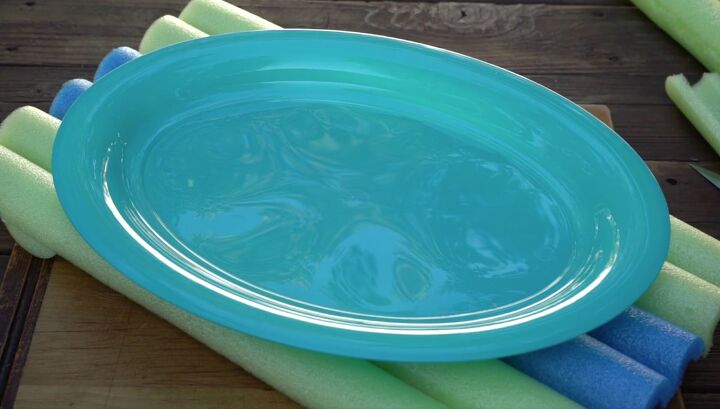
Add the tray
Next, we are now going to put a tray on here, and we're going to decorate it.
Add decor
I'm using some faux lemons to decorate my raft. You can see that I just poked a little stem through the seam of the noodles.
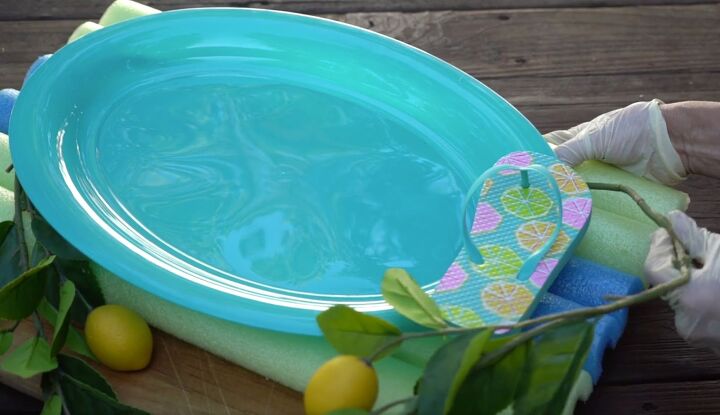
I'm going to place my tray on here so I know where my tray is going. And then I'm going to poke my other one through on this side, just like that.
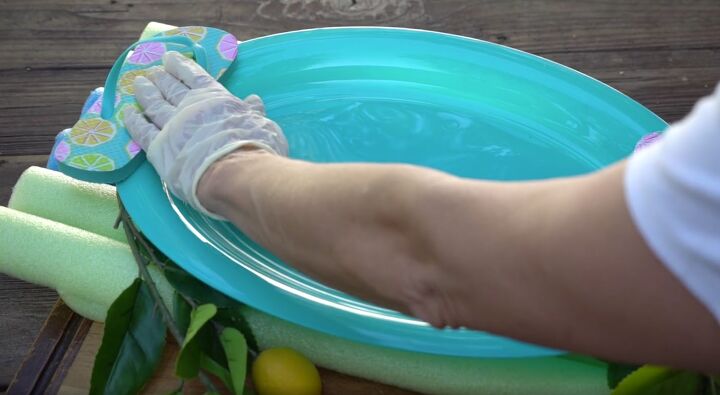
I've got one flip-flop already attached, and now I want to attach the other one. I just simply put some glue on the side and stuck the flip-flop to it. I want my flip-flops to look like handles.
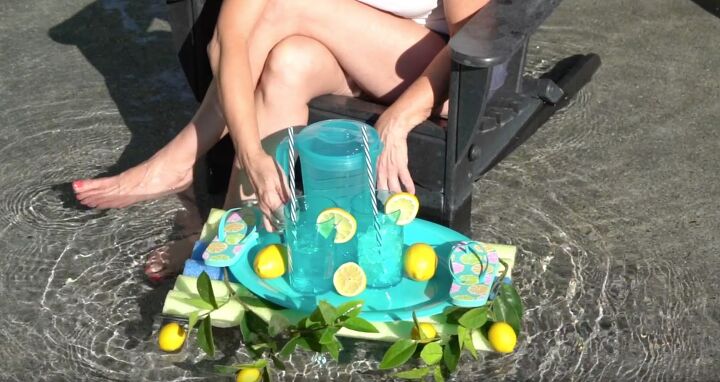
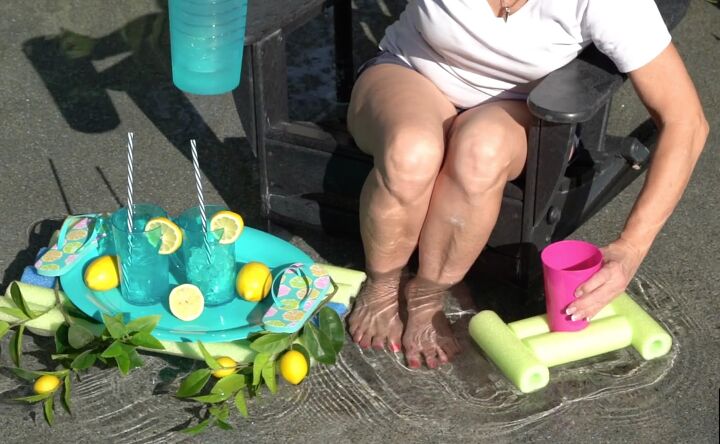
DIY pool noodle raft for drinks
I've got my pitcher of water, and two cups of ice. We're going to slice up a lemon and add that to our water and enjoy a drink in the pool.
2. DIY floating cup holder
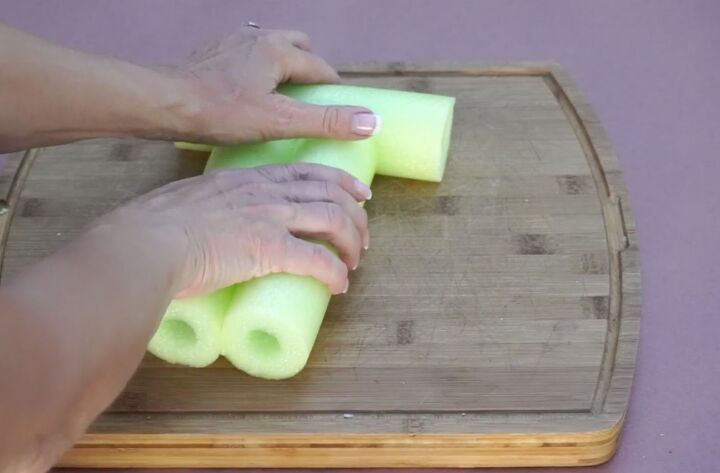
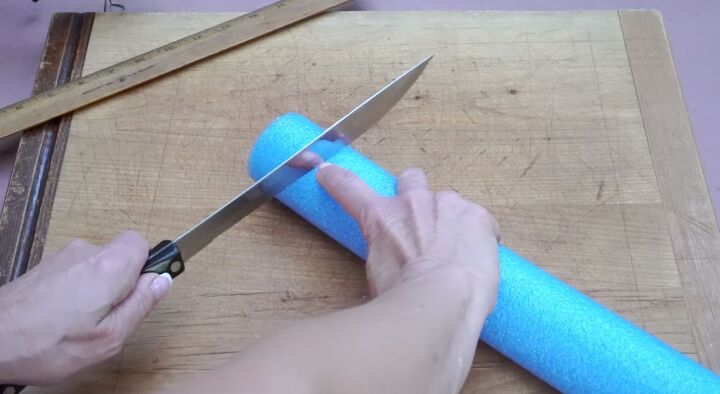
Cut the pool noodle
For my next pool noodle trick, I split a piece of pool noodle down the center.
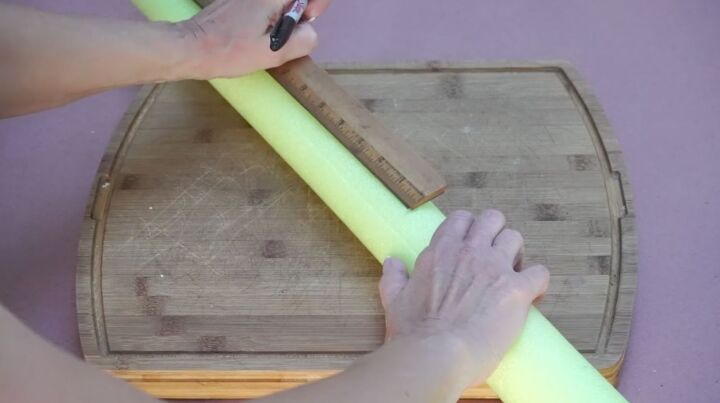
I'm going to cut four seven-inch slices out of it. Mark each seven-inch off with a marker.
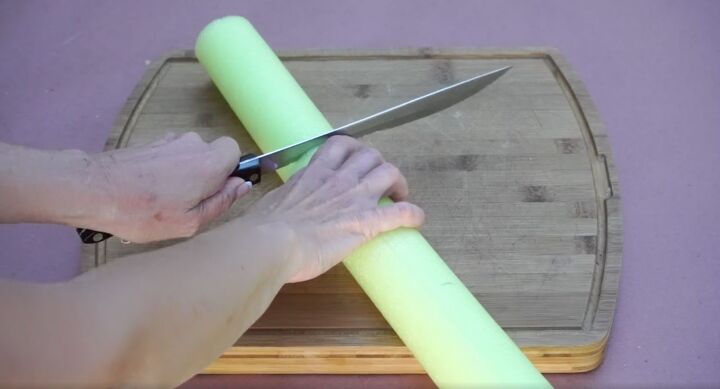
Then we're going to use a kitchen knife, a serrated knife, to cut out each section. It's quite easy. Just line it up with your mark and then just go back and forth, and it cuts quite nicely.
Glue the pieces together
Next, you want to put your cut ends in the center together and glue them together. You want to use a cool glue gun because you don't want the glue to melt the pool noodle. If it's too hot, it will.
Make a nice line or two of hot glue right where we cut that seam and put two of them together and one on either end.
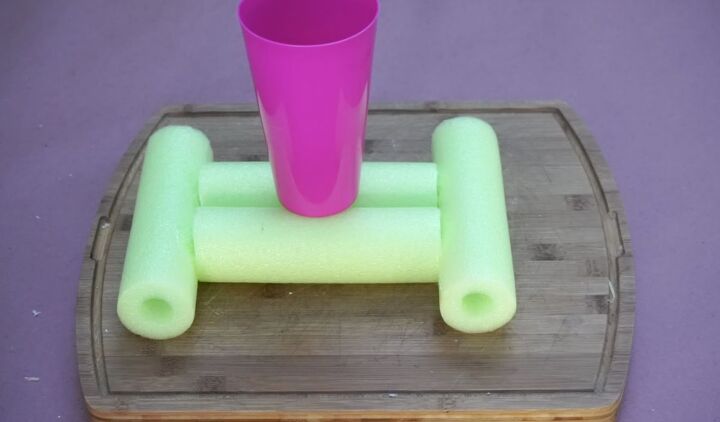
Then we're going to do the same thing with the second piece. We're going to glue them together making a mini raft with your cup in the middle.
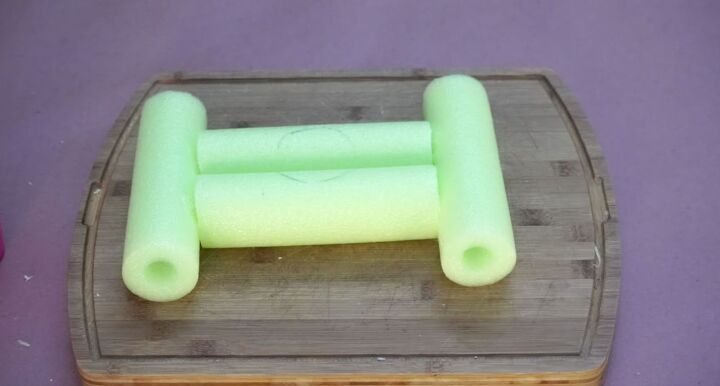
Draw the circle shape
Before removing your cut, draw a circle around it.
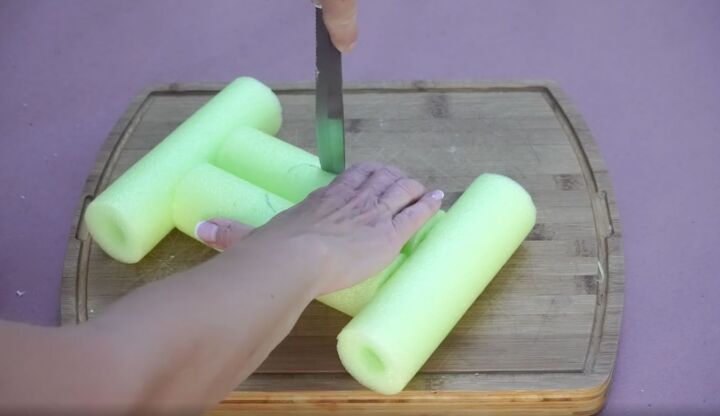
Cut out the circle
Then use a serrated knife to cut down to the seam and remove the parts in the circle. Don't cut all the way through. You just want to go through to the center.
When we cut that seam in the center, it worked really well because then you can just remove this piece.
DIY floating tray and cup holder
Finally, insert your cup and it’s ready to float.
3. DIY floating candles
Cut two-inch sections
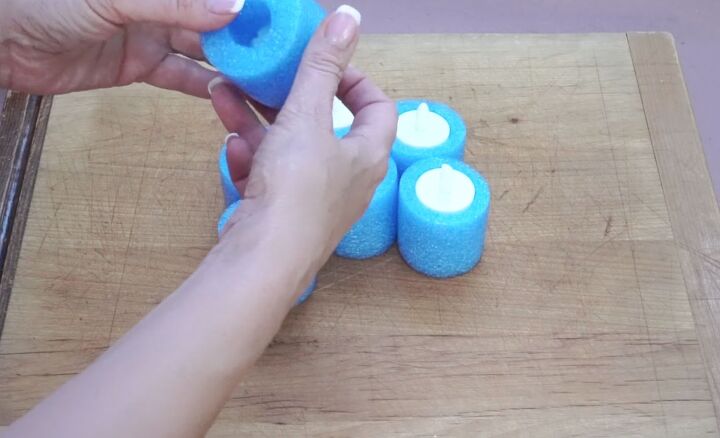
For my final trick, we are going to cut two-inch sections of a pool noodle.
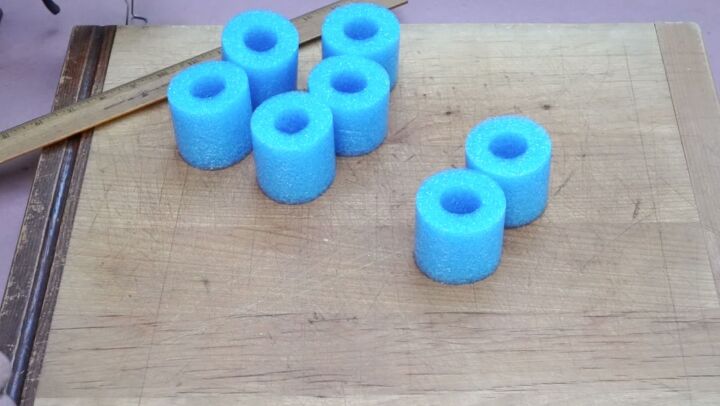
You need to have seven of these.
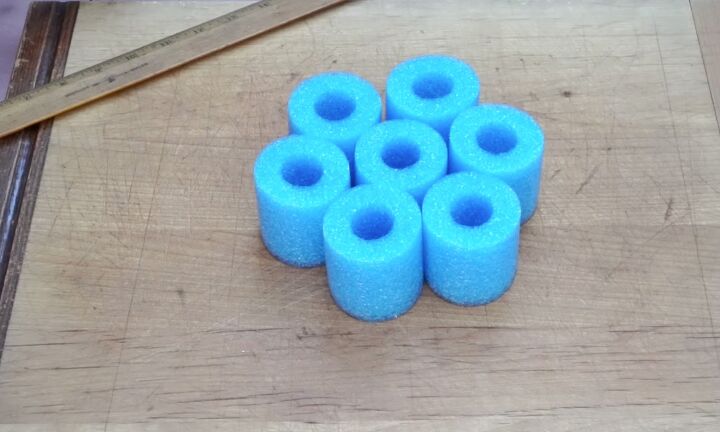
Make a flower shape
This is how we're going to get a flower. We're going to have one in the center and six around the outside.
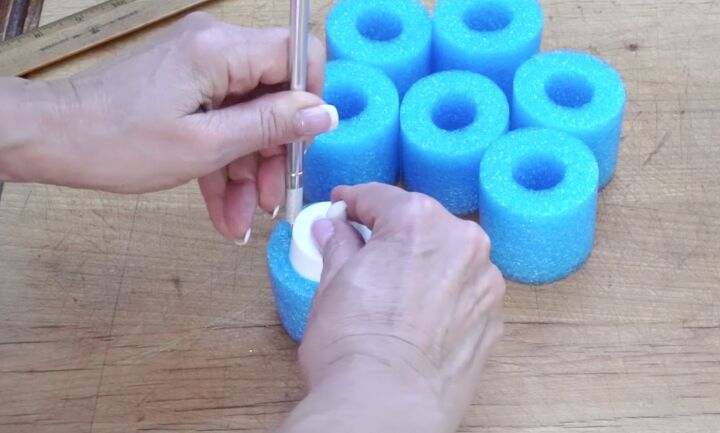
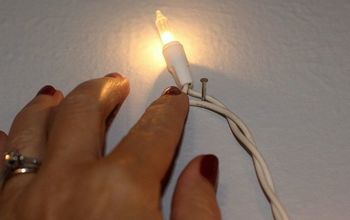
Add battery-operated tea lights
We are going to use these little battery-operated tea lights, and we're going to place them on the top and using an X-ACTO knife you want to cut all the way around.
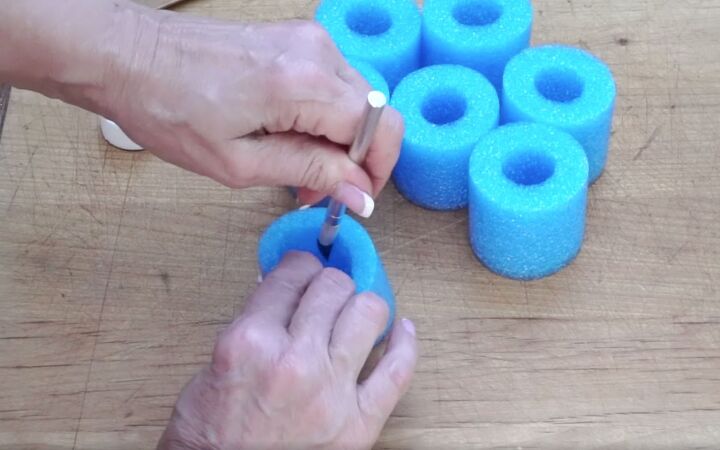
Once you've gone all the way around, you can see how loose it is. I'm just going to pull it down and then cut that small piece out of my noodle.
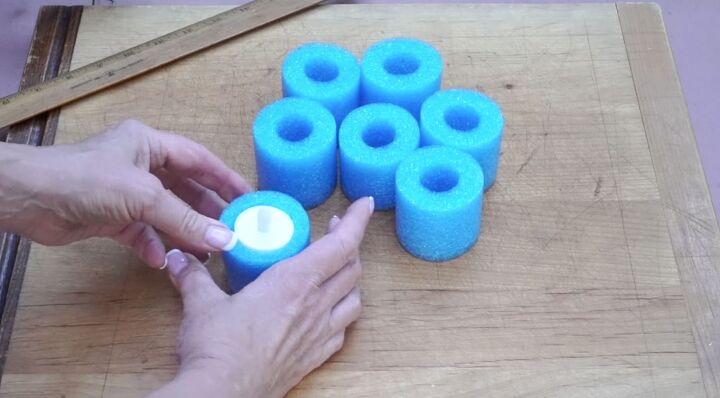
Then your candle will fit in there just like this.
Now we have all of our pieces cut, our candles are all put inside and there is plenty of room so the water should not hit the battery. You can put a piece of Saran Wrap under the candle if you choose.
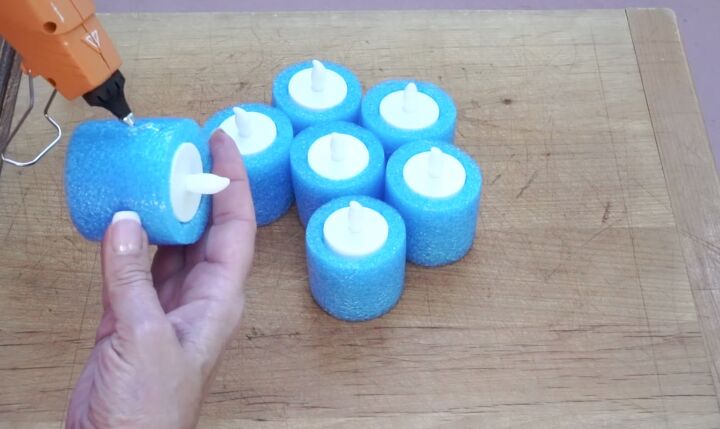
Glue the pieces together
Next, they need to be connected. I'm using a hot glue gun, but it is at a low temperature because if you use a high temperature, it really melts the pool noodles. Just use the low-heat hot glue gun and place the glue down one side.
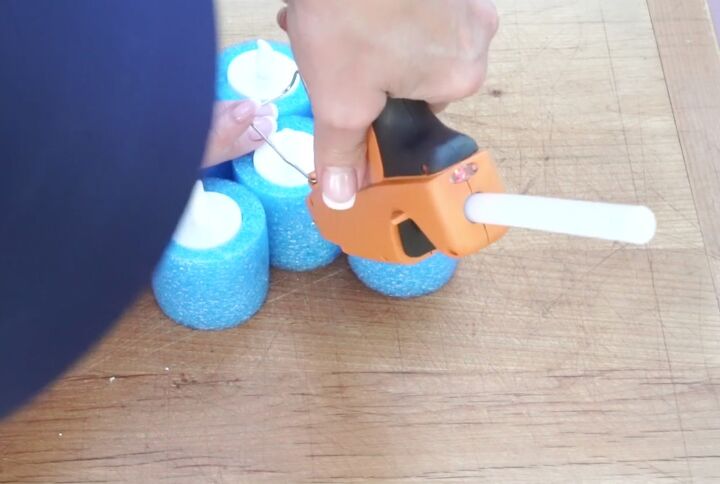
For the second one you want to place it in the center, and you want to place it on the side. Then attach that one.
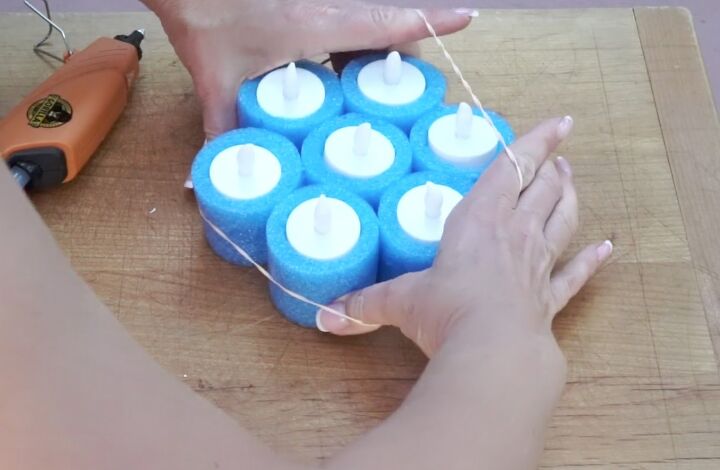
Use a rubber band while the glue dries
Do the same thing all the way around until they are all attached and use a rubber band to hold them all in place when they are drying.
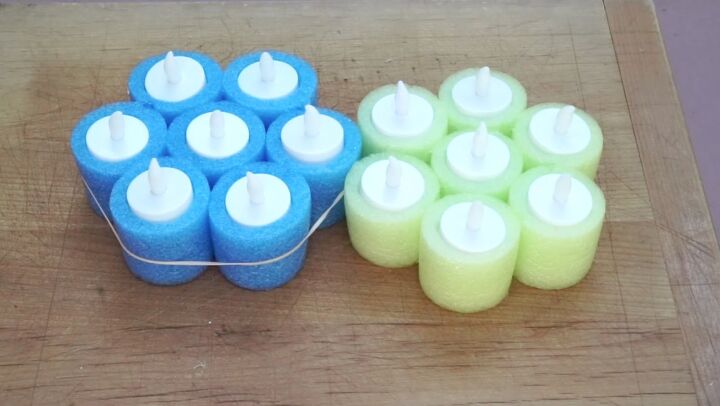
Our candle holders are done now so you want to remove the rubber band.
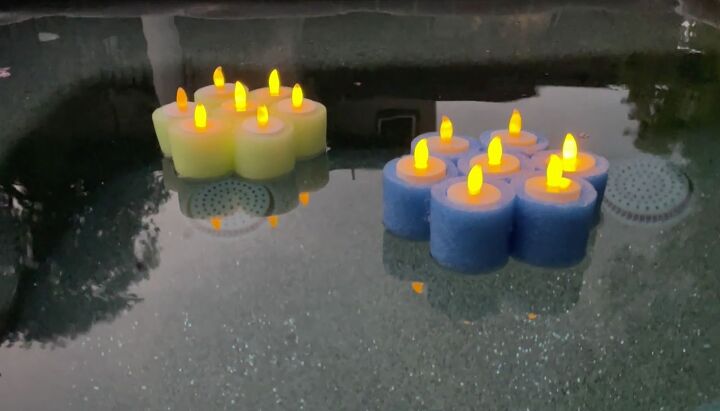
DIY floating candles
Once it's dark, we will turn our candles on and float them in the pool.
Pool noodle tricks
I hope you enjoyed this tutorial on how to make three floating pool noodle accessories for your pool. Let me know your thoughts and feedback in the comment below!
Resources for this project:
See all materials


Comments
Join the conversation
-
Thank you so much!
-
I absolutely love your idea with the candles.


Frequently asked questions
Have a question about this project?
Can you use E6000 instead of a glue gun. My cheapie glue gun doesn’t have a cool setting.
What does Thrush look like and how do you treat it?