


Faux Stained Glass for Windows or Cabinet Doors

My Catholic husband always rolls his eyes at me when we visit a church and I “ooh” and “ahh” over the stained glass windows. I, the Protestant, did not grow up with regular exposure to these beautiful works of art and therefore usually growl at him. Anyway…they’re so pretty!
I’ve seen many DIY stained glass projects on Pinterest that are also gorgeous. Since DIY is kind of my thing, you’d think I’d give it a go, right? The only problem is that I’m accident-prone and I know myself well enough to avoid working with glass. My mother was SUPER into the idea of making stained glass at one point, and for a birthday gift we got her all the tools and supplies to make her own. Since she she got over that potential hobby about a week later and never used the stuff, I even have supplies available should I ever decide to take the plunge. But for now, I’m:
- worried about my fingers
- reluctant to make stained glass décor because my girls are small and likely to bump or dislodge whatever breakable décor I set out or hang
- hesitant to paint my actual windows to look like stained glass because I will inevitably want to change it before too long
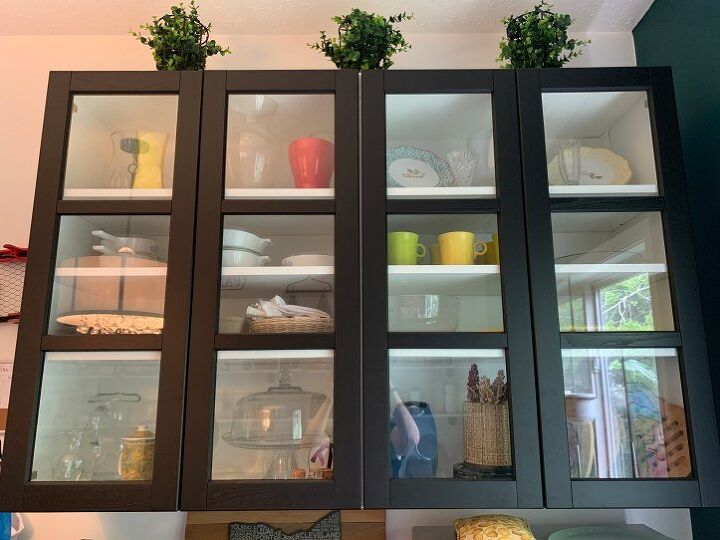
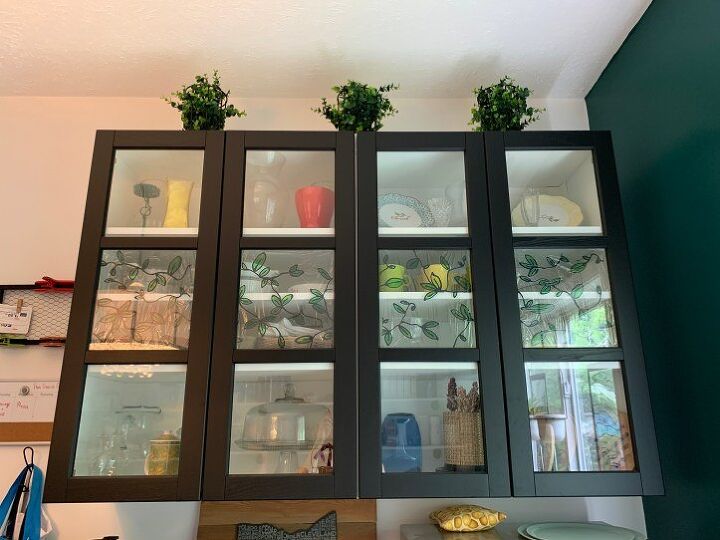
So, to give this a try, I decided to add some “stained glass” touches to my pantry’s glass cabinet doors. And while I was at it, I’d let my girls add some to the pantry’s window.
But this week, I had an idea. I remembered how, as a renter, I often painted plastic window wrapping to hang on walls that I wasn’t allowed to paint otherwise. Couldn’t I do something similar to make temporary, faux stained glass?
I didn’t have any window plastic on hand, so since the kiddos NEEDED a craft on that rainy day, I picked from what I had and used Saran Wrap. Turns out, this is a pretty good and cheaper alternative.
Supplies:
(See blog post on my website for purchase links if you’d like the specific supplies I used.)
- Saran Wrap (can also use an indoor window shrink kit)
- Stained glass paint
- Brushes (mine came with the paint above!)
- Simulated liquid leading
- Electrical tape (I used black, but you could use different colors!)
- Scotch tape
- Measuring tape

Window Version Step 1: Measure and cut Saran Wrap. First, I measured where I wanted the “stained glass” to cover the windows. Because the girls were doing these, I cut extra to give them room and allow myself the option of cutting off the “best” parts to use. 😜 Then I used scotch tape on the corners of these long sections of Saran Wrap and taped them to our countertop, making sure they were flat and relatively wrinkle-free.
Window Version Step 2: Paint. I gave the girls small dabs of paint at a time and let them brush it around as their artistic little hands saw fit. Even for adults, only work with a small amount of the paint at a time, because this dries pretty quickly. It has a gooey consistency that was different from anything I’ve worked with before, but you learn pretty quickly how thick or thin to apply it based on how strong you want the color. You can also mix colors over each other for a cool effect.
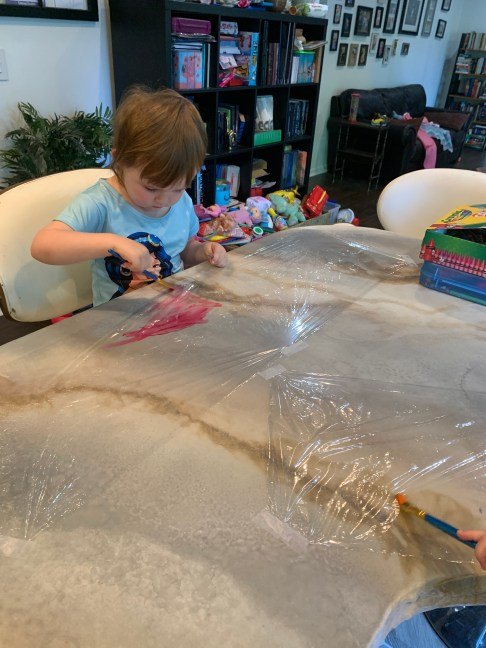
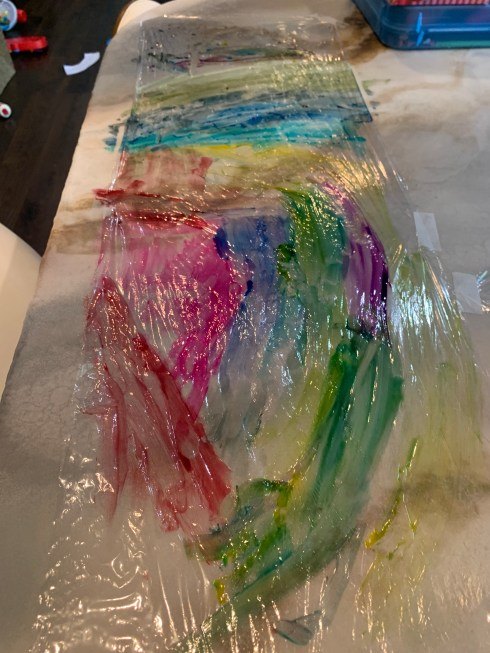
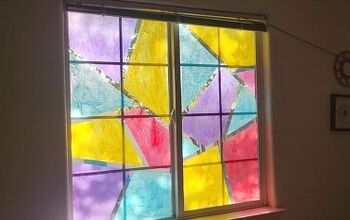
As you can see, my girls went VERY abstract. 😂 But this should also prove that even non-crafty adults can do this project too.
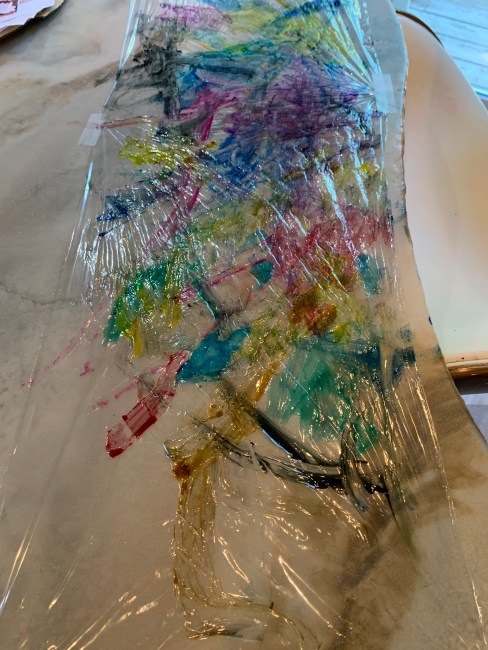
Window Version Step 3: Outline with liquid lead. Once the color was dry (I gave it about an hour), the next step was to use the simulated liquid leading to trace each color blob that the girls had made. You can apply this paint straight from the container to make nice lines if you squeeze slowly and consistently. This took only a little practice. And it looked pretty cool!
The liquid lead is obviously not real lead. It kind of works like puff paint in that it has some dimension rather than drying flat. In spots you get too thick, it will take about 6-8 hours to dry, so keep that in mind.
Side note: You could do the liquid lead outlining first, let that dry, and then paint your color after. But you have to wait to let the liquid lead dry, so for the sake of my girls’ patience I had them color first. If you have a specific pattern (or picture you want to trace – that would work GREAT) you may want to do the lead outlining first to be sure you have the pattern down before painting the color.
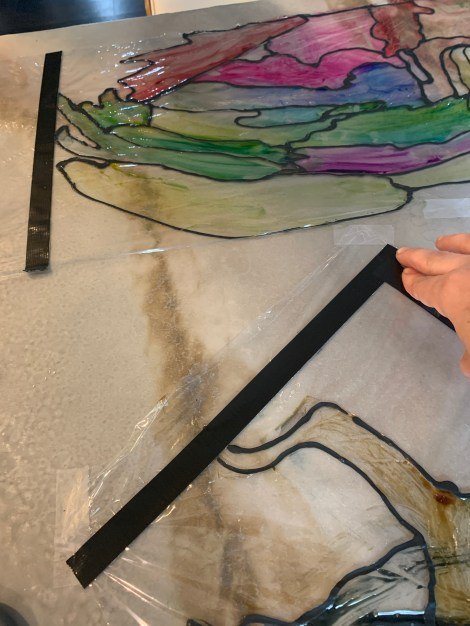
Window Version Step 4: Tape in place on windows. I didn’t exactly want scotch tape showing on the windows. But, what if I made a “frame” with black electrical tape? The adhesive of the electrical tape won’t leave residue on my glass when I want to remove these eventually, but it’s strong enough to hold on Saran Wrap, for sure.
To start, I placed straight lines of electrical tape at the top and bottom of each painting. This gave me a way to make sure the paintings would look level where I placed them on the window. There was some extra Saran Wrap on either end, so I cut this off.
Taking the paintings to the windows, I held them in place and placed another strip of electrical tape along the top and bottom to stick it on the window. I adjusted a few times, which was also a good way to test and make sure my tape didn’t mess up the glass – 👍 all good.
When it looked level enough, I measured top corner to bottom corner on each side and then cut those lengths of electrical tape to complete the sides of my “frames.”
Carefully holding the electrical tape in place along the first side, I made sure it would cover the edge of the painting and also stick to the window. Do NOT press this tape down until you’re sure it’s in the right place, as it will stick to the Saran Wrap and tear if you try to reposition. Once lined up correctly, I pressed down the tape. Then I did the same on the other side, pulling the Saran Wrap a little to stretch out any wrinkles.
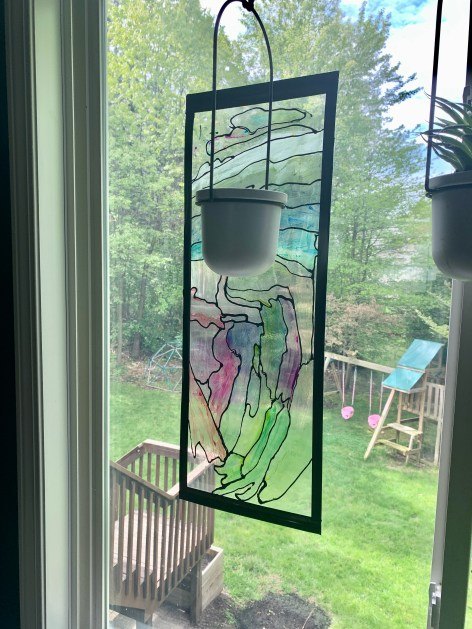
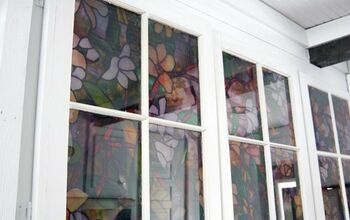
I finished these frames for each painting, and they were done! The girls were very proud of themselves, and again this end result tells me anyone can do this and make cool-looking faux stained glass for their windows.
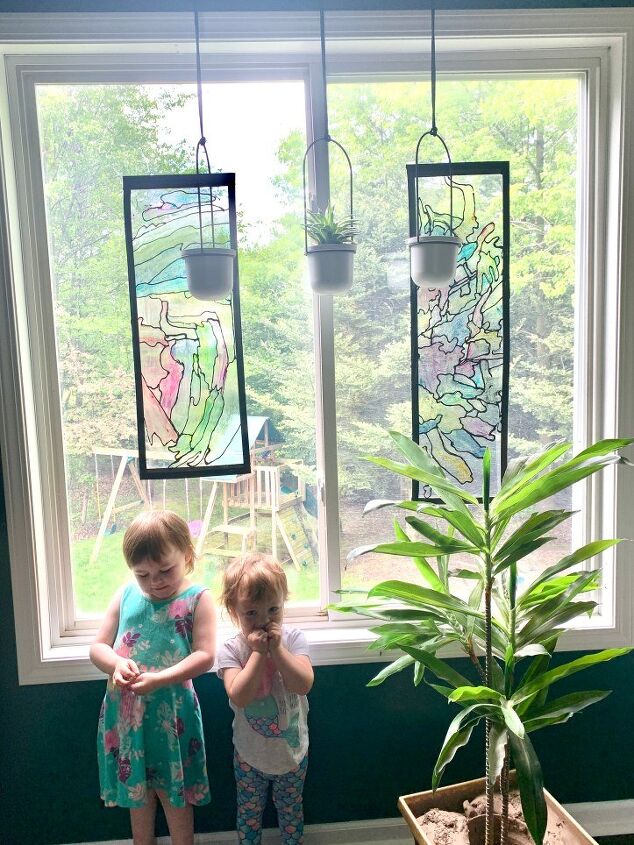
(I know they’re different lengths, but the 2-year-old yelled at me not to cut it shorter, so what was I gonna do? LOL)
Once the girls were satisfied and out of my hair… My turn!
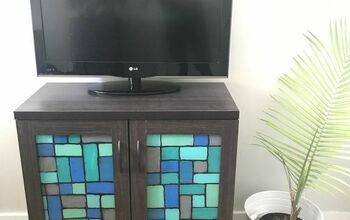
Cabinet Version Step 1: Measure and Cut Saran Wrap. For my own project, I measured how long I would need based on the sections of my cabinet doors that I wanted to decorate. I didn’t want to overdo it and so decided to try this out on only my middle sections, so I needed 40 inches. This I taped to the counter, same as before.
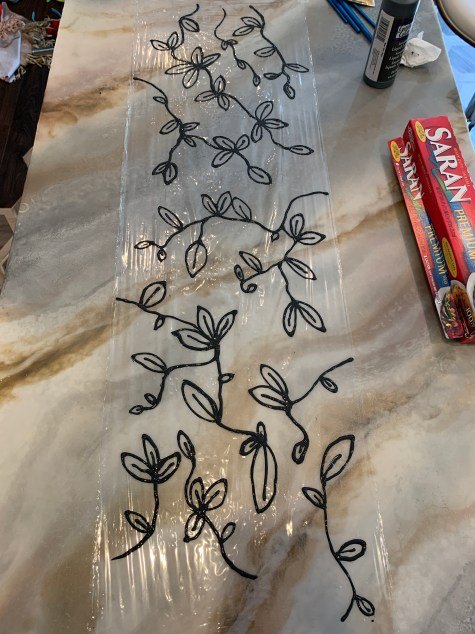
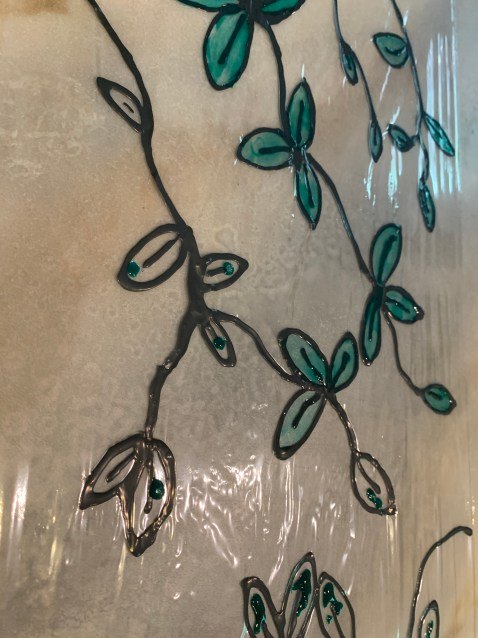
Cabinet Version Step 2: Outline with liquid lead. Purely as an experiment, I did the leading first this time. Honestly, it just depends on your pattern and personal preference. I thought about tracing a picture (which again would work GREAT if you want), but I decided to freehand some simple leaves and vines.
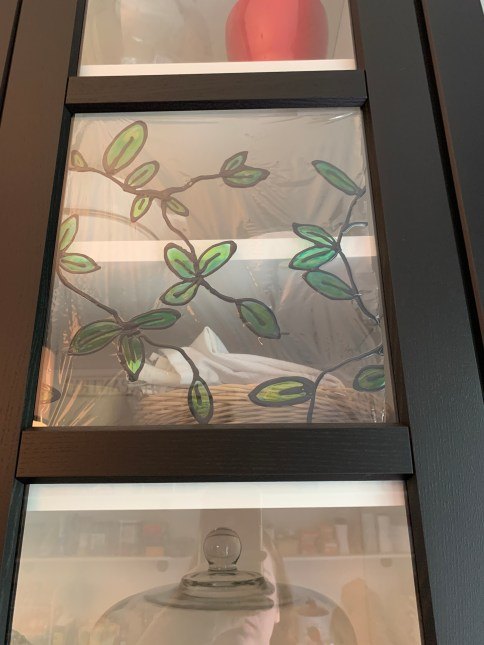
Cabinet Version Step 3: Paint. I let the outlines dry for about 6 hours. Then I dabbed paint in several leaves and brushes it on, starting with dark green. By the time I got done with that, it was dry enough to go over with a lighter green to add some depth. Very simple and pretty!
Cabinet Version Step 4: Cut sections and tape inside cabinet doors. I double-checked how big each section needed to be for my cabinet doors and simply cut my big strip into sections, then taped them on the inside of the doors. If you’re doing a whole glass door, obviously your measurements will be for the whole door and you don’t need to cut into sections. Also, since we hardly use these cabinets and therefore rarely open the doors, I just used scotch tape. If you’re going to see the insides a lot, I’d use electrical tape like before so it’s a less messy “frame” inside.

Side note: If you use window plastic, you can blow dry to get out wrinkles, but the Saran Wrap worked pretty well with adjustments to get a mostly smooth look. If I’d used electric tape inside, I could’ve gotten them even tighter and smoother…but I said good enough for now!
And that was is!
Again, this is a good craft project for artists of any skill level – kids OR adults. Although you might not leave these faux stained glass creations up as permanent decorations, they’re a nice way to add color in the spring after looking at the same cabinets/windows all winter.
For a more permanent faux stained glass decoration…stay tuned and cross your 🤞 that my next project turns out. I’m on a roll!


Comments
Join the conversation
-
You could use plexiglass also. By the way Walmart carries the glass paint.
-
I can't believe I found this when I had just Rescued an old door with the oval glass insert! A few of the textured and clear panels were missing glass, but it inspired me to try to repair it with clear packing tape and clear silicone caulking, and then paint the panels. Thank You.


Frequently asked questions
Have a question about this project?
I’ve always found it sssooooo difficult to handle Saran Wrap—have any advice on how to keep it from sticking to itself! Great artwork by you and your girls—very creative. Thanks for sharing
Could you also use Cling Wrap? It should stick and stay on the glass without the tape, right?