


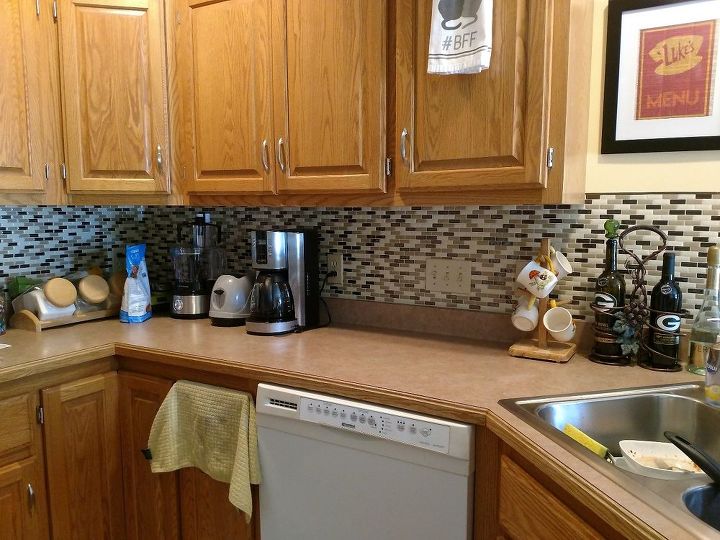
Plain Wall to Tiled Backsplash

As I've been browsing the internet, looking for inexpensive ways to get a nice backsplash, I came across Smart Tiles. They give the look of tiles at a much lower price and a lot less labor. There's still some labor and you definitely need to pay attention to your measurements, but it's easy once you get on a roll!
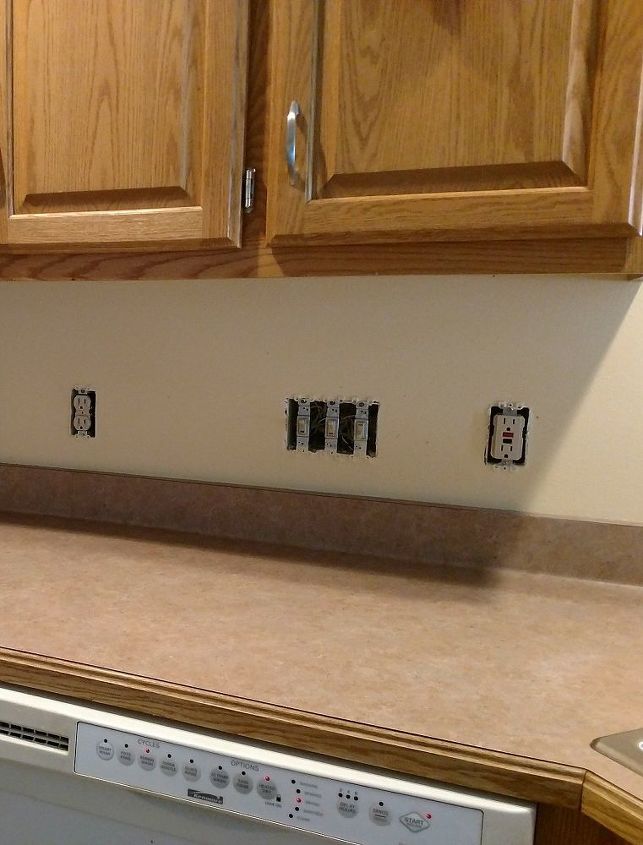
The first step is to thoroughly clean the walls and remove all of the outlet covers.
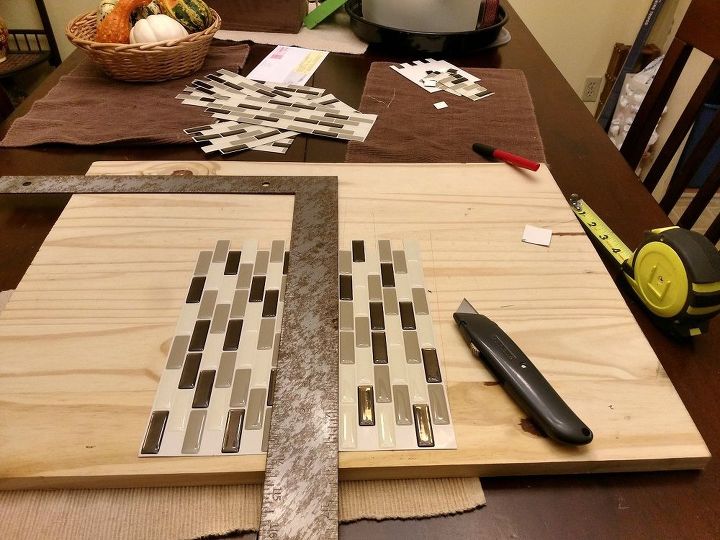
You need to measure the walls and determine how many tiles you'll need. You also have to measure where the outlets are and cut that space out of each tile.
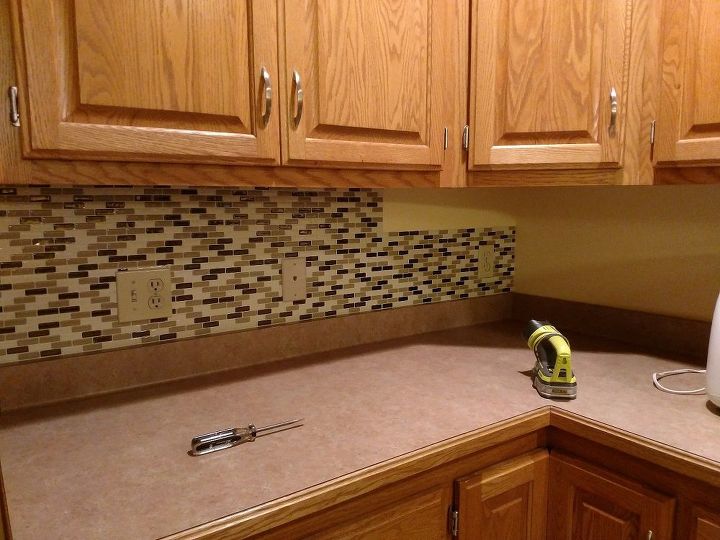
It's fairly simple once you get down a pattern of placing and measuring. Remove the backing and stick onto the wall. I recommend pressing the tiles into place with pressure and rubbing the tiles to make sure the adhesive really sticks to the wall.
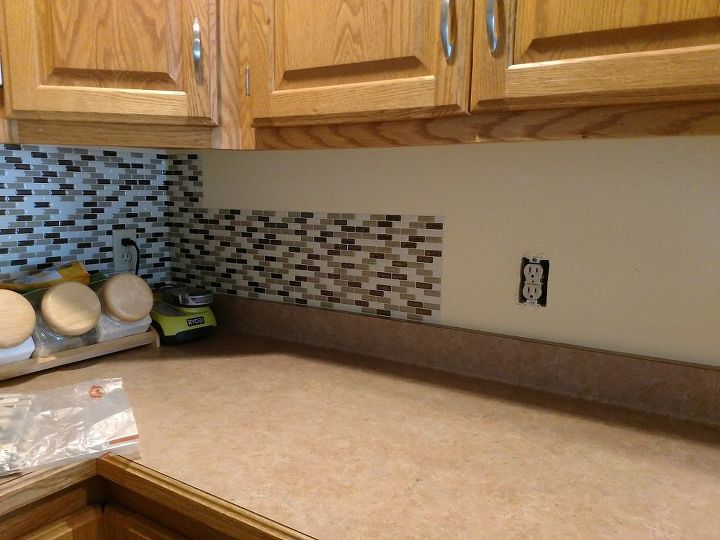
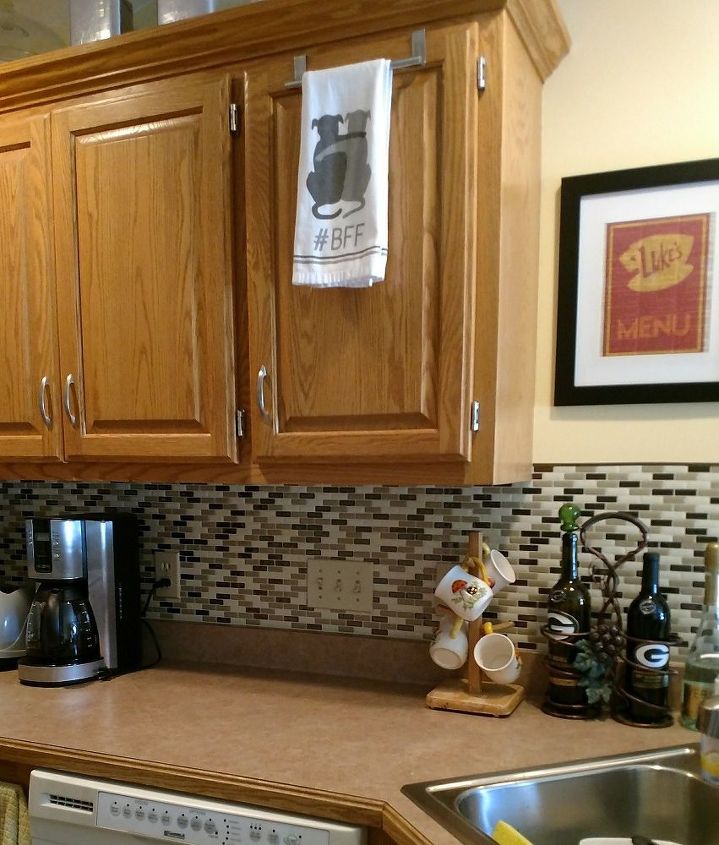
I'm truly satisfied with the end result. It's a nice, simple addition to a fairly plain kitchen wall.
* We did have a few tiles start to pull away from the wall after a couple months, but we used a spray adhesive and pressed it back into place and we haven't had any problems since then.


Comments
Join the conversation
-
I like the new look...makes me think your cabinets should be dark to really set off the transformation.
-
The tile you chose gives a nice updated look to the oak cabinets. Very sophisticated.


Frequently asked questions
Have a question about this project?
My walls are textured. What would i use to help them stick? I am sure I would have to use something extra or maybe sand (yuck). Lol
Love it! Came out great!!!!
do you have to grout after or no?