


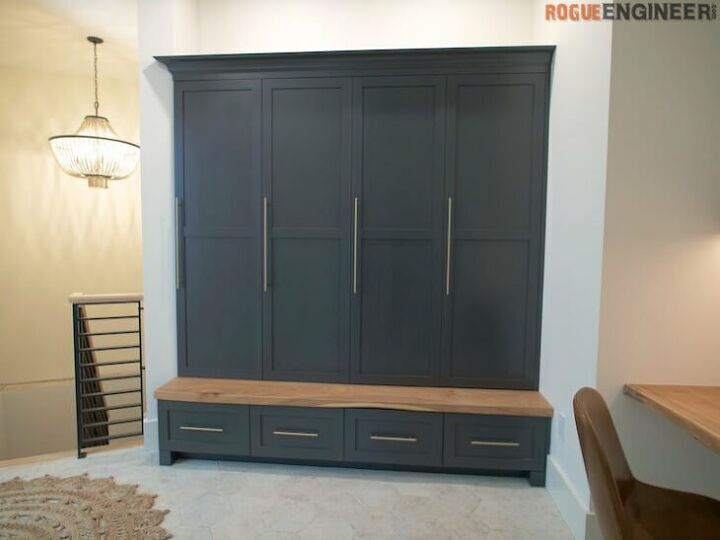
Mudroom Lockers
Last month we built and installed a custom built-in bench with drawers for our mudroom and it turned out great. Part B of this project was to build the locker units to sit on top. With this mudroom being a main throughway in our house, we wanted it to look nice, be functional, and hide all of our daily crap. So we built a 6 foot tall unit with hooks, multiple shelves and doors to hide it all!
If you love this stuff as much as we do, you might want to consider following us on Instagram where we post sneak peeks and behind the scenes stuff in our stories. Also, did you know you can get tons of projects plans from all around the web when you follow us on Facebook and Pinterest!
Wanna see how it all came together? Check out the full project video below and don’t forget to subscribe on YouTube so you won’t miss future videos!
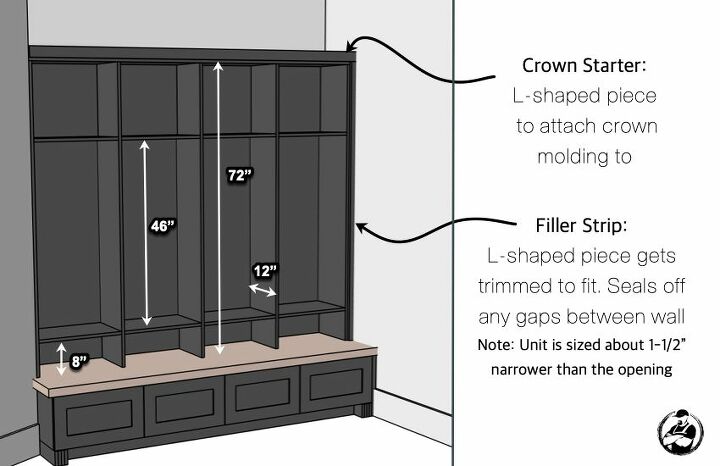
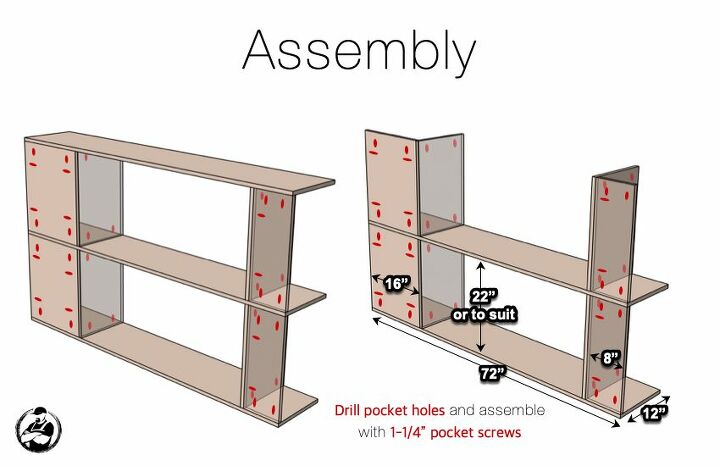
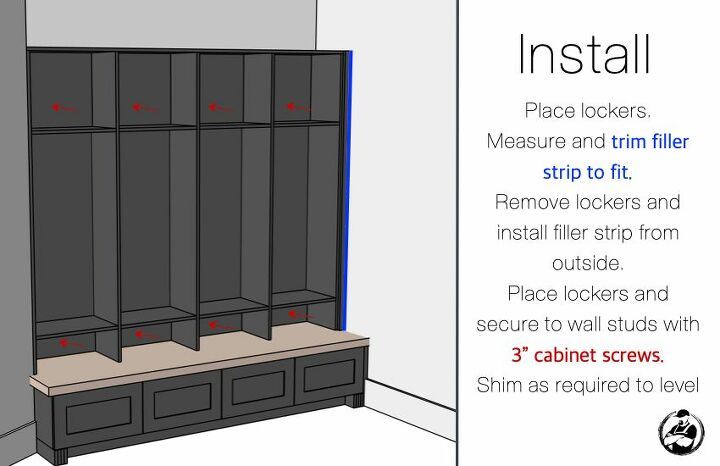
I put together a drawing below to show how the lockers, filler strip and crown starter get installed on top of our mudroom bench. The dimensions are rough and meant to give an idea of sizes and spacing. This is a custom built in unit that can be adapted for your space. This tutorial is designed to give you an idea of the assembly process and pieces.
Note: Read through these plans fully before starting as some details may not be in the order of operations.
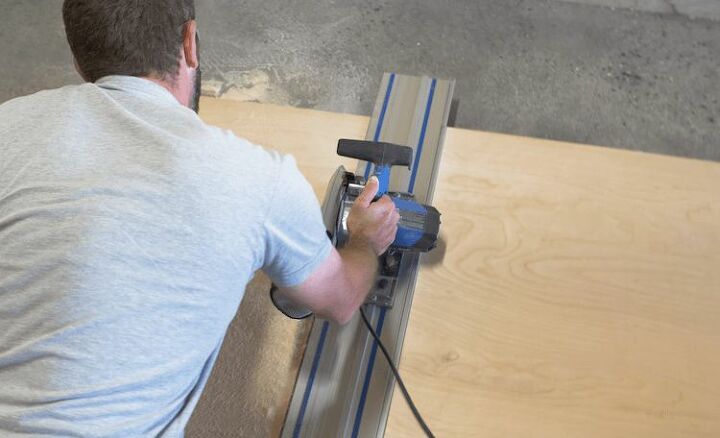
When it comes to breaking down plywood for projects like this I have a new friend and his name is the Kreg Track Saw. This tool along with a sheet of rigid foam insulation make breaking down plywood faster and safer than using a table saw.
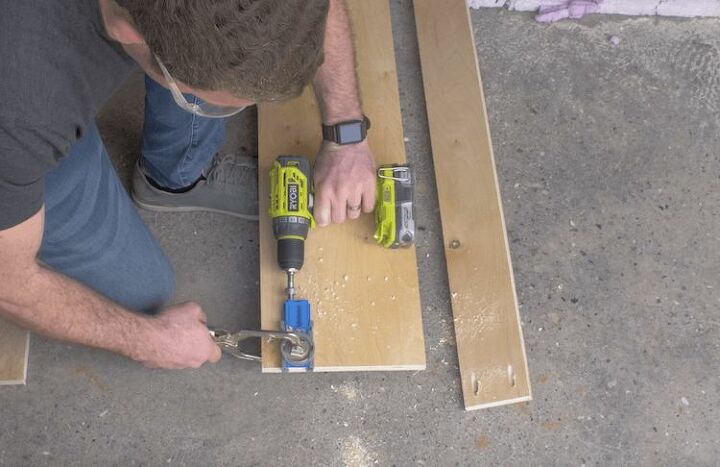
When it comes to joinery, we will be using mostly pocket hole joinery for this project. A pocket hole is an angled hole that allows a hidden screw to secure two pieces of wood together. The Kreg R3 is an inexpensive jig that will make this drilling process easier and quicker.
If you are drilling lots of pocket holes, the Kreg K5 or the Kreg Foreman (shown below) will really speed the process up.
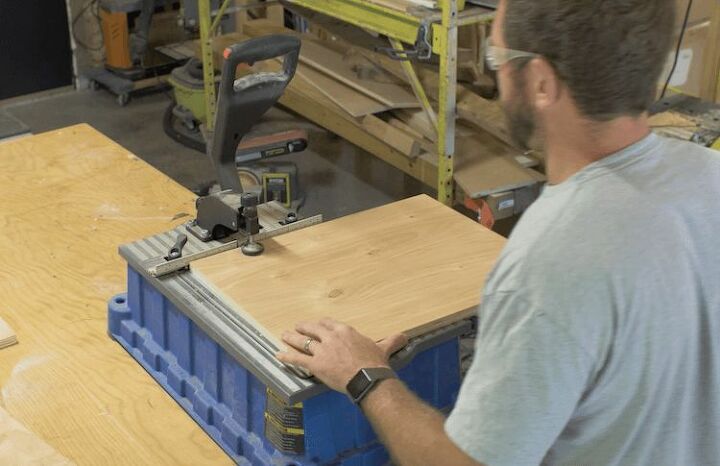
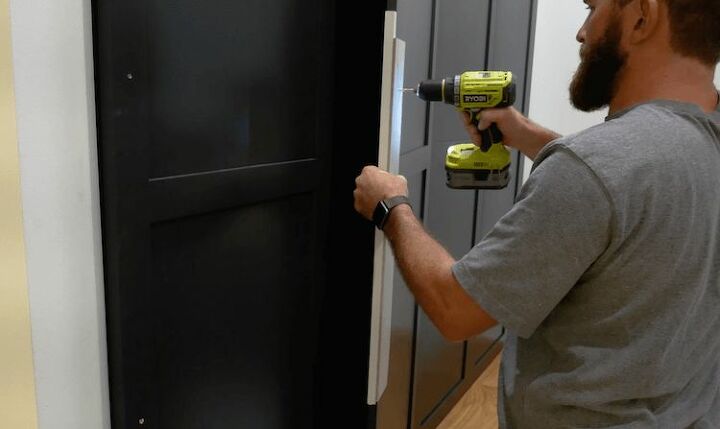
With all the pieces cut and pocket holes drilled we move on to the assembly. Four lockers are about as big of a unit as I would suggest building as one. This thing was difficult to move around once it was assembled so take that into account.
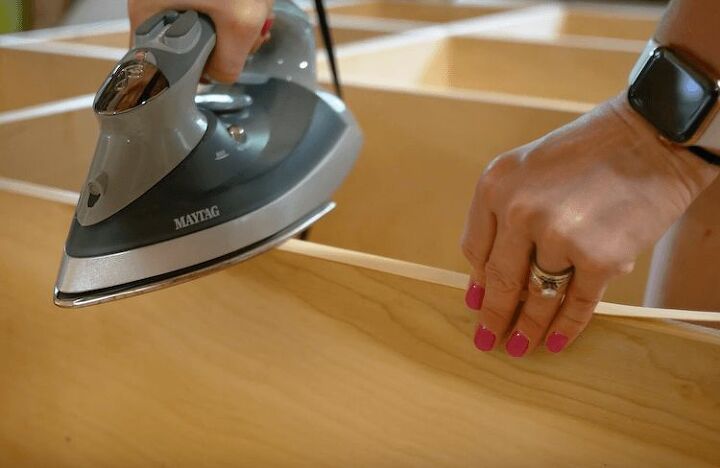
With the unit assembled it was time for paint. Before that we needed to edge band the plywood edges. We did so with a birch iron-on edge banding. The edge then need to be sanded or trimmed with a trimmer. This process can also be down before assembly which may be easier for some.
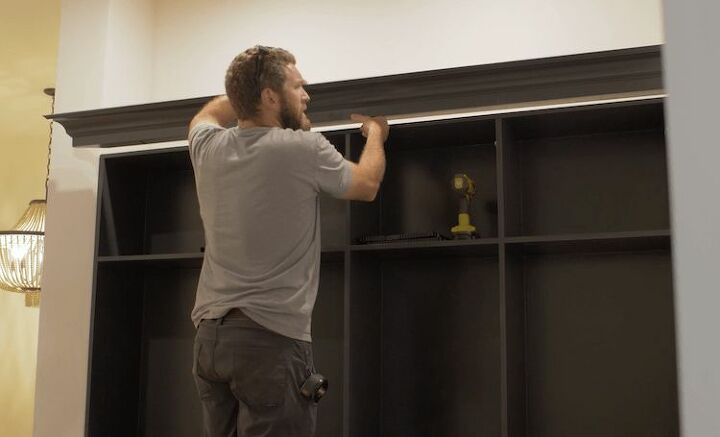
We installed our crown to the crown started before paint and even cut the miter and filled all the nail holes. Both ends were intentionally left long and cut to fit on install.
Finally, it was time to mount the hardware and normally I would use the Kreg Hardware Jig but we were installing really long pulls so I made a jig of my own with scrap plywood. I also, marked where the center rail on the door should go for easy locating.
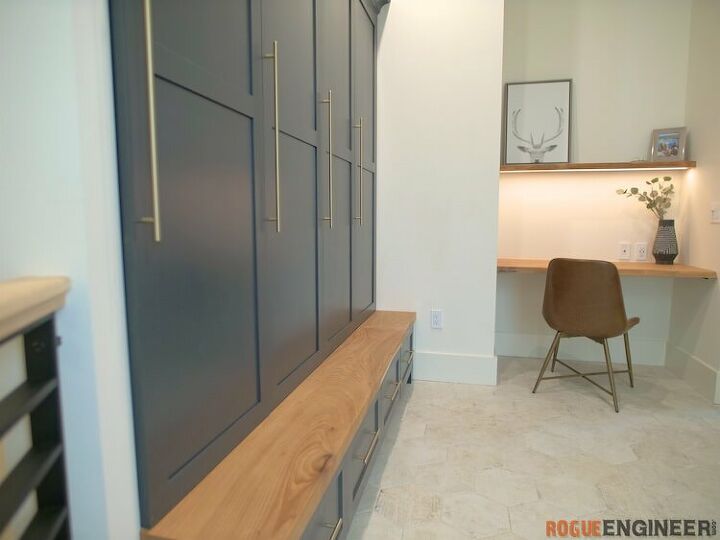
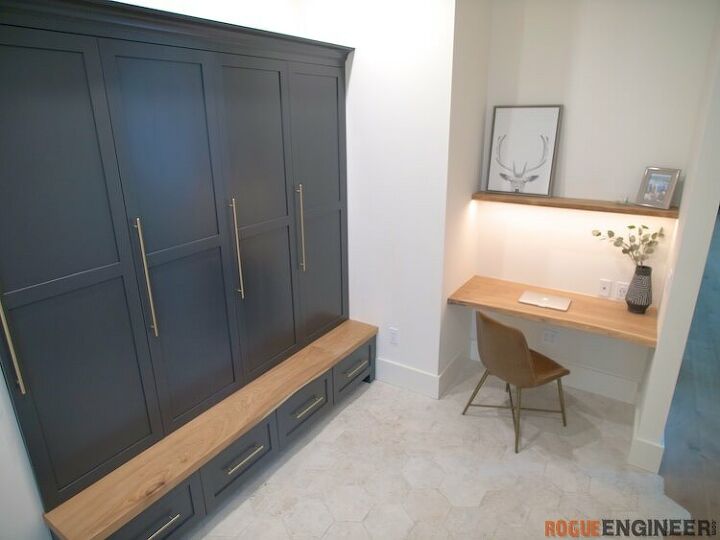
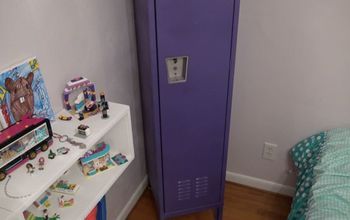
This is such an awesome space and the desk is going to be a great place to work from.
Resources for this project:
See all materials


Comments
Join the conversation
-
Fantastic! It's very important to have your kids take responsibility for their own things early on. This is beautiful and functional.
-
Beautiful job. I don't have a mudroom but would like to build the same in my garage on the wall next to the door into the house. It will hold lots of things and keep the sides of the garage clutter free. Thanks for sharing!


Frequently asked questions
Have a question about this project?
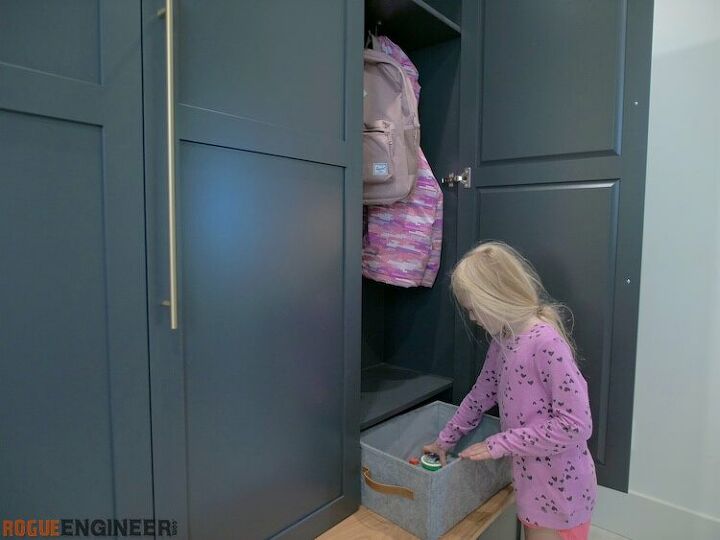
This is gorgeous but if each child is responsible for their own stuff, I want to know how that little girl in pic is able to hang her backpack and jacket by herself?? LOL