Make Easy Arrow Wall Art

by
My Husband Has Too Many Hobbies
(IC: blogger)
I had good intentions of organizing my craft supplies, but I was distracted by the amount of craft scraps I was hanging on to. Decorative Paper, vinyl chalkboard contact paper, metal scraps - so instead of organizing, I decided to try to come up with a craft idea to use some of my scraps.
Did I mention that I have cardboard scraps too? Well, I pulled out some and drew a simple pattern for an arrow head and feathers.
I cut it out and used it as a template to cut arrow heads and feathers from some of my scrapbook paper, the leftover chalk board vinyl and from my copper tooling foil scraps.
I also gathered some twine, bamboo skewers, wooden beads and my trusty glue gun.
The self adhesive chalkboard paper easily attached to the cardboard. The scrapbook paper was glued. I pulled out some skewers and painted a few white, I had a few that were painted silver from a previous project and some I left as they were.
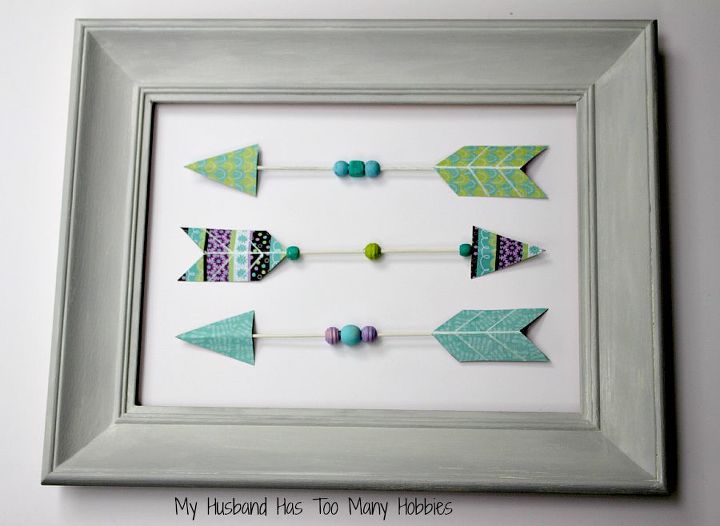
Using hot glue, I attached the arrow heads to the bamboo skewers. Then I added the beads. To keep them secure, I dabbed on a bead of hot glue where I wanted the bead to be to hold them in place. Then I attached the feather pieces.
For the rustic arrows, I used copper tooling foil. These were sturdy enough that I did not need to glue them to the cardboard templates.
Chalk board arrows.
Scap book paper arrows.
And Rustic Arrows.
Enjoyed the project?

Want more details about this and other DIY projects? Check out my blog post!
Published July 20th, 2015 6:00 AM
Comments
Join the conversation
1 comment









Frequently asked questions
Have a question about this project?