


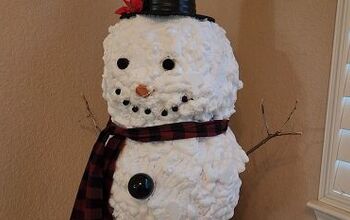
Snowman for Christmas :)

$20
3 Hours
My husband and I looked at some Christmas decorations at Michael's and we really liked them but they were too expensive. We especially liked a wooden snowman with lights but he was priced around $70. My husband built our snowman for about 20 dol worth of materials. We already had aluminum flashing from some house projects so we only needed plywood and lights. We can't wait to put this snowman outside for Christmas :)
Materials:
- 1/2 inch plywood 2x4
- 6 inch aluminum flashing
- screws 3/4 to 1 inch
- pencil
- sand paper 16 grit
- tape measure
- pliers
- knife or heavy duty scissors ( to cut aluminum)
- jigsaw
- hammer
- screwdriver
- cats paw pry-bar
- work bench
- drill
- drill bit 7/8 for the lights we used
- globe light set 10 ft, 10 pc ( available at Michael's)
- a scarf of your choice :)
Instructions:
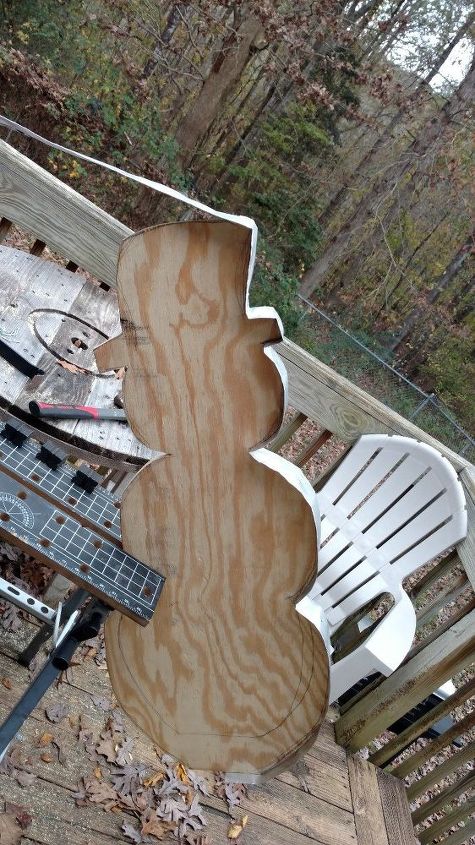
1. Draw a design on a plywood ( that was my job :) )
2. Use a jig saw to cut the design out
3. Sand the edges and wherever you see pencil marks
4. Measure a snowman around
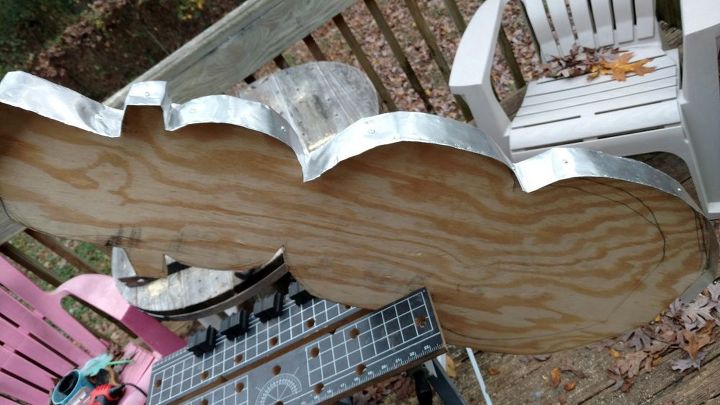
5. Cut out about 12 ft of flashing
6. Fold in half so it is 3 wide ( about)
7. Where the folds come together, fold about 0.5 in to the inside. you can use hammer for this and a hard surface. This is a tricky part and it takes some time
8. Put your snowman on the side and stabilize it.
9. Starting at the bottom work the metal around. Secure with the screws
10. When you get to the curvy spots use the pry-bar to push the aluminum in
11. Cut the excess of the metal
12. Mark where you want to place the lights
13. Drill holes
14. Disassemble each light bulb and put it through the drilled holes
15. All set :) Now you only need a scarf :)
Materials:
- 1/2 inch plywood 2x4
- 6 inch aluminum flashing
- screws 3/4 to 1 inch
- pencil
- sand paper 16 grit
- tape measure
- pliers
- knife or heavy duty scissors ( to cut aluminum)
- jigsaw
- hammer
- screwdriver
- cats paw pry-bar
- work bench
- drill
- drill bit 7/8 for the lights we used
- globe light set 10 ft, 10 pc ( available at Michael's)
- a scarf of your choice :)
Instructions:
1. Draw a design on a plywood ( that was my job :) )
2. Use a jig saw to cut the design out
3. Sand the edges and wherever you see pencil marks
4. Measure a snowman around
5. Cut out about 12 ft of flashing
6. Fold in half so it is 3 wide ( about)
7. Where the folds come together, fold about 0.5 in to the inside. you can use hammer for this and a hard surface. This is a tricky part and it takes some time
8. Put your snowman on the side and stabilize it.
9. Starting at the bottom work the metal around. Secure with the screws
10. When you get to the curvy spots use the pry-bar to push the aluminum in
11. Cut the excess of the metal
12. Mark where you want to place the lights
13. Drill holes
14. Disassemble each light bulb and put it through the drilled holes
15. All set :) Now you only need a scarf :)

Ready and waiting for Christmas :)
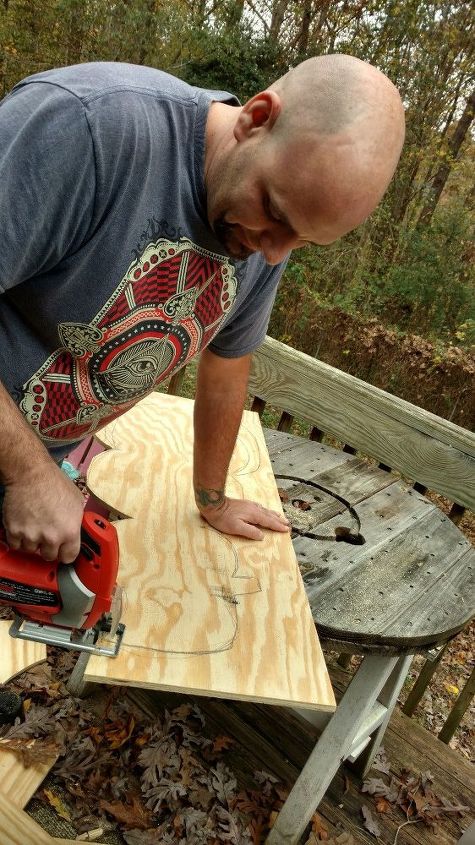
Cutting plywood with jigsaw
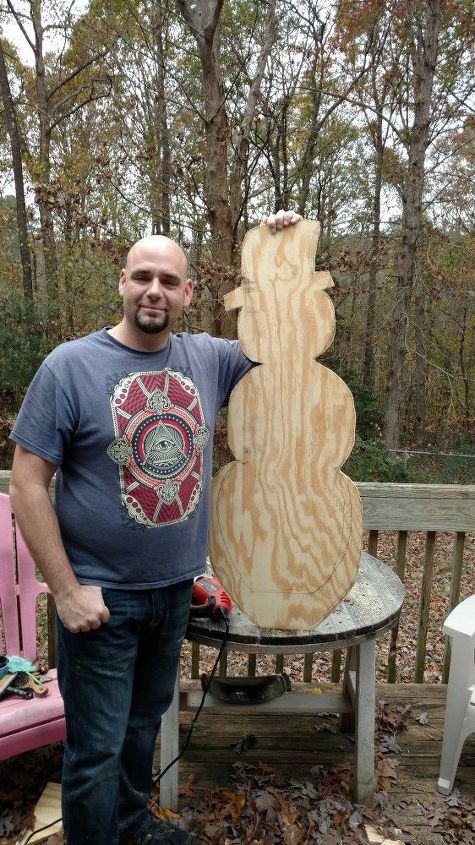
:)
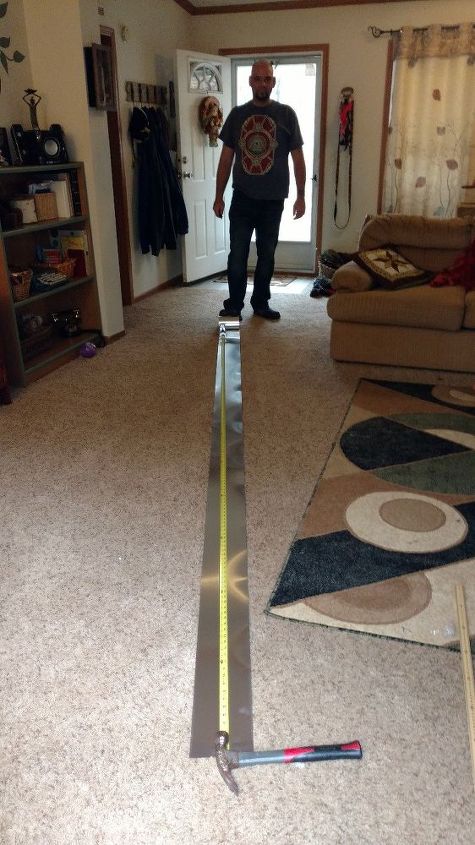
Measuring aluminum
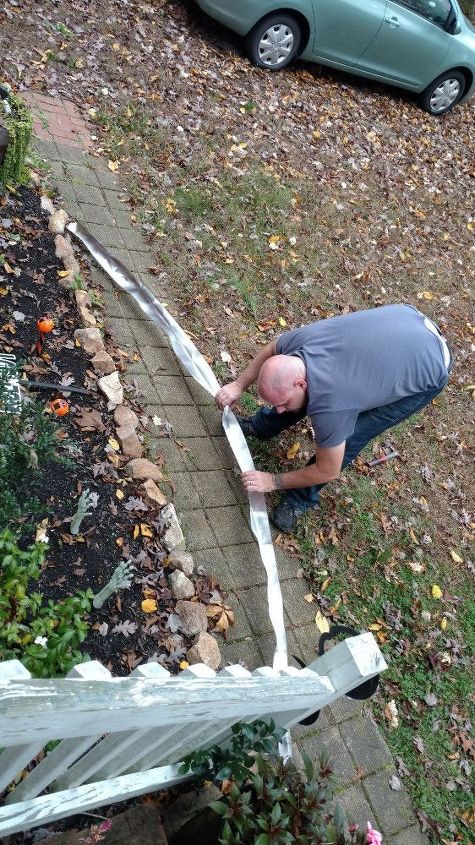
Bending metal
Putting metal on using screws
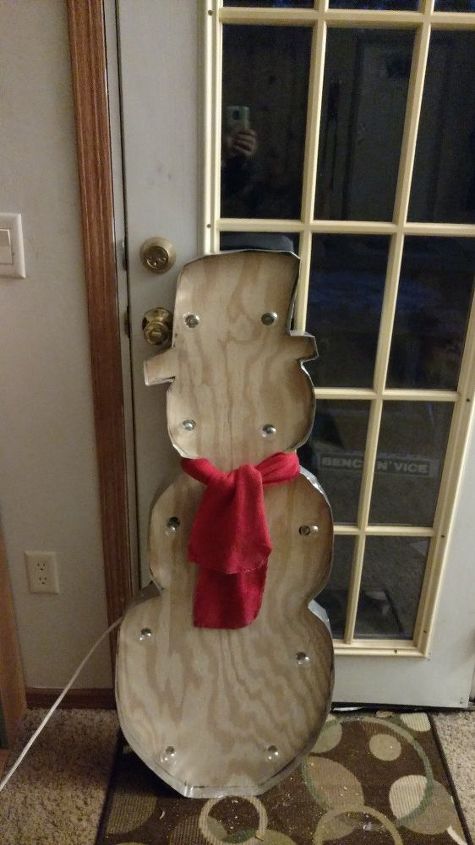
With the lights... And a scarf ( from old fleese blanket)
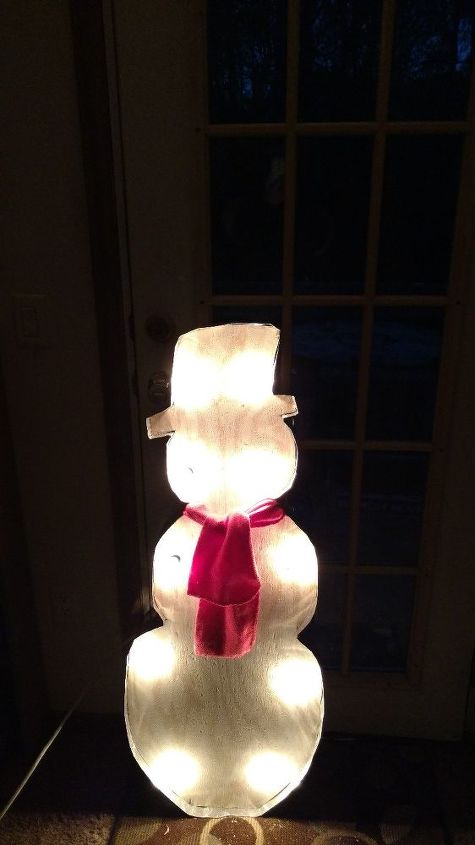
At night :)
Comments
Join the conversation
2 of 175 comments
-
Great work. Love him💙
-
Cute it would have panted wood white and used more Christmas type lights. That’s what craftings all about make it yours.


Frequently asked questions
Have a question about this project?
So cute. Did you fold the flashing in half?
What do you do if it rains do you run out and scoop it up and run inside each time I love it did a project very similar and it rained and it just destroyed all my work in seconds it was horrible is there something you can do or is it a loss each time