


DIY Alternative Christmas Tree
Every year, I try to create an alternative tree for Christmas. I think it’s because we live in country where December typically is sweltering and snowflakes and fir trees just don’t make sense to me under the circumstances!
I really had to dig deep to come up with something different this year, but I have to admit that I am thrilled with the result!
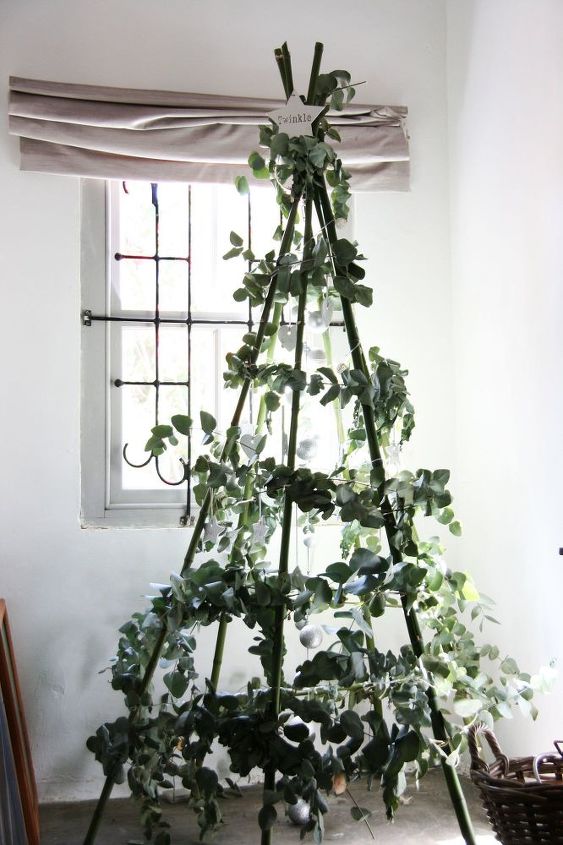
We have long since sung the praised of both the teepee and pennygum, and in this project the 2 come together to produce and impressive tree that smells great as well.
I constructed a basic teepee frame with 6 pieces of bamboo, all 2m long, and then fixed pennygum branches to it with twine. It was really simple and quick to make, and what I love about it most, is that although it’s quite big, it doesn’t appear to be this heavy thing in the corner.
Click here for the video! https://youtu.be/Yq6XMOuejXI
I really had to dig deep to come up with something different this year, but I have to admit that I am thrilled with the result!
We have long since sung the praised of both the teepee and pennygum, and in this project the 2 come together to produce and impressive tree that smells great as well.
I constructed a basic teepee frame with 6 pieces of bamboo, all 2m long, and then fixed pennygum branches to it with twine. It was really simple and quick to make, and what I love about it most, is that although it’s quite big, it doesn’t appear to be this heavy thing in the corner.
Click here for the video! https://youtu.be/Yq6XMOuejXI
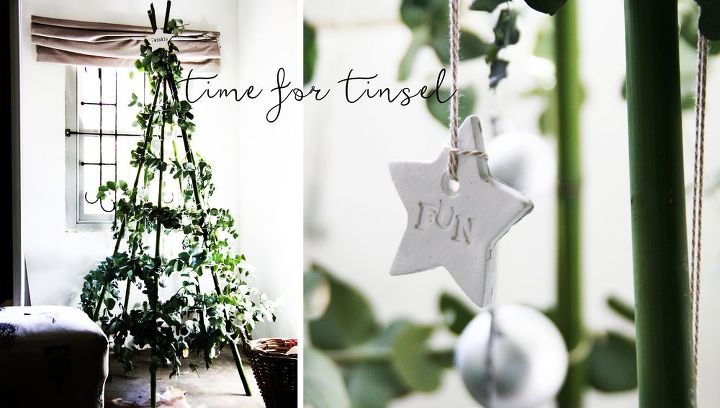
I chose to adorn the folliage with a collection of white, wood and silver ornaments instead of going colourful. The lovely green-grey leaves are already such a beautifully soft colour that I didn’t want any other colours to compete with it.

I made the white clay hearts and stars with the printed wishes on them for our tree a few years ago. It’s as simple as rolling out the air dry clay and using a cookie cutter to create the hearts and stars. Remember to make a small hole for the string! Use a stamp to create the personal wishes and allow to dry before you string them up!
{
"id": "3103168",
"alt": "",
"title": "",
"video_link": "https://www.youtube.com/embed/Yq6XMOuejXI",
"youtube_video_id": "Yq6XMOuejXI"
}
{
"width": 634,
"height": 357,
"showRelated": true
}
For the full step-by-step tutorial, visit the post!

Want more details about this and other DIY projects? Check out my blog post!
Comments
Join the conversation
3 of 6 comments
-
Going to try this on a small scale, tiny house 😊
-
This is so creative and beautiful.
Just wondering how long this fresh leaves lasted? Did they dry out in a nice dried flower sort of way or was it more like wilting?


Frequently asked questions
Have a question about this project?