


DIY Hanging Shower Planter
We're officially obsessed with indoor gardening and plants in general. We decided that we needed plants in every single room, so we built our own 'raining' plant hanger. I was skeptical about how it would turn out, but I'm actually really in love with it. It took us less than an hour to build and was easy to hang from the ceiling.
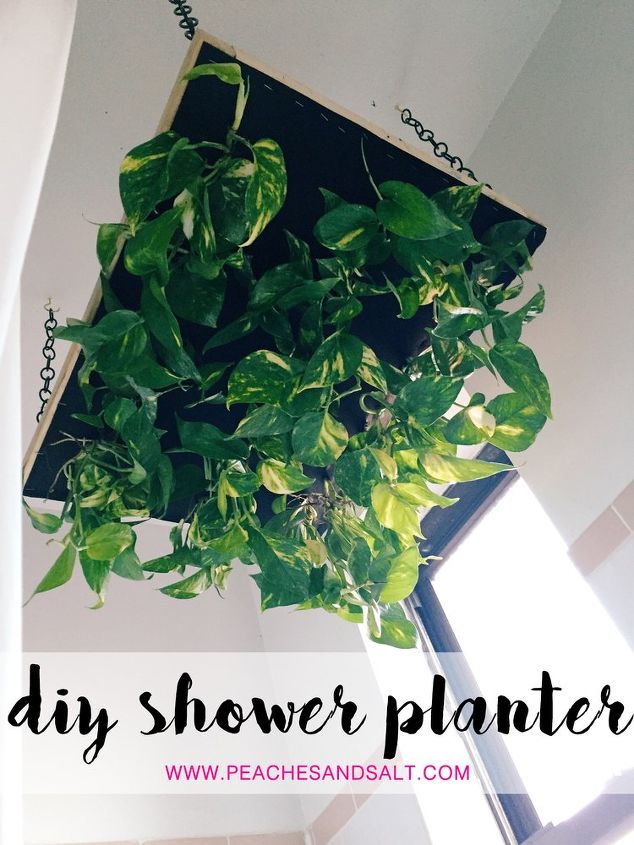
Make one for your shower using our guide below!
MATERIALS:
- (1) 1'x1'x8' board
- Chicken wire cut to 1'x2'
- (1) Roll fiberglass screen
- Staple gun and staples
- Plants
- Small gauge chains
- Metal hooks
- Soil
TOOLS:
- Wire cutters
- Needle nose pliers
- Wood Screws
- Drill
INSTRUCTIONS:
1. Go to your local hardware store (we went to Lowes) and pick up your supplies. If you don't have a saw, ask the wood department to cut your board into 2 pieces: (2) 2' sections and (2) 1' sections.
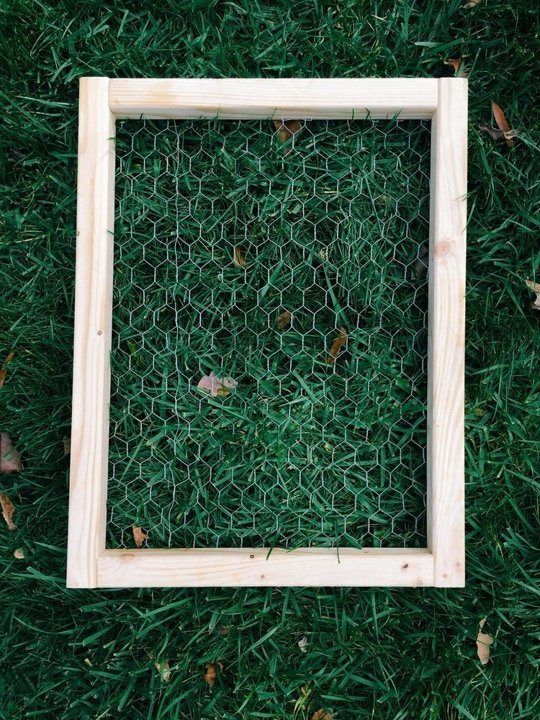
2. Layout your boards in the shape of a rectangle and pre-drill the holes so your wood won't split when you screw them together. Screw all 4 boards together.
3. Cut your chicken wire with the wire cutters to fit the rectangle and then staple around the edges so it's tightly secured. Cut off the excess chicken wire around the edges.
4. Fold over your fiberglass mesh 4x so it's thick. This will keep your soil from falling out. Staple it around the edges, right over the top of the chicken wire layer, so it's tightly secured.
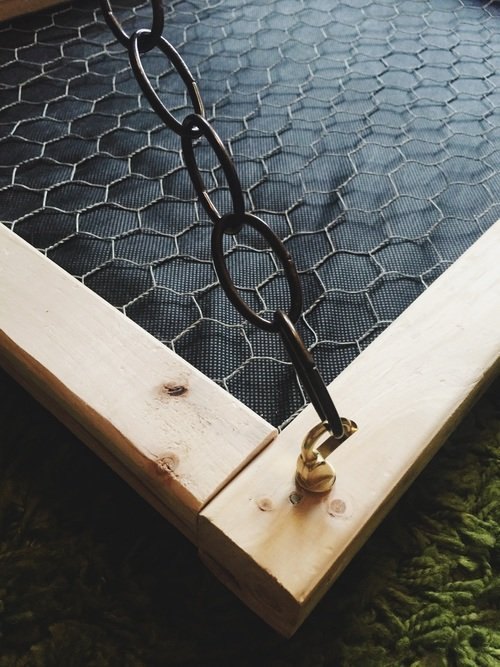
5. Add your hooks to the corners of your planter. Our hooks had clamps, which made them easier to hang. Then screw your 4 regular ceiling hooks into the ceiling, after you have measured the right distance.

6. Take your plants and separate them by gently breaking apart the soil and dividing them by the root.
7. Measure out where you want each plant to go on the black mesh (this is where you will make holes for the plants). We made holes 2 inches apart using a ruler. You can use a knife to make each hole.
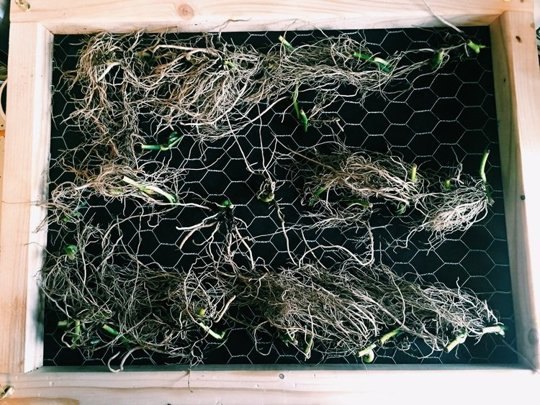
8. Gently feed the roots through each hole and add a layer a soil that completely covers them.
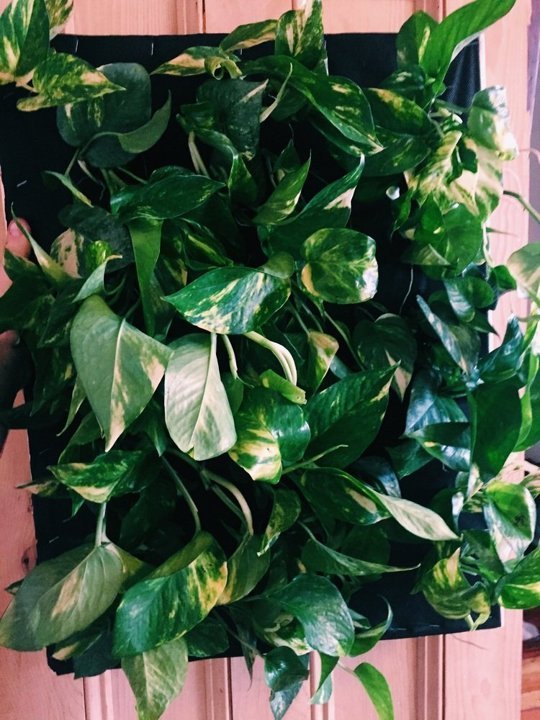
9. Moisten the soil so you can see the roots and layer with more soil. You can continue to add more soil wherever needed.
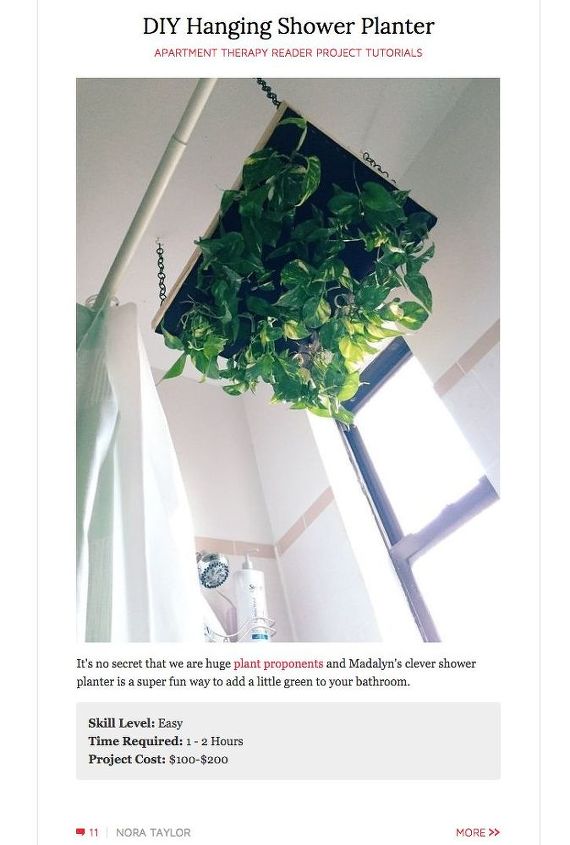
10. Hang your planter above the shower and get ready to enjoy!
Resources for this project:
See all materials


Comments
Join the conversation
-
Very pretty. I think I'd go with fake plants so I didn't have to worry about it.
-
I would think the soil would fall out on your head in the shower. It looks cool, but it didn’t say if there was a way they protected it so the soil wouldn’t fall through.


Frequently asked questions
Have a question about this project?
I also like plants everywhere, but I have a dark bathroom so I use artificial ivy. Never would have thought of plants from the ceiling. Maybe if they trailed down as if they were part of the shower curtain? Clever.
How do you keep the soil from slipping through the holes?
I remember when I first seen this post long ago. My question is do you still love it? Have you had issues with soil falling on you while you shower? I too love plants in my home and have a couple in my bathroom. I'm just not too keen on having them overhead while I shower. I wonder how this would work in a different area of the house instead?