


DIY Map Love Hearts
$5.00
Easy
Have you ever wondered how someone came up with "that" idea? I'm giving you a glimpse into how I came up with my DIY Map Love Hearts, and how easy it was to make. I used ours to show the three locations of where our grown children live; but you can make map love hearts of places you've traveled to, places you have lived (especially if you've traveled around with the military), or any other way that has a significant meaning for you.
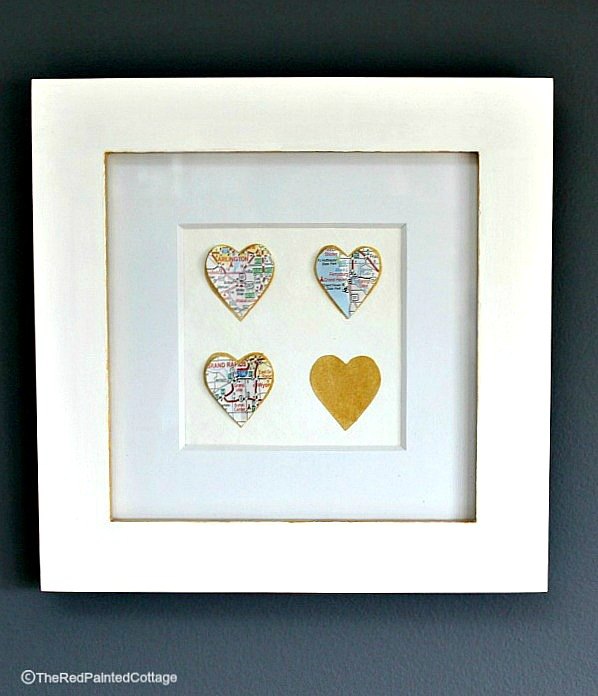
This is my finished DIY Map Love Hearts, but follow along for my inspiration and how I made it.

This was my inspiration. Even though it was on clearance, it was still costing more than I would have paid, plus the maps were of no significance to me.
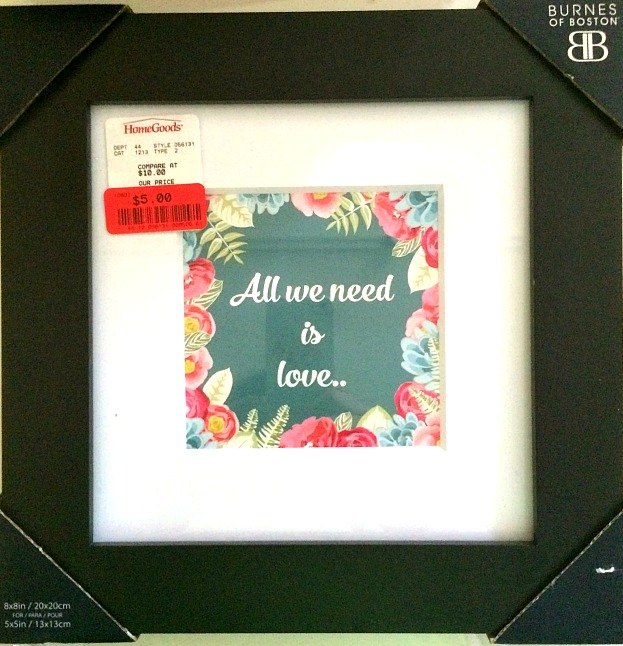
Shortly afterwards, I was this frame on clearance and knew I could transform it. If you have old frames laying around your house or you see any at flea markets or second-hand stores, know that all you have to do is to paint it to give it a new look.
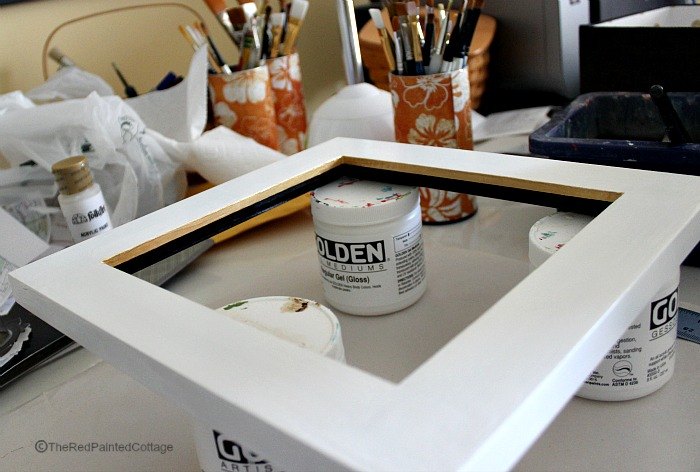
I primed mine, then painted it with white craft paint. After it was dried, I put a coat of craft satin varnish over everything.
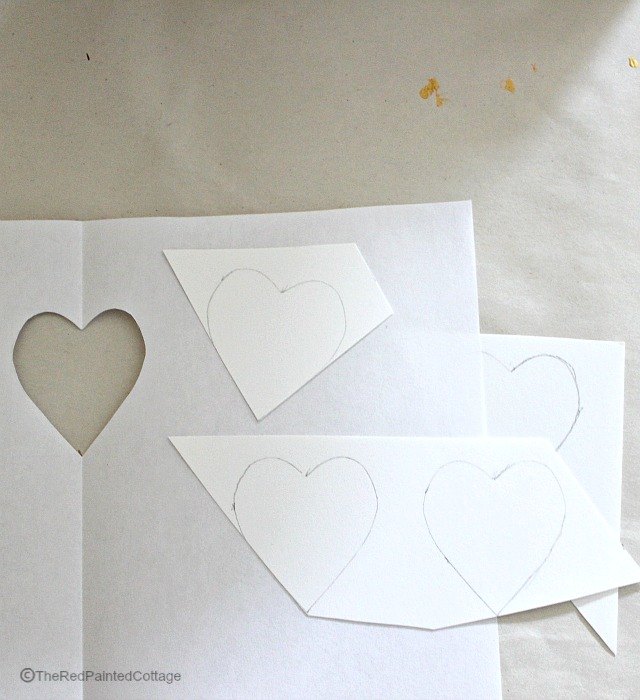
Once I determined how big I wanted my hearts, I made one by folding it and using that as a template for the actual ones. For the background hearts, I used a heavy-weight computer paper that felt more like business cards. You need to use something with a tad more weight to it so the paper won't curl after painting your hearts.
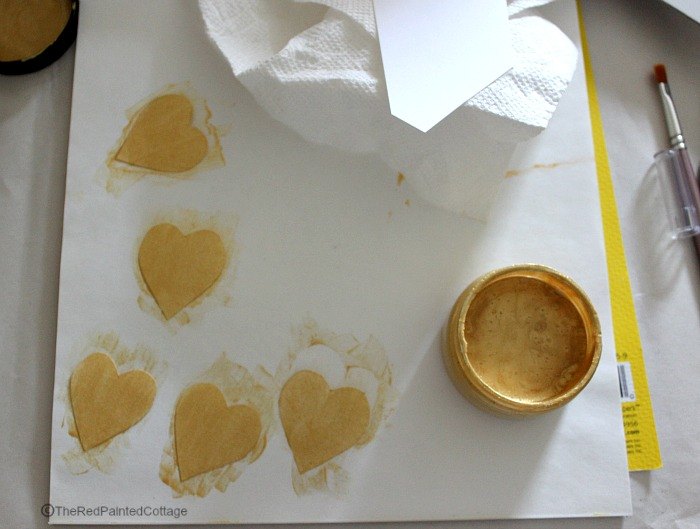
I wanted my hearts to be gold, so I found some 18 Karat gold paint on Amazon. Other than the frame, this was my only additional cost, but now that I have it, I can use it for so many other projects. I painted one extra heart, JUST IN CASE.
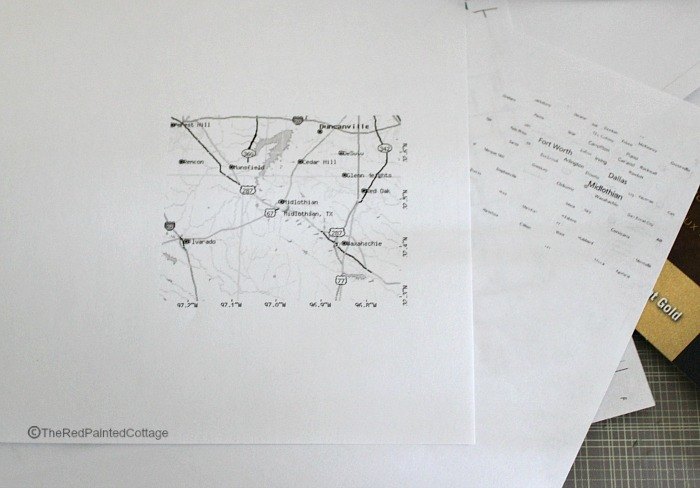
For my map hearts, I took real maps and copied them in black and white and then enlarged or made smaller depending on what I needed for the size of my hearts. In my case, I used AAA driving maps and ended up enlarging them 110% to get them to the size I needed. Then I printed that area with colored ink.
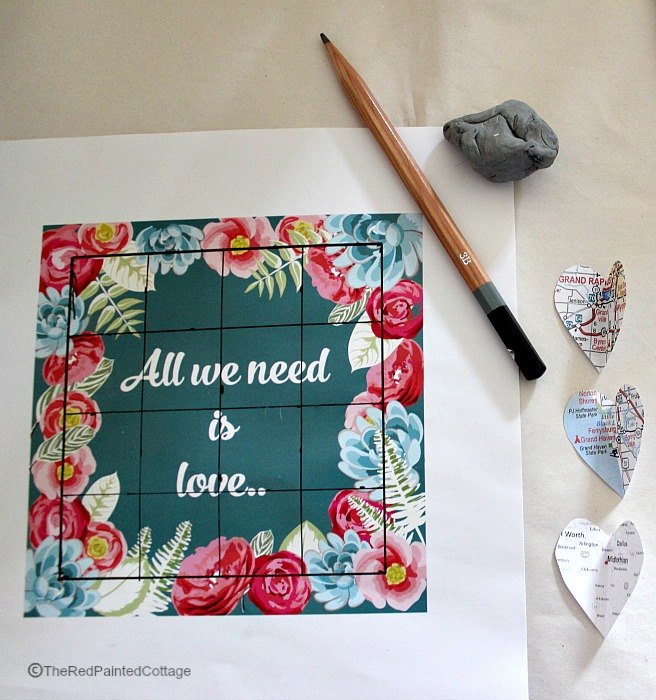
My frame had the above printed paper in it and I made a grid of the area that was going to show in the frame so I could determine the placement of my hearts. When cutting out my map hearts, I also cut them just a tad smaller than my gold hearts and folded them in the center.
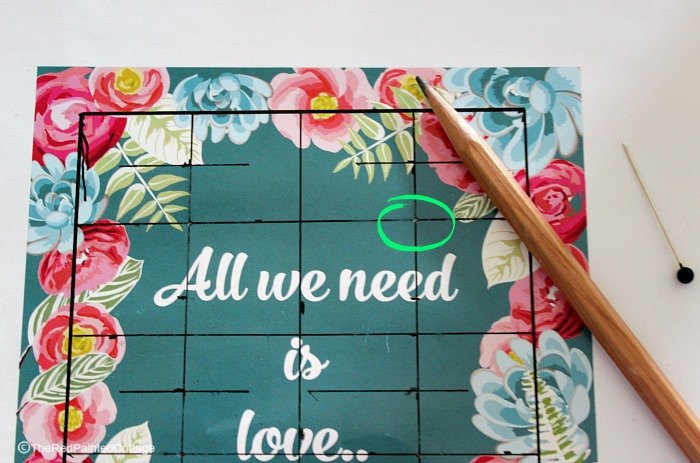
For my background paper that I was going to glue my hearts onto (and that would also show in the frame), I used 140# cold press watercolor paper. I have tons of it at home, but any craft store sells small pads of this. It's heavy and it has a texture to it. I couldn't really draw lines on this watercolor paper for my heart placement, so I took my paper with the grid and after determining the center of each heart, I used a straight pin to make a hole.
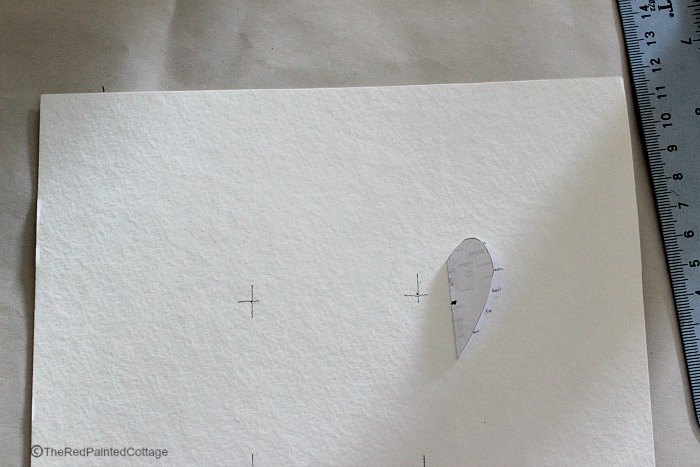
Then I used a pencil to mark through the hole onto my watercolor paper. Make sure everything is exactly where you want it to be and then using Mod Podge, I glued my gold hearts on. Don't use too much, you don't want it to seep over the edges of your heart.
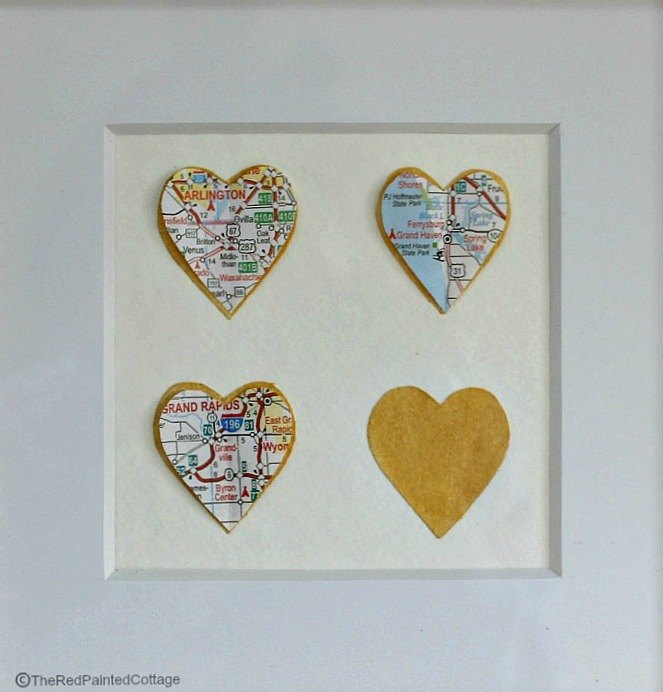
For the maps, I only added Mod Podge to the center fold of each map heart. You want the hearts to remain folded and fluffy looking.

You can see here that I also painted the inside edge of my white frame, with the 18 Karat gold. If you use no glass or double-mat your frame, your hearts that are folded will be more pronounced.
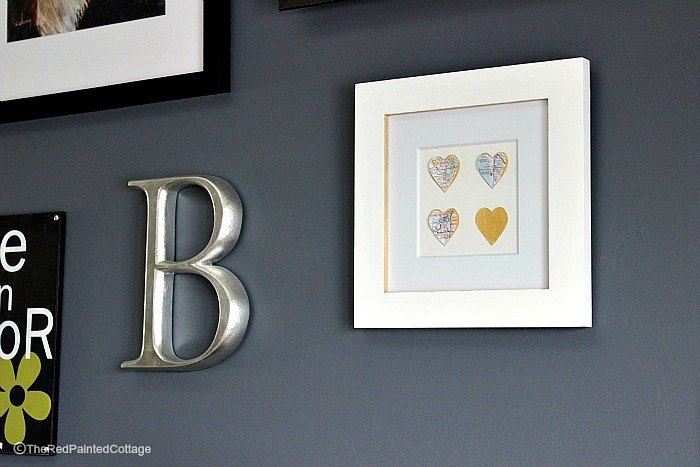
Now I have a beautiful frame with map hearts that show the love we have for our family!

Want more details about this and other DIY projects? Check out my blog post!
Comments
Join the conversation
2 of 38 comments
-
Great idea! I love recreating a more expensive idea into a budget-friendly one. Love the personalized map idea.
-
that's just enough room to use the 6 states I have lived in would be perfect for my on going wall of goodies.


Frequently asked questions
Have a question about this project?