


DIY Umbrella Stand With Side Table
$30
1 Day
Easy
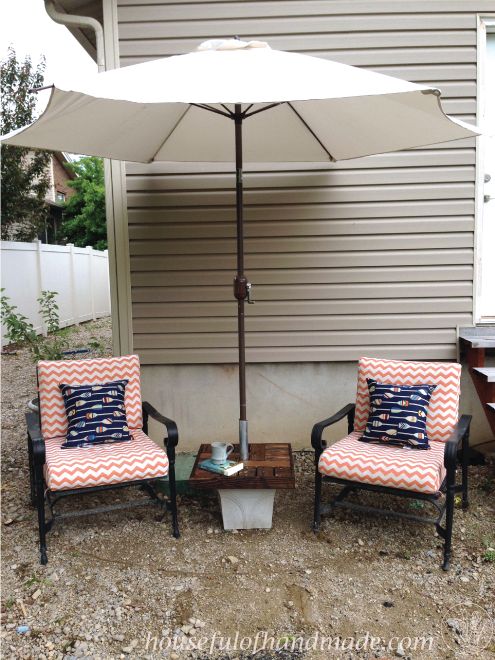
I love sitting outside watching the kids play. I found a great outdoor umbrella to make the perfect sitting area for me, but when I went to buy a stand I was shocked at how expensive they were. It was going to cost me over twice as much as I paid for the umbrella to buy a stand. No way! So I figured out an easy way to DIY an umbrella stand and bonus, it's also the perfect side table for my sitting area.
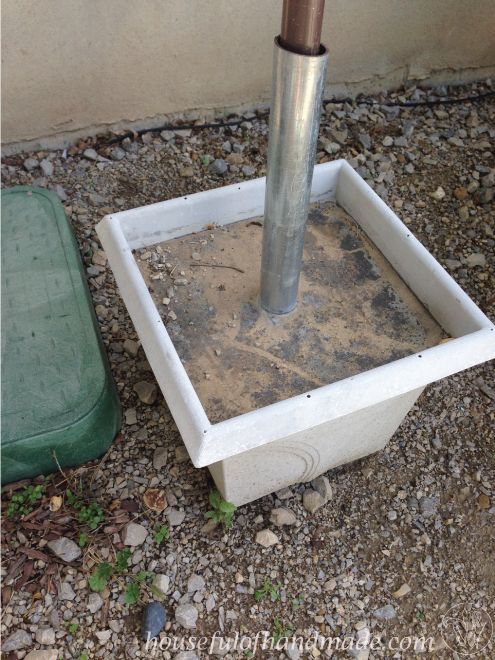
To make a proper umbrella stand, you need something sturdy enough to hold all that top weight without tipping over. I always recommend removing your umbrella (or at least closing it) when not in use but sometimes that doesn't happen. So if you can make an umbrella stand sturdy enough to even withstand a decent wind, even better.
Making this stand was easy and inexpensive. The one thing I would recommend, make it close to where you want it to live. It is very heavy when you are done! My husband was not too happy about moving it from the garage to the backyard.
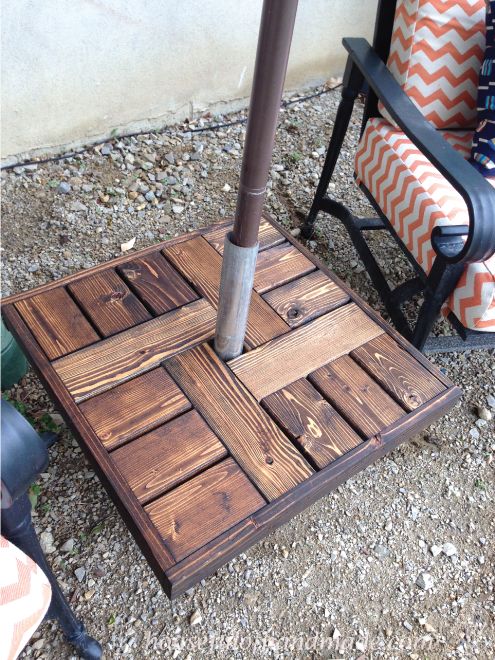
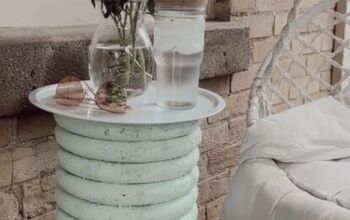
Using some masking tape or painters tape, center the 2" piece of pipe in the planter. Make sure it is straight up and down too (I used a level). Then mix up your bag of cement and fill the planter all around the pipe. You want the pipe to remain empty since that is where you will put your umbrella. Let it harden.
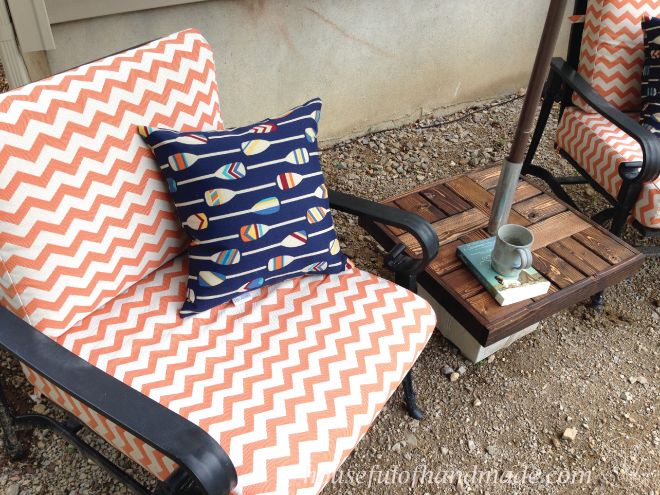
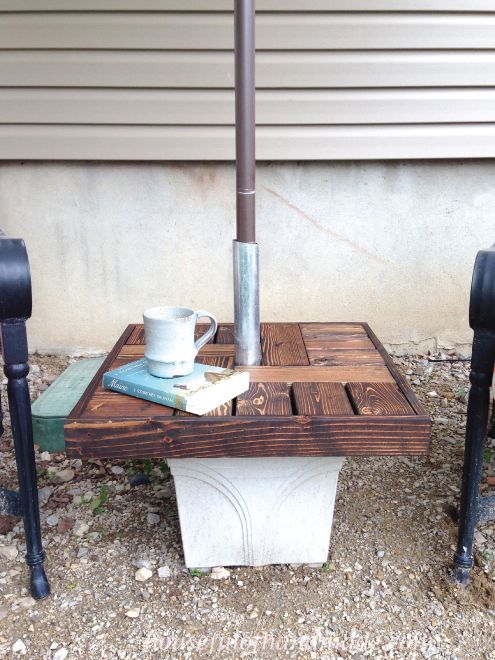
Now you can add your umbrella and enjoy the shade, but it doesn't look too pretty. So I designed this simple table top that sits directly down over the planter. It is not attached, which is nice because I can remove it to bring inside for the winter, which I forgot to do so it stayed out all winter but looks great because of the waterproof sealer I used.
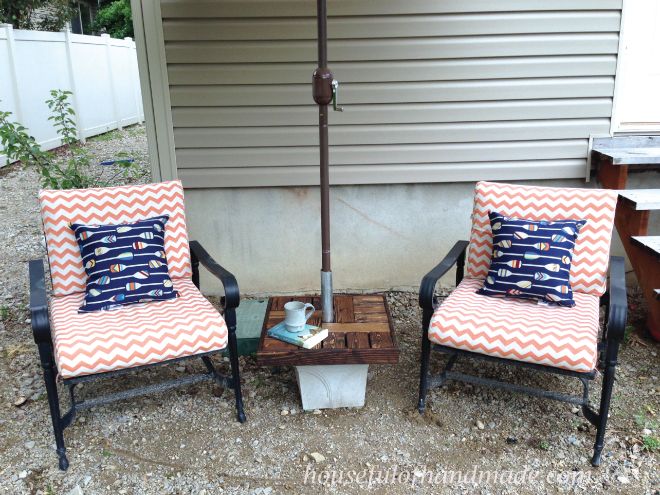
The table makes this umbrella stand work perfectly in our seating area. I have a place for my beverage, phone and a book so I can enjoy the outdoors while the kids play.
For step by step instructions and a supply list for creating the table top, make sure to visit my blog. And hopefully the sun will continue to shine and spring will come so we can go outside and enjoy it!

Want more details about this and other DIY projects? Check out my blog post!
Comments
Join the conversation
2 of 64 comments
-
Eu fiz parecido, mas coloquei rodizios, furei os cantos coloquei as rodas antes de encher de cimento, agora levo onde quiser.
-
It works for me...I like the table top.....I'm thinkin' of one using a cement block.....I have 2 umbrellas and I think the 1 would work. Thank you....BTW, I love the chairs too!!!


Frequently asked questions
Have a question about this project?