


DIY Subway Tile Backsplash
1 Material
Hey friends! I am so excited today to share with you some major progress we have made in our master bathroom! I finally finished the subway tile backsplash that I have been working on. and today is the day that I get to share it with you! I am a beginner at installing subway tile, and this is the largest job I have done yet.

For this tile job, I bought a manual tile cutter, nothing fancy, and you can only cut straight lines with it. I would not say that my tile job is the work of a professional, but I think I did a pretty good job for a beginner, and I learned a lot along the way! So the next time I install tiles, I think I will be able to improve! But all in all, we are thrilled with this transformation!

This is the bathroom shortly after we moved into the house. The walls were a cucumber green when we moved in. I didn't mind the color, but it cast a greenish glow on everything. I was not thrilled with the look of this room, but I thought it had great bones, and I knew that I could make it into a room that we loved.
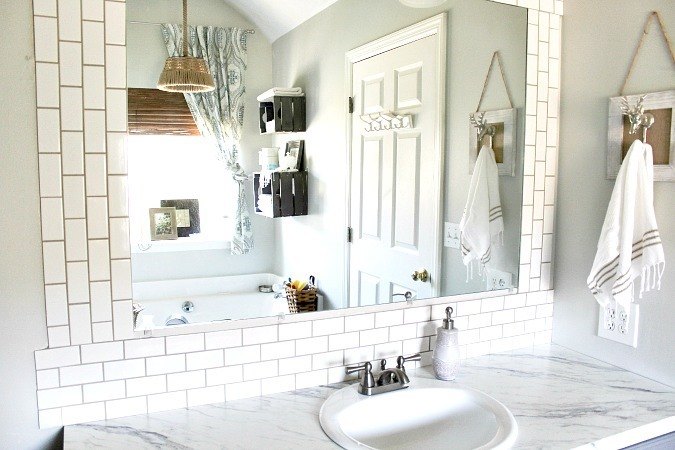
And this is the same view now! Isn't it such a huge improvement? It feels so much more fresh, clean, bright and airy! This is now a space that I enjoy spending time and getting ready in.
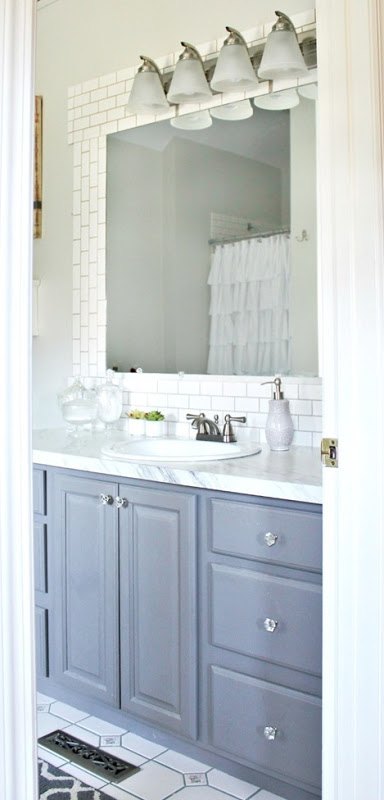
The painted vanity with new sink and counter. But add the subway tile and it is so much better! It's kind of like this out of style vanity grew up, developed a sense of style, and became a hipster! If you would like to read more about the details of this project, please click through to the blog post where I shared all about it!

Want more details about this and other DIY projects? Check out my blog post!
Comments
Join the conversation
2 of 26 comments
-
Fabulous!
-
Beautiful!


Frequently asked questions
Have a question about this project?