


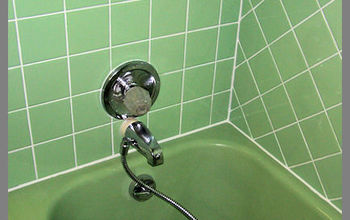
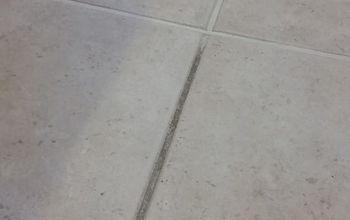
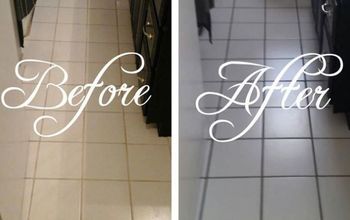
Fix Cracked and Missing Tile Grout


Resources for this project:
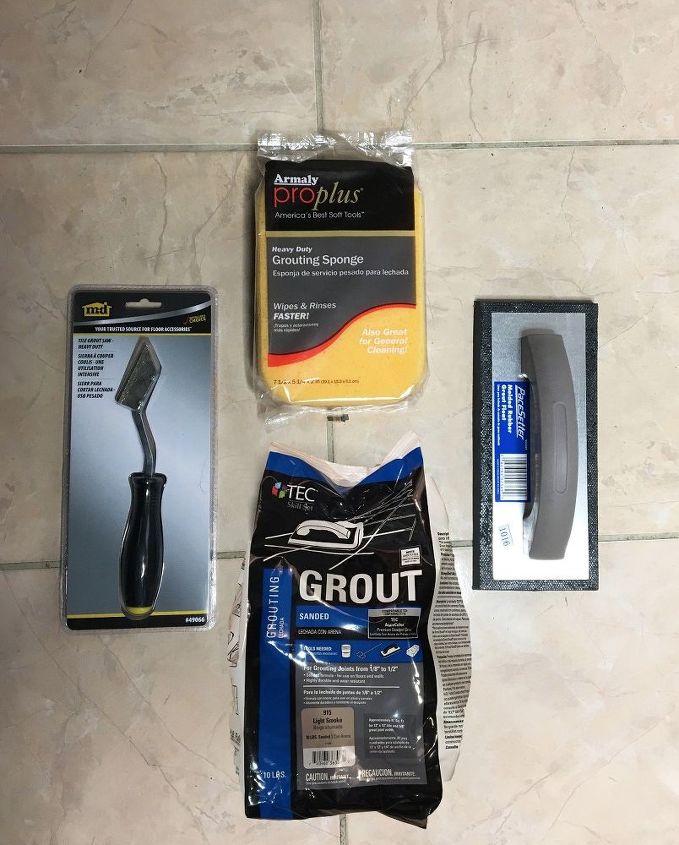
See all materials


Comments
Join the conversation
-
3 tips for beginners.
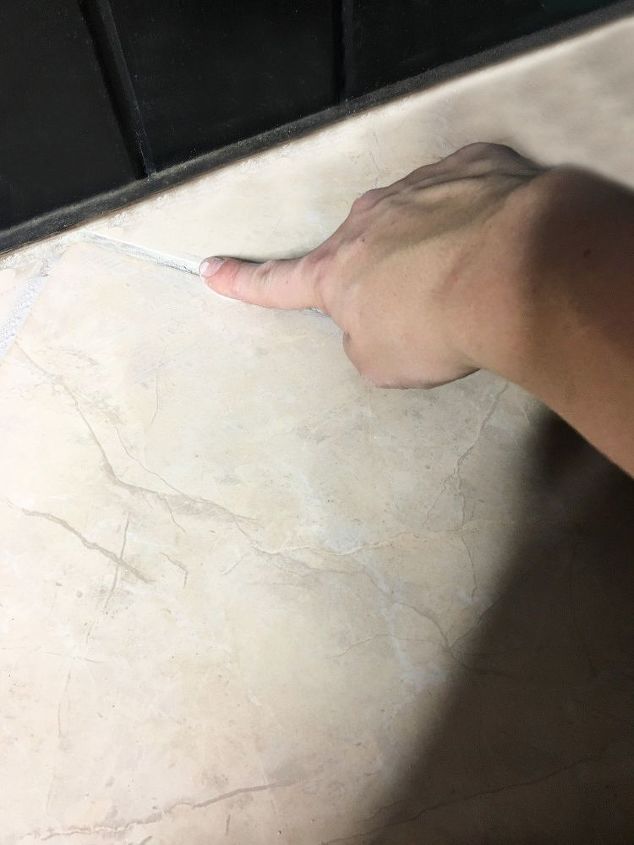
Tip 1 -the other 2 are not as long. NEVER smooth grout w/ your fingers. Most, if not all, has lime in it. BTW, cement does, too. Makes them stick better. I am going into detail. This is important. Before embalming, lime often dumped in graves, esp during an epedemic, to make those bodies decompose faster. You will remember this hint, I'm thinking & I hope you do:) Puttering along, smoothing grout w/ your fingers, you will suddenly notice they hurt. And they have little red circles on the tips where you see the upper layer of skin is gone. Deeper than a blister. It gets worse. They stay sore for several days. Getting them wet stings bad. Super Glue to cover the wound is a construction worker's go-to. It only burns like fire for a few seconds & then water doesn't hurt. But. You can bev ome skkergic yo it-not supposed to get it on your skin snyway. Snd, allergic, the itching will drive you crazy. Best read on. If you are very unlucky, you will get what they call "cement poisoning" which is an infection the doc who treats you will call blood poisoning because it travels through your bloodstream. It can be dangerous to the point of being life threatening if not treated. i have had it once, for no apparent reason. 2nd time from taping sheetrock. Painting exterior trim all mornimg. Heavy wooden ladder & first noticed my arm felt sore when I went to lunch. Like a muscle soreness. The huge heavy ladder, I thought. Washing my hands, I saw red streaks on my skin from my fingers to just past my wrist. I joked it must be blood poisoning. Mom said no wounds, surely not. Didn't eat much. Realized I felt feverish & a little nauseous. Streaks over halfway to elbow. Showed Mom. Call the doc, Mom said. He was on his way to deliver a baby who was getting close to being born. He turned around & came back to our town to treat me first. Antibiotics by injection, more to swallow & an order that if it got into the bend of my elbow he wanted to know it immediately as it could not be allowed to get any closer to my heart, lungs & brain & would be admitted to the hosp. What he would do, there, I didn't ask. I was young & scared enough. Every heart beat caused severe pain in my arm, my fever was high, nausea worse & I wanted to go home & lay down. I did ask why could it happen w/ no wound & was told any break in the skin, even so small we can't see it, can let infection in. Most times our body fights it off & we never know it, but this was one the body didn't beat. It did not get into my elbow, just sat below it for two more days & nights & then faded away. I was pretty well out of it w/ the fever. I remember the pain, but little else. The second time I had it I was using joint compound & perlited plaster to tape & patch plaster in an old house. Never knew compound to have lime, so expect it was that plaster. A blob fell down into my boots & rubbed a sore spot on my instep so I did have a wound. As soon as I felt the ouch, I cles ned up & chsnged sicks, but already too late. I learned to dress to keep grout, cement, etc off your body. Long pants outside your boots, not tucked in. If you feel anything inside your clothes, shoes, gloves, get it off & your skin cleaned & change anything that might have cement, cement products, grout & perlited plaster in it. Thousands of people work w/ it all the time w/o problems so I wouldn't spend any time worrying about it. But I would still be quick to get it off my skin. That second round was as bad as the first though 20 yrs later.
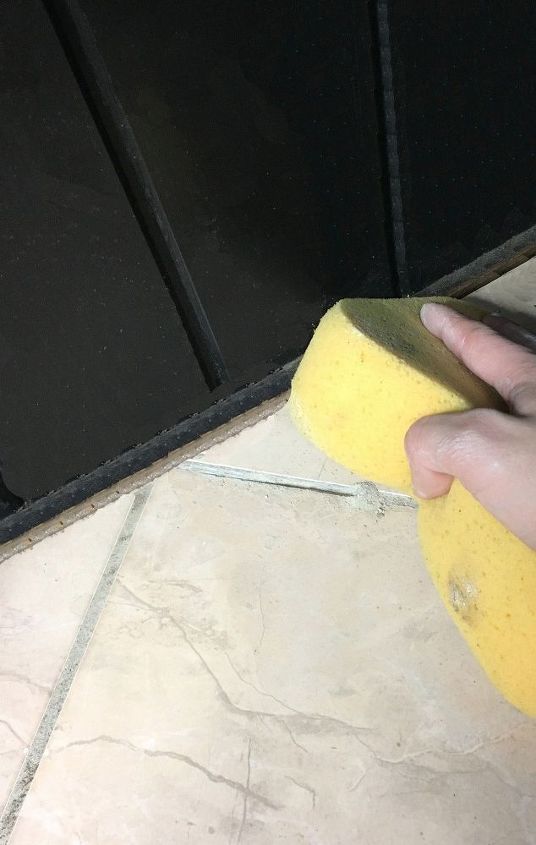
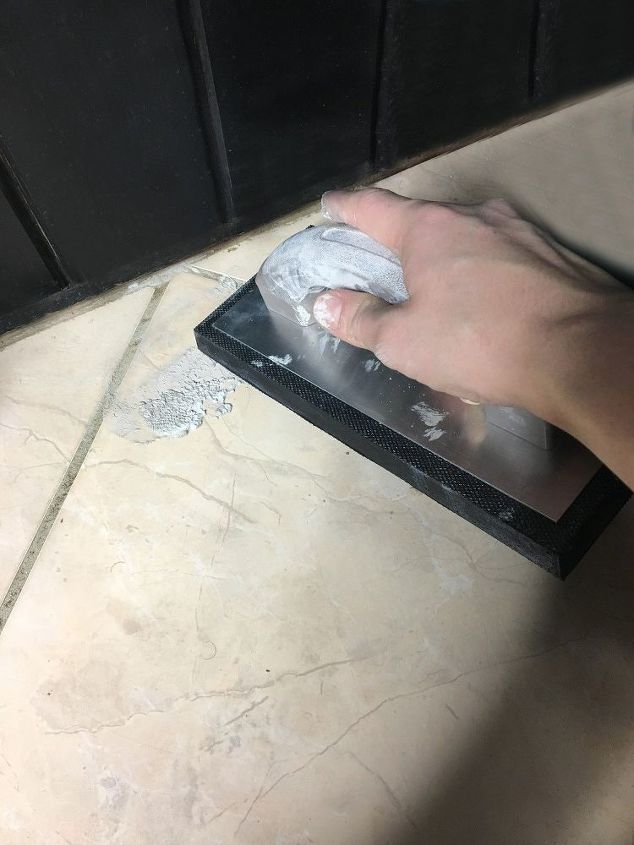
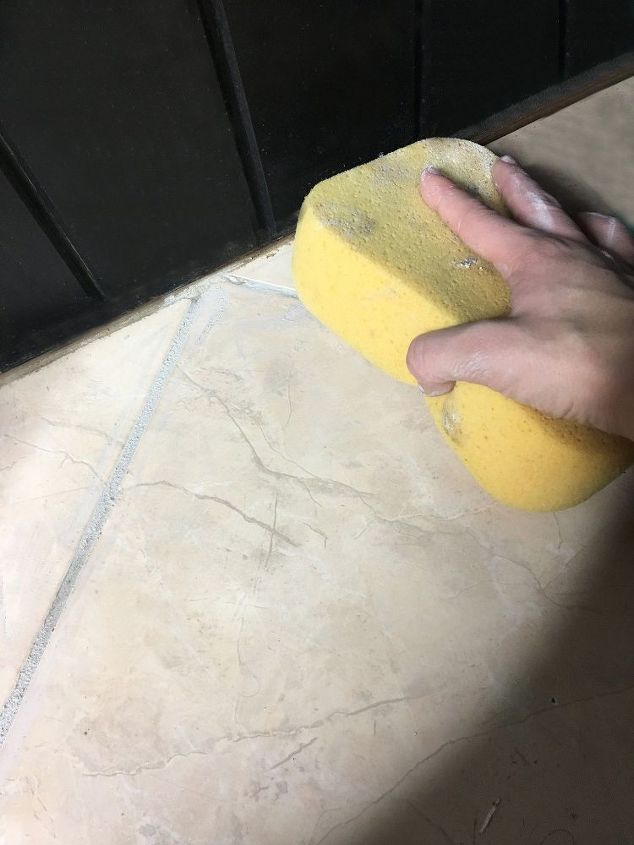
Tip 2. After grout has been applied, running your sponge diagonally across the joints to clean the excess off will not remove the grout from the joints as much as running in the same direction as the joints. if you get good at it, you won't remove any at all.
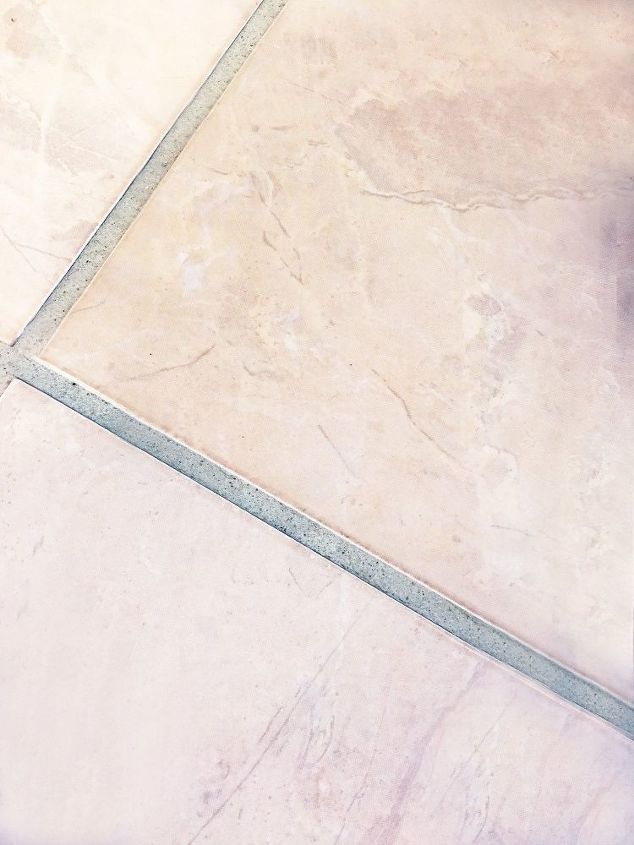
Tip 3 DO NOT stop cleaning until the haze is gone completely. Never wait gir the next day. Give the grout 15 min or so to set up some if it's a small area you covered quickly. If it's a large area or you are slow, you need to grout some, then clean some as you go. You can see when the haze begins to dry & you don't want it to dry. Do the wiping on the diagonal & use a light touch. if you ate losing too much grout in the joints, give the grout a little more set time & try it again. Wring out rags & sponges so they are damp, but no dripping to wash the grout in the joints away. And truly, a sponge works best for the cleaning. Soft clean rags are best to buff. .Waiting until the next day, at best, will mean a lot of time & extra scrubbing & rubbing to get the haze gone & often buying a special cleaner to help get it off. Worse case, it can mean ruined tile you have to replace because leaving that smeary haze on-which is grout w/ lime in it-has actually eaten into the tile & ruined the finish. Go over the entire area. Change water, rinsing bucket well, rinse sponge, change buffing rags often so the grit doesn't scratch the tile &/or not clean well, buff dry as you go. Then go over the whole thing again using clean water, rags & sponges you didn't use the first time. If you do a good job, you may not even need a touch up.
-
Thank you for all your information. I will definitely keep all this in mind should I ever have to work with lime.


Frequently asked questions
Have a question about this project?
You did a great job but why didn't you have the apartment manager get it fixed?
When you say you painted the grout I believe you mean that you purchased actual grout paint?
How long has it been since doing this? I did this too and found that after a while the new grout started breaking up as all the moisture in the new grout seeped into the old/ existing grou and came out. I was told that the old grout needs to be really saturated with water before putting in the new to really make the new grout adhere as it dries