


Patriotic Window

5 Materials
$30
2 Hours
Easy
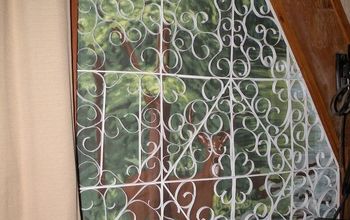
Ever heard the phrase, "One man's trash is another man's treasure?" Well, this project is the perfect example of that! My mom purchased this old window from a junk barn place several years ago, tried to do a project on it (hence the silicone residue on one of the panes), eventually I ended up with it and it's been sitting in my basement for about 2 years. Coming from a military family and loving the Americana style, I had to do something patriotic with this amazing window and I'm pretty happy with how it came out. *Note: it didn't actually cost me $30 to do this project as I already had all of the supplies on hand. I would say if I had to go out and purchase all of these supplies though, it would cost me between $30 & $40.

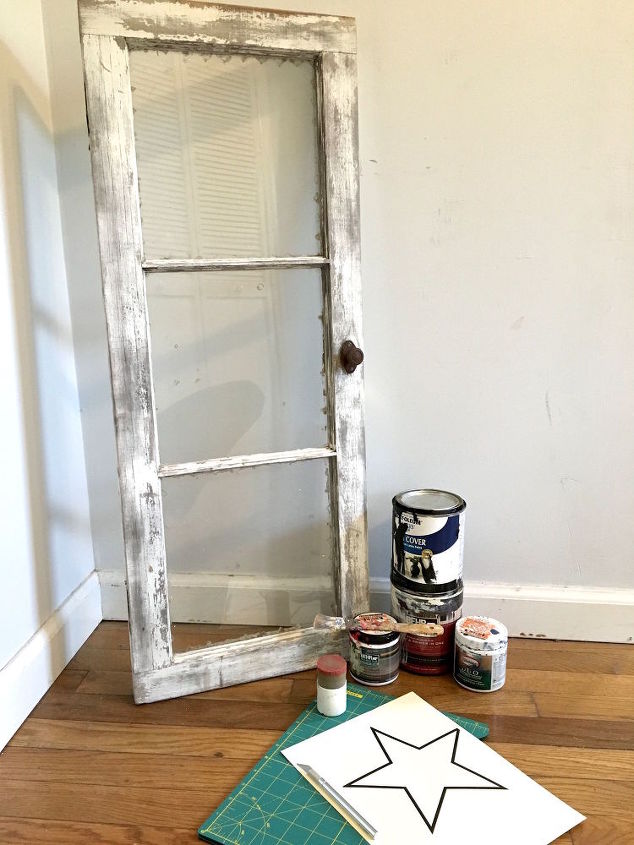
To start, you'll want to clean the inside of the window panes-wipe off any dirt or dust. Then get started on your star stencil. I measured the size of my top window pane, then found a star in google images and saved it to my desktop. After that, I opened a new Word document and dragged the star into my document-there, I was able to manipulate the size of the star to what I needed to fit in my window pane. Once you've got your desired size, print the star on cardstock (you'll want to use cardstock since it's thicker than your usual printer paper and won't tear as easy).
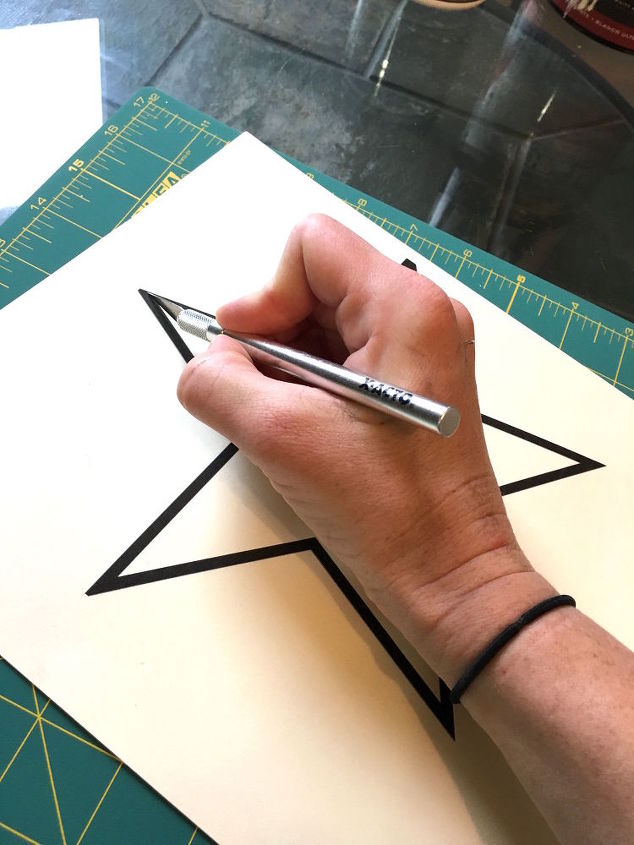
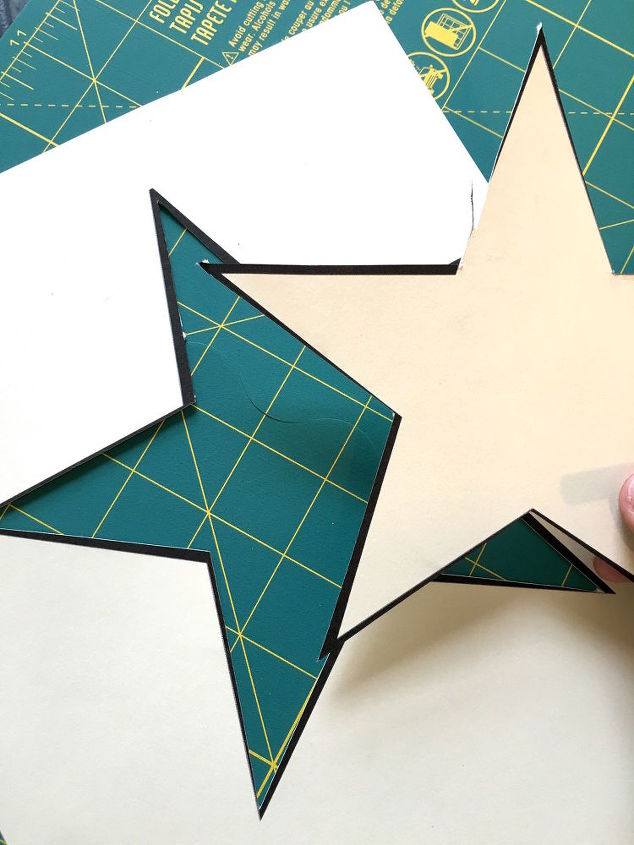
Now that you've printed out your star, take your X-Acto knife and cut the star out.
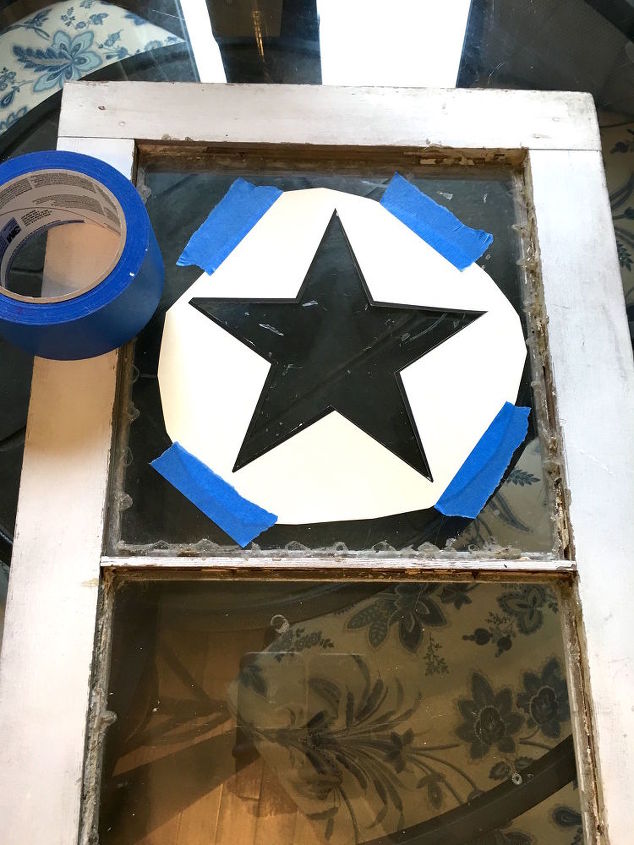
If you're working with a 3-pane window like I am, take your star stencil and place it ON THE BACKSIDE of the top (or left, if you're wanting a horizontal flag) window pane. You don't have to use painter's tape to secure your stencil but I chose to in order to be able to work with both of my hands to paint.
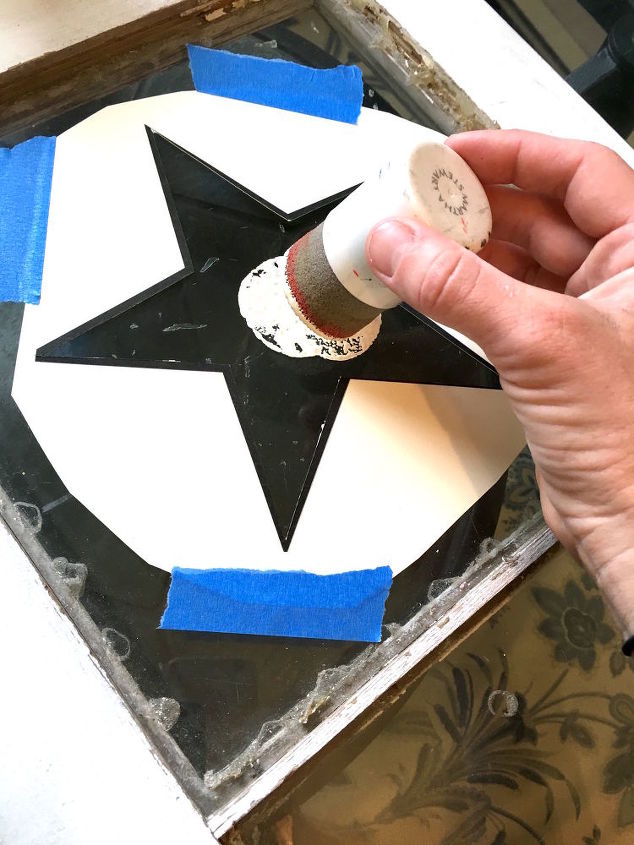
Take your sponge and dab your white paint into your star stencil. Don't be afraid to lay the paint on thick--you'll want good coverage so you can't see through from the front side.
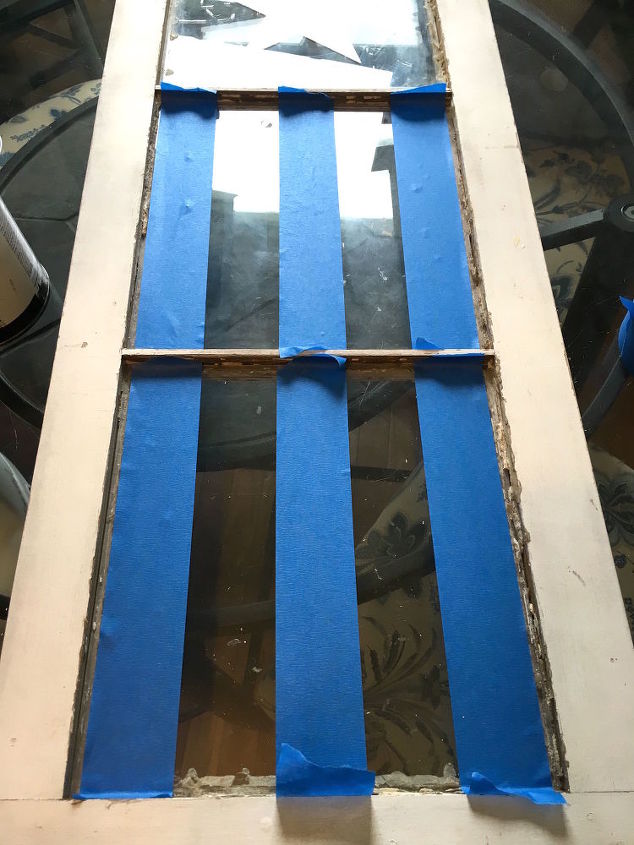
While you're waiting for your star to dry, you can start painting your stripes. Another optional step is to use painter's tape for your stripes. I can't paint a straight line to save my life so I chose to use the tape, however, hindsight I wish I would have trusted myself to paint without the tape as I experienced bleeding of the white paint and didn't feel much like scraping it off.
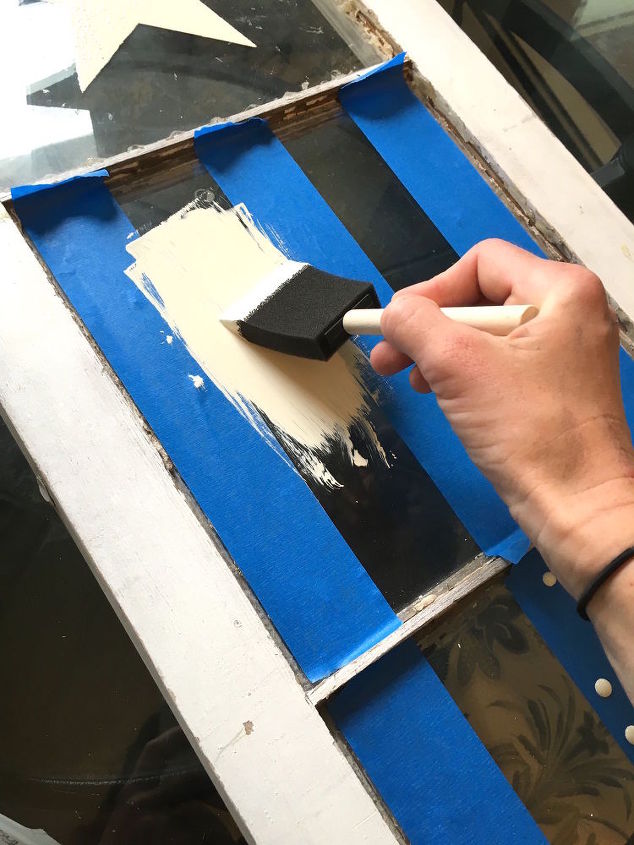
Again, lay your paint on thick. I initially was using a regular paint brush but switched to a sponge brush because it gave me better coverage of paint on the window.
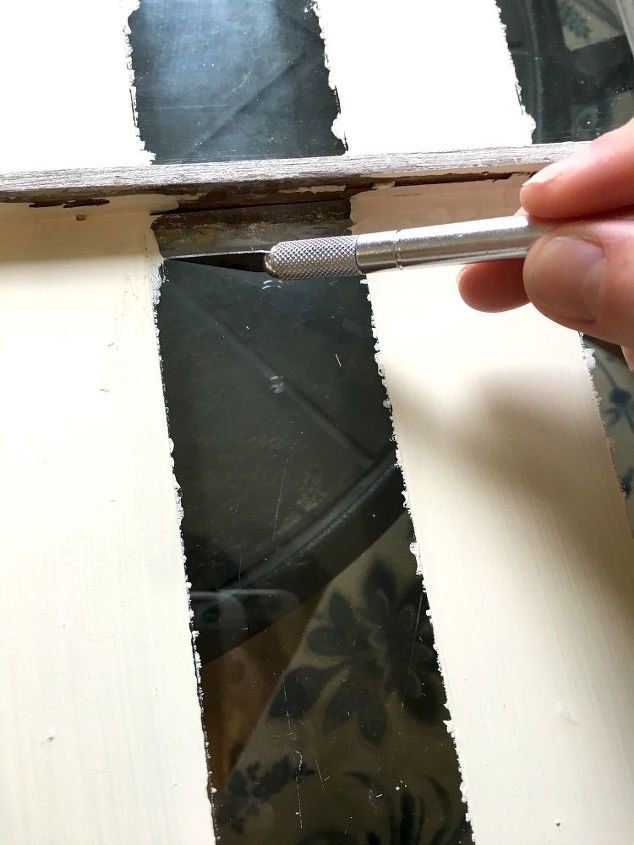
As I mentioned before, I experienced bleeding with the white paint so I took my X-Acto knife to try and scrape the heavier-bled areas but I didn't bother with the smaller places since I plan to keep this window for my home decor.
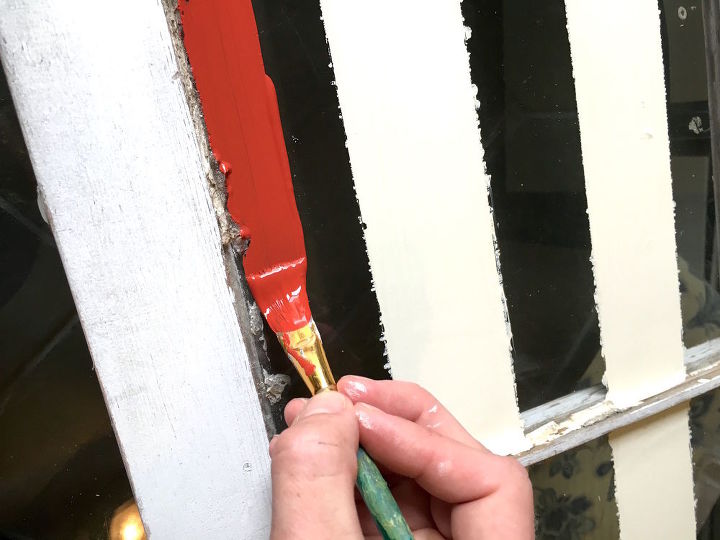
After your white paint has dried, take a paint brush and carefully fill in the red stripes (if you used painter's tape, you'll obviously want to pull the tape off first, then paint :)). I tried using long, continuous strokes with the brush and laid the paint on thick.
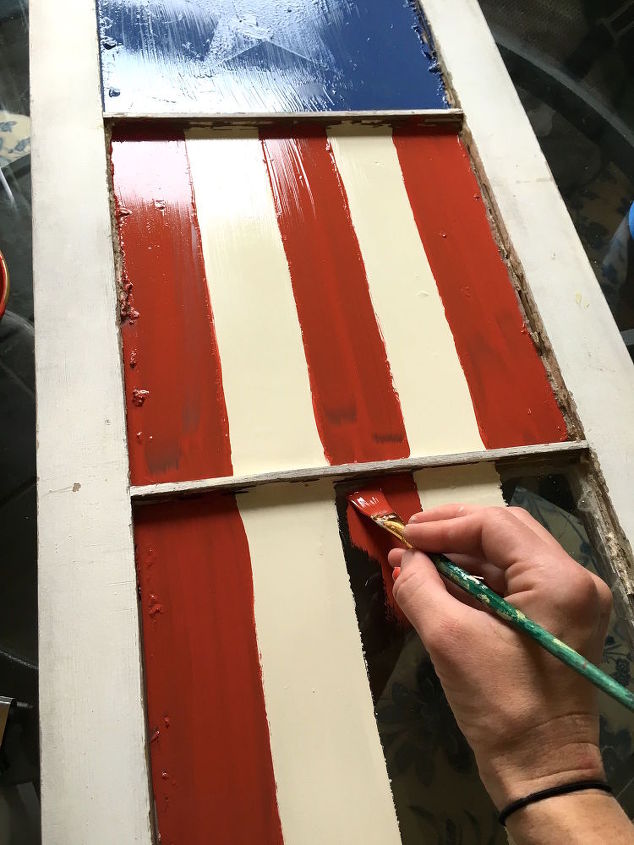
Continue filling in all of the red stripes; once they dry, apply a second coat.
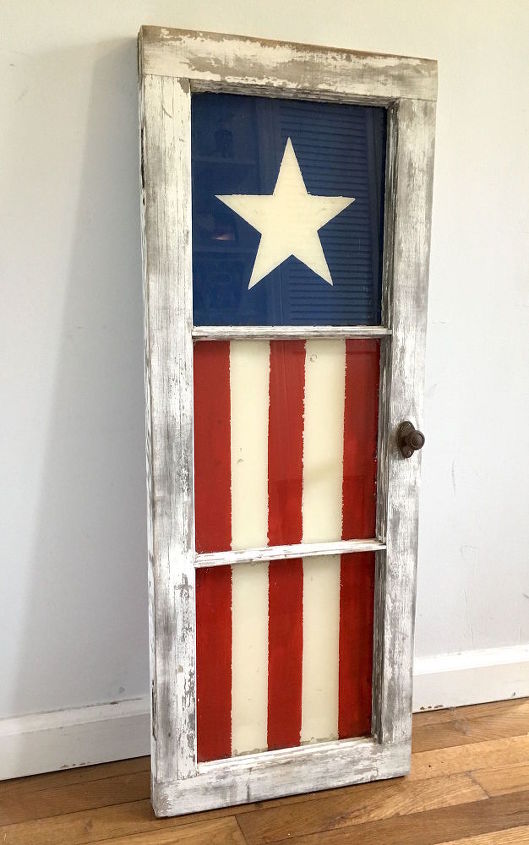
Once all of your panes have dried, turn your window around and admire your awesome work!
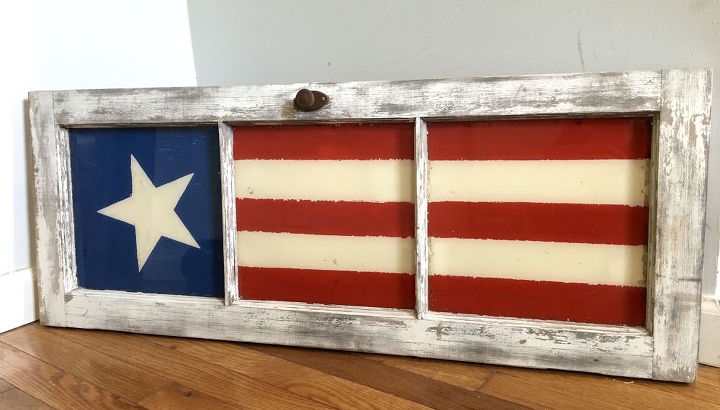
This patriotic window isn't a true replica of 'Ole Glory but I love the rustic, Americana vibe it gives, and can't wait to find the perfect spot for it in my home.
Comments
Join the conversation
2 of 80 comments
-
I love this!! I've got a very similar window and have been trying to think of what to do with it. Now I know!! I'm thinking I might hang it on the side of my barn. Thanks!!
-
Absolutely love this. As a Veteran, I’d proudly display this in my house like I display the American flag outside. With pride.


Frequently asked questions
Have a question about this project?
Looks fantastic
we are a military family as well