


Rustic Farmhouse Table Using Paint and Glaze

by
Patricia
3 Materials
If I was being kind I would describe this table as having a maple finish. But the truth of the matter is it was downright filthy and was covered in grime, soot, sticky something, etc. But the price was right at $8, so I shelled out the cash and brought it home.
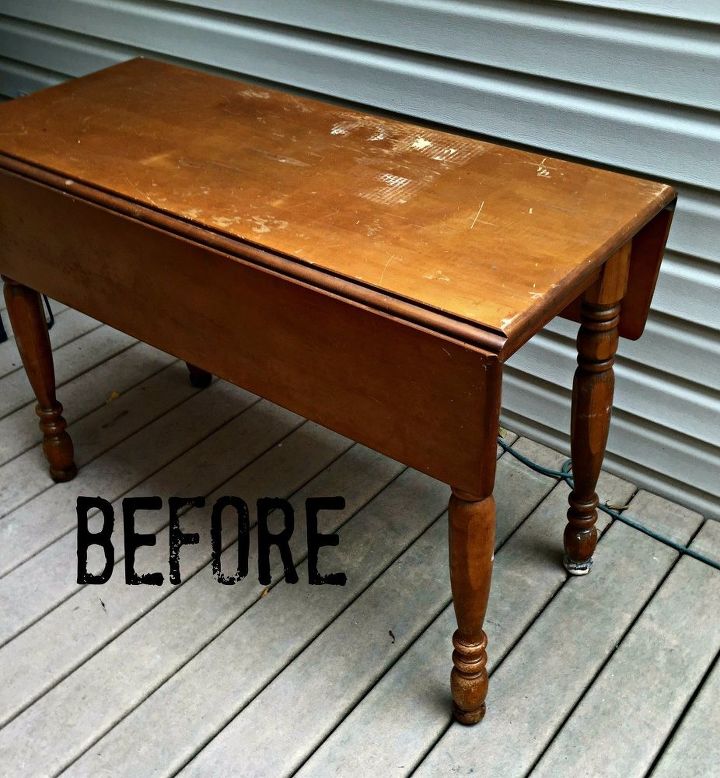
I had to clean and disinfect the table before I could even take a before picture! I planned to give it a rustic farmhouse look, so the first step was to sand the top smooth.
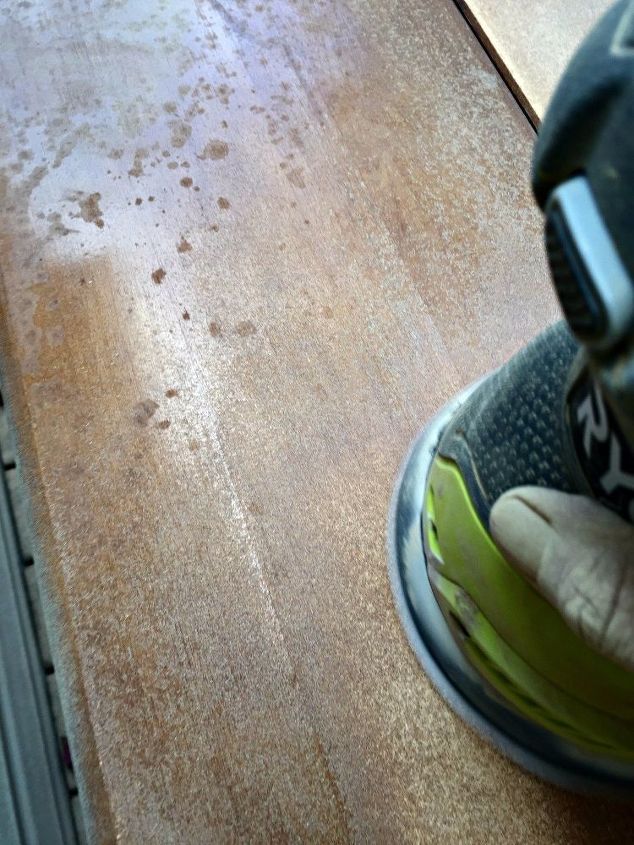
I debated whether to stain the top or paint it, but in the end I decided to paint it.
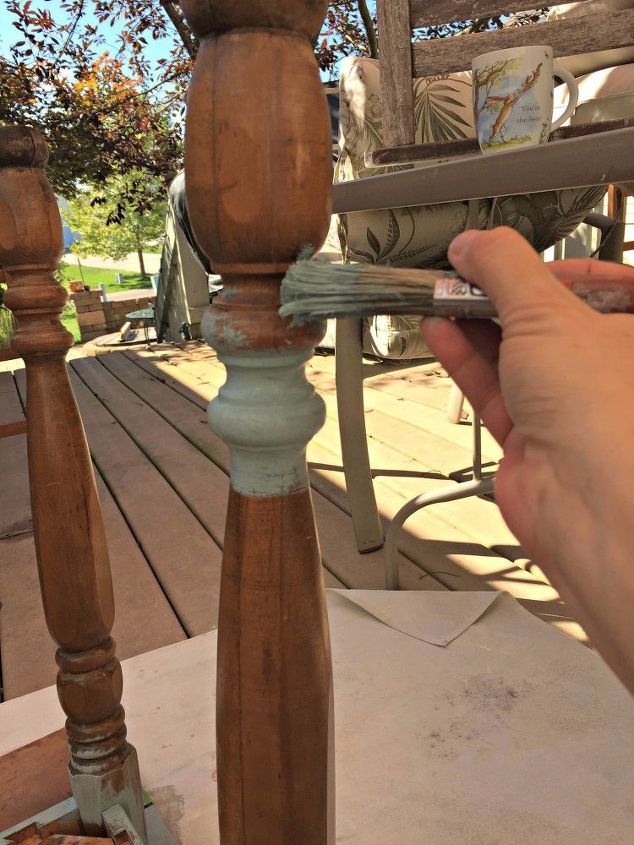
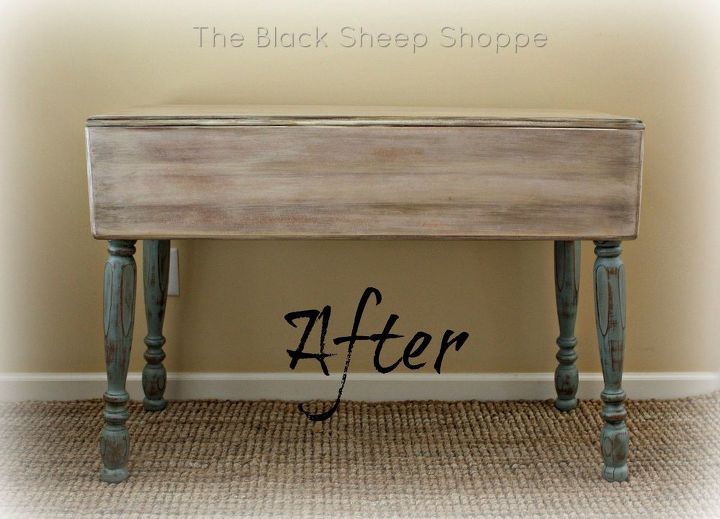
I painted the base of the table in Duck Egg Blue and used 220-grit sandpaper to distress the paint.
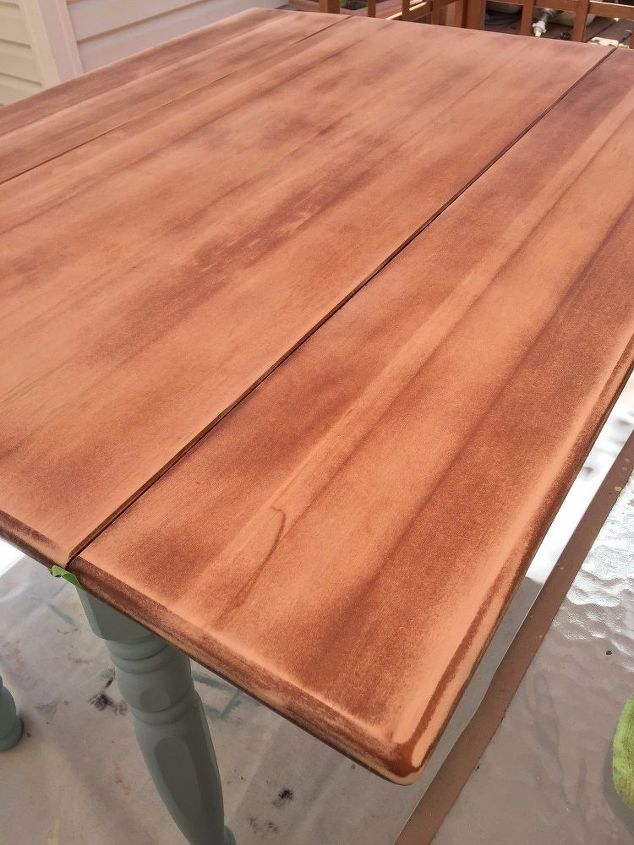
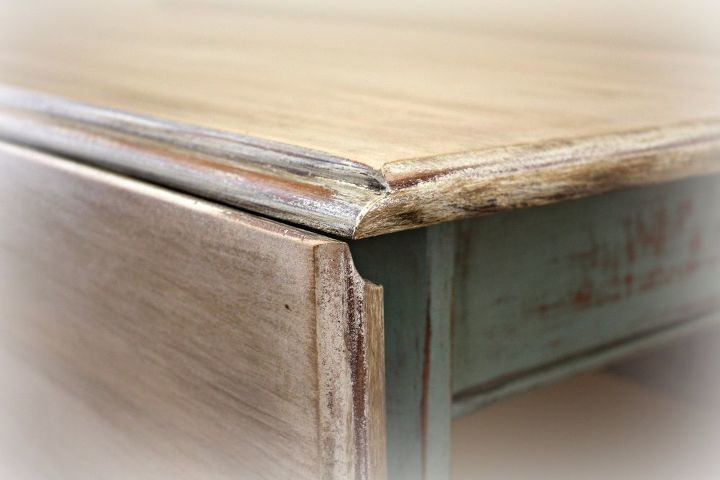
For the top I applied a thin coat of Old White to get a translucent finish.
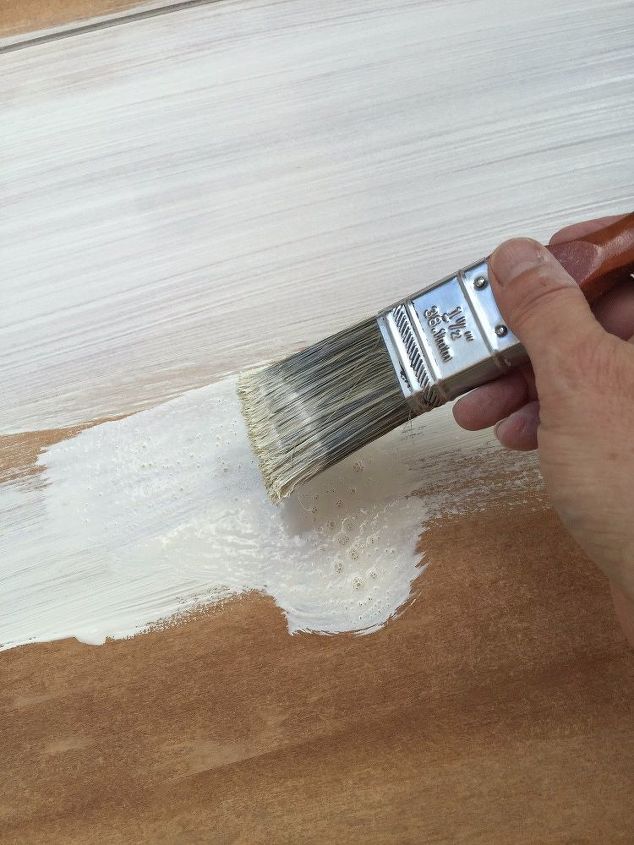
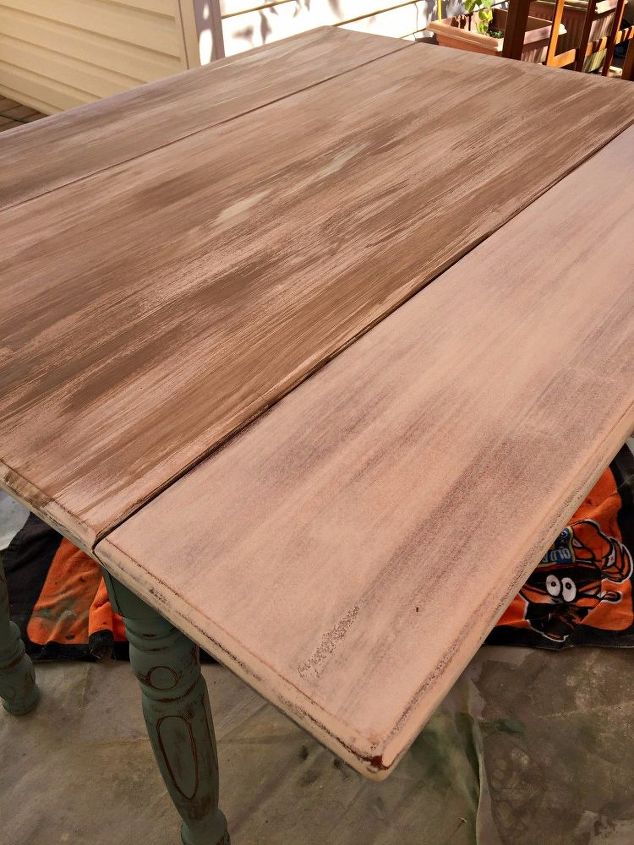
Then I applied an uneven coat of a contrasting color, Coco, to add some dimension to the overall finish. Next I hand sanded the top to diminish the contrast and blend the colors.
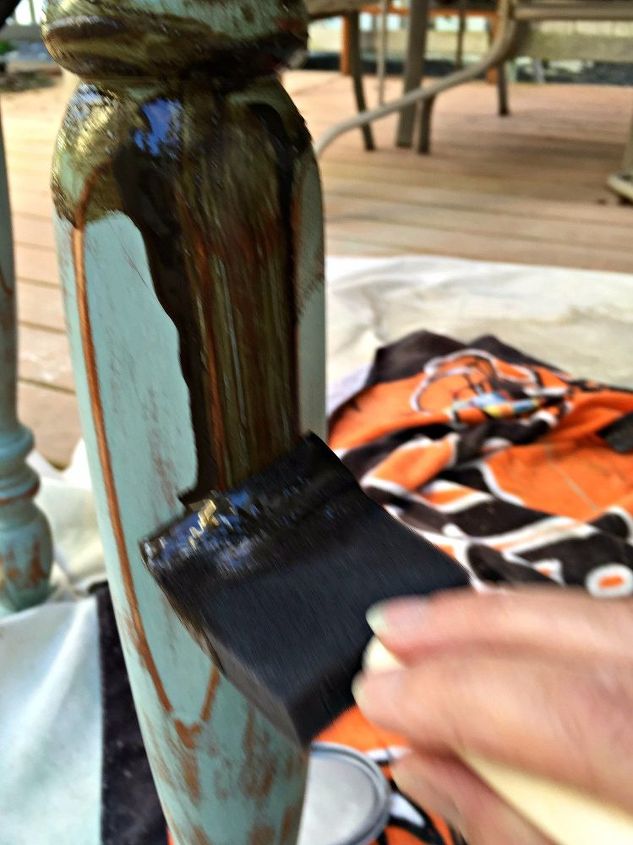
I applied a coat of soft clear wax and then applied decorative glaze. This step is a little scary at first!
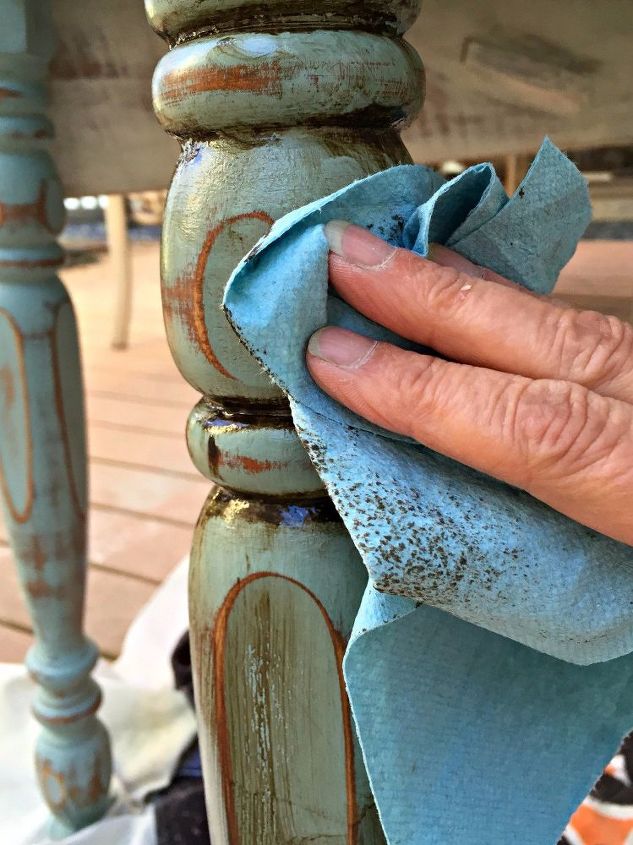
I wiped off the glaze until I got the look I wanted. The glaze is very easy to work with, especially over a waxed finish.
Now the table is clean and fresh, but it still has a time worn look! The table has a smaller footprint which makes it perfect for small spaces. The drop leaves can be extended when extra space is required. I'm currently searching for some chairs to pair with the table.
Despite using multiple colors, it still has a neutral color scheme.
If you're interested in achieving a similar look, then I'd like to invite you to stop by my blog for more photos, instructions, and a detailed supply list.
Want more details about this and other DIY projects? Check out my blog post!
Comments
Join the conversation
4 of 96 comments
-
what a fantastic job. The colr mixture is perfect
-
Awesome work! I absolutely love the way this turned out!!


Frequently asked questions
Have a question about this project?
I have a table like this with ladder back chairs. If you had chairs, would you paint them to match the base of the table? Thank you
After you achieved the “look”, could you apply a few coats of polyurethan (light sanding inbetween)? I’d love you use your method in my dining table but need a strong finish/sealer to prevent damage.
This piece had bleed through written all over it. Did you use a stain blocker or anything?