


DIY Antique Gum Ball Machines
3 Materials
I love antiques, but not the price.
This is a technique I used to update a cheap plastic toy gum ball machines I found at the Dollar Store, and make them look aged to perfection.
It’s easy, and can be done in about an hour, including paint drying time.
This is a technique I used to update a cheap plastic toy gum ball machines I found at the Dollar Store, and make them look aged to perfection.
It’s easy, and can be done in about an hour, including paint drying time.
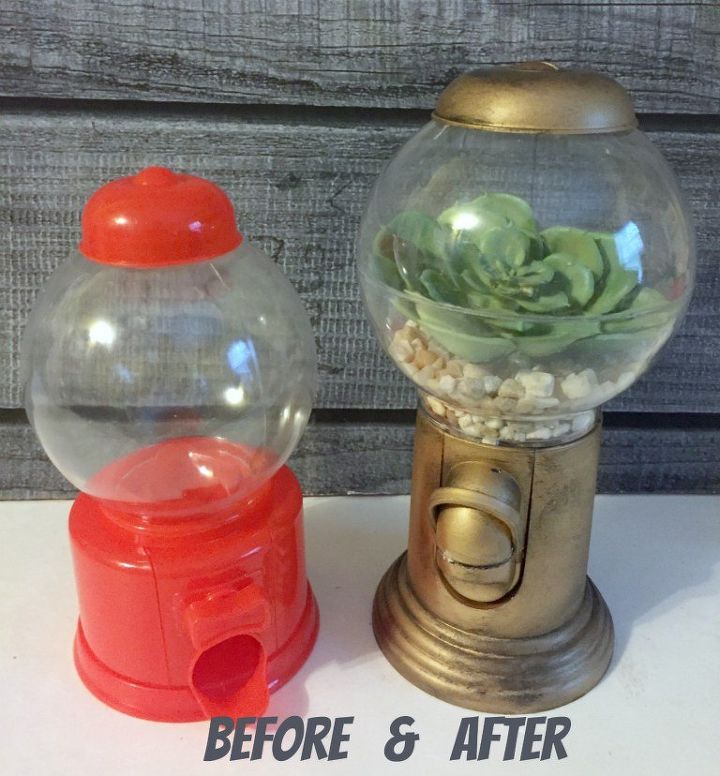
Originally, these are a bright shade of red. If you find some that are a more authentic shade of red, you could skip right over the first step, which is to paint them a new color.
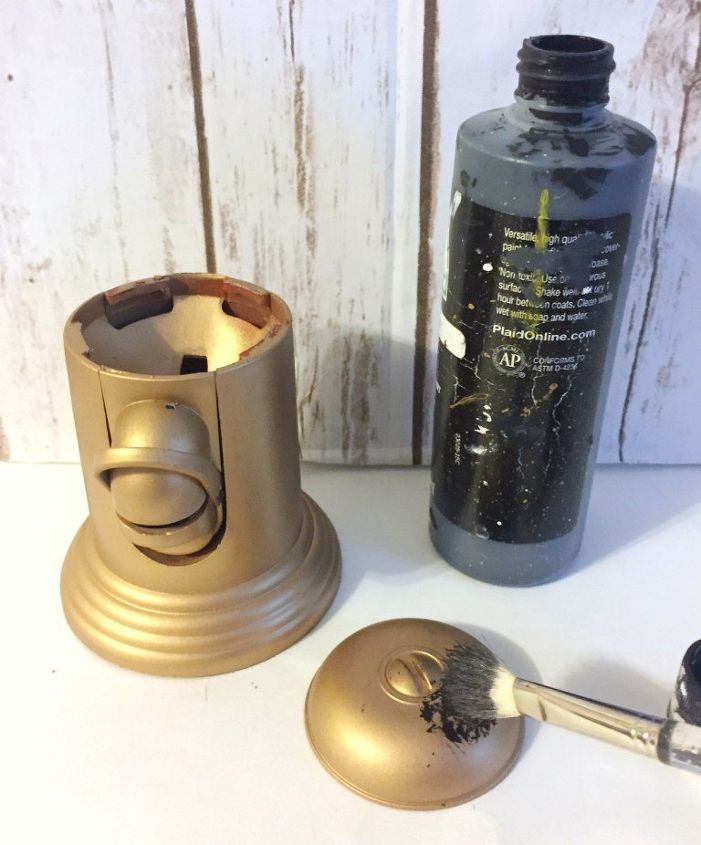
Take the gum ball machine apart, and spray paint the top lid and base.
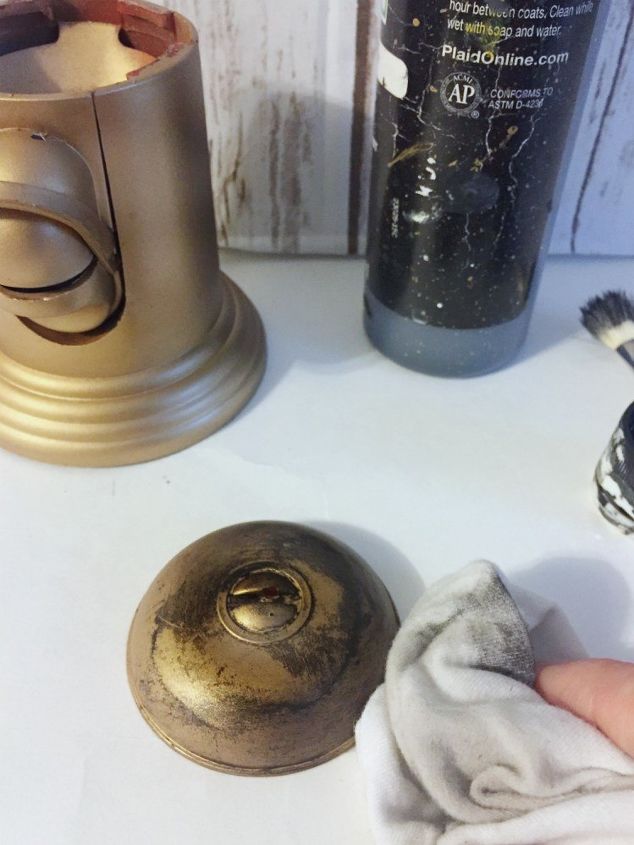
Now, for the "antique technique".
Make sure you get the black paint down in all the cracks and crevices for an authentic patina look.
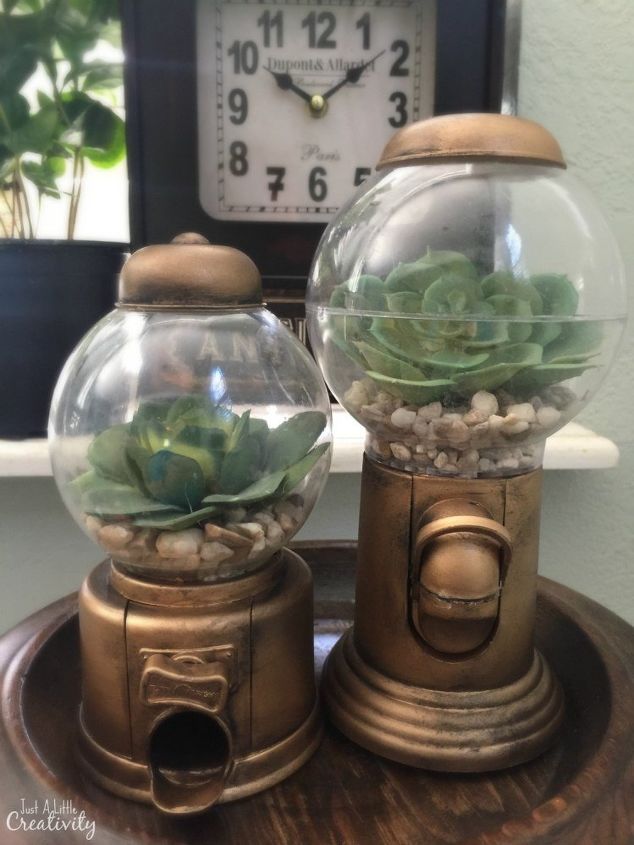
I do recommend that you plug the holes on the inside with fabric or paper and hot glue in order for your filler to not fall through the hole the gum balls are supposed to go through.
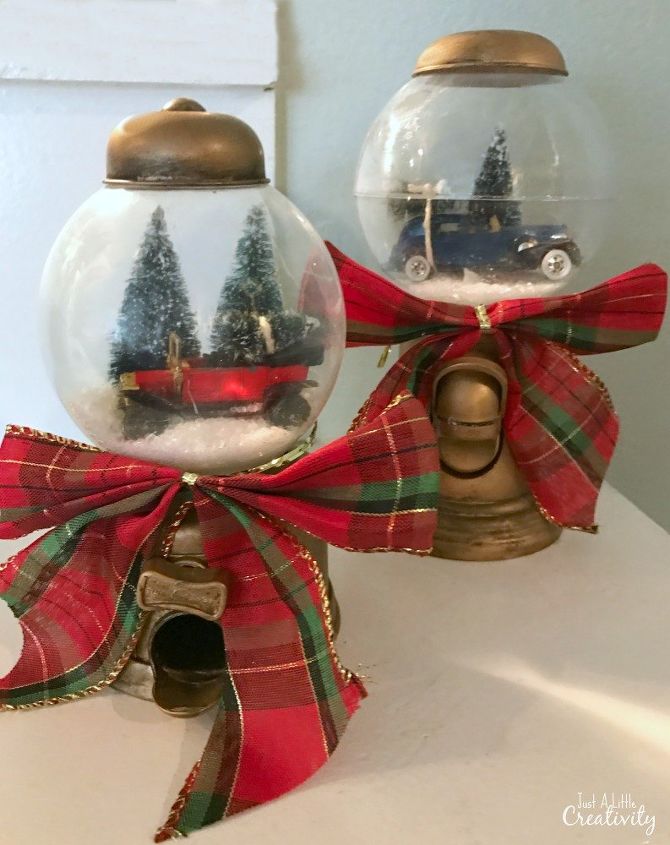
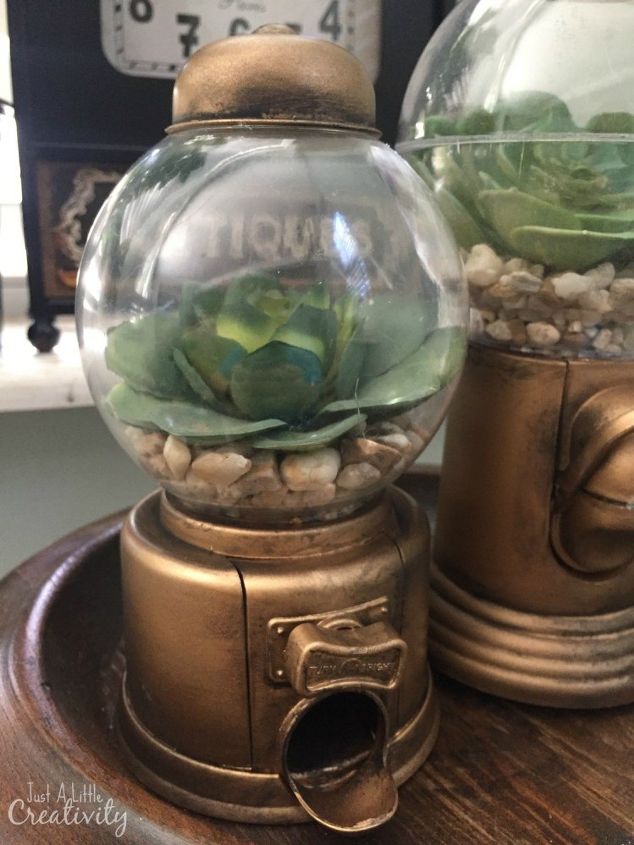
And at Christmastime, it's easy to turn these into pretty winter snow globes.

Want more details about this and other DIY projects? Check out my blog post!
Comments
Join the conversation
3 of 9 comments
-
Love it looks awesome
-
Now I am torn, I thought the would also make great winterscapes but I really like the succulents too. Great idea!


Frequently asked questions
Have a question about this project?