


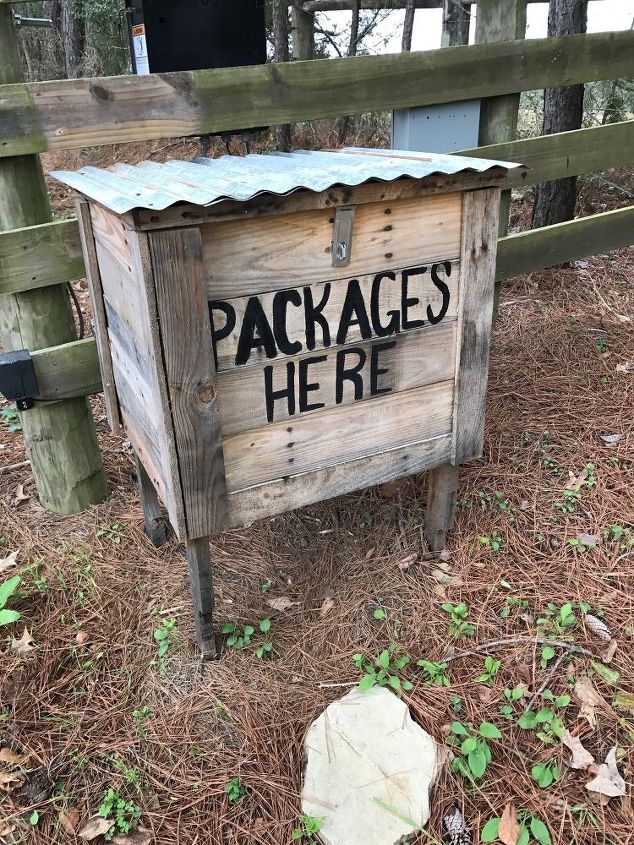
How to Make a Parcel Box From Pallets
9 Materials
My hubby decided making a Parcel Box from free pallets was more within the budget than the expensive (and small) boxes he'd seen online - So here's his DIY project!
When we looked online to find a Parcel Box, they were pretty pricey. $150 - $350.00 pricey! So the Mister decided he'd make one out of pallets instead. He picked up 4 free pallets after calling local businesses asking if they had any they wanted to get rid of. Several businesses will happily give them to you when asked.

Inside view
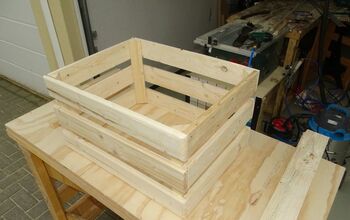
Disassembling the pallets was the hardest part. After trying the crowbar, he decided to use the reciprocating saw to just cut through them completely and remove the nail heads.
Once you've taken it apart, lay out the boards and decide which pieces you'd like to use.
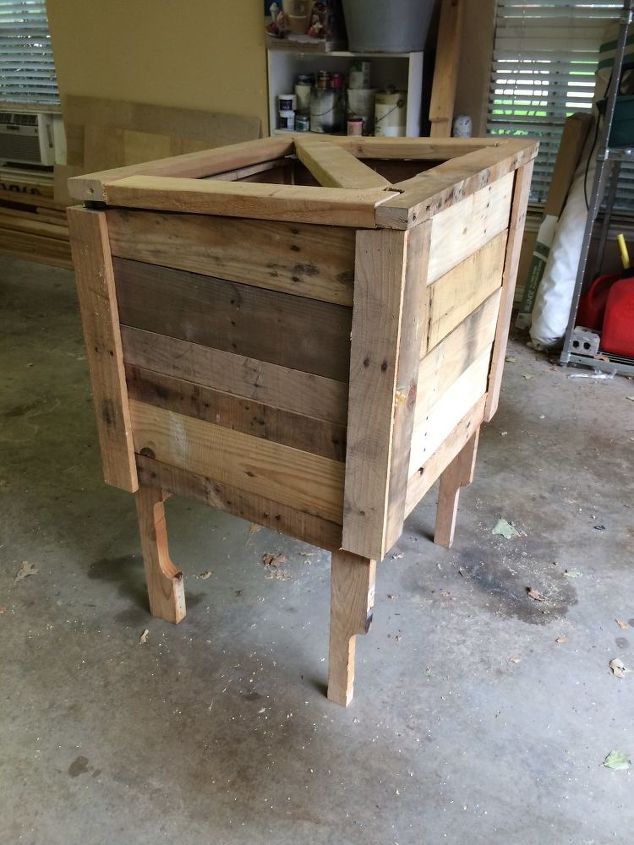
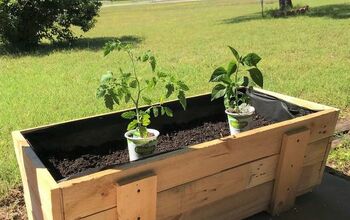
We decided the box would be 24 x 24", it needed to hold large packages, and be weather resistant.

View with open lid and chain
The frame was made by the 2x4 (stringer) boards of the pallet and the sides are made from the deck boards. When planning out the use of the 2x4 (stringer) boards, be careful not to let the forklift slots end up in an inconvenient spot. Additional 2x4 (stringer) boards were used for the top lid frame and the box was also designed to have a slight angle towards the back to shed water.

Stinger Board Legs
The legs are one continual piece from the top to bottom. With the legs on it, it's to deep for a shorty like me to reach down into so take the height into consideration when building. We have a lot of rain runoff so it needed higher legs.
Full view with hinge
It has worked perfectly now for many deliveries. I'll eventually get around to painting the entire thing making it much cuter, but for now, it works like a charm! For any additional information, check out my blog!

Want more details about this and other DIY projects? Check out my blog post!
Comments
Join the conversation
3 of 25 comments
-
great idea. I love it. looks great and serves the purpose.
good job and thank you for sharing.
-
In the city if things aren't "nailed down" they tend to disappear- what keeps thief's from taking the entire box?


Frequently asked questions
Have a question about this project?
The 'Ask a question' button above is not working so I'll ask here...
Are the delivery people using the box and , if so, are they taking the time to lock it when they do?
I notice you live in the country like I do! Do you have any concern about bees or wasps nesting inside?
Are the pallets totally waterproof?
Did you have to seal them? I live in a rainy area without much shelter space so that's my concern.
It is absolutely adorable!
thank you