


RE-PURPOSING OLD FURNITURE

by
Maria L
5 Materials
$50.00
4 Days
Medium
My husband built this dresser for our bedroom sooo many years ago, about 20, to be exact.
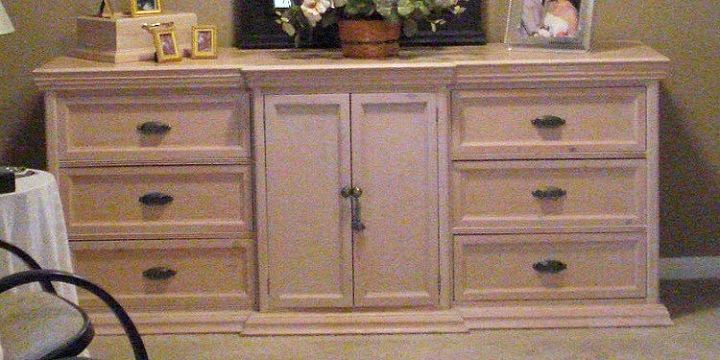
It was a Thomasville copycat. We loved their style, but we sure could not afford it back in those days. I don't even have a good picture to show you. So, when we bought our new bedroom furniture, we were left with this dresser that did not fit
or go anywhere else in the house.
I already had a vision for this piece of furniture, but my husband was very much ready to donate it. It took a couple of weeks of " no, we can't, yes, we can" until I convinced him to give it a try and see if we could make an entrance chest out of it.
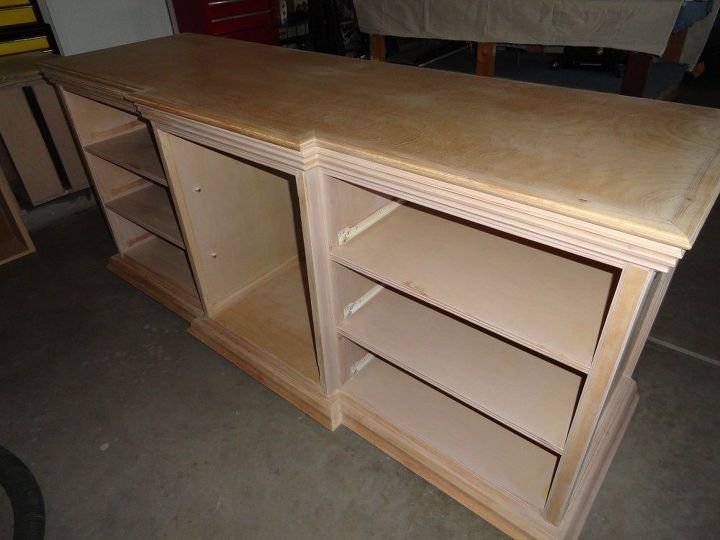
So, the dresser went in the garage. It took us four days of work (everything you can imagine went wrong) and I received many looks of "I told you so". 
We did start by removing all the hardware, filling up the holes with wood putty and lots of sanding to only realize that the dresser was to wide for our entrance hall. Yikes!
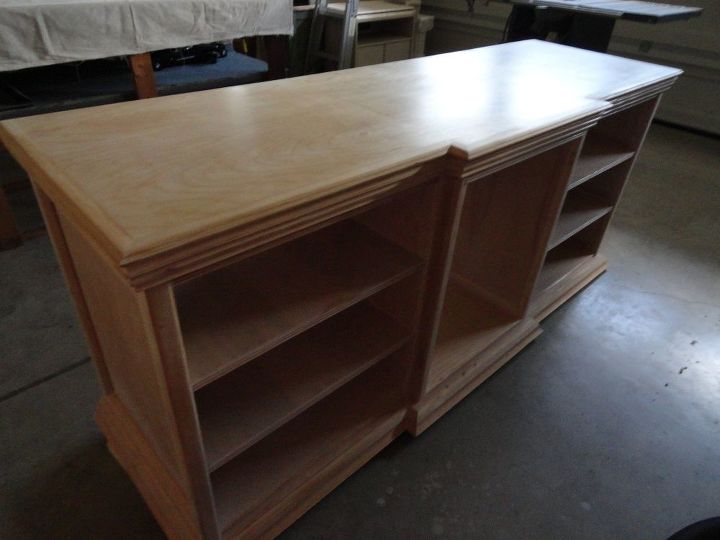
We ended up having to cut the back of the dresser six inches length wise to make it fit right. We used every saw available to us in our work shop but what worked the best was the scroll saw with eight inch blades. It was a very long and tedious process.
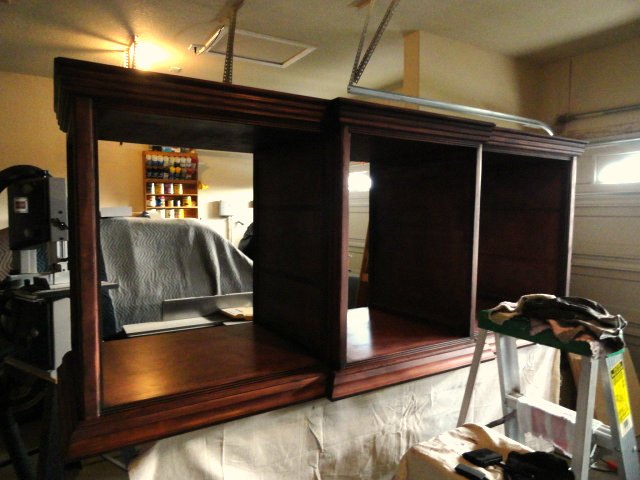
After rebuilding the molding pieces for the sides of the chest and installing them, next day we were ready to stain. We used two coats of Minwax Red Mahogany Oil-Based Interior Stain.
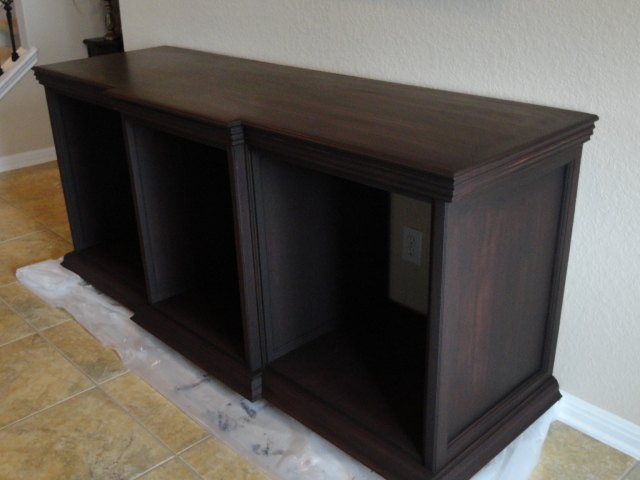
After two coats, we had to bring it in the house, since the outside humidity was not helping us in any way.
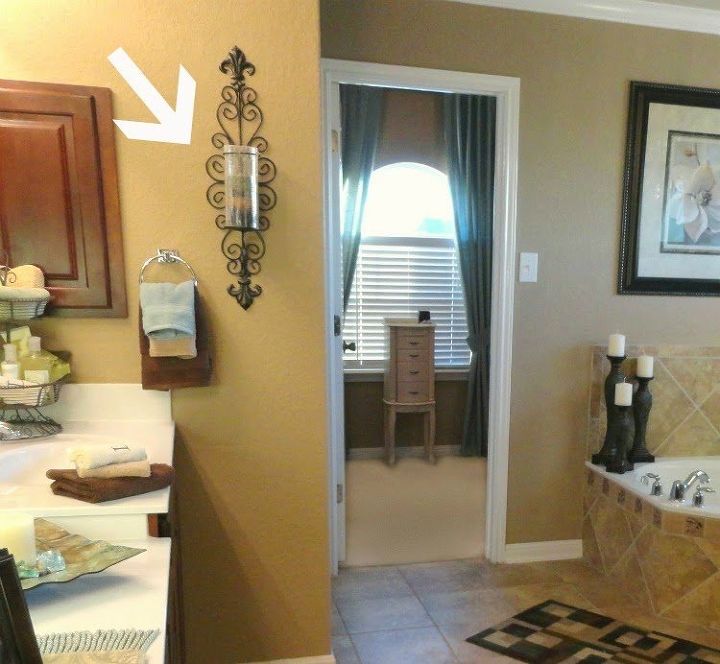
At this point, we were stuck. We knew we wanted doors with some kind of metal scroll on them, but that was not so easy to find, until next day, while shopping at Kirklands, we found two sets of metal candle holders in the clearance area
just like the ones we have in the bathroom.
They were missing the glass and they were on sale for eight dollars a set.
We looked at each other and knew right away this would work. You just have to use your imagination a little.  We purchased two sets.
We purchased two sets.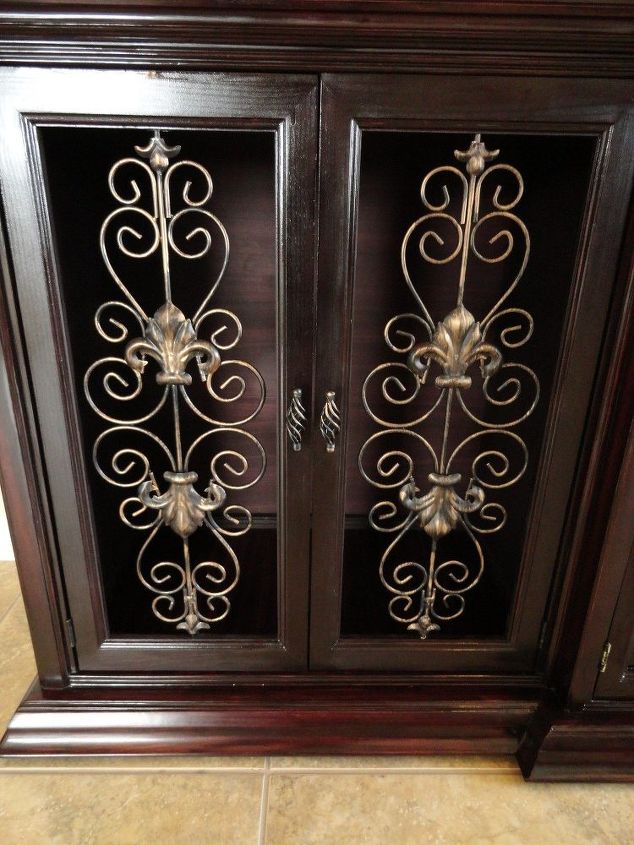
After another whole day, we were finally able to put the doors together. We built them using some 1 x 3's that we already had in the workshop.
We were then ready to apply the polyurethane. We used Minwax semi gloss Fast-Drying Polyurethane
We allowed a whole day and night for it to dry. Next day, we cut the extra metal ring off the candle holders, drilled holes on the top and bottom of the door frames and installed them very easily.
For the center, we left the original doors. And to finish it off, we purchased six pretty knobs at Lowe's.
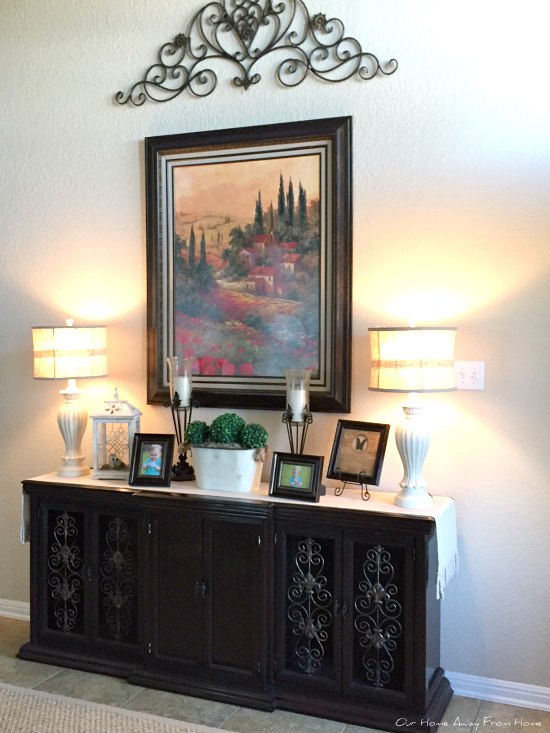
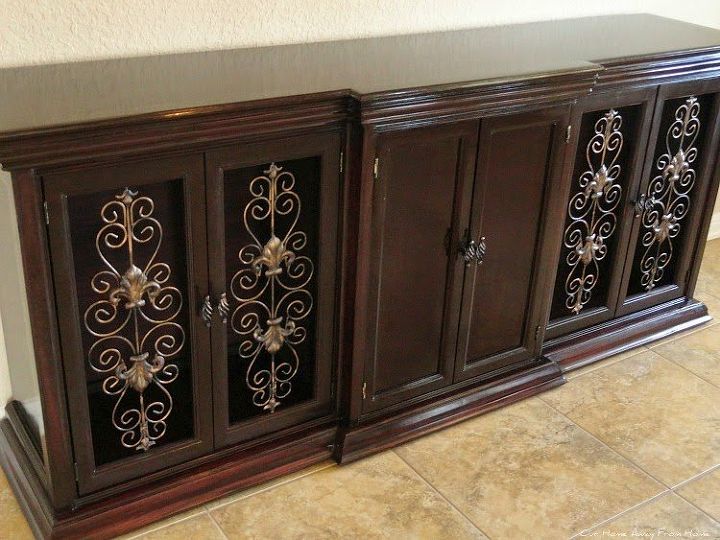
And here is our finished product! I still can't believe we pulled it off .
I still can't believe we pulled it off .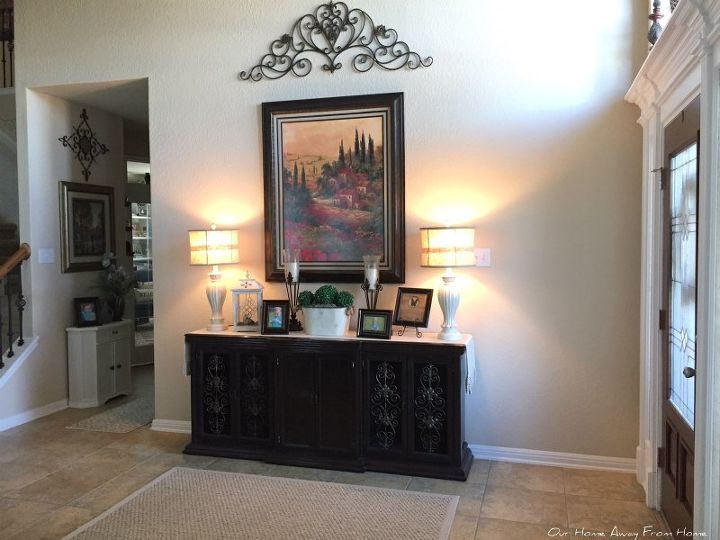
A few accessories later and we got ourselves a hall chest.
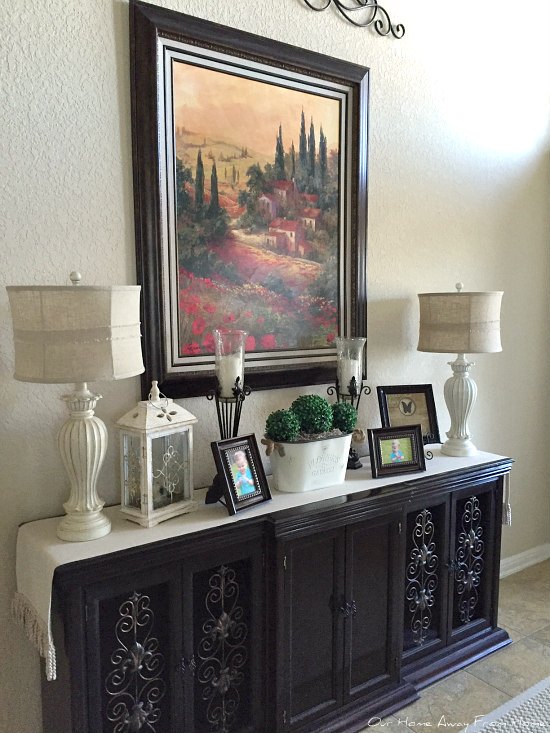
Total cost of this project was exactly fifty dollars and four days of work, but it was worth all the trouble.
Want more details about this and other DIY projects? Check out my blog post!
Comments
Join the conversation
2 of 112 comments
-
what a wonderful show piece. you did an awesome job
-
You did a truly nice job on the wood and design. I think you'll enjoy it for many years. :-)


Frequently asked questions
Have a question about this project?
Just curious; it seems that adding back those inches you took off, it wouldn't be too big...?
Wow what a rich transformation👍👏👌
I simply love it😍
No question, just a statement.
ABSOUTELY STUNNING!