


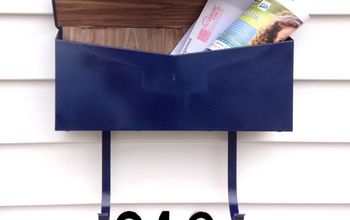
Mailbox Makeover

11 Materials
$35
2 Hours
Medium
Mailboxes generally have the same look around where we live: a plain mailbox on a plain post which is so not my personality or style. After nearly 5 years of looking at our ratty mailbox and post, I decided to vamp it a little and I'm so pleased with how this fairly easy project came out!
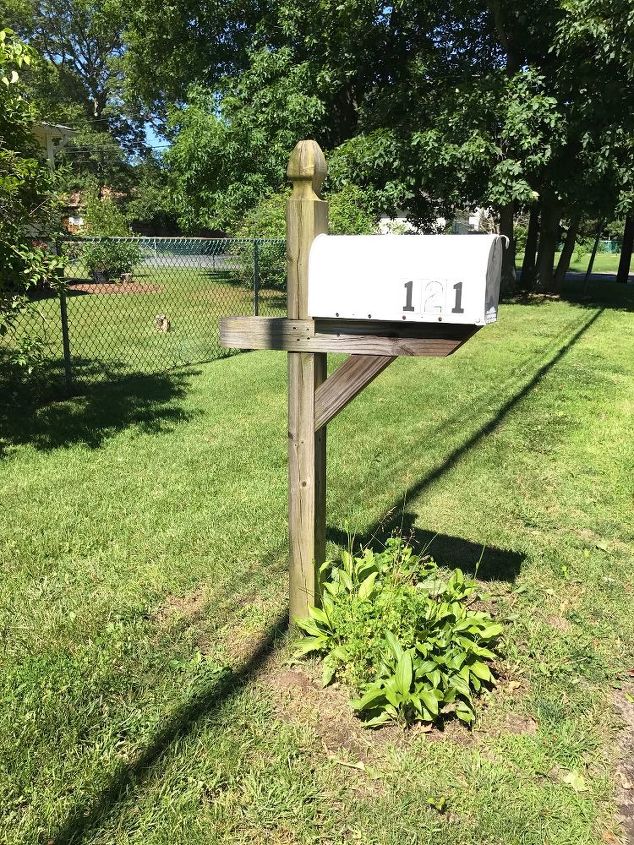
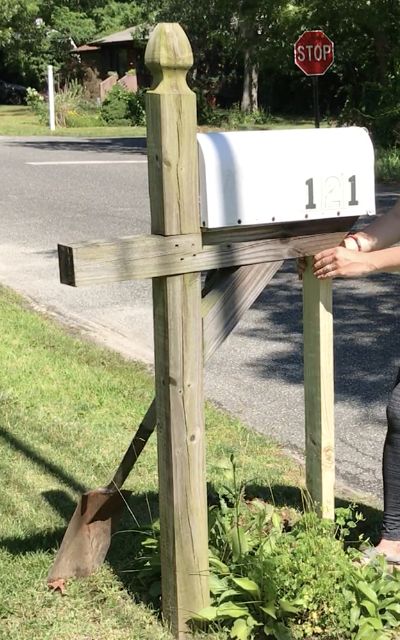
BEFORE:
This is the mailbox that came with the house when we bought it almost 5 years ago and clearly it needed some TLC!
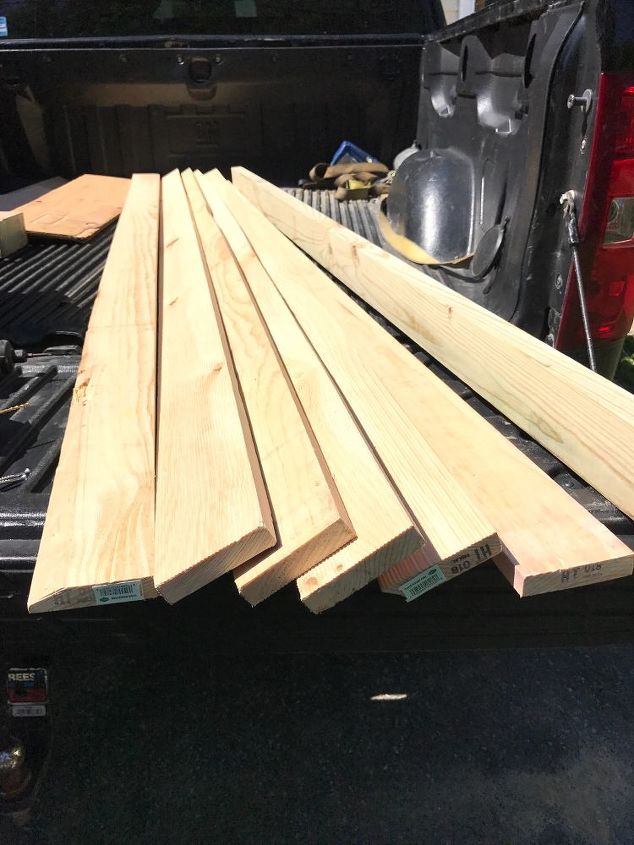
SUPPLIES:
-4 (1x4x8) pine boards *Note: We purchased 6 but returned 2.
-1 (2x4x8) board
-measuring tape
-Behr exterior semi gloss paint (Color: Cherry Cola)
-vinyl black/silver numbers
-2 (2.5" wood screws)
-DeWalt reciprocating saw
-2" paint brush
-18 gauge brad nails
-nail gun
-DeWalt chop saw
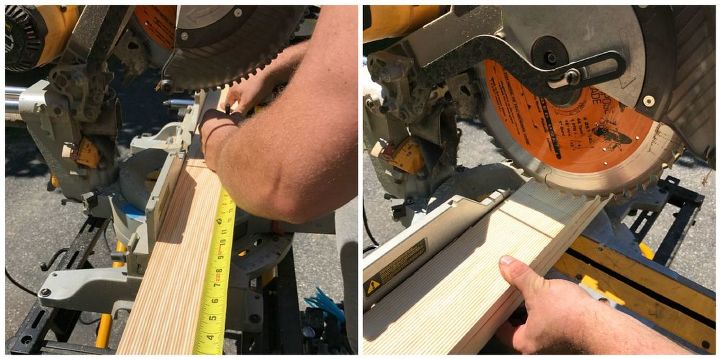
STEP 1: Measure and cut 1x4x8 boards
First, Rob measured how wide we wanted our planks to be which turned out to be 16". Then, he cut the planks to size using a chop saw. If you don't have power tools, you can do this with a manual saw or see if the hardware store where you purchase your wood will do this for you.
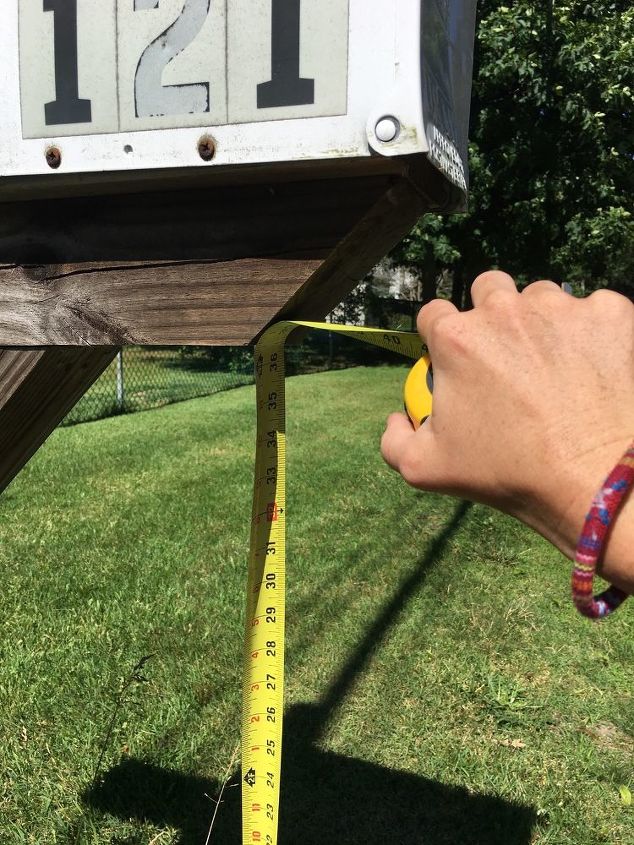
STEP 2: Measure, fit and secure post
Next, I measured from the ground to the end of our existing mailbox post. This would determine how much I needed to dig into the ground in order to fit in our support post.
STEP 2: Measure, fit and secure post
Next, I measured from the ground to the end of our existing mailbox post. This would determine how much I needed to dig into the ground in order to fit in our support post.
Once I had a measurement, I dug a small hole with a shovel...
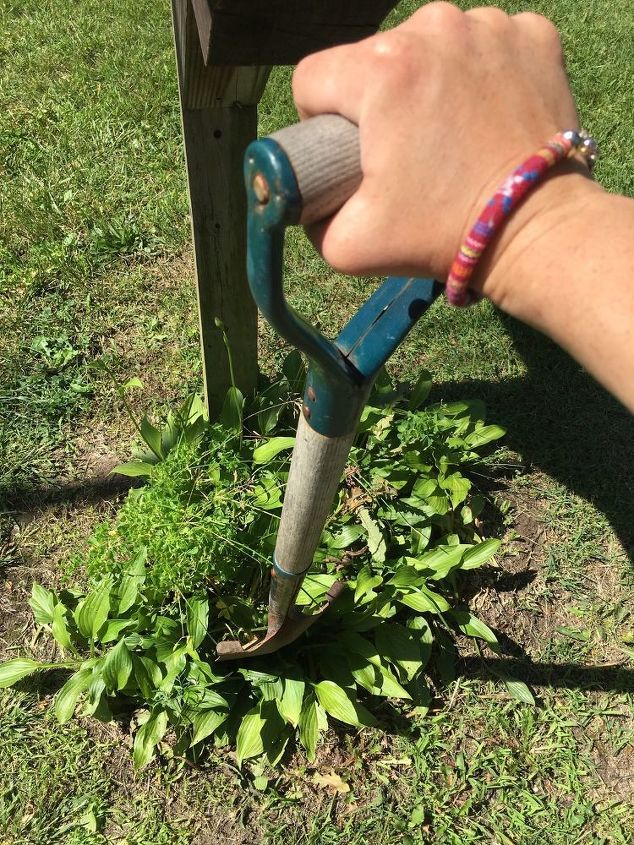
Once I had a measurement, I dug a small hole with a shovel...
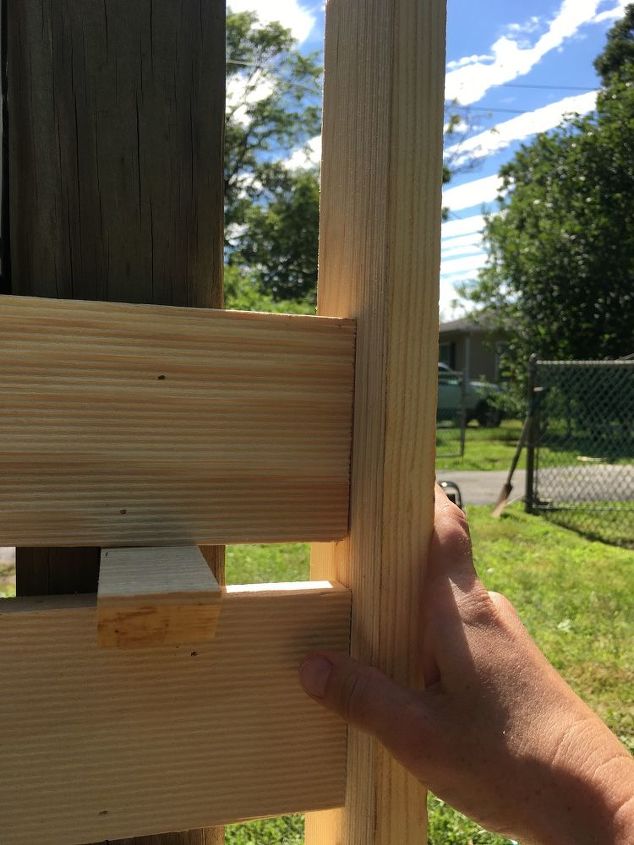
...then, wedge in the support post underneath our existing mailbox post.
Finally, I used 2.5" screws (one on either side) to secure the support post to our existing post.
Optional: I didn't want the little piece of our existing post sticking out the back any longer so I used a reciprocating saw to cut it off in order to make the tall part of the existing post flat.
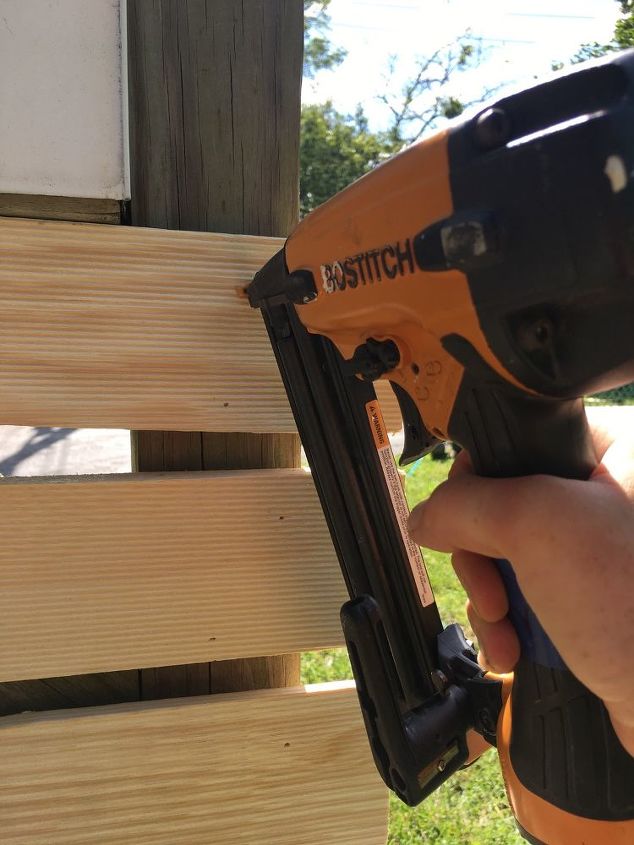
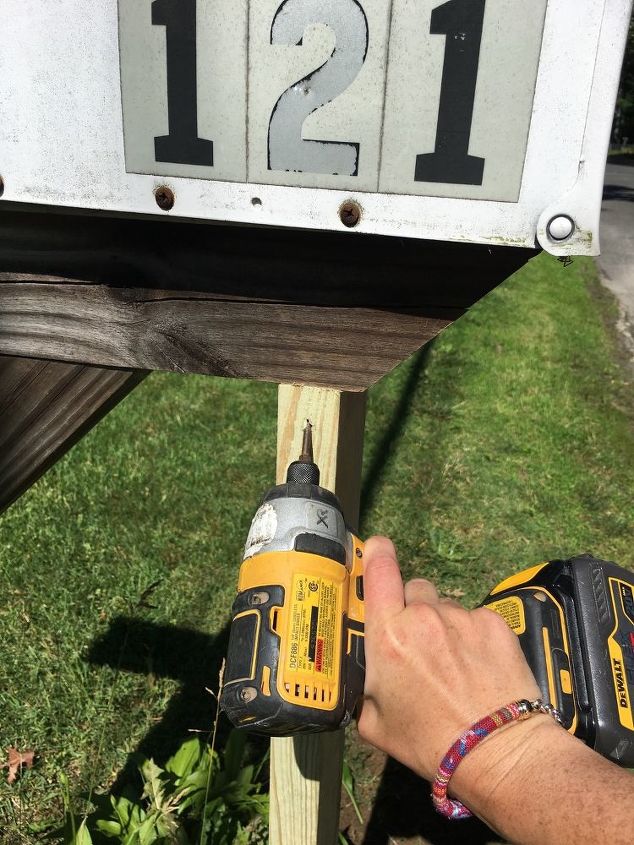
STEP 3: Install planks
After my support post was secure, I started installing the 16" planks Rob had cut for me. I used 2 nails for each end of the planks.
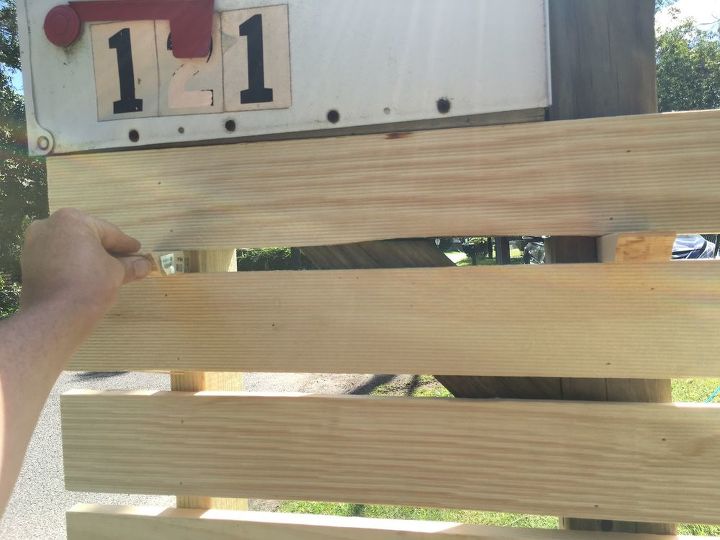
In order to ensure the planks were evenly spaced apart, I lined one end of the plank to the front of the existing post, secured the plank with nails, then used 2 scrap pieces of wood as wedges to space the plank above to the next plank.
Then, to ensure that the planks were even with each other, I used an extra plank to line then up from the back.
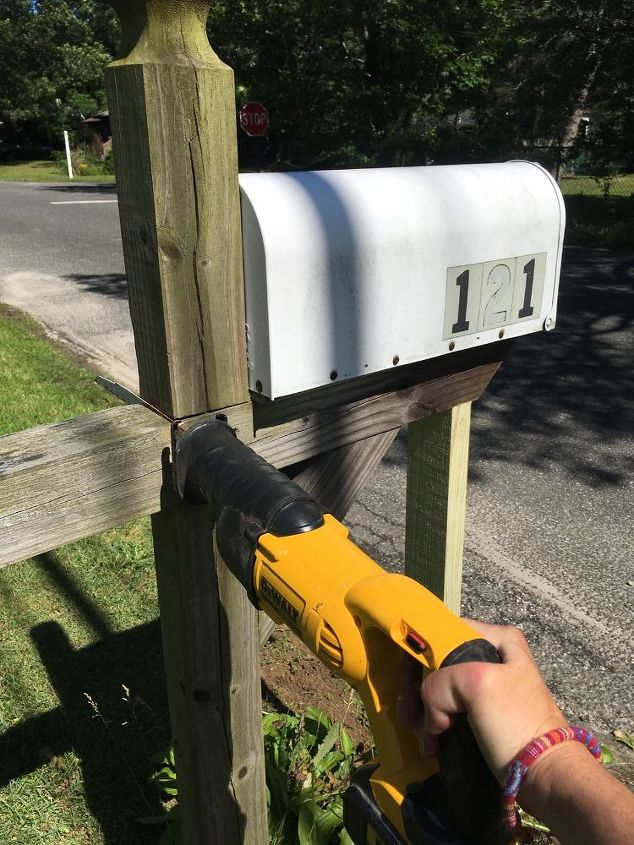
STEP 4: Paint
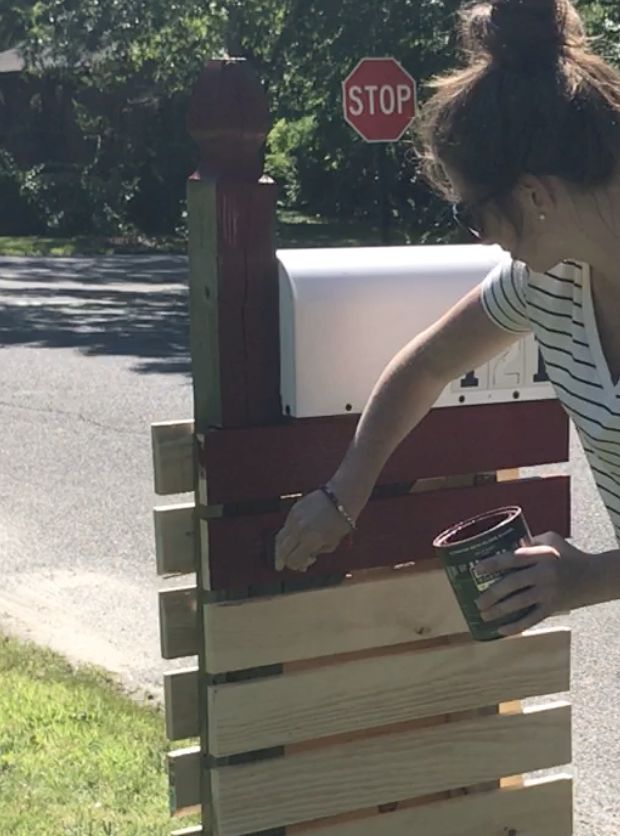
Hindsight, I would have painted my planks before installation but at the time, I was clueless as to the look I was going for so I decided to install the planks first in hopes inspiration would come to me. I decided to use the same paint I used on our front door (and the sliding barn door inside) to tie in the mailbox with the house. I used Behr exterior semi gloss paint in a deep red color called "Cherry Cola".
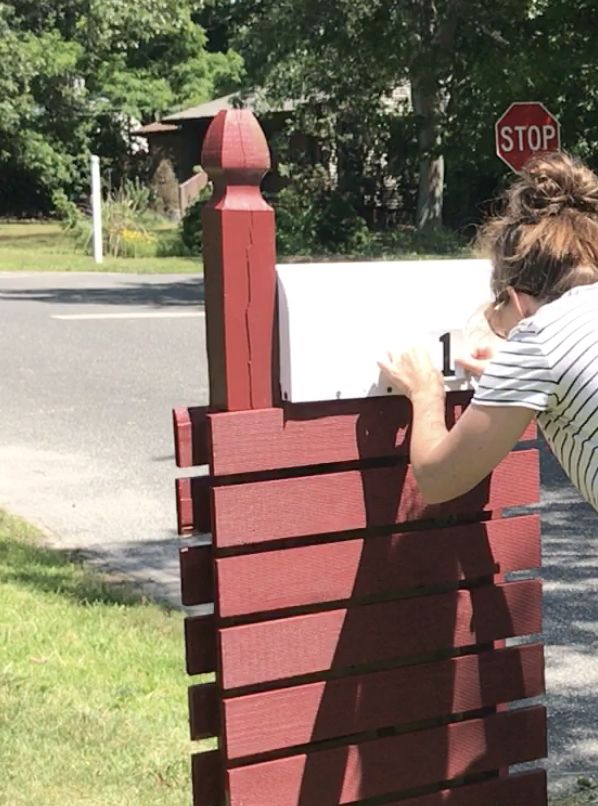
Optional: Because the numbers on our mailbox looked a hot mess and they were basically baked onto our mailbox, I simply grabbed new numbers (the same kind we originally had) and applied them over the original numbers. Our mailbox was in decent shape and I liked how the white popped against the red so I decided not to get a whole new mailbox. The sky's the limit with the numbers though! If you want a plain mailbox, you can get nice numbers to install on the planks but I felt that look was too modern for the whole look of our house/style.
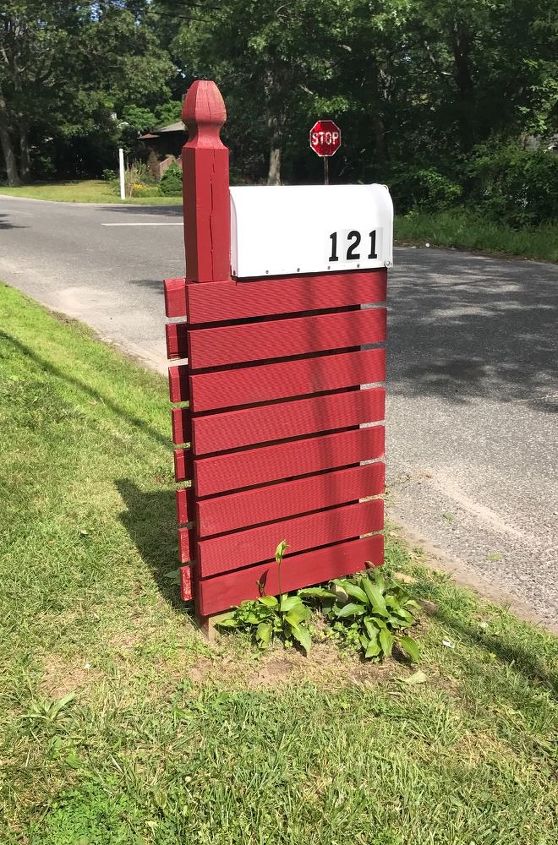
I'm so in love with our "new" mailbox! It was so simple to give it a unique facelift without breaking the bank and it ties together with our house now instead of sticking out like a sore thumb. 
{
"id": "3929843",
"alt": "",
"title": "",
"video_library_id": "8444",
"thumbnail": "https://cdn-fastly.hometalk.com/media/2017/07/31/3929843/mailbox-makeover.jpg"
}
{
"width": 634,
"height": 357,
"showRelated": true,
"noautoplay": ""
}
Resources for this project:
See all materials


Any price and availability information displayed on [relevant Amazon Site(s), as applicable] at the time of purchase will apply to the purchase of this product.
Hometalk may collect a small share of sales from the links on this page.More info
Comments
Join the conversation
2 of 69 comments
-
I think it is really cute.
-
Possibly use pallets and cut to size? Think I will try that. Your idea is fabulous!


Frequently asked questions
Have a question about this project?
Were you thinking of using the little car I seen in the video next to the post? If so You could plant a vine maybe some clematis vine in a nice red color or white .You could chain it to the bottom of the post so no one takes it and hide the chain with the vine . IN winter you can bring it in so the plow doesn't destroy it .
In hindsight, wouldn't it have been better to use galvanized screws? That way they would not rust from weather or come loose over time.
Did you use treated wood? Wouldn’t untreated wood tend to fail fairly quickly when exposed to the elements? I really like the idea and wish I could do it but we are also in Minnesota and need to deal with snow plows!