


Easy DIY Photo Display
4 Materials
$10
1 Hour
Easy
This photo display is a great gift idea for the holiday season, and it's so simple to put together! It's the perfect way to display a few family photos that can easily be changed out regularly. If you like this project, you can see more easy and affordable DIY projects on my blog, Love & Renovations.
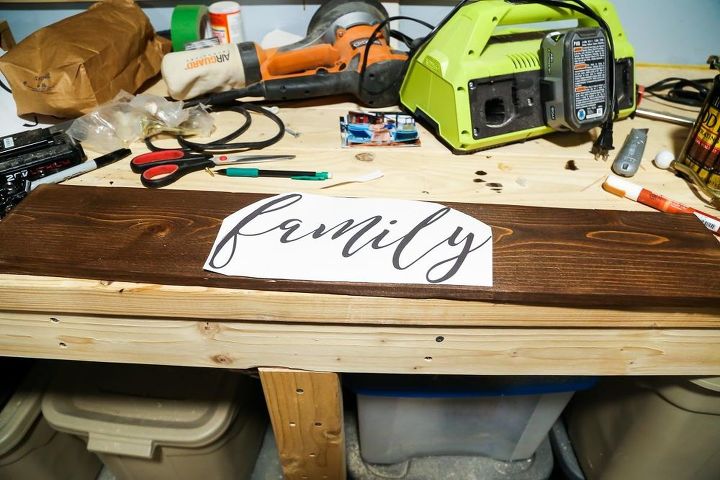
I started off with a scrap piece of wood - I used a 2x6 piece. You can cut it down to whatever length you want. I stained the board and then printed out the word "Family" in my favorite font (it's called Remember Script).
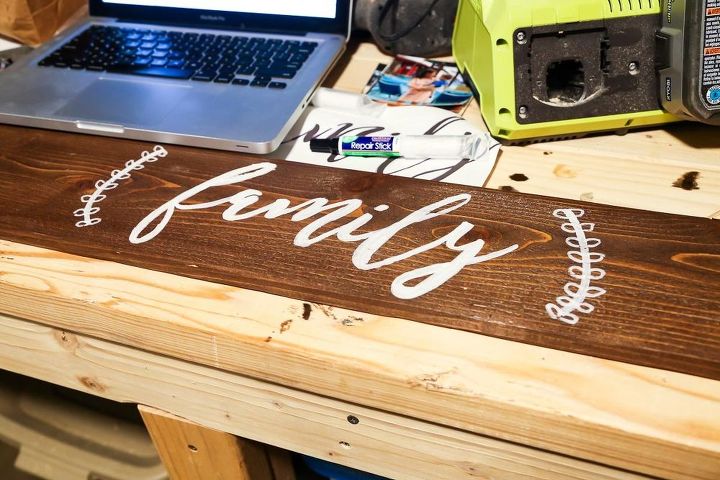
I used graphite transfer paper to trace the word onto the board, then I used a white paint pen to fill in the letters. I free-handed a little leaf detail on either side of the word.
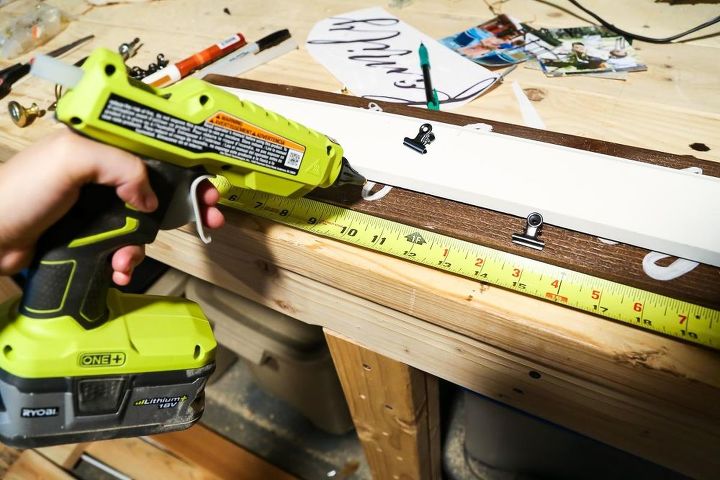
Next up, I used my hot glue gun to attach some small metal clips along the bottom of the board. I used a tape measure to help me space them evenly.
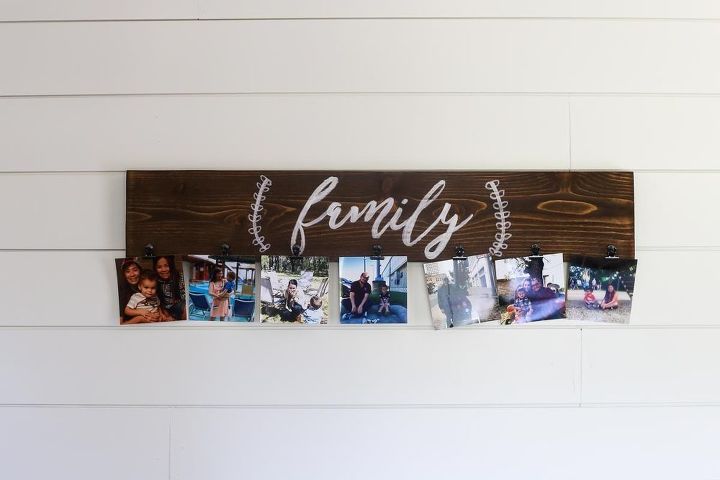
Finally, I added some photos and hung it up! This project only took me about an hour to put together, and is such a simple and beautiful idea for a DIY Christmas gift. It is lightweight enough that I was able to hang it using Command picture hanging strips. You could also use a metal french cleat. You can see more details and photos on my blog post.

Want more details about this and other DIY projects? Check out my blog post!


Frequently asked questions
Have a question about this project?
Where did you purchase the clips to hang the photos?