


Easy DIY Copper Laptop Table

by
Zest it Up
11 Materials
$20
2 Hours
Easy
Sometimes working at your desk all day can not only seem to drag on, but make your booty sore!! Just keeping it real peeps! So to mix up the scenery and have a cozy spot for those never ending emails, I decided to take my own stab at making a laptop stand. Then I can take my work to the couch and also not get my legs on fire from the blasting laptop heat LOL. Since we love all things copper here at zest, it only seemed fitting to create a copper laptop stand. As we enter the holiday season, this DIY would make for a great gift that is practical but yeah oh so stylish without breaking the bank. Especially for those of you with a friend or family member who might work from home?
Photo Cred: Anya McInroy
Supplies:
- 8 x 3/4″ 90-degree copper elbow fittings
- 12′ of 3/4″ copper pipe
- 1 x 3/4″ tube cutter
- Scrap wood cut to 17.5″ x 20″
- 8 Screws (small enough to not go through wood)
- Drill
- White Vinegar
- Steel Wool
- Liquid Nails glue
- Goo-gone
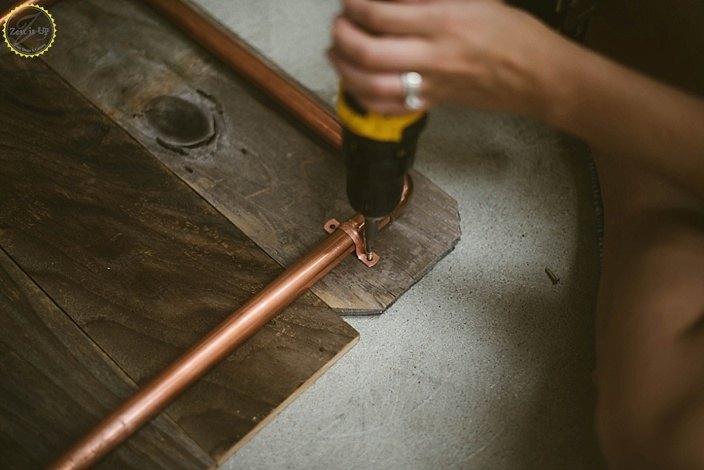
- 6x 3/4″ copper pipe straps
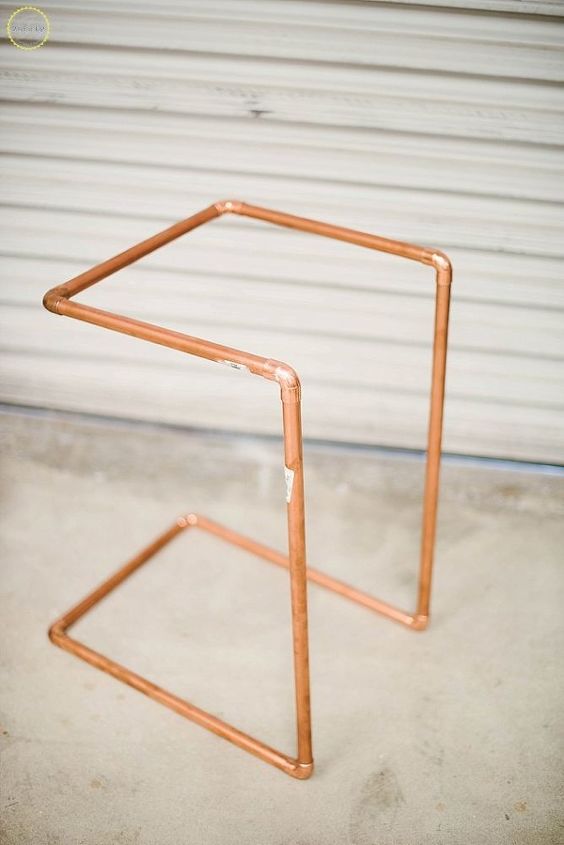
Cut the following pieces of pipe with your cutter:
- 4 x 14″ pieces of pipe
- 2 x 18″ pieces of pipe
- 2 x 26″ pieces of pipe
See pic for assembly, be sure to wipe ample glue between each joint and let dry for drying time suggested before assembling wood.
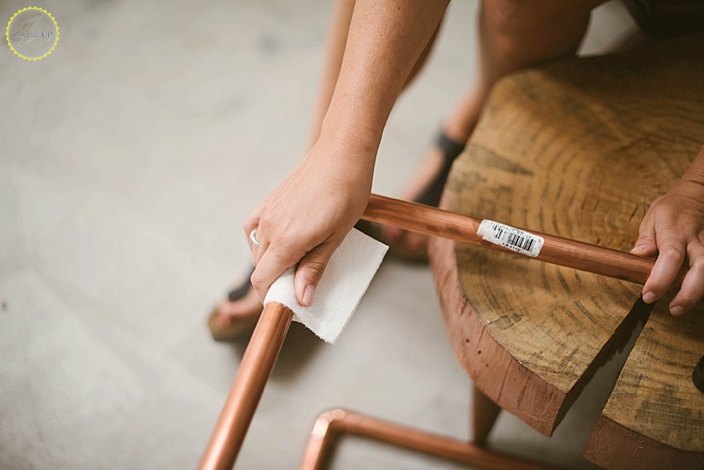
After your main stand is all structured and dry, take some goo-gone and be sure to remove all your stickers. (you could do this before assembly as well).
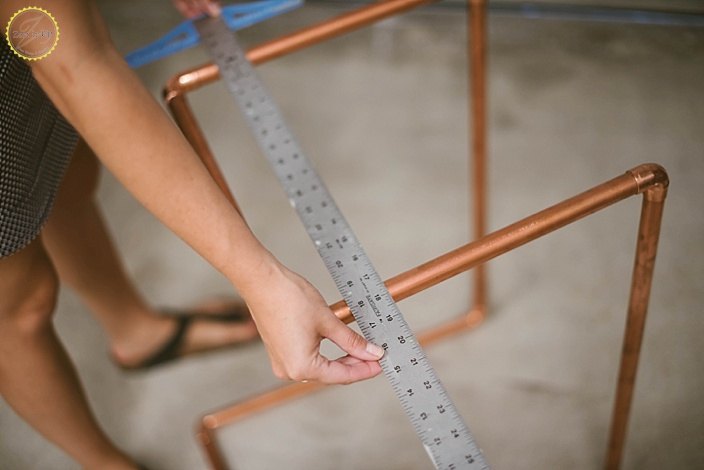
Next grab your six copper pipe straps as well as the drill and attach your wood planks to the stand by securing with screws.
I found it easiest to assemble if I flipped my stand upside down and let gravity do the work while drilling onto a table or floor. Make sure your screws are small enough that they don’t pop through your gorgeous wood too! Place a copper pipe strap in each side of the wood panel to secure.
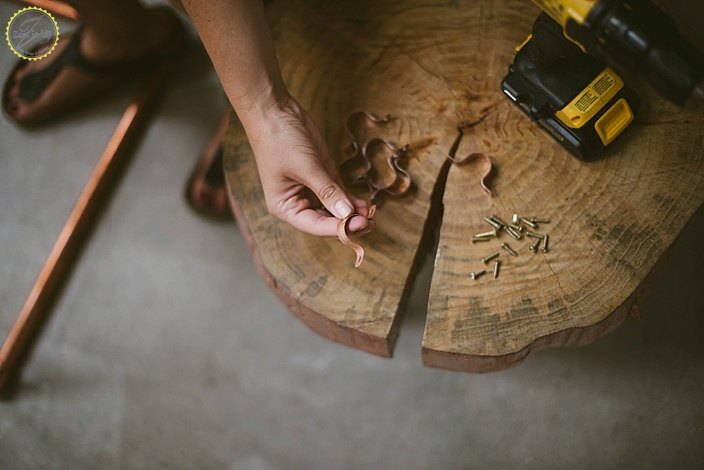
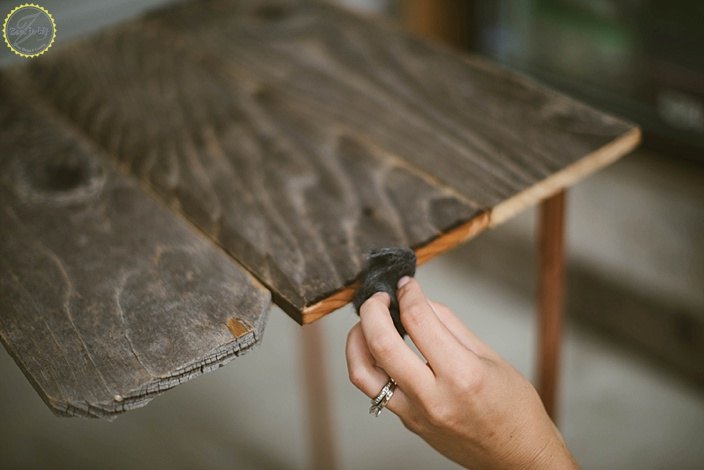
Now if you stained your large fence boards and then cut them, like me, you will want to match the side panels to your stain. I used some steel wool that I soaked in white vinegar for 15 mins and then painted on the solution to magically “age” my wood that was freshly cut. This is the easiest and most inexpensive way to age and grey out that wood to match!
All done and ready to get to work, but comfy now 
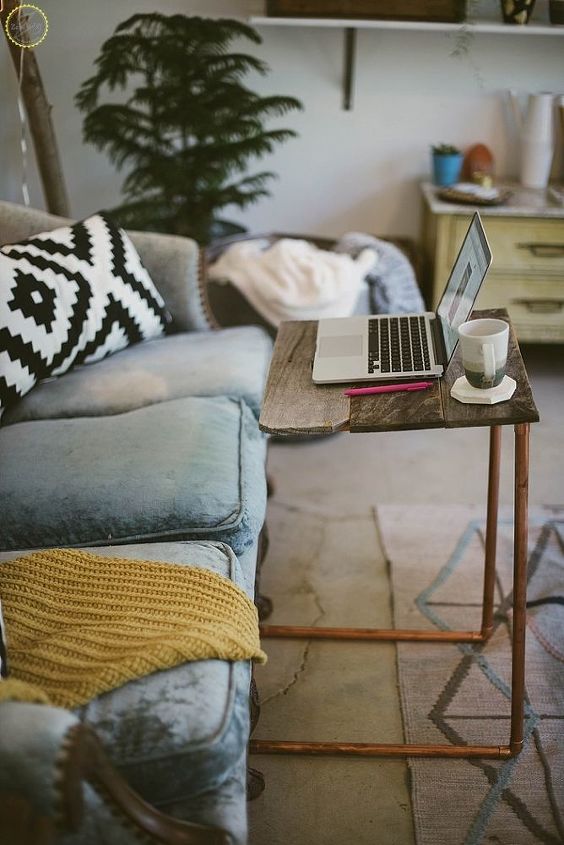
Working in style!
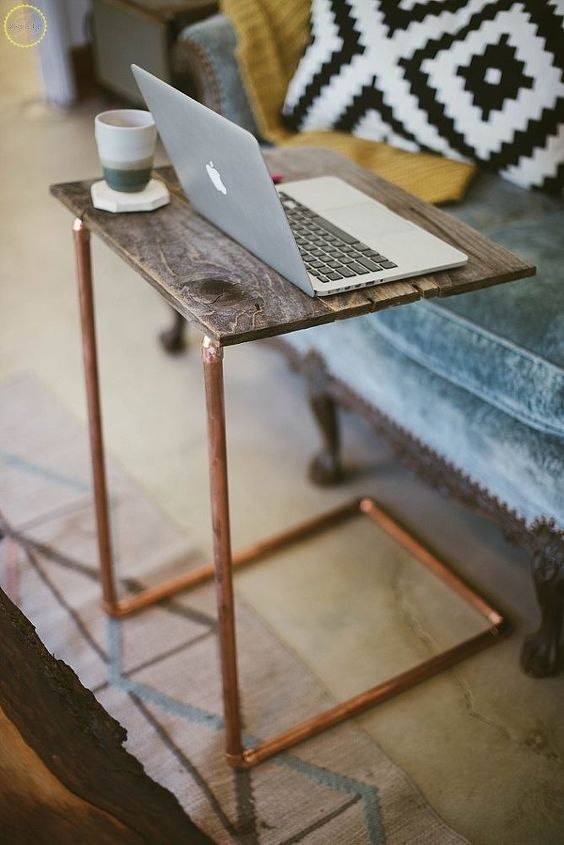
Love the way this turned out! Looks like a modern TV tray, LOL!

Happy crafting, friends!
XO,
Sam
Want more details about this and other DIY projects? Check out my blog post!
Comments
Join the conversation
4 comments
-
This is very cool! Looks great. Been looking to make some tray tables for me and my son for our laptops when we watch TV. I would use some clear plastic tubing or PVC pipe on the base so not to scratch my hardwood floor. Great share!
- See 1 previous
-
That is so nice and handy and when it is not in use it can be tucked away under a piece of furniture that isn't being used at the time.


Frequently asked questions
Have a question about this project?