


How To Frame A Mirror With Wood Flooring
2 Materials
$20
1 Day
Easy
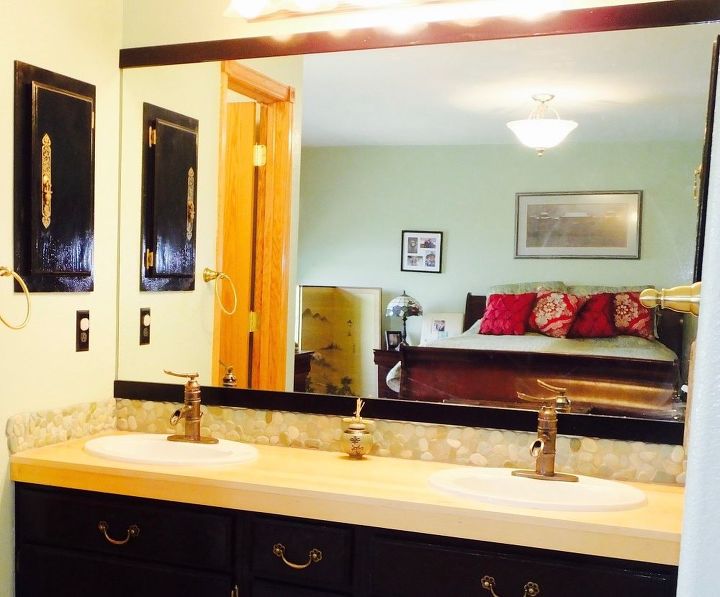
When we remodeled our master bathroom, I was faced with a choice. Should I remove the existing, huge, but boring builder's grade mirror or should I upgrade it? I didn't want to spend the money to replace it, so we decided to frame it out instead. I've seen lots of tutorials online where people frame around the existing mirror. It looks okay, but I really wanted my mirror to sit inside the frame to give it a more professional, finished look and to hide the beveled edge of the mirror. Now, I could have used regular wood trim and cut out a lip for my mirror, but I had something even better. Wood flooring. I didn't realize it at the time, but wood flooring is the perfect choice for framing a mirror. The "groove" side of the tongue and groove flooring is already grooved. If you remove the bottom portion of wood that forms the groove, you're left with the perfect lip that fits a builder's grade mirror perfectly. Confused? Let me explain.
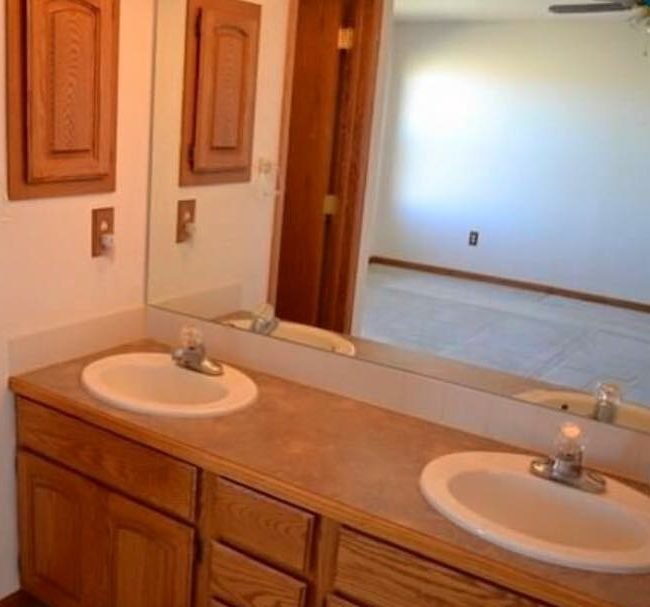
This was my bathroom mirror before our upgrade. It is huge and replacing it would have been very expensive. But, I hated how plain it looked.
We had a bunch of extra wood flooring left over from our home flooring project (future post), so I decided to use it to frame the mirror, because A) I’m cheap, B) it was (sort of) free, and C) I hate spending money.
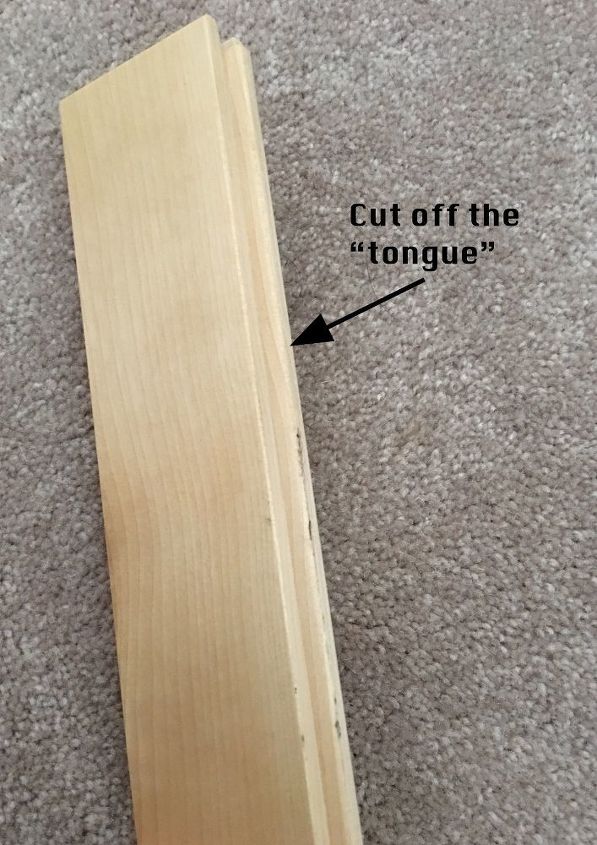
First, I cut the tongue off of my flooring pieces that I chose for my mirror.
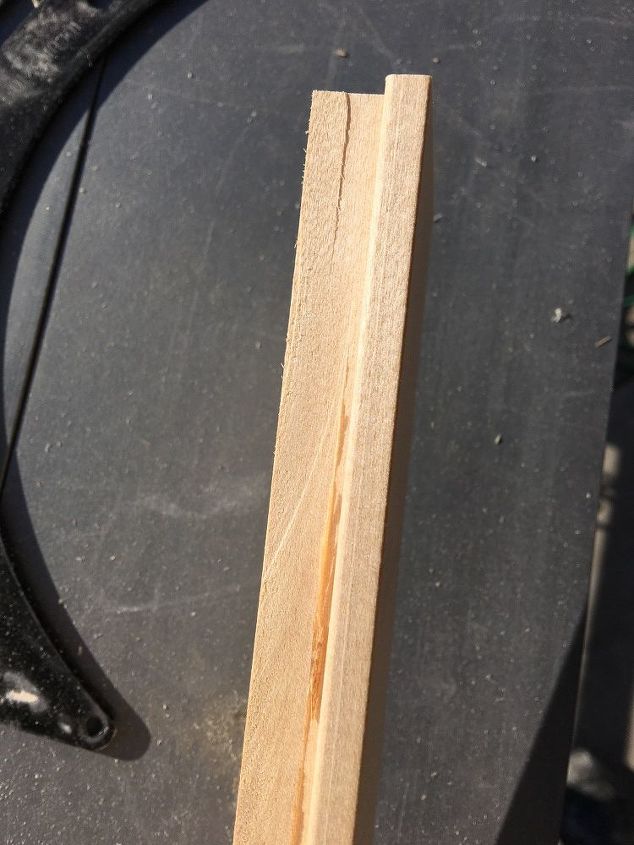
Back side of groove: removed
Next, I cut off the back portion of wood on the “groove” side of my flooring. If you remove the back portion, you’re left with a perfect lip to place your mirror in.
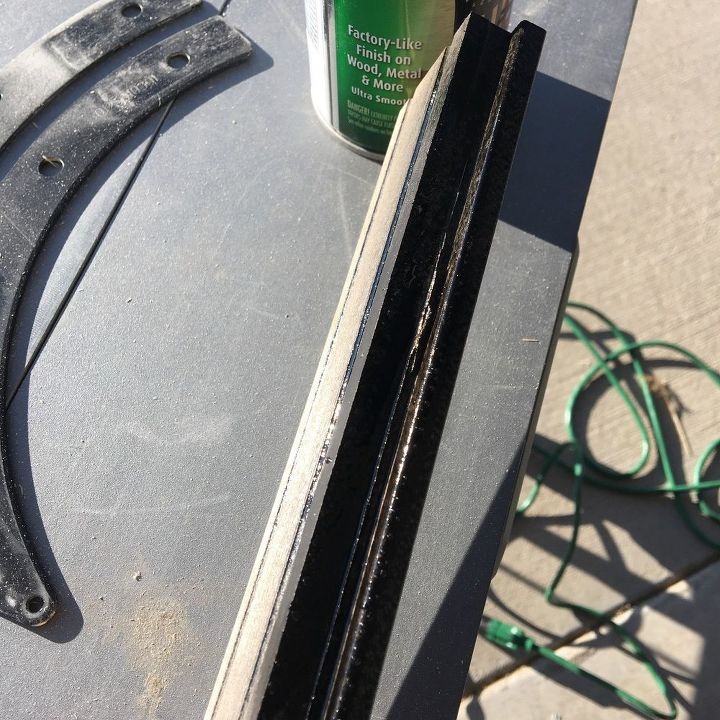
Then, I sanded and painted my wood. I used a black lacquer because I was going for an Asian-inspired look in my bathroom. When you paint the wood, make sure to paint the backside of the lip (see above) because the mirror will reflect this and you’ll be able to tell if it’s not painted.
Remove the plastic clips from your mirror and install the wood. We used a nail gun and I recommend that route. Use a laser level or measure by hand to make sure you're hitting studs with your nail gun. You don't want the wood to fall off of the wall and you want it to support the mirror. I covered my nail holes and painted over the holes.
That’s it. Because we were going for a minimalist design and because our mirror took up the entire width of the wall, I only installed two pieces of wood, along the top and bottom. You can tell what a difference this simple addition made. However, you could easily miter your corners and use this method to install a frame around the entire outside of your mirror.


Any price and availability information displayed on [relevant Amazon Site(s), as applicable] at the time of purchase will apply to the purchase of this product.
Hometalk may collect a small share of sales from the links on this page.More info

Want more details about this and other DIY projects? Check out my blog post!
Comments
Join the conversation
2 of 17 comments
-
Perfect update for that mirror! Thank you.
-
Sorry I am new to this so I noticed I asked about my stairs on the wrong place. But, I LOVE your mirror. I am a new home owner so I am about to take your post to Lowe's and see if the can help me with my ugly contractor grade eye soar. Thanks for the post.


Frequently asked questions
Have a question about this project?
Nice job! Thanks for your idea. I plan to do this with my "special builder's grade" mirror.
Any idea what material your vanity is and how did you prep the surface of your vanity prior to painting?
Ours has a metal lip at the end any suggestions how to deal with that?
Anyone know of an EASY, FAST and DURABLE way to stain stairs and hand rails that gets LOTS of day use?