


Update an Older Cathedral Arch Mirror
8 Materials
$50
2 Hours
Easy
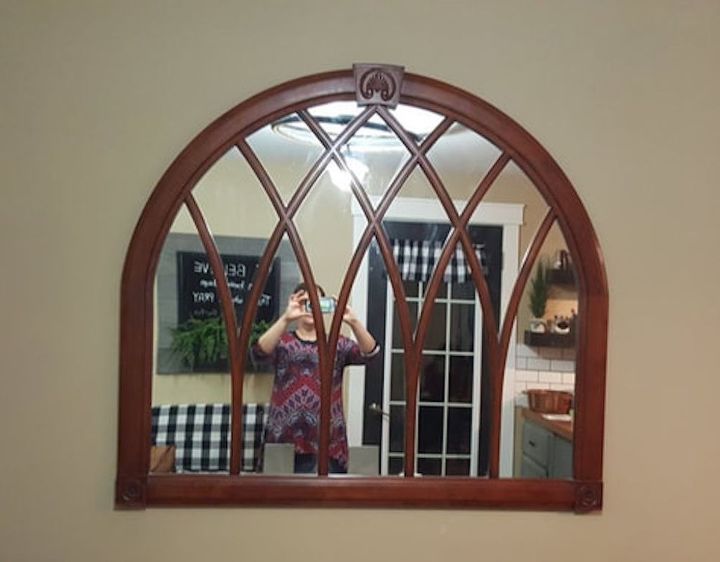
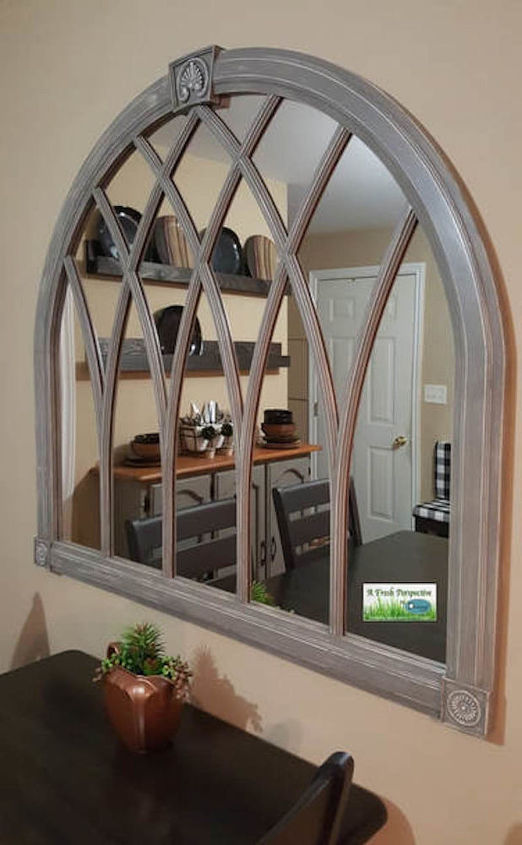
I have been drooling over arch mirrors for awhile now. There have been a few on the local auction sites but they were tall and skinny and selling way over my budget. So when THIS mirror came up in my Facebook newsfeed, for sale in a local buy & sell group, I jumped on it asap. My bartering instincts always overtake me and I bartered and immediately another buyer offered the lady full price. I could have kicked myself! Imagine my surprise when not too long afterwards I received an inbox saying I could have it! Yay, me!!!
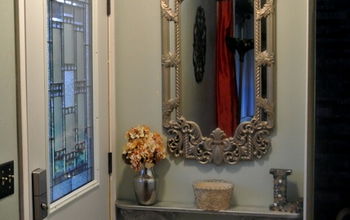
It is a heavy, solid wood Bombay mirror! Gorgeous, isn't it?? I hung it as is to get an idea of how it would look there where I wanted it.
Prep time! There was a screwed-in decent heavy duty wood backing holding the mirror glass in place. I removed the screws and put them in a baggie for safe keeping and removed the backing and mirror, setting those aside. Next, I cleaned the face of the wood thoroughly with vinegar and water and then rinsed well with fresh clean water and fresh rag. The next step was to prime. I primed it using Plaster Paint Company's New Surface then left it for several hours to give it time to really bond.
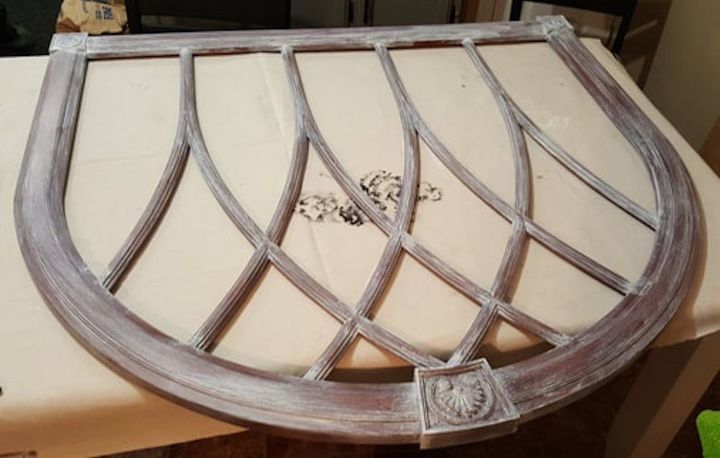
Primed!
I then gave it a light sanding to remove any ridges that may have been there (I didn't see any but I wasn't about to take any chances). Brush away the light dust and it was ready to paint.
Using my Cling On brush (of course!), I painted on 2 coats of Dixie Belle's Fluff paint leaving a couple hours in between coats for good measure (you only HAVE to wait until each coat is completely dry to recoat).
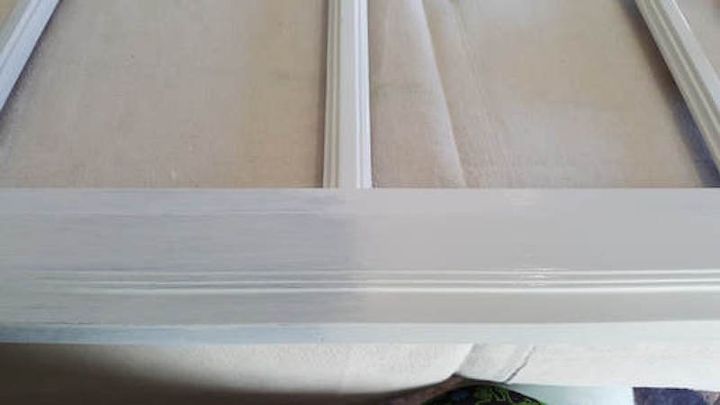
Left: first coat. Right: second coat
After the white was done and ready, I tried to dry brush grey and that did not look right AT ALL (and actually was pulling the white right off to the wood!). So. Using the same paint as I used on my lower kitchen cabinets and my hutch (Benjamin Moore Chelsea Grey in Aura Matte paint mixed with Chalk-tique powder), I painted a full coat over the white and allowed that to dry a couple of hours.
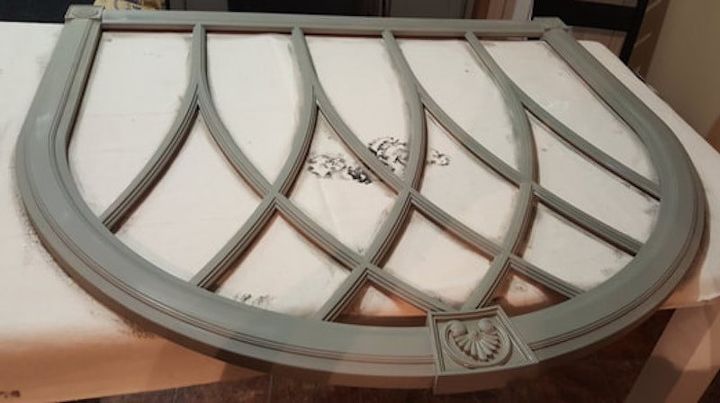
Full coverage in one coat!
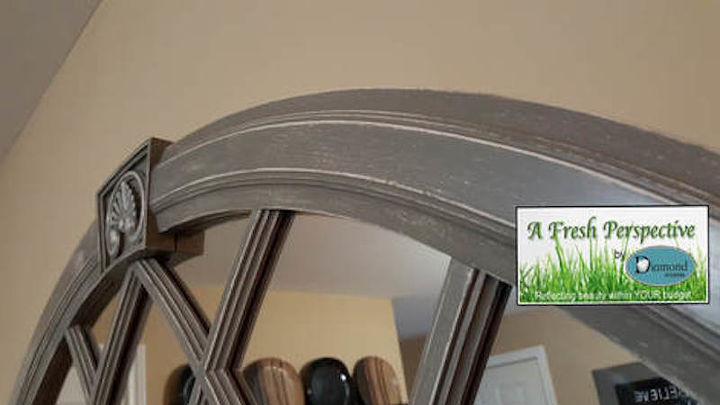
After the grey paint had fully dried for a few hours, I took a very fine grit sanding sponge and sanded all over. This exposed the white underneath and even down to the bare wood in some spots. I love how it looks!!! It is sooo smooth and silky feeling, too.
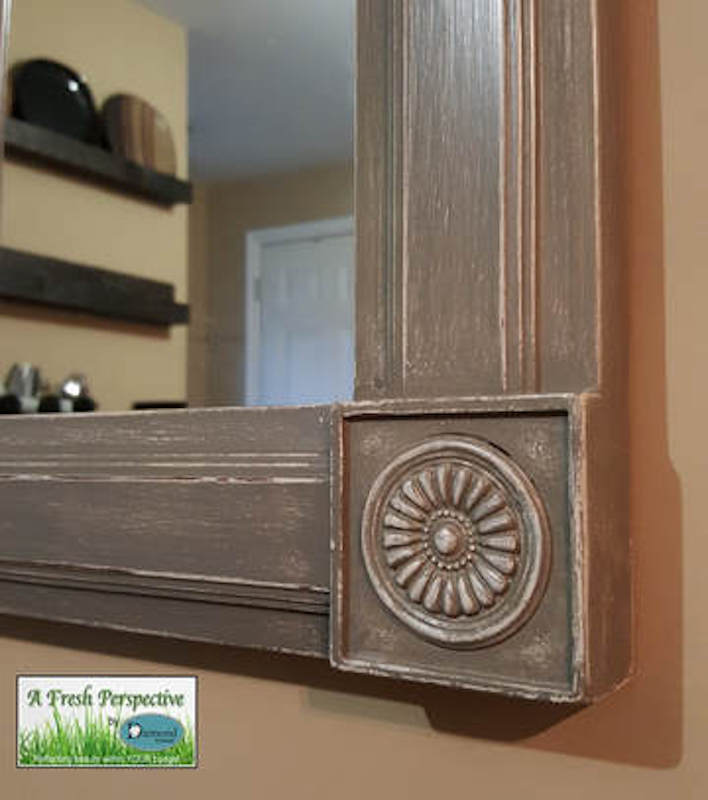
The last step in this process was to top coat. I left this a day or two before applying Plaster Paint Company's Matte Liquid Wax Sealant. For the first coat I used a cheap sponge brush but found that super time consuming so for the second (and final) coat, I used my Cling On brush. That went smooth and very fast. Like duh! I should have used that to begin with! LOL
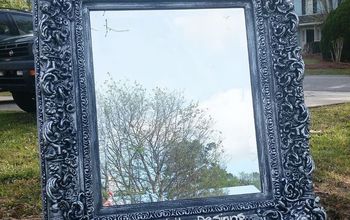
I LOVE how it turned out!

Resources for this project:
See all materials


Any price and availability information displayed on [relevant Amazon Site(s), as applicable] at the time of purchase will apply to the purchase of this product.
Hometalk may collect a small share of sales from the links on this page.More info

Want more details about this and other DIY projects? Check out my blog post!
Comments
Join the conversation
2 of 31 comments
-
Love it !
-
Beautiful, great job!


Frequently asked questions
Have a question about this project?
Nice! I assume it is very heavy, so how did you hang it on the wall?
What is a cling on brush?