


How to Make a Better Strawberry Pallet Planter

by
Tanya
2 Hours
Medium
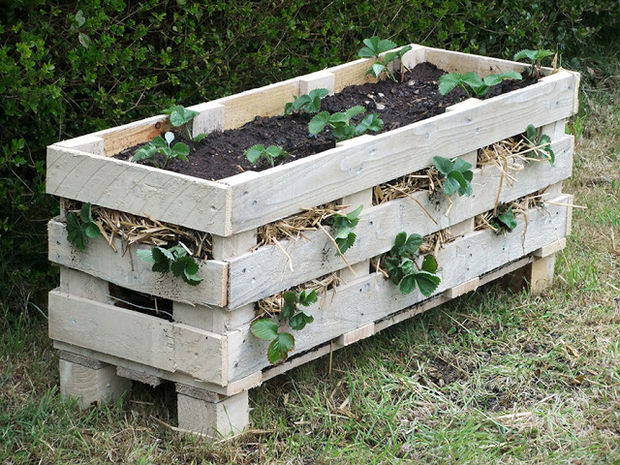
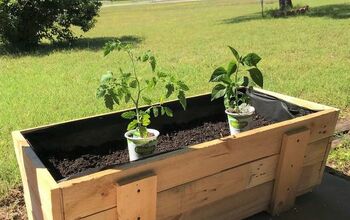
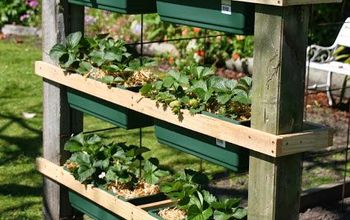
Create a stunning planter out of a single wooden pallet. The slots along the side make it suitable for planting strawberries but it could be used to grow all manner of fruit, veg, and flowers.
A video tutorial of this project should be on YouTube shortly. The Lovely Greens YouTube Channel is: https://www.youtube.com/lovelygreenstv
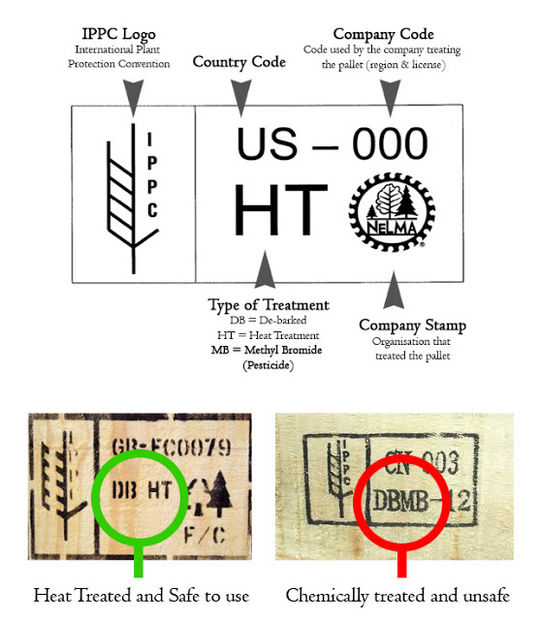
Step 1: First of all, choosing pallets for diy projects involves a bit of know-how. You need pallets that are in good condition, without rot, and which have not been treated with chemical insecticides. Most people are probably not aware of this but pallets that cross international borders must be either heat treated or sprayed to stop the spread of foreign pests. Whether you think this is a good idea or not, you certainly do not want pesticide-soaked furniture or objects in your garden let alone your home. Not only can it kill off insects that eat your crops but it can indiscriminately kill all the beneficial insects too. There's also the possibility of your plants absorbing these chemicals into their tissues and into your tasty strawberries!

Step 2: For this project you will also need to look for a pallet that has six or nine planks making up its main surface. The reason for this is that the first major step will be in slicing the pallet up into three equal sized pieces (both six and nine are divisable by three). If there's such a thing as a pallet with twelve planks then all the better because that means you can build an even larger planter.

Step 3: The easiest way to do this is to cut lay the pallet so that the long planks are in parallel with your own position. If your pallet has nine planks, like mine did, then count over three planks and then saw the wood between the third and fourth planks. Saw right in the middle, to keep things easy and to ensure that all of your proportions remain correct. Continue another three planks and cut again. Remember that you'll have to saw in the exact places on both the front and back of the pallet.
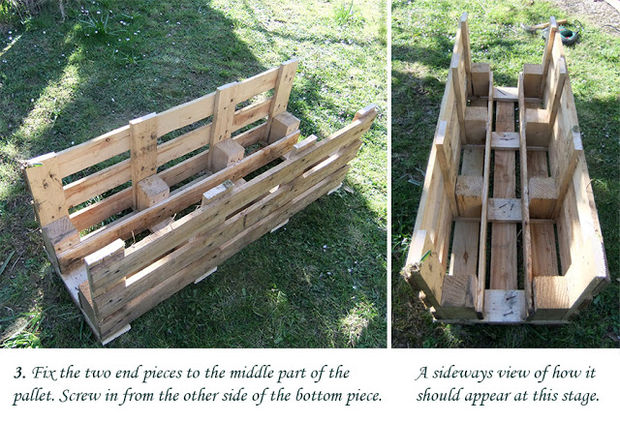
Step 5: Fix the two end pieces to the middle part of the pallet. Screw in from the other side of the middle (bottom) piece.
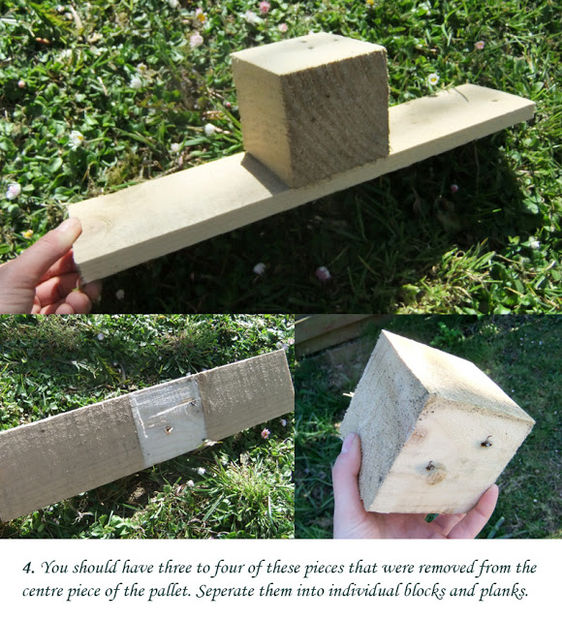
Step 6: You should have three to four of these pieces that were removed from the centre piece of the pallet. Separate them into individual blocks and planks.
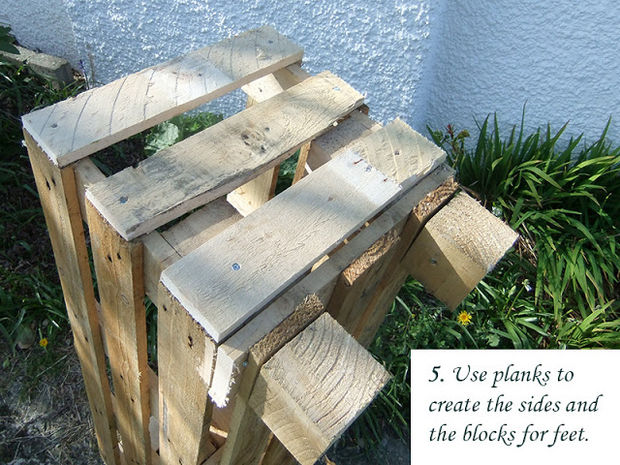
Step 7: If you've followed the directions in step 3 and sawed in the middle between the long planks, then the little planks leftover from step four should all be approximately the same length. They will also be the same width you need to create the shorter sides of your planter. If your original pallet was the same size as mine then you'll have four of these planks to make up two pieces for each side. The bottom planks for each of the shorter sides can be created by re-using the bits of wood you cut off the side pieces in step two. For a more pleasing and symmetrical effect, line the small side planks up with the planks along the front and back pieces.
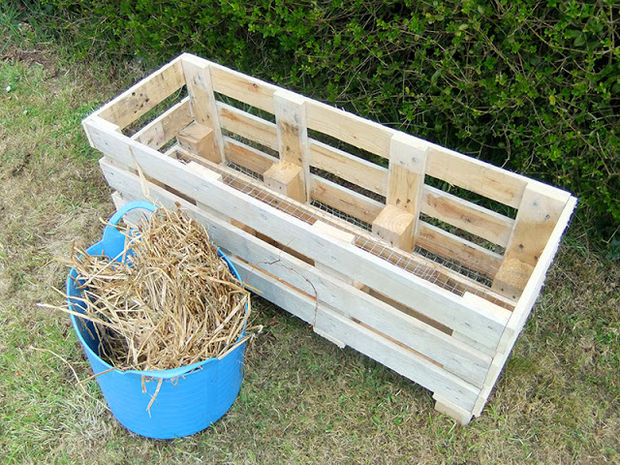
Turn your planter right way up and have a look at it. Does it feel sturdy? Are the feet wobbly? Are there extra bits of wood sticking up that you could trim back? Once you feel the planter is complete then either plant it up as is or use a non-toxic outdoor wood paint to paint the exterior. Being wood, this piece will eventually rot down but some tlc now can help extend its life.
Comments
Join the conversation
2 of 12 comments
-
What a great idea. It's So cute
-
Good idea with wooden pallets


Frequently asked questions
Have a question about this project?