


Upcycled Shutter Headboard Plus More

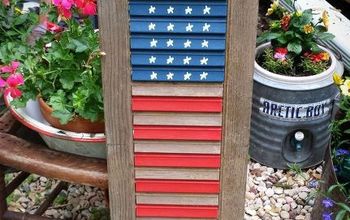
I wanted to make a new headboard for my nephew and found this shutter at an antique store for $10.
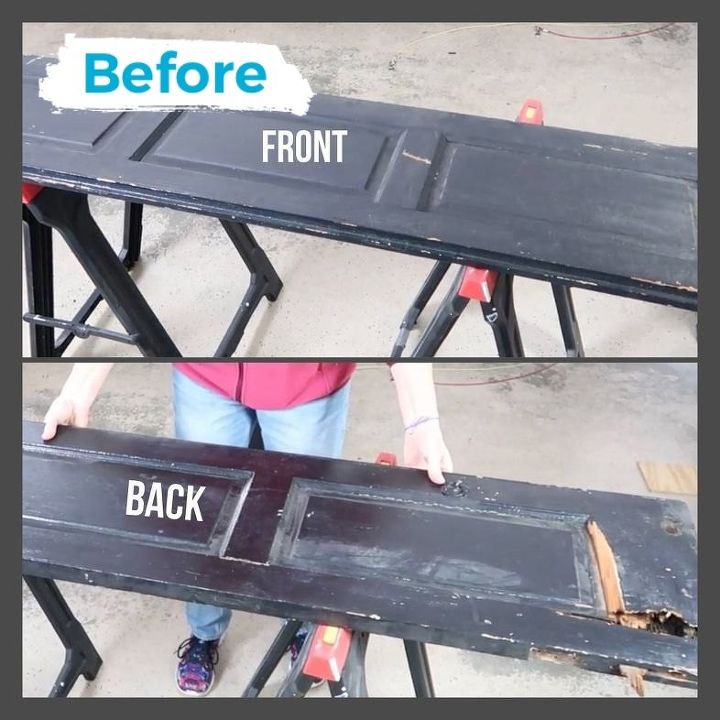
As you can see, the front of the shutter looks great; however, the back of the shutter is damaged. No worries though. No one will see the back.

The shutter was a little too narrow for my taste so I wanted to frame it out but along the side, was a rounded piece of wood that probably fit into the shutter on the other side of the window.
I sawed that rounded piece off so the edge would be flat.
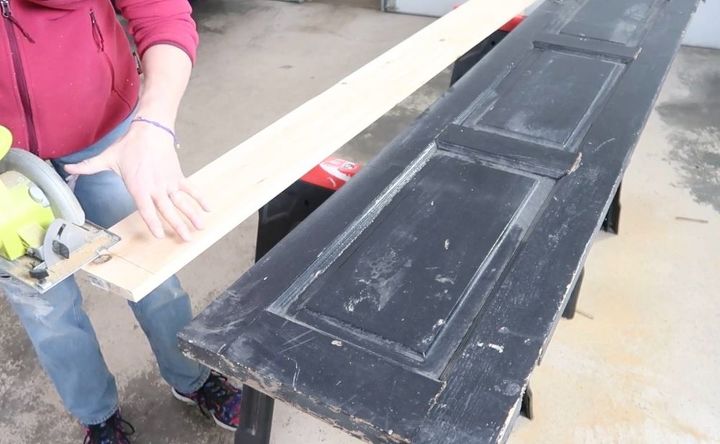
Using 1”x6” pine, I measured the length of the shutter and cut the boards to size.
I laid the shutter onto the floor facedown.
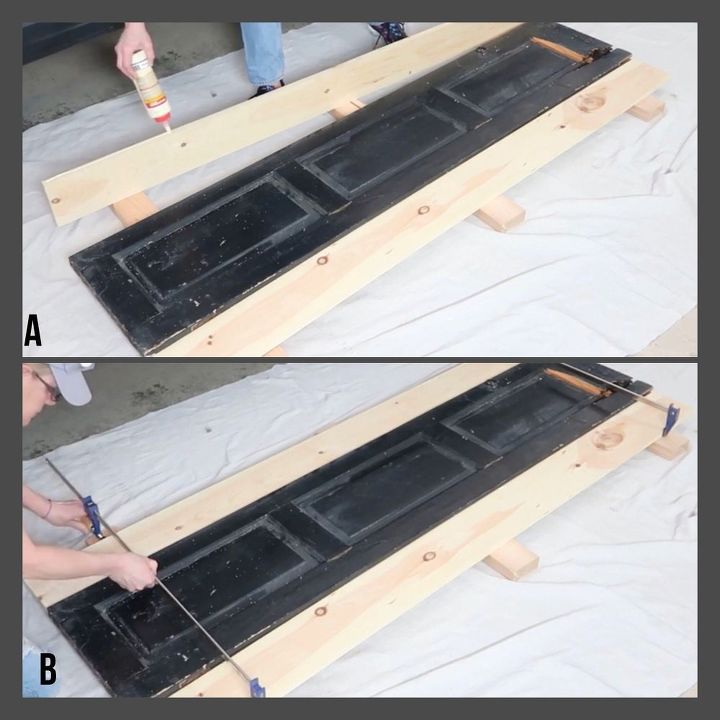
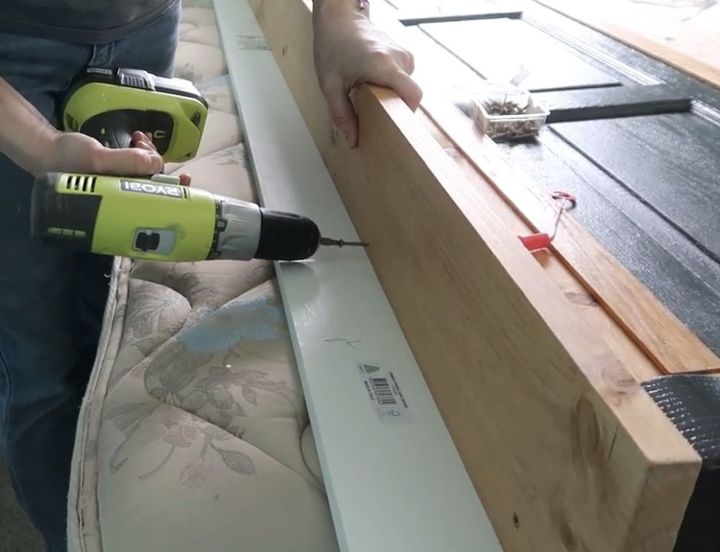
A-I applied wood glue to the edge of the pine
B-And clamped the pine to the shutter. I allowed it to dry 24 hours.
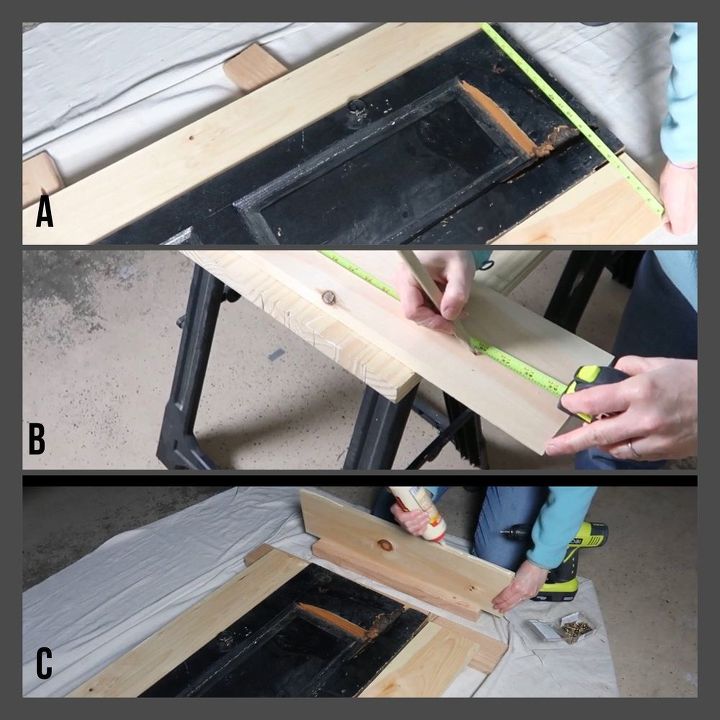
Using 1”x6” pine,
A-I measured the width of the shutter
B-Marked the pine board and cut to length
C-I added wood glue to the edge of the 1”x6”
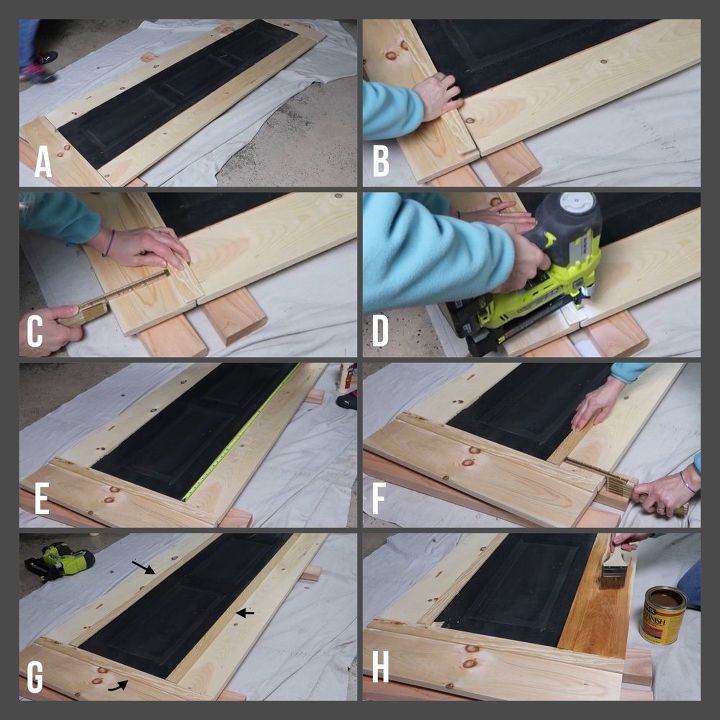
A-I flipped the shutter onto it’s front and
B-Using a 1/4” piece of moulding, I measured and cut to fit the width
C-I laid the moulding over the gap in the wood, measuring each end making sure it was even
D-then glued and nailed it into place. I did this to both ends
E-I measured the width of the shutter and cut the moulding to fit
F-I laid the moulding to cover the gap and measured to make sure it was even on both ends. I glued and nailed the moulding into place
G-I applied moulding to both sides
H-I sanded and then applied 3 coats of wood stain. I used Minwax Ipswitch Pine. When the stain was dried, I applied 2 coats of polyurethane
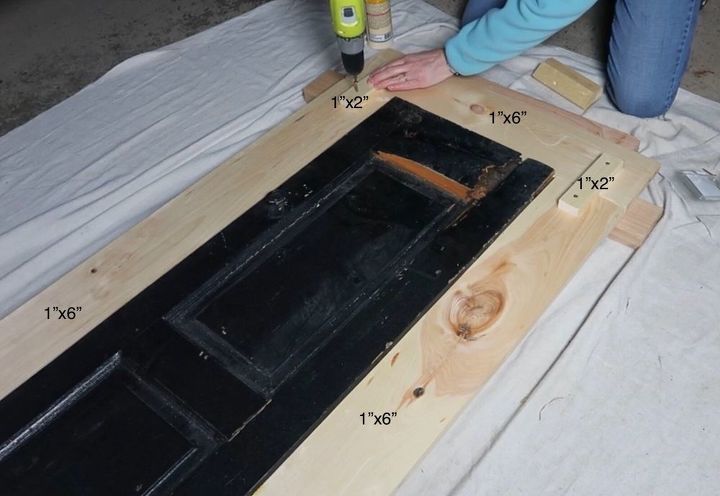
The smaller 1”x6” pine board didn’t sit flush to the shutter so I glued and screwed 1”x2” pine boards which attached everything together.
In retrospect, I should have cut the top and bottom of the edges to make them flush.
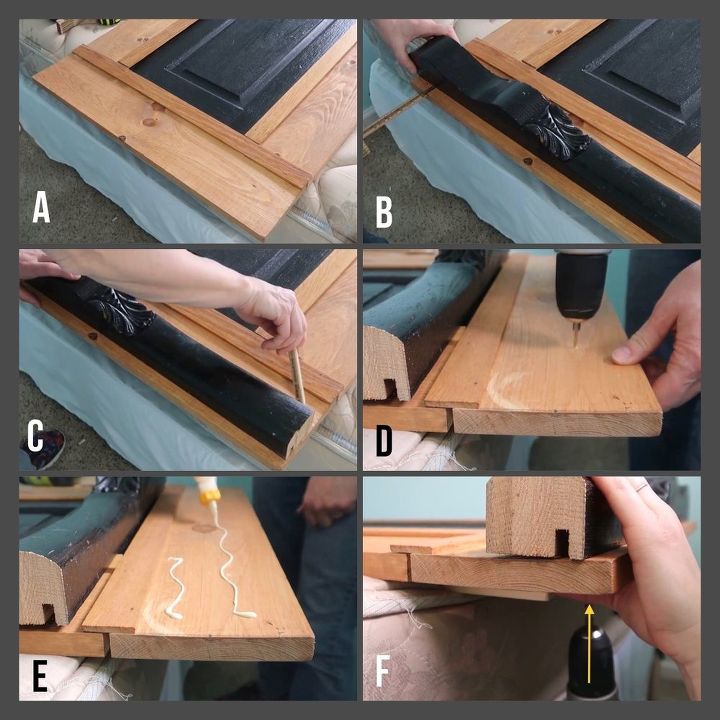
At the same antique store, I found black corbels which I cut to fit the width of the headboard.
A-On the side piece of pine
B-I laid the corbel in the middle of the pine
C-and drew a line where I wanted to place the corbel
D-I predrilled holes in the pine
E-Applied wood glue
F-And screwed the corbel onto the headboard from the back
And because I couldn’t stop there :), I added a piece of 1”x6” board to the top of the headboard which I glued and screwed in place. This board rested on top of the corbels.
With all of that wood, this headboard was heavy so I decided to hang it on the wall instead of attaching it to the bedframe.
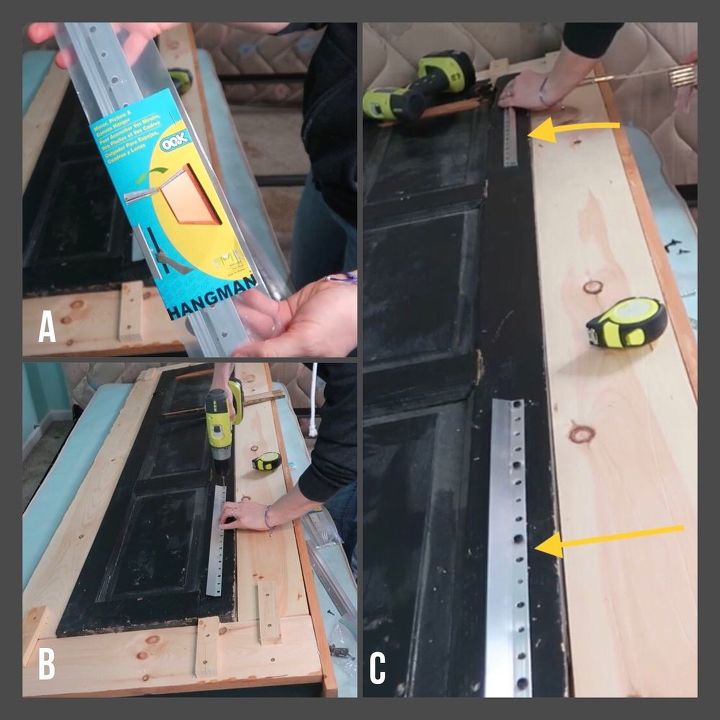
A-I used 2 French cleats.
B-I measured and screwed them to the back of the headboard
C-I placed one on either end.
Using those measurements, I marked the wall accordingly.
I then installed the other part of the cleat to the wall.
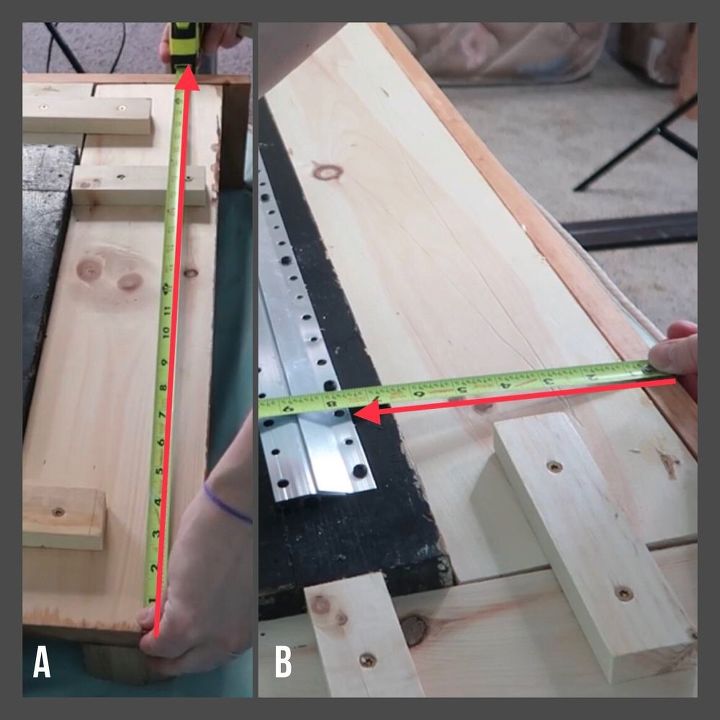
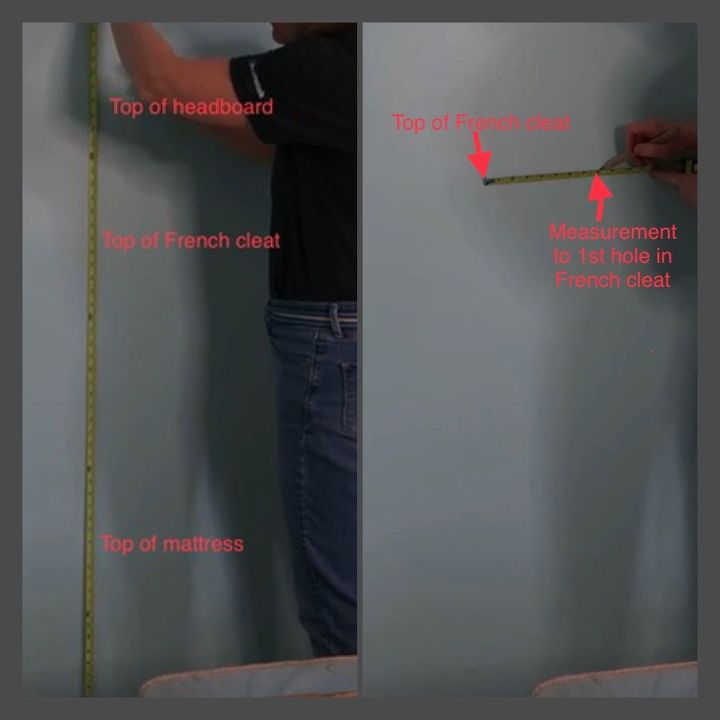
To find the correct height to hang the headboard,
A-I measured the width of the entire headboard
B-Then measured from the top of the headboard to the bottom of the cleat.
I also measured from the floor to the top of the mattress.
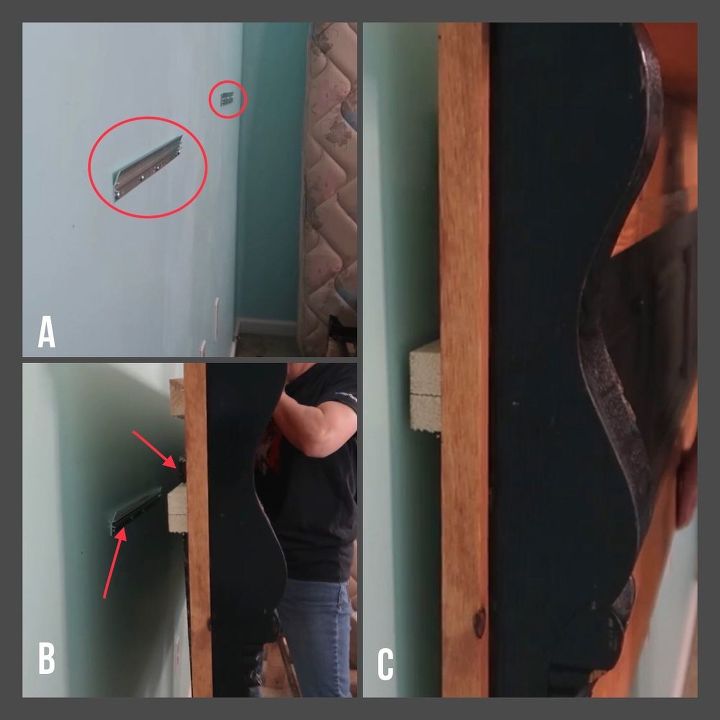
A-Both cleats are attached to the wall
B-You can see the cleat on the wall and where it is on the back of the headboard
C-The headboard mounted onto the wall.
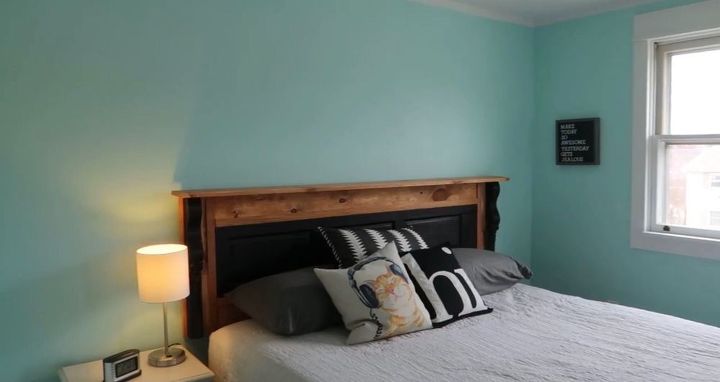
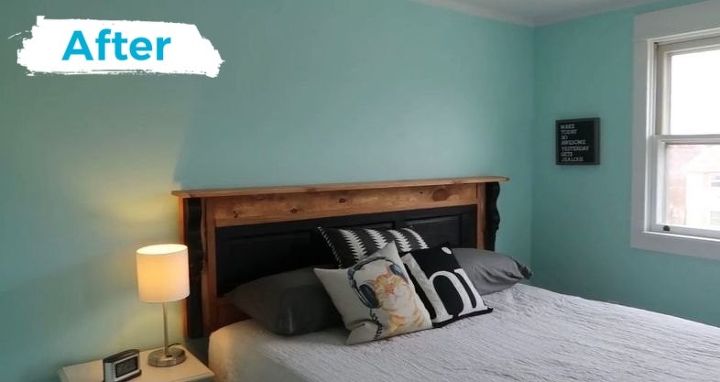
The headboard turned out great! I was worried about it’s weight but being attached to the wall gives me a sense of ease that it won’t fall off.
I spent an entire week remaking my nephew’s room. If you’d like to see the before and after pictures, please click on my profile.
Resources for this project:


Comments
Join the conversation
-
Extremely cool! Great looking piece.
-
Wow this is beautiful


Frequently asked questions
Have a question about this project?
Yes I want to use hollow interior doors like this. With a space to put tablet or phone. Any suggestions?
I just want to know what a corbel is?