


How to Stencil a Mermaid Fish Scales Wall

Make a splash and dive head first into the decorating trend we can’t get enough of: mermaids! Scales, iridescent colors, and a touch of sparkle transform a room from underwhelming to underwater! However, you don’t need to shell out a lot of cash to get the room makeover you’ve always dreamed of. You can easily create your own custom mermaid paradise by painting a feature wall with a fish scale stencil design and enchanting metallic colors. Stenciling a wall is more affordable than wallpaper, plus you get to choose how glam or subtle you want by using different paint colors! Watch the video tutorial below to see how you can stencil your own mermaid fish scales wall…
Moroccan Scallops Wall Stencil & Metallic Royal Stencil Cremes from Royal Design Studio Stencils website. www.royaldesignstudio.com
Supplies:
Moroccan Scallops Wall Stencil, metallic stencil creme paints, and stencil brushes from Royal Design Studio Stencils www.royaldesignstudio.com
Behr Ultra Interior Flat Paint in Tsunami
Foam roller with tray, angled paint brush, level, paper towels, and painter’s tape
Step 1: Use painter’s tape to mask off the ceiling line, baseboard, and adjacent walls. Paint 2 coats of the base color of the wall with Behr paint and a foam roller. Use an angled brush to paint along the edges of the wall. Allow to dry between coats.
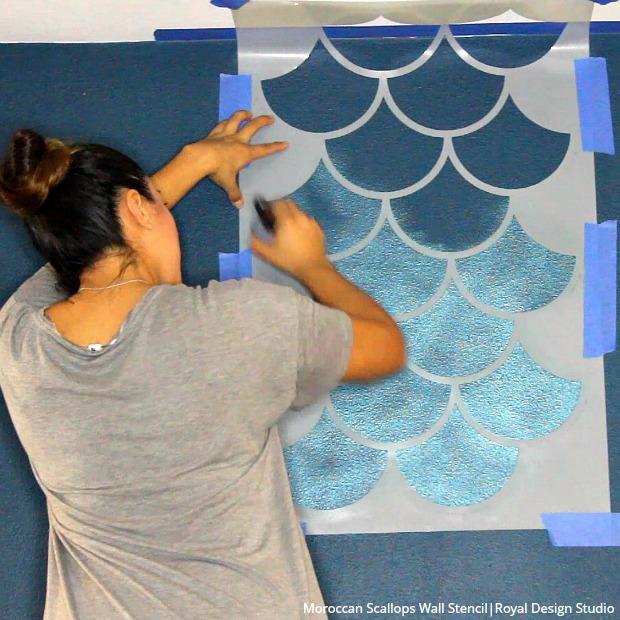
Step 2: The Moroccan Scallops Wall Stencil comes with a free ceiling filler element and is designed for the scallops to face up, however, for this project, flip the wall stencil so the scallops face down. Now the stencil design will look like fish scales. Since we will not be using the ceiling filler that faces up, make sure to place the wall stencil so that it overlaps with the ceiling. Use a level to make sure it is straight and then secure it with painter’s tape.
Step 3: Load a 3” stencil brush with Metallic Teal Royal Stencil Creme and offload any excess paint onto a paper towel. Stencil the entire design. When you are stenciling the ceiling line, release the taped stencil from the ceiling and use your fingers to push the stencil into the corner. Use your other hand to stencil into the ceiling line.
Step 4: Load and offload a 2” stencil brush with Patina Green Royal Stencil Creme. Stencil along the bottom half of each scallop design to add some depth.
Step 5: Load and offload a 2” stencil brush with Bright Gold Royal Stencil Creme. Stencil along the top half of each scallop design to add some highlights. This will make it look like the fish scales are stacked on top of each other.
Step 6: Repeat Step 3 to blend all the paint colors. Remove the wall stencil from your first repeat.
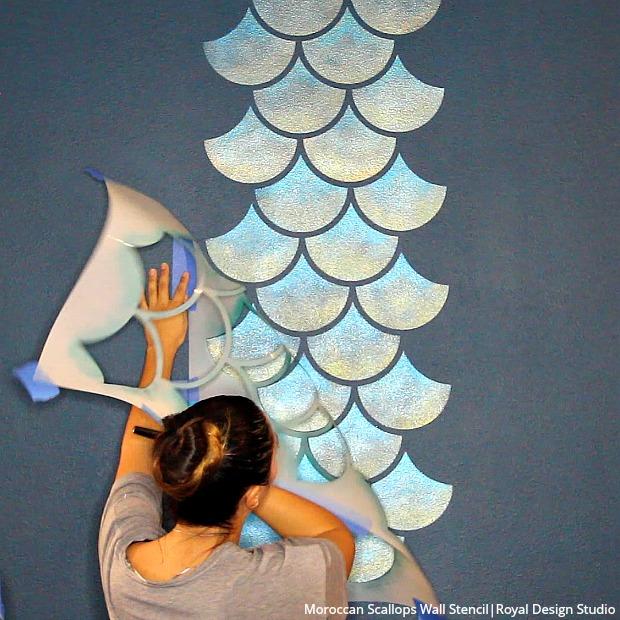
Step 7: Reposition the wall stencil underneath the first repeat. Use the registration marks built into the stencil to perfectly align the design.
Step 8: Repeat Steps 2 through 7 until your entire feature wall is stenciled.
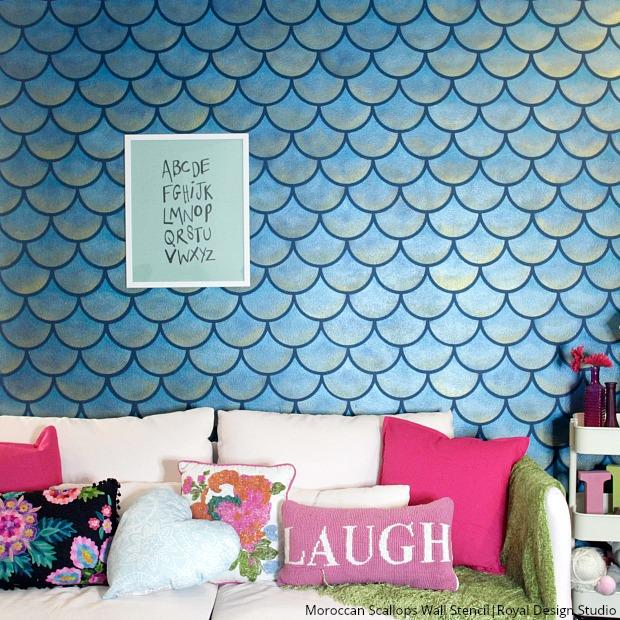
This stenciled wall was mer-made to be seen! Your friends and family won’t believe that it isn’t wallpaper – you can tell them you mer-made it yourself!


Frequently asked questions
Have a question about this project?