


How to Create Beautiful Pressed Flower Wall Art for Under $10

The rustic and elegant pieces available at Pottery Barn have always been a huge inspiration for me when it comes to home decor. However, I am rarely willing to pay the top-dollar prices that they sometimes charge. One such piece which really caught my eye was their pressed flower frame wall hanging, which looks perfect in any country-style home or apartment. Instead of forking out hundreds of dollars, I decided to create my own version of this piece, using mostly items from the Dollar Tree. With a little bit of elbow grease, I was able to create a stunning and on-trend piece of pressed flower art for my living room for less than $10. If you're wondering how you can create something similar for your home, read on to find out exactly how I did it.
Feeling inspired?
Tools & Materials
When creating this pressed flower frame, I mostly used materials that I already had lying around the house. Anything on this list that you don't have to hand can easily be picked up at your closest craft store or Dollar Tree. Here is everything you will need to create this look:
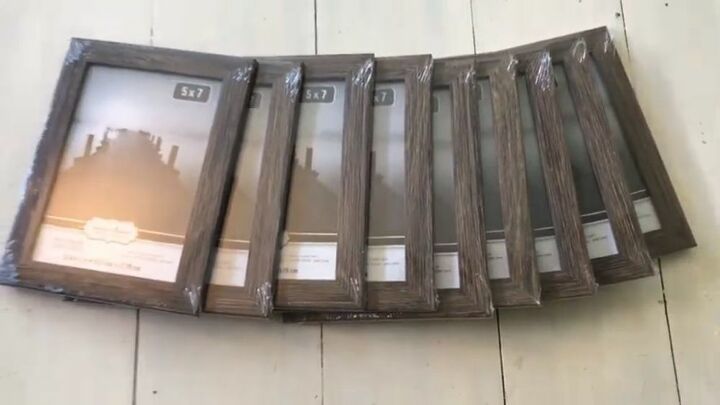
- Nine 5x7 picture frame - I bought all nine for only a couple of dollars at the Dollar Tree.
- A large roll of brown craft paper
- A tube of E6000 adhesive
- Hot glue gun
- White chalk paint
- Popsicle sticks
- Flowers
- Scissors
- A microwave
Step 1: Gather Your Materials
Before creating your pressed flower art, the first thing you will want to do is to gather all of your materials in one place. I found that this project took up quite a lot of space, so I'd recommend choosing a room with plenty of free floor space and as little furniture as possible. You will be working with hot glue and adhesive, so I'd recommend placing a layer of plastic or cardboard down before you get to work, as the last thing you want is to get glue on your living room floor. If you're squeamish about using hot glue, you can also wear gloves for this project.
Step 2: Remove the Stand from the Frames
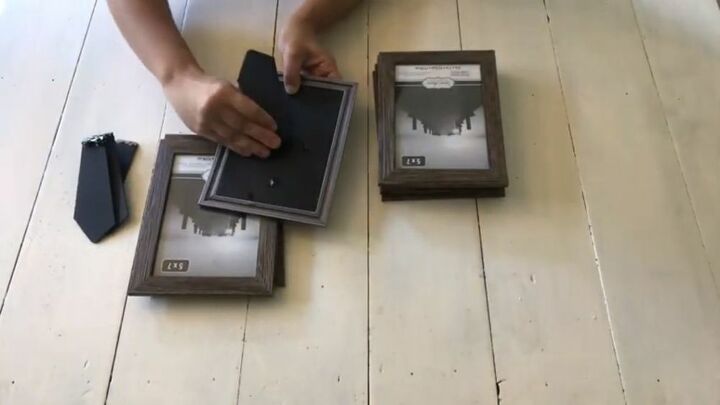
With all of my photo frames in one spot, the first thing I had to do was prepare them for the pressed flowers. I started by removing the stands from all of the photo frames so that they would hand flat against the wall once the project was completed. If you're using cheap Dollar Tree frames, this shouldn't be challenging. All you need to do is give them a twist and they will detach from the back of the frame.
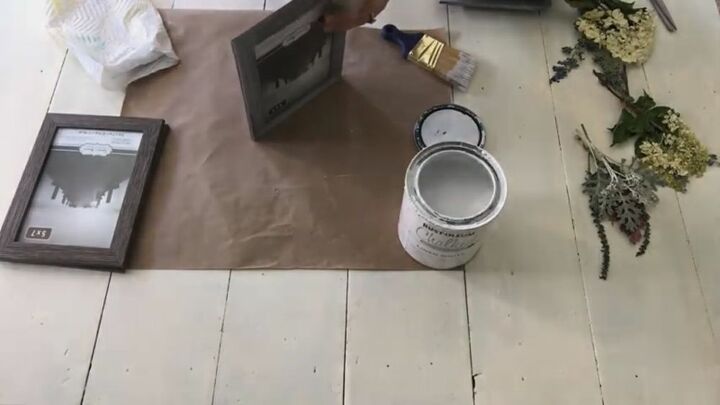
Step 3: Cut Brown Craft Paper to Size
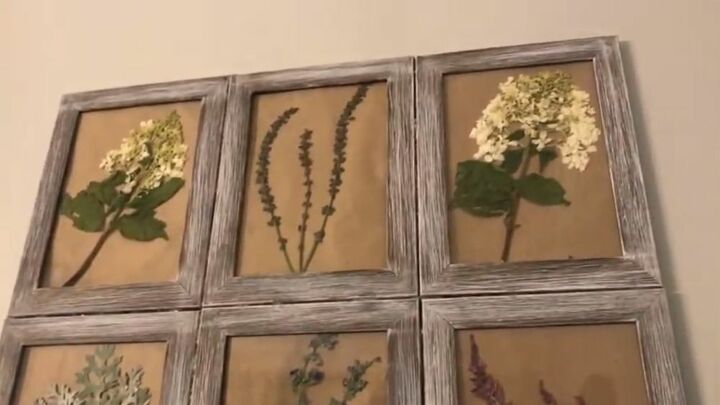
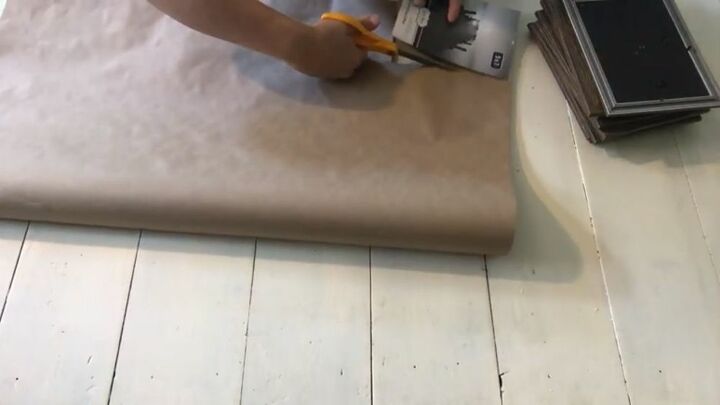
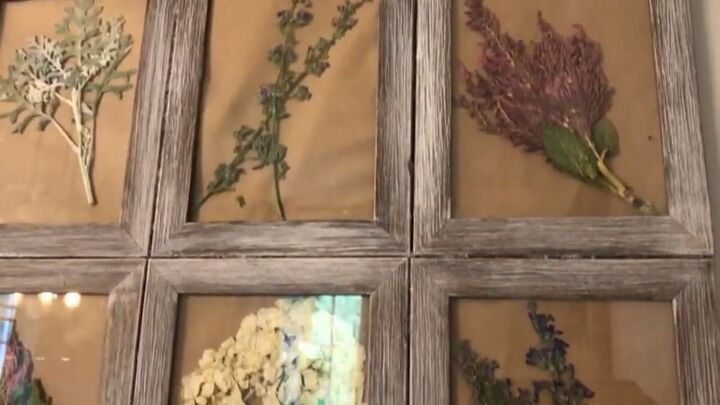
To give that rustic, colonial-style Pottery Barn effect, the main thing you'll need is some brown craft paper. This will serve as the backdrop for all of your pressed flowers, as well as serving the additional function of keeping the flowers from being squashed. Using the paper that came in the inside of my photo frames as a stencil, I cut nine equally sized squares of craft paper out of my roll. I then put these to one side and made sure to keep them safe and dry.
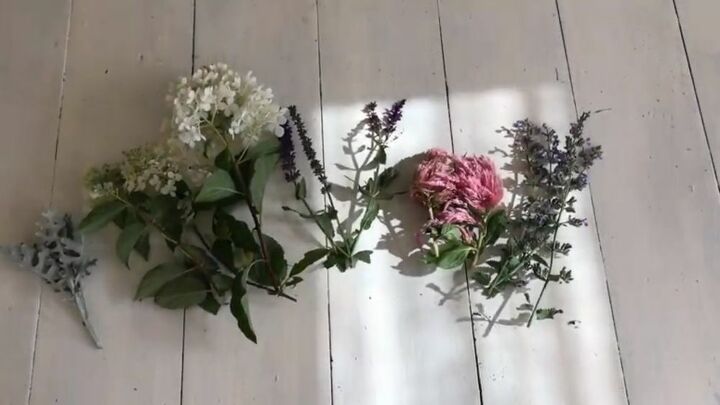
Step 4: Pick Your Flowers
This was definitely the most fun part for me! I'm blessed to have a large garden that is currently in full bloom, giving me plenty of options for my pressed flower frame art. I tried to mimic the Pottery Barn item as closely as possible, which meant picking out hydrangeas, ferns, and bluebells. If you don't have a garden of your own, you can pick up similar flowers at your local florist or grocery store for very little cost, or you can go foraging in your nearest forest or national park if doing so is legal in your state. Once you've picked out your flowers, give them a rinse and a trim so that they're ready to go.
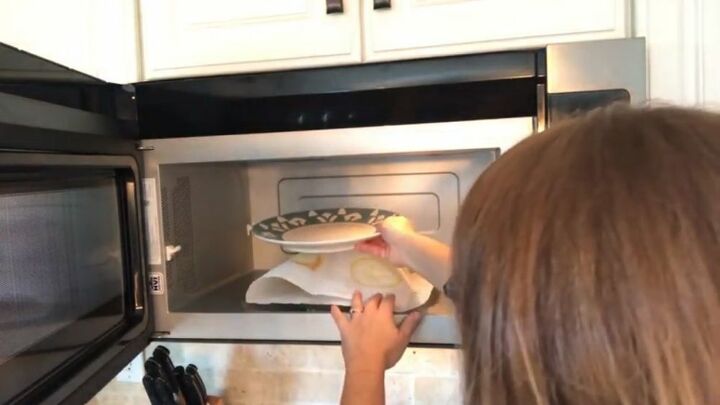
Step 5: Dry the Flowers
Next up, I realized I needed to dry my flowers out completely so that they would be suitable to place in the frames. Luckily, I learned a funky trick for drying out flowers in just a few seconds. Taking one flower at a time, I place it between two sheets of kitchen towel before putting it in the microwave. I then placed a heavy dinner plate on top of the kitchen towel to flatten the flower beneath. Once this was done, I gave each flower a blast in the microwave for 15 seconds, sometimes adding more time for those that still looked moist. Once the flowers look completely dry, you're good to go.
Step 6: Dry Brush the Frames
This one is more about personal taste for me and isn't a necessary step. Since I really wanted to emulate the Pottery Born aesthetic, I opted to dry brush all of my photo frames with a light coating of white chalk paint. If you choose to do this, remember to not lay the paint on too thick. You'll want it to dry quickly and look like a faded white, rather than a bright, glossy white.
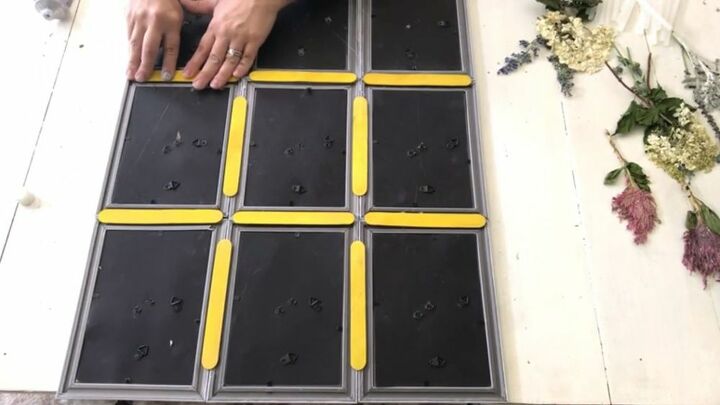
Step 7: Glue the Frames Together
Now it's time to bring the pressed flower frame assortment together. I found this a little bit tricky, but I also discovered a workaround to make the whole thing easier. I glued three frames together side-by-side until I had three rows of three frames. Then I glued those rows together to create a single 3x3 formation, just like the Pottery Barn piece. While I could have just used the E6000 adhesive to attach them, I found that using hot glue on top of the adhesive made the whole thing dry much more quickly, making it easier to stick together.
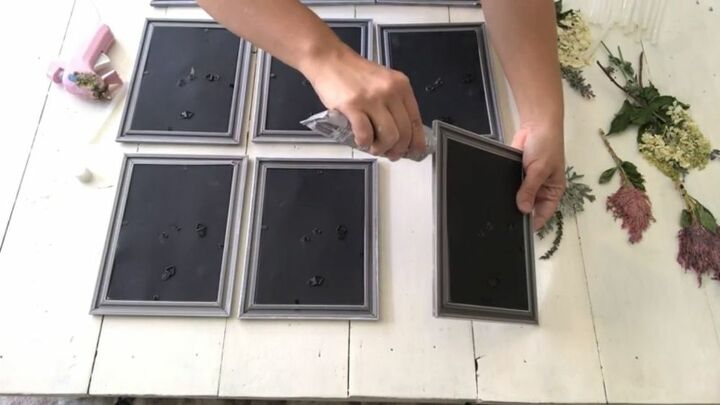
Step 8: Reinforce the Frame
You'll want your frame to stay together and hang as one sturdy piece, so you'll need some reinforcements. For me, I found that some popsicle sticks (not used) were more than sufficient to hold the whole thing together. As you can see, I used a total of 10 popsicle sticks on the back of the frames, hot gluing them to the gaps in between to make the whole thing a lot stronger. Once they have dried, you're all ready to start adding your flowers.
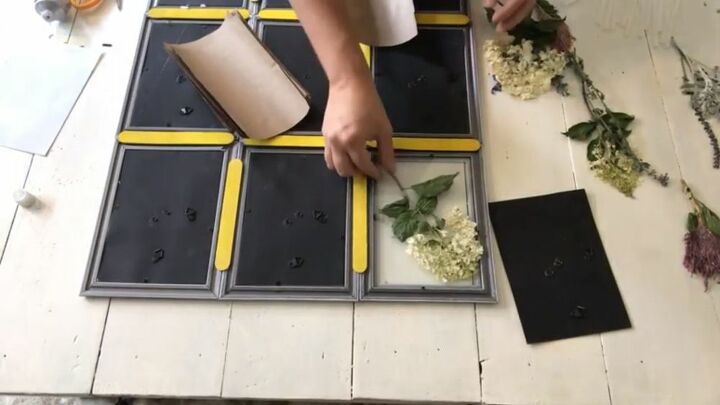
Step 9: Insert Flowers and Craft Paper into Frames
Now it's finally time to place your pressed flowers into the frames. Remove the backs of the frames and place your flower directly onto the glass. I found that I had to trim most of my flowers down to size so that they would fit into the frame, but this isn't a problem. Once you have aligned your flower exactly how you want it to appear, take your craft paper sheets from earlier and place it on top of the flower. Once you have resealed the photo frame, repeat the process until all nine of your frames are filled with pressed flowers.
Step 10: Hang and Enjoy
Now all that is needed is to hang your beautiful pressed flower art! This timeless look cost less than $10 for me to put together, compared to the $400 they charge at Pottery Barn for the same item. In addition, the fact that I created it myself with flowers picked from my own garden makes the piece so much more personal and meaningful.
If you liked this tutorial, make sure to recommend it to a friend, or share this article on social media!
Resources for this project:
See all materials


Comments
Join the conversation
-
I think I'll use foamboard for the backing. Also, will paint it a different color. It will be just a bit further back from the glass if I can make the foamboard a little larger and just glue around the outside back of the frame. I have no idea if it would work, but it's worth a shot!!
-
I intend to glue the glass back in the frames, lay out the flowers on a large piece of foam board, place the frames (after they are glued together) over the top. That way the back board will hold all the frames in place, so no need for the popsicle sticks.


Frequently asked questions
Have a question about this project?
Could we see a picture of the whole thing?
Do you have to use the brown paper?
Loved your project. I am definitely going to make this; however, I think that I will use cardboard as the backing instead of craft paper.
I do have a question though, what were the total seconds of drying out in the microwave did it take you?