


Painted Doormat DIY
8 Materials
$15
2 Hours
Easy
Recently, a blogger friend made a doormat that said 'cute shoes' and I thought it was adorable! But I knew I couldn’t pull that one off with 4 boys in the household and me being the only girl, so I resorted to creating one of my own that says oh hello and I absolutely adore the way it turned out.
You are going to be so surprised at how easy this is and how much charm it adds to your doorstep!
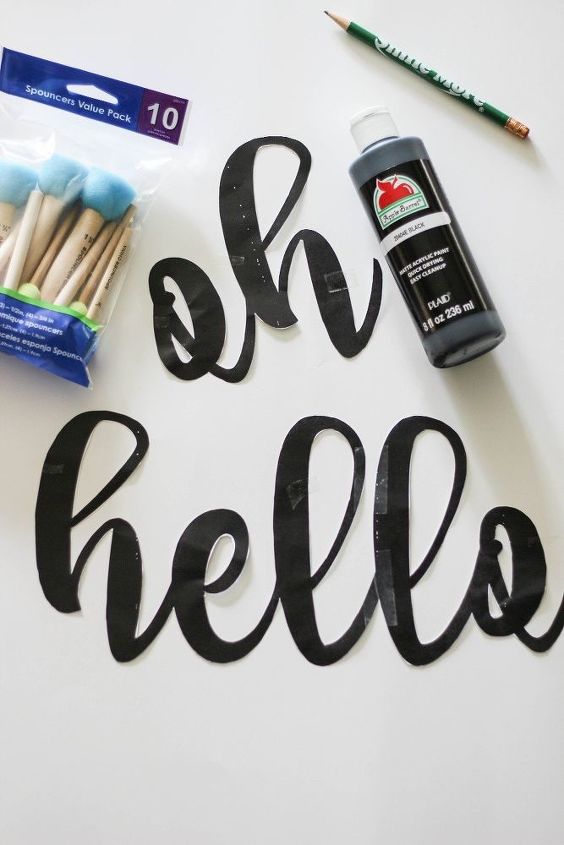
The first thing you are going to do is print out the Oh Hello Template. Then tape hello together between the two L’s and cut out your words. Once you have your words cut out, use small pieces of tape and tape them to the poster board in a few areas.

Next you are going to use a pencil and trace around the edges of the words, then remove the words from the poster board. Using an xacto knife, cut around the edges of the words to create a stencil. I placed a piece of cardboard under my poster board so that the knife wouldn’t score my countertops.
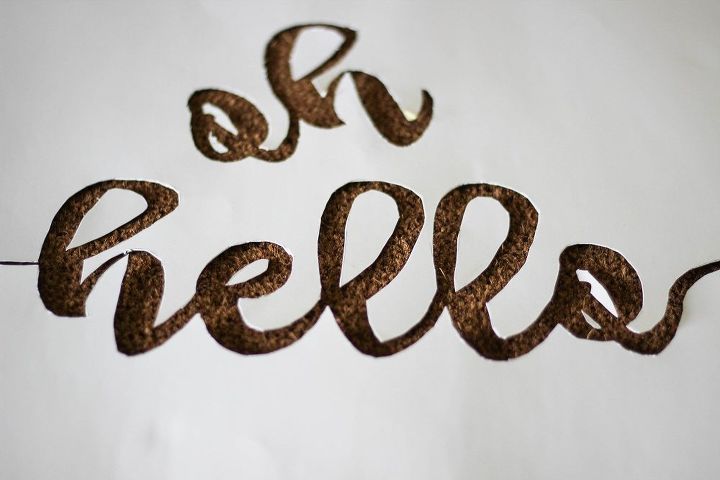
Once you have your stencil cut out, place it on top of your doormat on the area that you want your words to appear. I tried to center mine the best I could.
Dip your spouncer brush in your acrylic paint (I squirted some paint on a paper plate) and pat it on in an up and down motion to cover the area in your stencil. Continue this process until you’ve covered all of the areas in your stencil. Tip: make sure you hold the stencil firmly in place. I let it go a few times and it moved on me.
Remove your stencil and touch up any needed areas with a small paintbrush. I also extended the ends of my h and o I little with the paint brush to make it look a little more whimsical.
DONE!
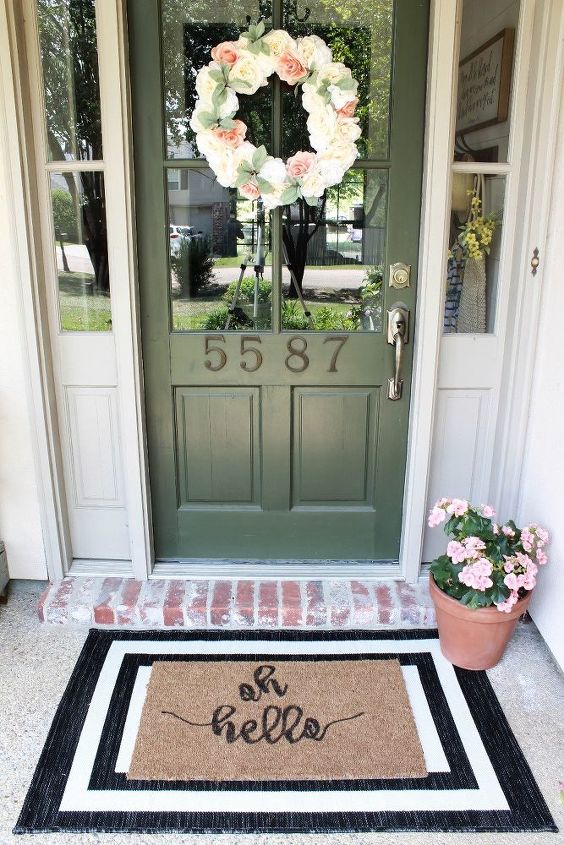
How easy peasy was that!? And look how adorable it turned out!
I layered mine on top of a black + white striped rug to give it a little extra dimension.
This is a great way to add a little fun to your doorstep and welcome your friends and family. And the fun part is that you can pretty much create whatever you want your mat to say. I created my words for the template in PicMonkey. PicMonkey is so ease to use and there are so many different things you can create using it. I use it all the time to create all sorts of prints.
Resources for this project:
See all materials


Any price and availability information displayed on [relevant Amazon Site(s), as applicable] at the time of purchase will apply to the purchase of this product.
Hometalk may collect a small share of sales from the links on this page.More info

Want more details about this and other DIY projects? Check out my blog post!


Frequently asked questions
Have a question about this project?