


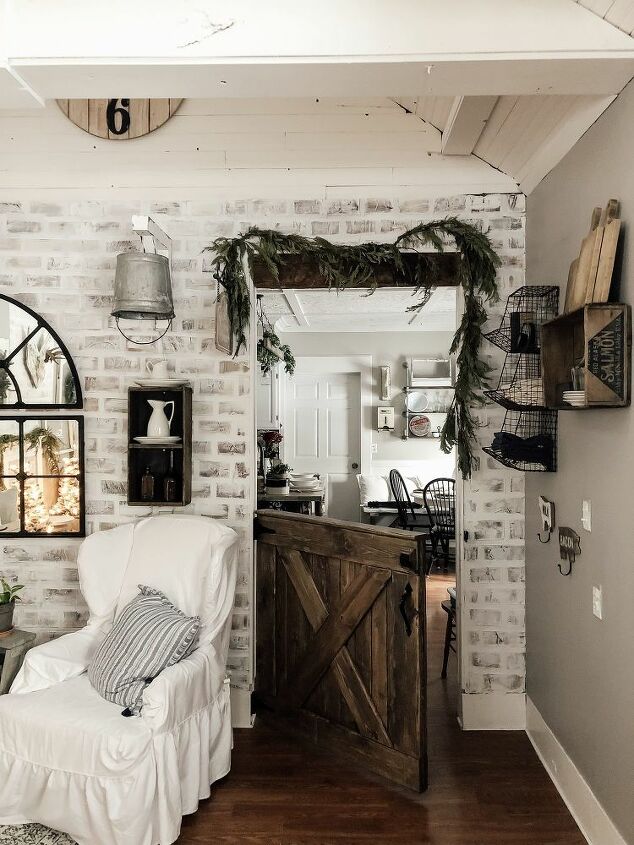
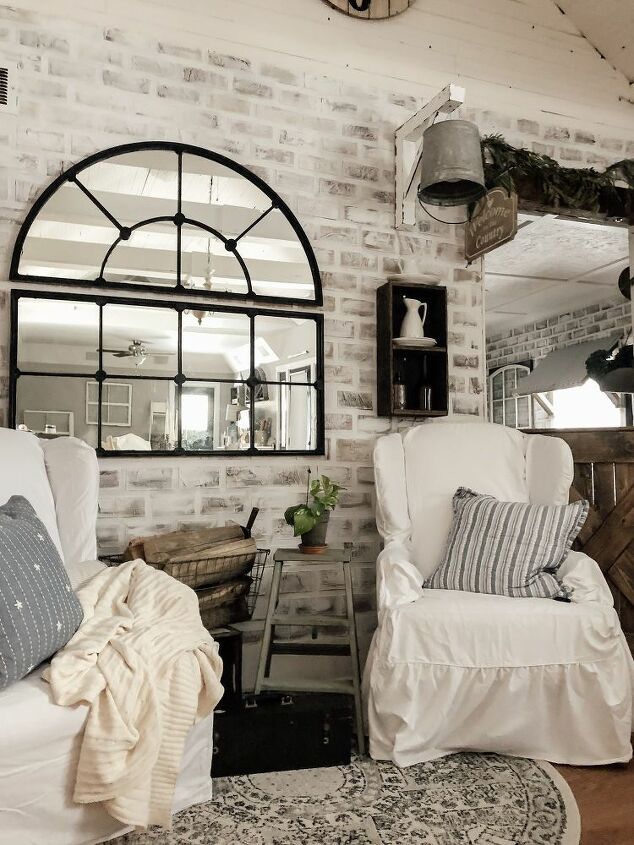
Faux Brick Accent Wall
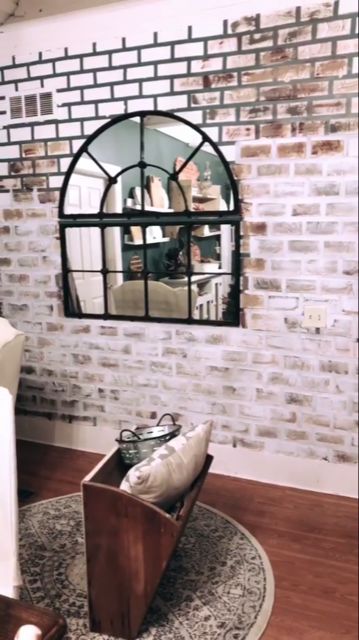
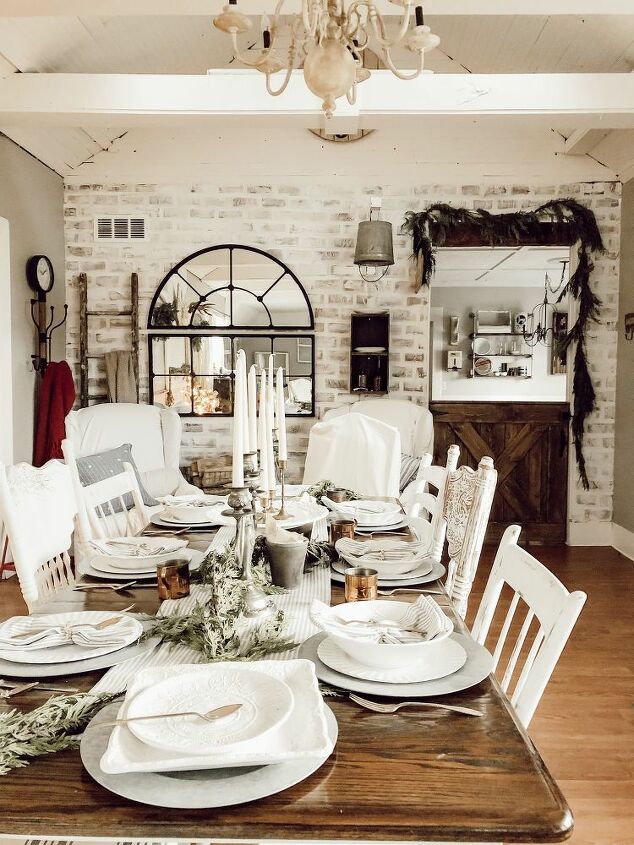
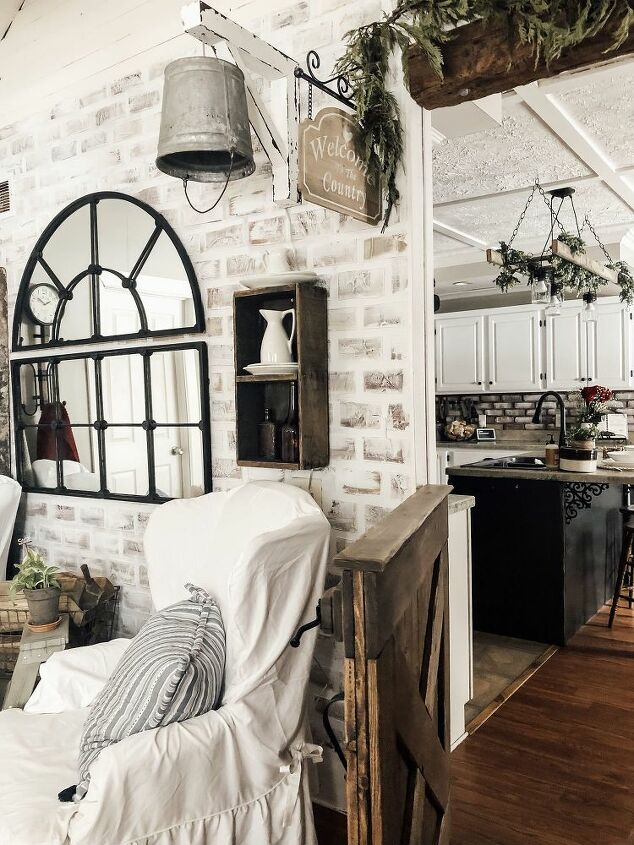
We finally found some time to work on dining room and decided to add a faux brick accent wall to this room. It's a long and skinny room conjoined to our living area and needed something to help break it up. I decided to create a budget friendly faux brick wall and we love how it turned out!
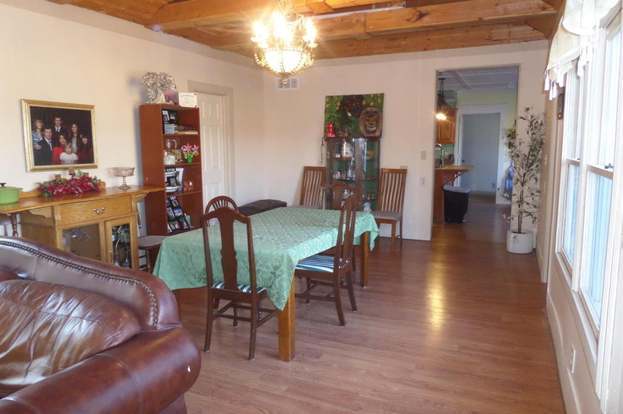
Let's take it back to the listing photo and where this room began. The far wall is the wall we'll be bricking!
Materials:Large Container of Joint CompoundSpackle KnifeMasking TapeGlovesAcrylic PaintWhite Paint (Latex or Chalk)
Step One: Taping
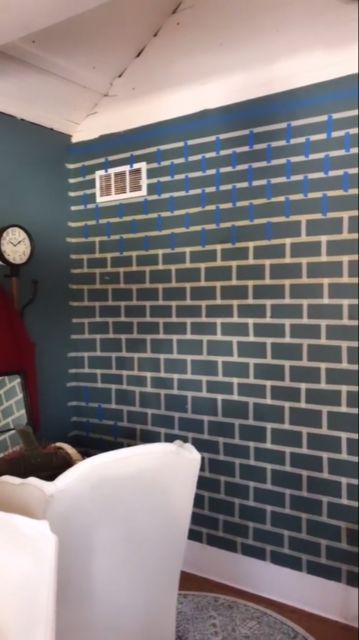
The first step is using your masking tape to tape off your bricks. I measured how tall I wanted my bricks to be, and used a level to draw a horizontal line. I then taped all of my horizontal lines first. Then I randomly placed my vertical strips to create my bricks. Bricks create a pattern so once you have row done, it’s easy to guess where the rest should go.
Step Two: Joint Compound
Next, you are going to smear your joint compound using your spackle knife all over your wall. You don’t need to get it smooth, as bricks have texture and that’s the look we’re going for here.
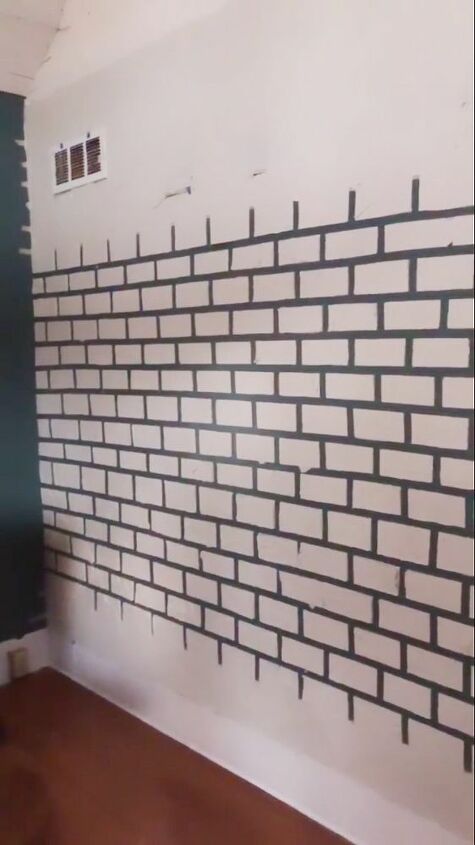
Step Three: Tape Removal
After you’ve spread your joint compound on, remove your tape. This can get messy so wear gloves and keep a trash bag nearby. You want to be sure to do this while the joint compound is still wet or it’s going to be hard to remove the tape.
You can see at the very top of the wall that I haven't removed the tape just yet.
Step Four: PaintingOnce your joint compound has dried, you can start painting. I use acrylic paints because they’re cheap and can cover a lot of surface area. I just stipple my brush in a few different colors, and wipe it onto the bricks. You can get messy with this, because we’re going to paint in the grout lines later. The colors I used were dark brown, brown, a mix of creams, and off white.I then whitewashed my brick by dipping my brush into white paint and lightly brushing over the bricks.
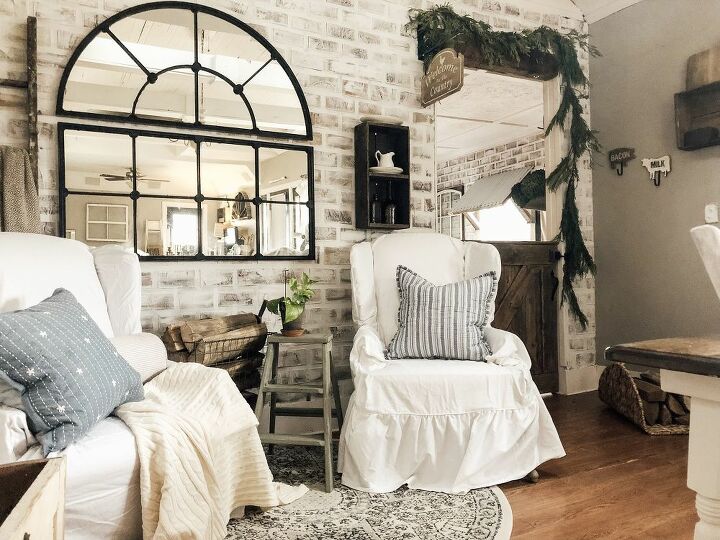
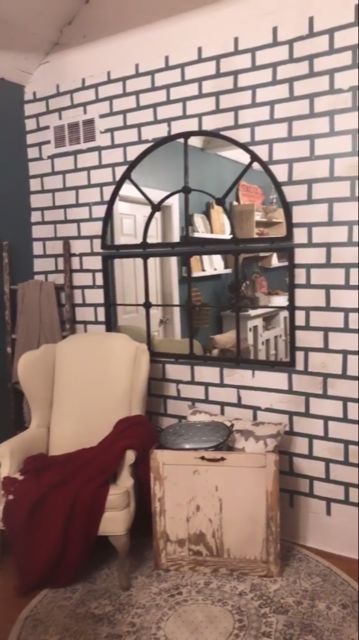
And for the final result!
The faux brick added so much depth and texture to this room and for a project that cost less than $30, I'd say it was well worth it!
You can head to my blog here to see more photos: https://www.haydenscharrer.com/faux-brick-accent-wall/

Comments
Join the conversation
-
That is just gorgeous! What color is the gray paint you used on the other walls?
-
So pretty love the dutch door too!


Frequently asked questions
Have a question about this project?
I’m starting my faux brick wall project this weekend and couldn’t be more excited....the only thing that concerns me is that since my wall is somewhat like yours with openings, not a wall connected to two other walls, how does it look an the ends?
Could you ad a dye to the joint compound mix to tint the compound and not have to paint? I would like light gray brick and white grout.
looks awesome! So I"m here to check out doing this for a very large wall at my little church that has no money to buy brick facade . and I don't want the wallpaper stuff since it has no texture/dimension. Do you happen to have an idea on how to calculate time and material per sq footage? TIA.