Upcycle a Stone Coaster With a Decoupaged Napkin

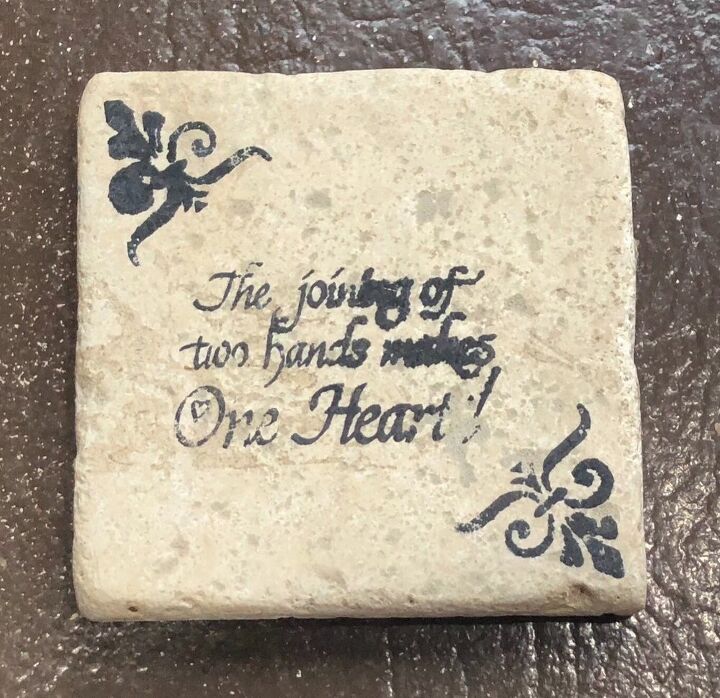
I ran across a set of four stone coasters in a thrift store one day. Someone had tried to stencil and had a fail with bleed through. Their loss was my gain so I bought them with the idea I could do something with them some day.
Today is that day. We are going to deliver this beautiful bistro set to its new owner this weekend (hopefully the snow stops soon), but we wrapped and loaded it before the snow started in case we can’t go until Sunday.
This is a repeat client and I wanted to have a little gift for her. As I am such a hoarder….I mean a person who is always prepared …… with supplies, I just happened to also have a package of napkins I purchased in a shop somewhere that I knew would look great with the color of paint I used, Missouri Limestone Paint Company Chalk-style paint “Clothesline”, one of my favorite colors.
Here are the steps I took to create two coasters for her that will look great on the stained table top. Sorry, I forgot to take pics of this part.
1. I cleaned the coasters thoroughly.
2. I painted the tops and sides (to cover the black stencil) white “January” color. The white paint will really help the print stand out.
3. While the paint dried, I cut out the flower area a little bigger than the coaster. I peeled off the two whole layers of the napkin so that I was left with only the printed part.
4. For the decoupage medium, I did not use Modpodge. I used Varathane water-based Polyurethane. I find it works great for decoupage. I applied a layer over the white paint and while still wet I applied the napkin. I used a sponge dipped in the poly to press the napkin into the stone, making sure I had no bubbles.
5. Once dry, I used 220 sandpaper to sand the edges.
6. I then used 2 coats of Rustoleum spray lacquer on the tops and sides to seal the napkin. Using lacquer will not reactivate the poly, so no bubbles formed.
The coasters look beautiful! I think my client will be very happy with her gift.
Discover more about my work and ideas I collect at https://linktr.ee/sharsumpaint
Enjoyed the project?
Resources for this project:
See all materialsComments
Join the conversation
-
 Vicky Kallivrousis
on Mar 19, 2019
I absolutely love this. Great job!!
-
 Sharon Strothcamp Sumner
on Mar 19, 2019
Awww....thank you so much!
-
-
-
 Joan Saller
on Apr 05, 2019
Love these and going to make them....think I’ll use small tiles and apply some non scratch circles to the backs. Sorry don’t know what the proper name is. I use them for anything that can scratch my tables. Can’t wait!
-








Frequently asked questions
Have a question about this project?
These are very pretty coasters. Would mod podge still work just as good? I think I may be allergic to the polyeruthene.
What waterproofs the coasters? They are really nice! Going to try this.
Ok you painted over the previous design. Why not lightly sand? Coaster appears to be white anyway. After painting with the chalk paint and the poly it doesn't stop the absorbancy of the coaster? Love the idea. Planning on trying. We have stores called Tuesday Morning, Ross, and a few more that you can find beautiful napkins to pick from.