


Secret Pop Of Color With Painted Interiors of Kitchen Cabinets
Painted Kitchen Cabinet Interiors
Looking to add a pop of color to your kitchen? Our recent kitchen DIY inspired me to add a peak a boo hint of color on the inside of my kitchen cabinets. This unexpected pop of color added a fun coastal feel to the space.
Coastal Kitchen DIY
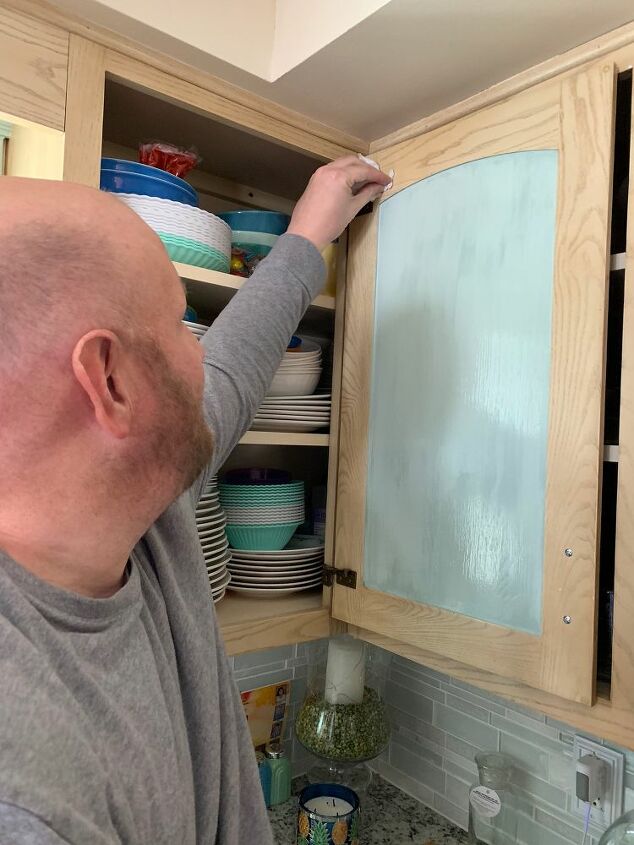
Alright, I have to admit, Jon looked at me like I was crazy when I told him I wanted to paint the inside of our kitchen cabinets. We recently added a bright pop to the windowsill in our kitchen and the extra paint inspired this quick little DIY.
This fun pop of color adds hidden coastal vibes to the space, which I love. However, this project would also work great with chalkboard paint, or dry erase paint. It would allow you to make a grocery list or calendar on the inside of your cabinetry that could be wiped clean when need be.
So, lets get started! Here our some tips and tricks we have learned form using the product, in addition to basic instructions.
Valspar Cabinet Enamel Paint
I think it should be noted that the paint we used gets ok reviews online. The majority of the complaints seemed to center around the fact that the paint (may) require a lot of coats to cover, or that there is noticeable brush strokes. When working on a project like this; its super important to have realistic expectations. Regardless of how "great" a product may be, it can not work miracles. My main suggestion is to take your time, allow drying time in between coats, and be patient with the paint.
Tips and Suggestions For Cabinet Enamel Paint
- Wipe down the surface you want to paint and allow time to dry.
- Use a piece of sand paper to sand any existinghigh spots.
- Allow time to dry in between coats.
- Work quickly and consistently with the paint. We noticed the paint started to dry quickly in the brush. So it was important to keep the project going so the brush didn't get clogged up
- If you are painting over an existing semi-gloss or glossed surface, realize that the paint will behave differently then paint on an unfinished surface.
- Our project required two coats, darker finishes may require additional coats.
Project Instructions
Here are the basic instructions we used to accomplish this fun DIY. We removed cabinet doors individually. However, you could remove all the cabinetry doors and paint them together. It was way to cold to try to accomplish this project outdoors. So, we were forced to work slowly, one door at a time.
- Remove door from cabinet at the hinge (also remove hardware if need be)
- Tap off edges
- Paint quickly, allowing for some dry time in between coats.
- Let cabinet door dry to the touch
- Reinstall door to cabinet
Still here?! We should connect! Find me on Pinterest by searching The Little Lake Cottage in the search bar. Or join our email list!!! Stay up to date on the latest and greatest from The Little Lake Cottage. If you are interested, please click on this link here, and sign up today! Cheers! Lauren

Finished Project
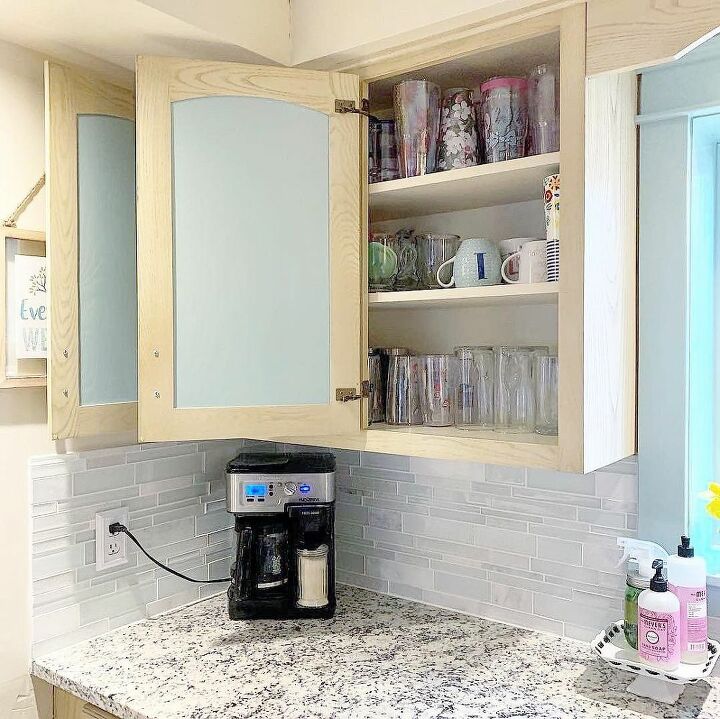
Finished Project
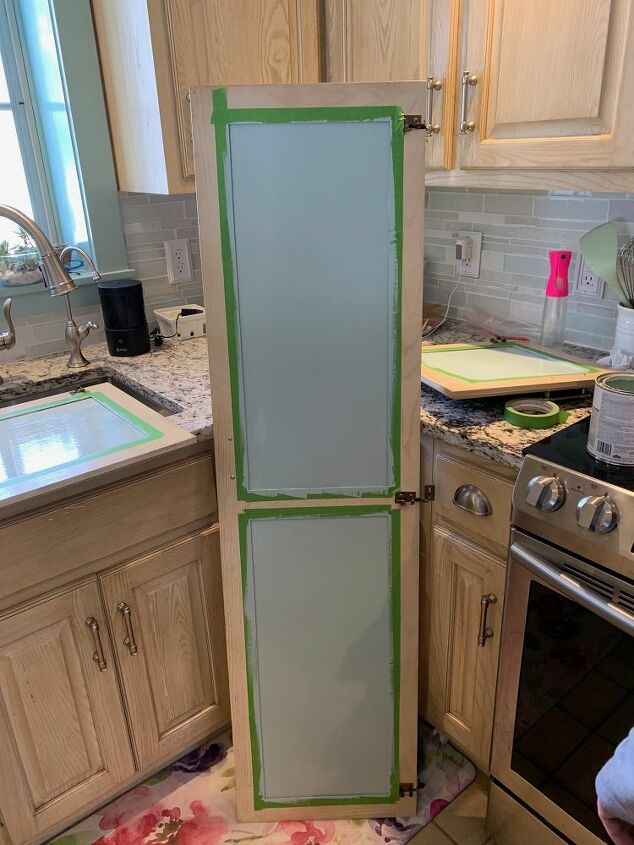
Drying pantry door
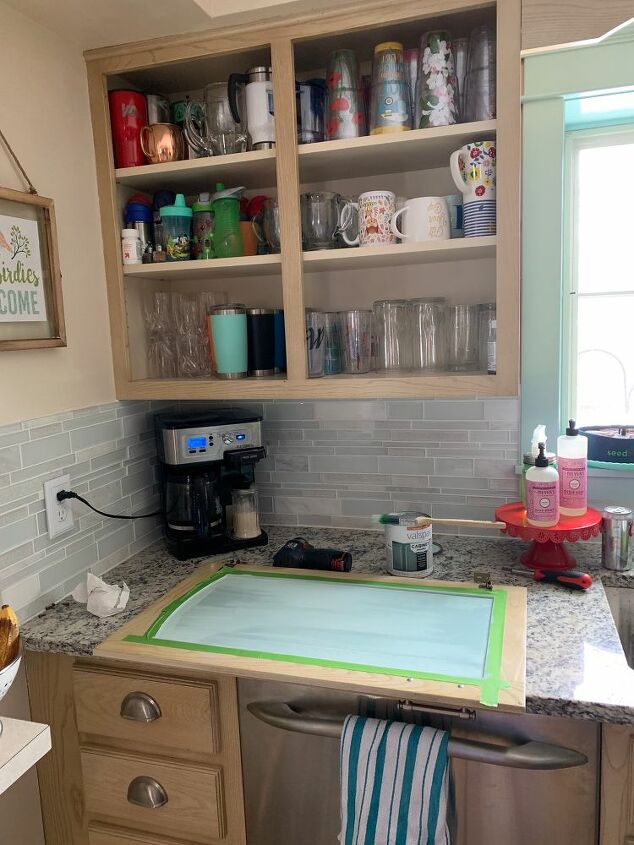
taped door, painted and drying
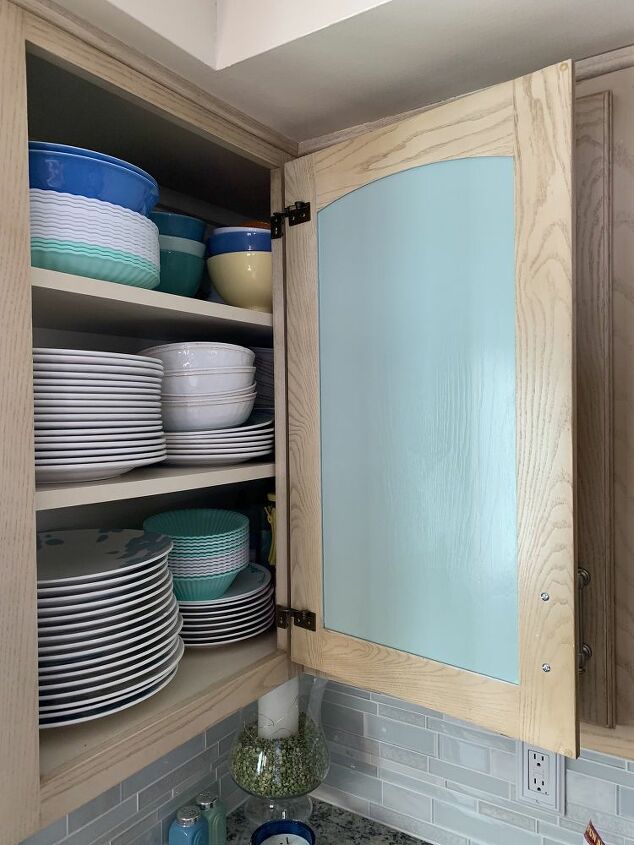
Close up of finished project.
Paint Color - Wythe Blue by Benjamin Moore
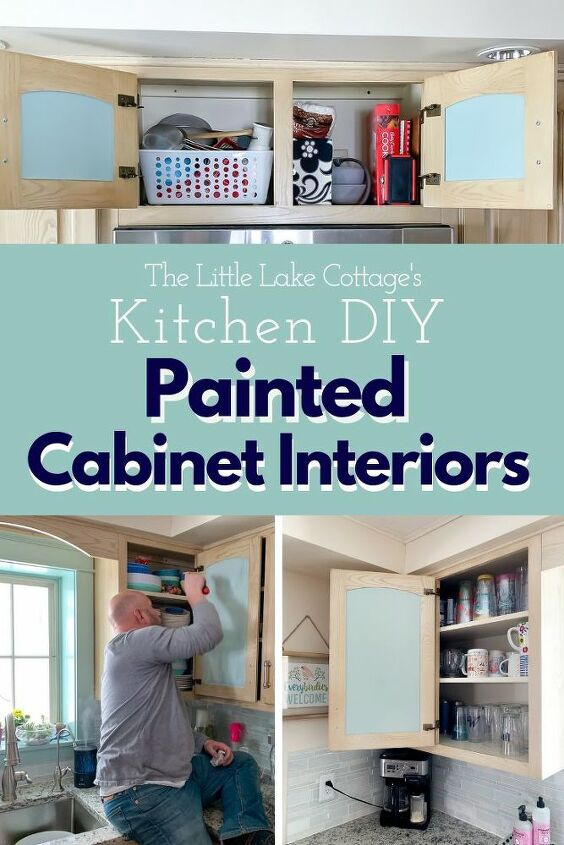
Finished Project

Comments
Join the conversation
-
I love the color of the outside of your cabinets. What color is it?


Frequently asked questions
Have a question about this project?