


Quick and Easy Faux Mosaic Tulip Art
I've always loved the look of traditional mosaics, whether it's tile, broken china, or whatever really... there's something so interesting about creating a picture out of bits and pieces.
So I decided to give it a try for a recent project challenge on my blog, but I went with a very quick and easy version.
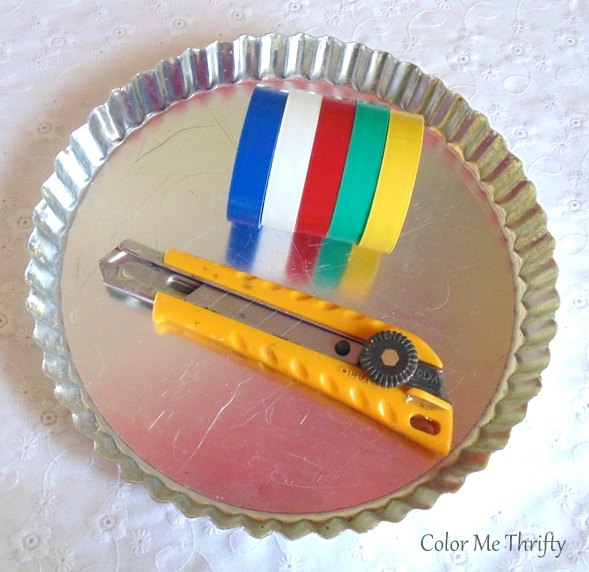
For my mosaic art I'm using something that can easily be found at any home improvement store... electrical tape.
Did you know that it comes in these fabulous colors? It's very cool stuff because it has just the right amount of sticky for a project like this.
I used a wider version of the tape to create my faux tile backsplash here in my aqua and red kitchen.
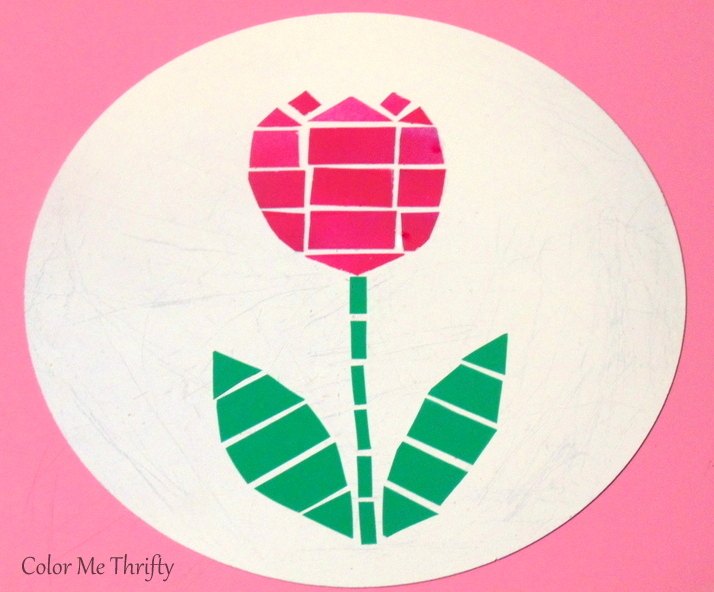
I'm creating my faux mosaic art by repurposing a $1 thrift store quiche pan with a removable bottom, which makes it much easier to create the picture.
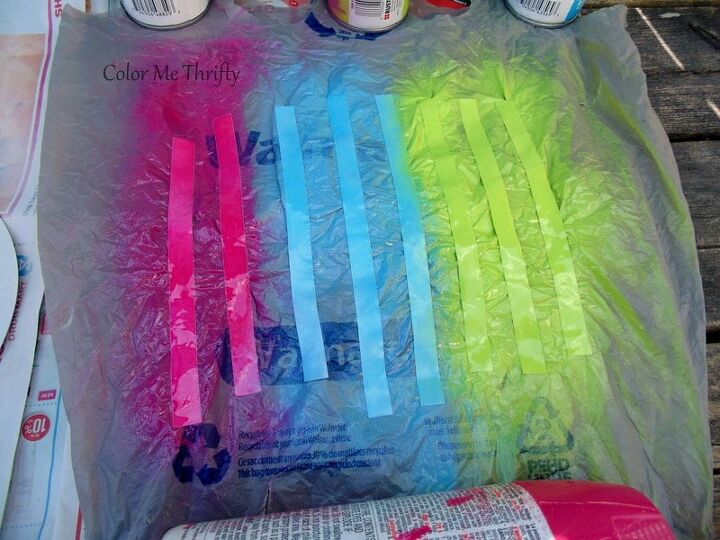
The electrical tape can easily be spray painted to if you want to customize your colors like I did.
I painted some white electrical tape pink, some dark blue tape an aqua blue, and some dark green tape an apple green.
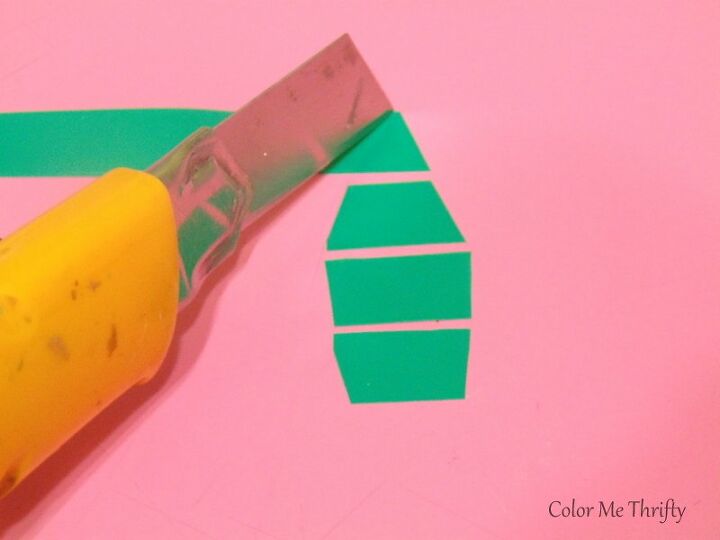
Then I just started cutting out pieces of the tape to create my tulip picture.
Here's how I did that.
I used my cutting mat, placed the tape down, and then cut it into whatever shapes I needed using an xacto knife.
It really went very quickly.
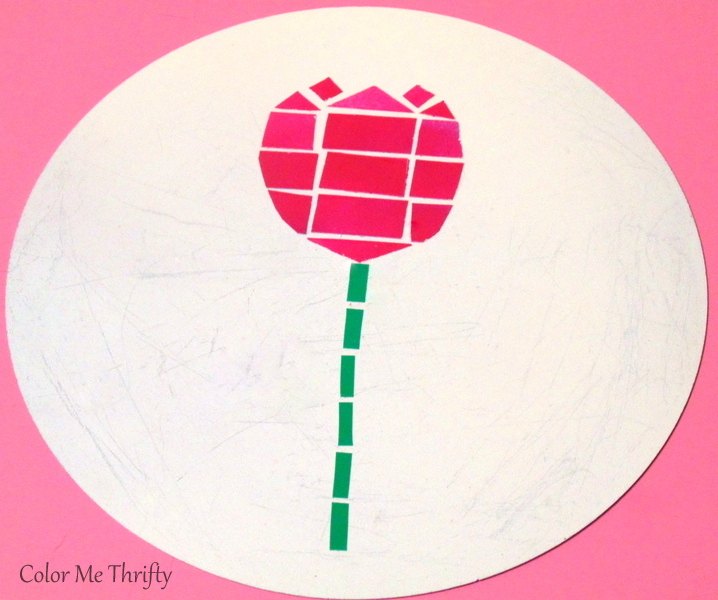
Here it is with my two leaves added.
Before starting to lay the pieces of tape down I spray painted the quiche pan bottom a cream color.
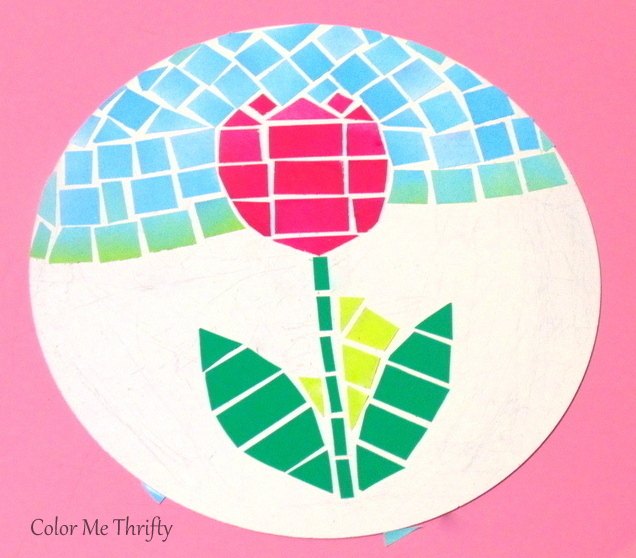
Then I just cut random pieces of the blue and green tape and put them down in a way that looked good to me.
There really is no right or wrong here.
And because it's electrical tape, which can be easily removed, you can easily fix any misplacements.
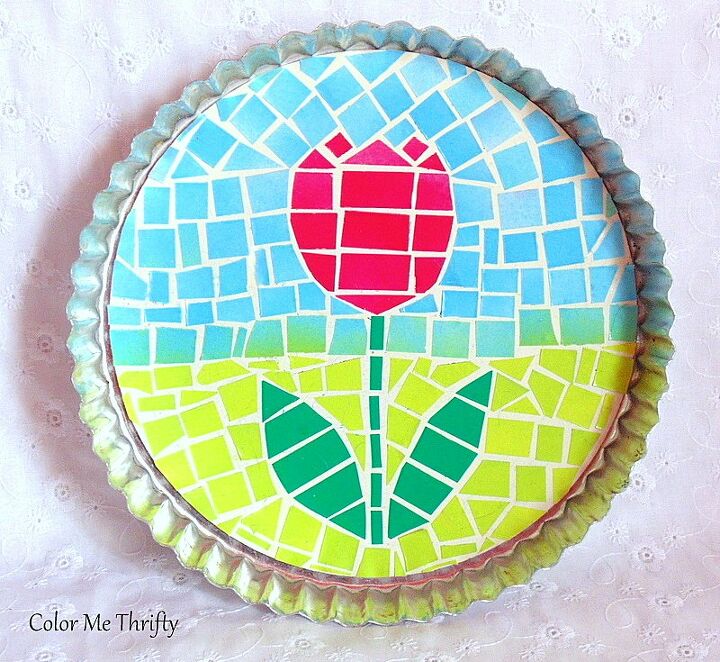
When I was finished I placed it back into the quiche pan frame. I love how the fluted edging looks with the mosaic picture.
This really is a quick and easy project with an amazing outcome.
It would be even quicker if you the tape's original colors for whatever picture you wanted to make.
To see more pics and tips please check out my Faux Mosaic Art blog post here.
Resources for this project:
See all materials


Comments
Join the conversation
-
so cute, and very creative!!!
-
SOOOOO CUTE!! Thanks for sharing!!


Frequently asked questions
Have a question about this project?
Hi, I have sone questions about your project. Could you use sissors to cut the tape, instead of a knife. Allso, did you make this pattern free hand. I was wondering if I could draw @ pattern first, then cut and stick the pices into the pattern. Lastly The spaces in between look like grout, but I was wondering, if you could use silicone in between the spaces, to create @ more realistic look. I love this. I think with some faux grout in between the spaces, it would make it seem more like real mosaics. You could even seel it to, if you wante'd @ more shiny look. Thanks so much in advance for @ repiy. Thanks allso for sharing @ fabulous project Kay Adelaide Australia
.
What about the colored duct tape or washi tapes? Then no spray painting is needed... 🤔
I love this! What a great idea! I'm definitely going to try it. I have a question though....electrical tape isn't very sticky, which is part of the benefit. How do you get it to stick after you spray paint it? Thanks in advance!