


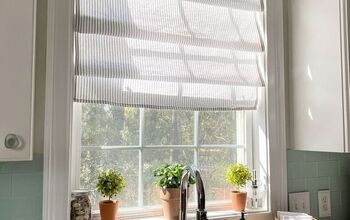
How to Turn a Wood Blind Into a Roman Shade

Here are step-by-step instructions on how to take an old two inch wood blind and turn it into a beautiful fabric Roman shade.
To begin this project you will need to collect a few supplies.
Supplies:
2" white wood blind
pencil
measuring tape
clothes pins
mod podge (I used outdoor)
fabric (enough to fit the length and width of the blind)
Measure height of inside the window and divide by 7. This is how many slats you will need including the bottom rail.
Lay blind stretched out on a table or floor
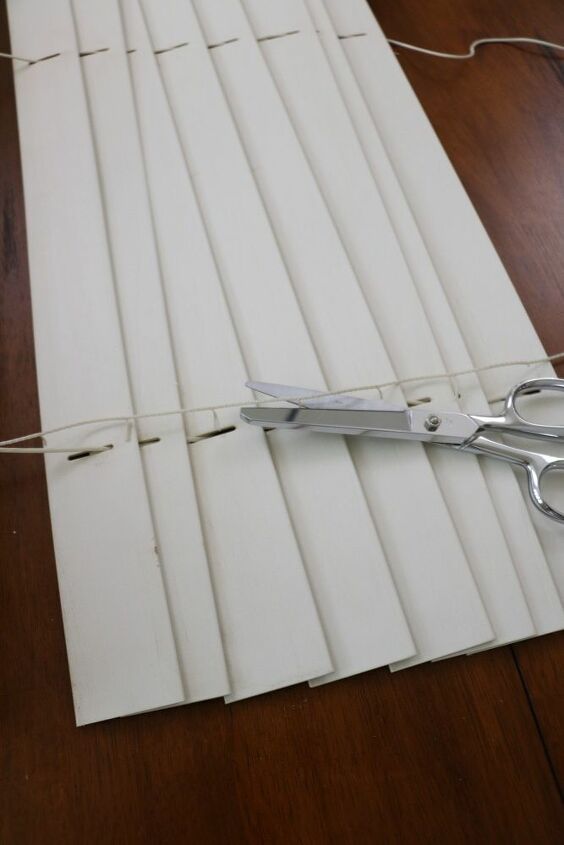
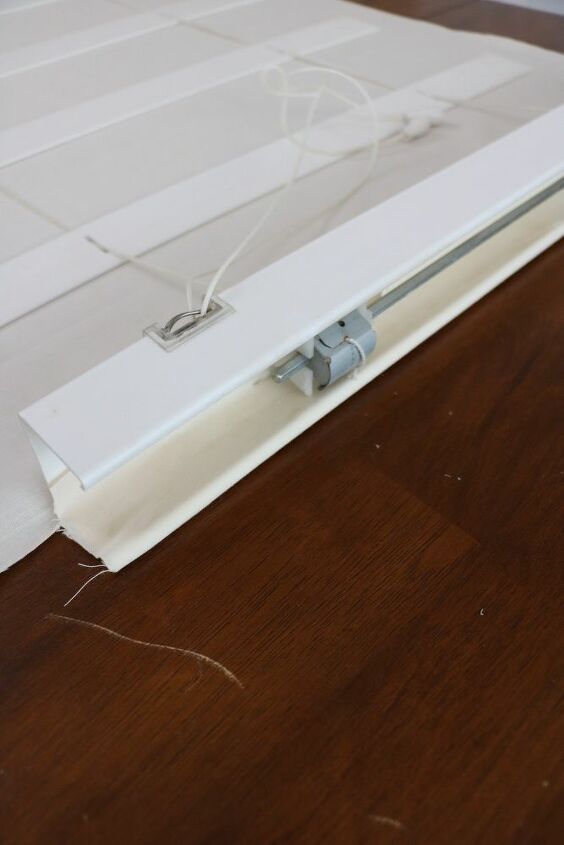
Cut the thin cord that pivots the blind. DO NOT CUT THE THICKER CORD THAT GOES INSIDE THE SLATS. Remove the thin cord.

Remember the number you calculated earlier? Count that many slats and slide them towards the bottom. You will be saving these slats. (In other words if your number is 5 then you will save 4 slats from the middle and the bottom slat is your fifth slat.)
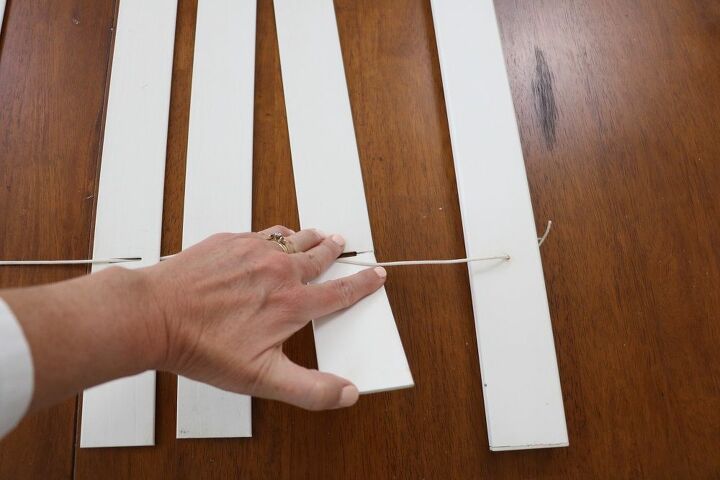
Snap the ends of all the slats that you are not saving and discard all those slats. (You should be left with the slats you are saving that are still attached to the thicker cord.
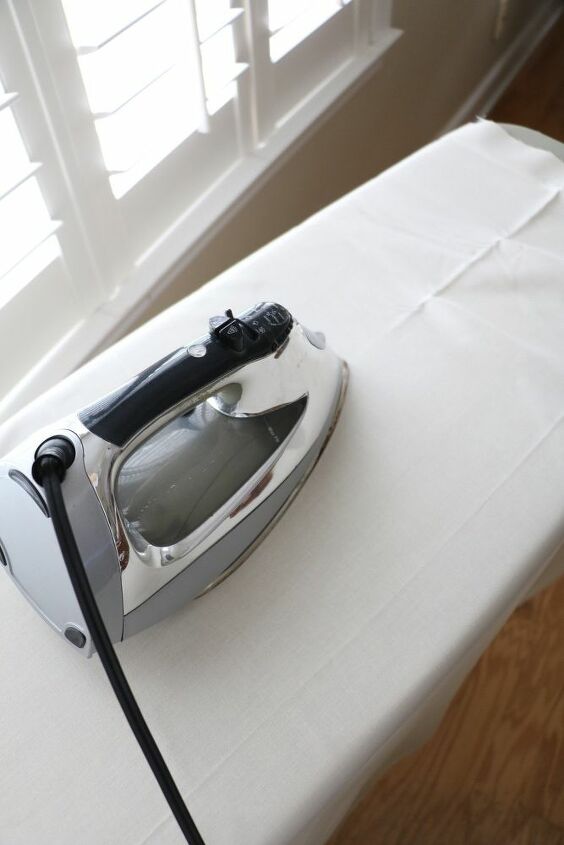
Iron the fabric

Lay the fabric flat on the table
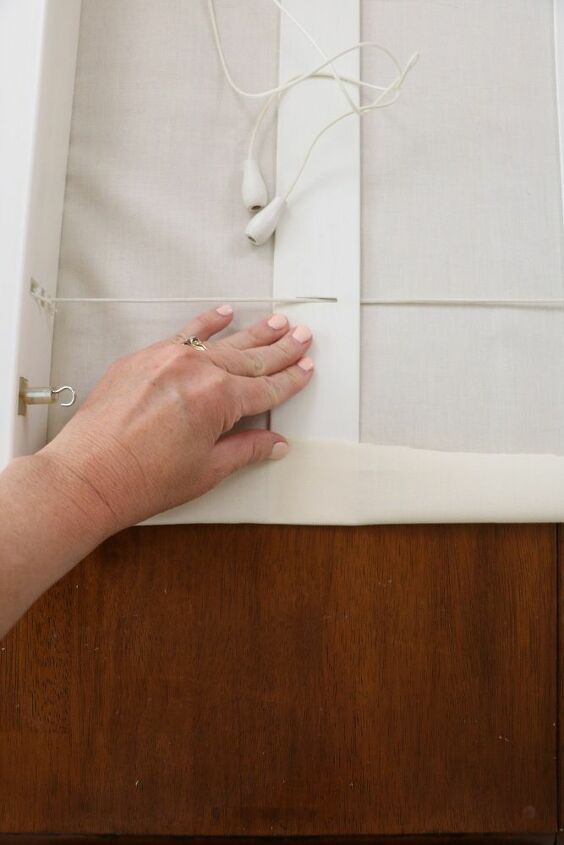
Place the blind stretched out on the fabric with the pull cord facing up. (You will be creating a blind on the backside so you don't see the cords when you hang it)
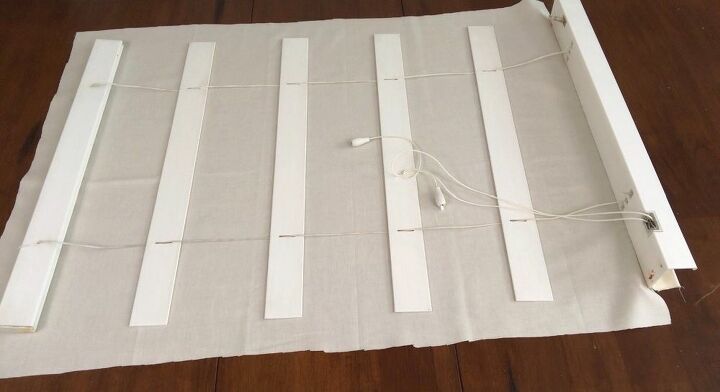
Spread out the slats evenly. They should be about 7" apart. I measured down from each side and made a mark with my pencil
Make sure each slat is lined up with the pencil mark on each side.
Cut the fabric about two inches out from the blind all the way around.
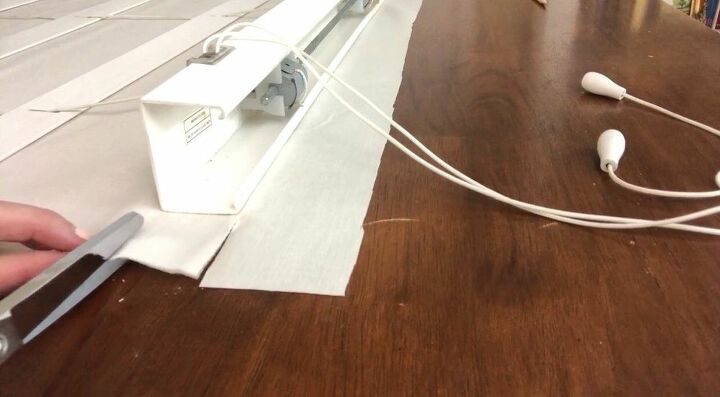
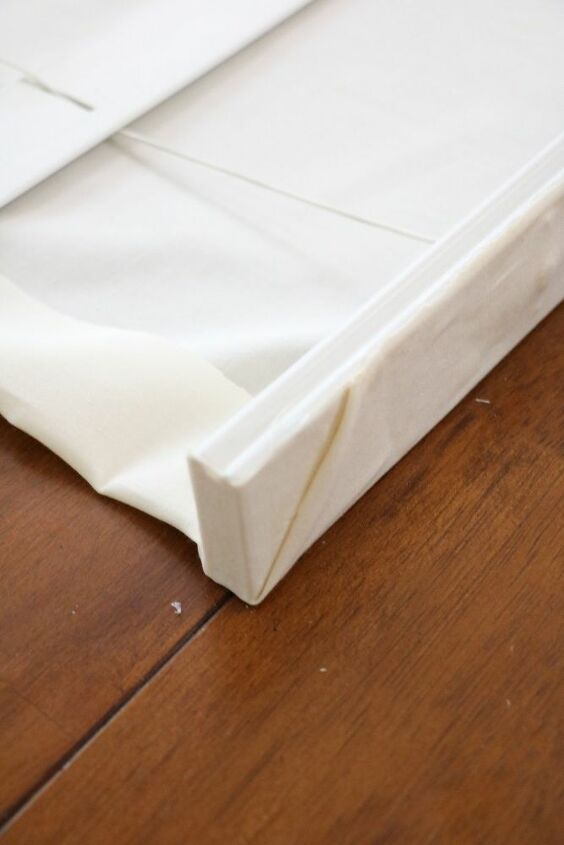
Starting at the top cut a notch on the side.
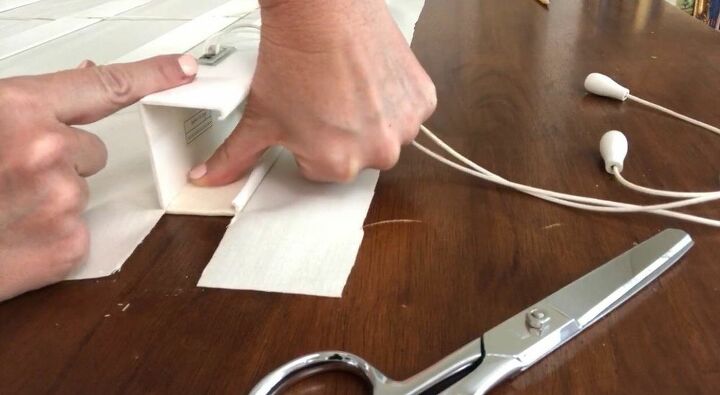
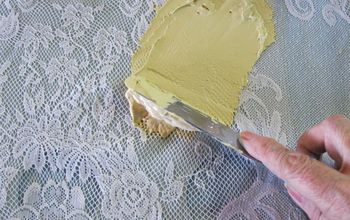
Spread some mod podge into the top rail with a small paint brush.
Then gently smooth the fabric into the head rail. Do this for both sides.
Brush mod podge into the top of the rail and smooth the fabric inside the top rail over the mod podge.
Put a little mod podge under each slat on the sides and then apply the mod podge on the top of the rail, only on the ends, and smooth the fabric onto the rail.
Cut a notch at the bottom side. Brush some mod podge on the ends of the bottom rail and smooth the fabric onto the sides.
Put a little mod podge onto the bottom of the fabric to secure the fabric at the bottom.
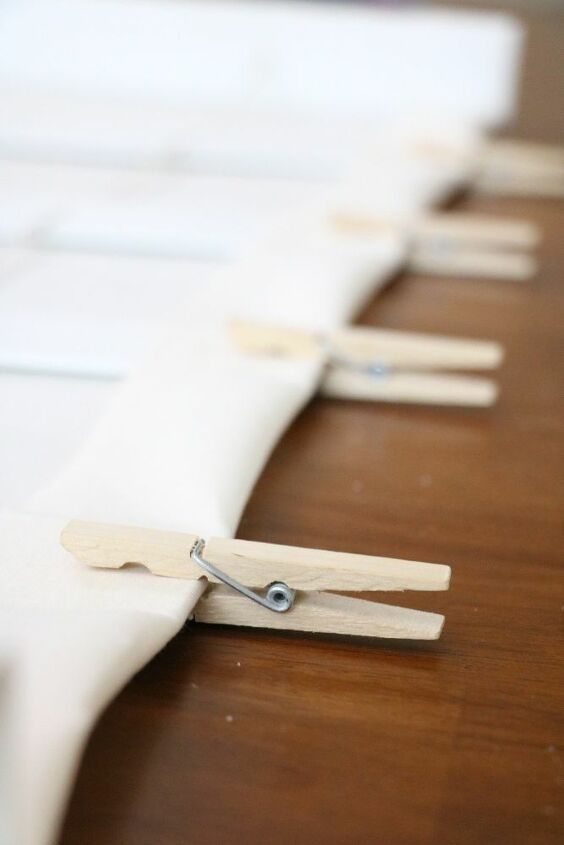
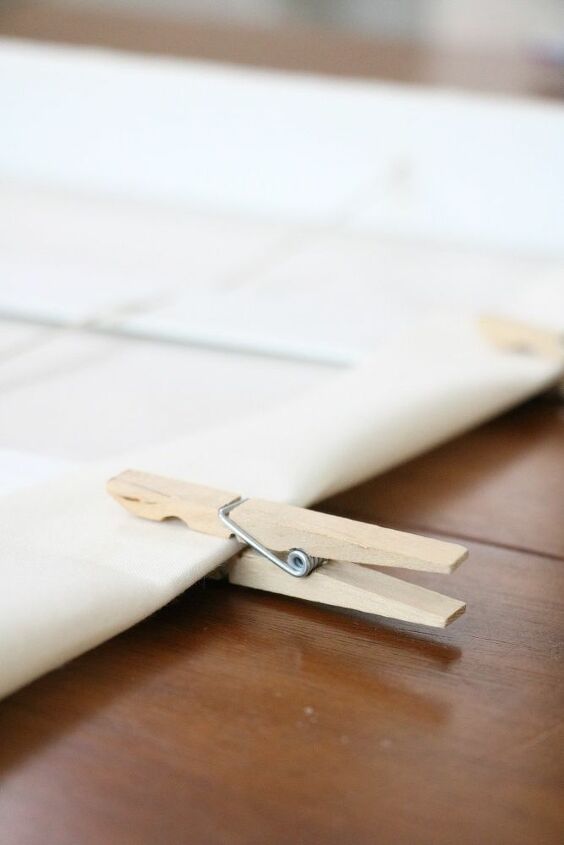
Let the glue harden over night (you can use clothes pins here to help keep it secure)
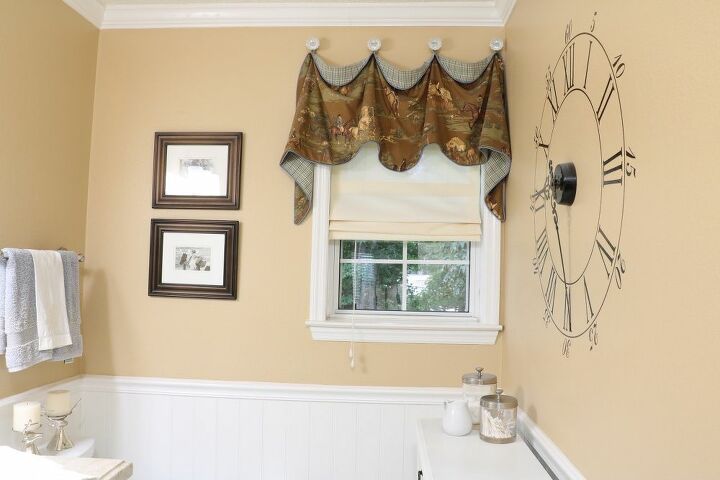
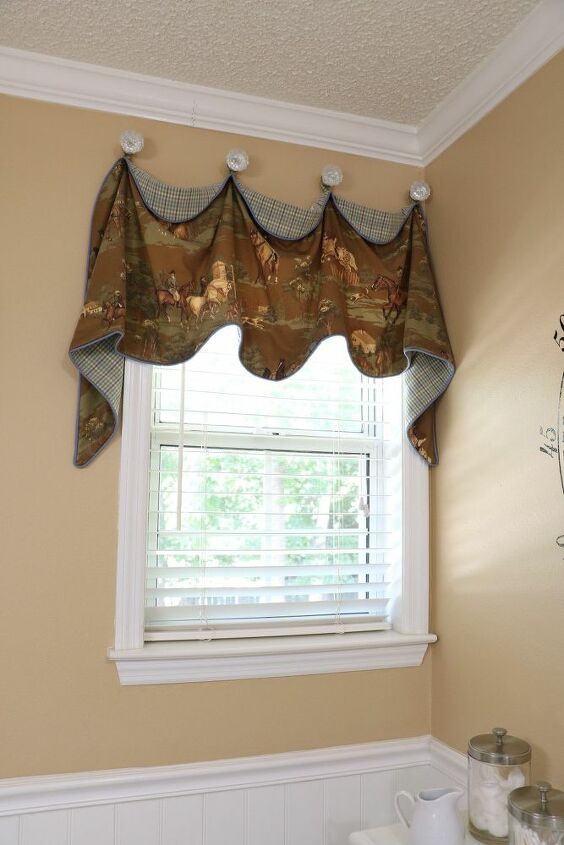
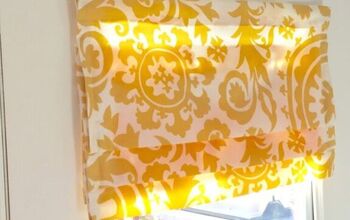
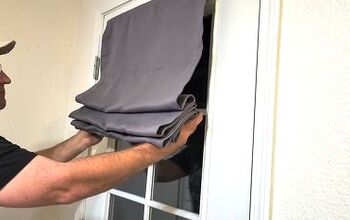
Hang your roman shade and raise it up some. After you raise it up some pull out any folds that may have gotten tucked inside.
And you are all finished!!
I am so so happy with how this shade turned out. After changing my I knew I wanted a little something softer for the window. This Roman shade did the trick.
Resources for this project:
See all materials


Comments
Join the conversation
-
You are an answer to my prayers. I have very large windows with blinds that I hate. Replacing them with Roman shades costs a fortune. This is the next project on the list. Thank you
-
Hi, are your valances hung from crystal door knobs? If so, how did you attach the knobs to the wall? I love this look and it gives me an answer to search for a way to add material over my windows that won't interfere with the curtains opening and closing. Thanks for any info on this, love the look you created.


Frequently asked questions
Have a question about this project?
What does the back look like from the outside of the window? The inside looks wonderful but it looks like the back facing out doesn’t look very nice....
Can you do this with drop cloth material? I have a lot and wanted to use it as curtains. My wooden blinds in my living room have been damaged by our cat. She broke several of the slats. Thought this would be a cheap way to repair the problem and keep the blinds.
Love what you did with your window but, what I want to know is where did you get the components to make your wonderful wall clock? I want one😀👍