


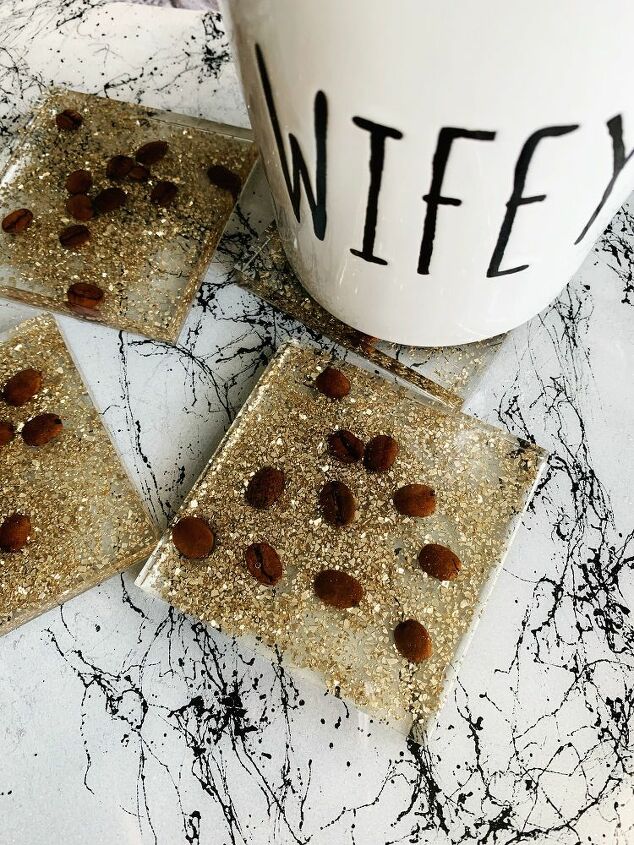
How to Make Coffee Bean Coasters

When I think of coffee my mind goes to early mornings, good smells, that “wake me up” feeling, good vibes and energy! So naturally when I came across an amazing photo on Pinterest of coffee bean coasters I HAD to make some! The artist I saw on Pinterest had put the coffee beans in resin with glitter. Their shape was square and they looked so modern and perfect! I HAD to try and make these beautiful coffee beans coasters!
I want to give a shout out to Hand Made With Ashley! I followed her tutorial! It worked great!
Supplies for Making Coffee Bean Coasters
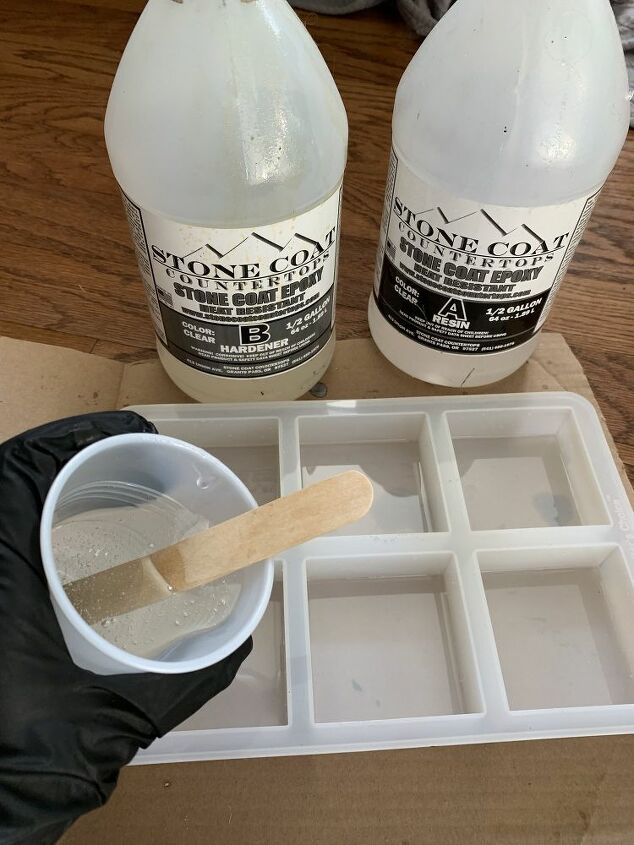
- Stone coat Countertops Epoxy
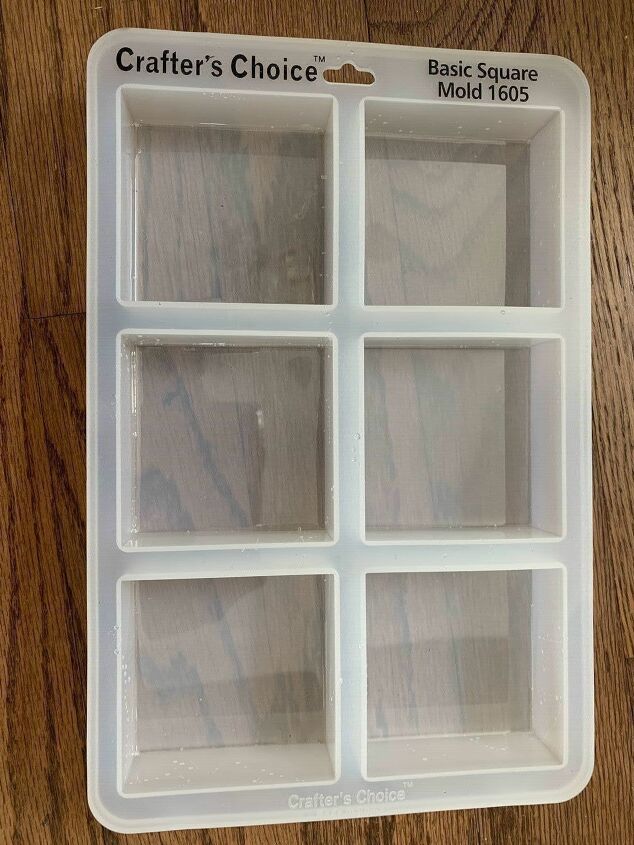
- Square Shape Resin Mold
NOTE: Shopresinmolds.com for less expensive mold!
- Plastic Cups– I use these plastic cups from the Dollar Tree!
- Heat Gun
- Glitter
- Popsicle sticks – I also buy these from the Dollar Tree!
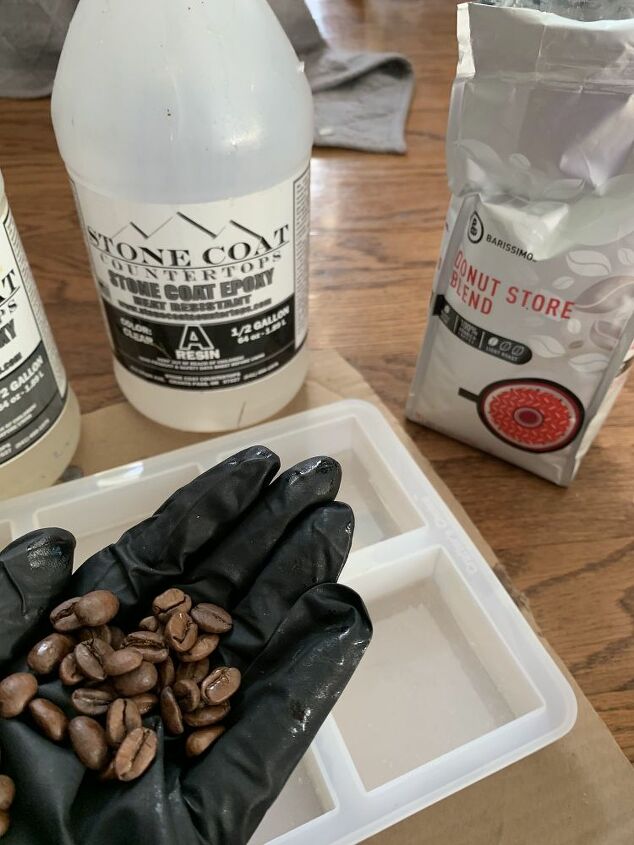
- Coffee Beans


Steps to Making Coffee Bean Coasters
NOTE: Please wear disposable gloves!
Begin by mixing equal parts of resin to equal parts of hardener. There is one bottle labeled A and bottle labeled B. Pour A to the first line a plastic cup. Then pour B to the first line of a new plastic cup. Pour A into B (or B into A you really just need to mix the equal parts that you have measured together.) Mix for two minutes with a popsicle stick. Once resin has been mixed for two minutes you are ready to pour into the mold. Pour resin into mold and let fully Harden. If you are using Stone Coat quick coat this should only take about 15 minutes. You should be able to make these in a day!
Once first layer of resin has cured you are ready to mix another layer of resin! Follow the steps to mix resin as you did before measuring equal parts of A to equal parts of B. Mix them together for two minutes. Pour into mold. This is the layer you will add the coffee beans too! Yae! SO exciting!
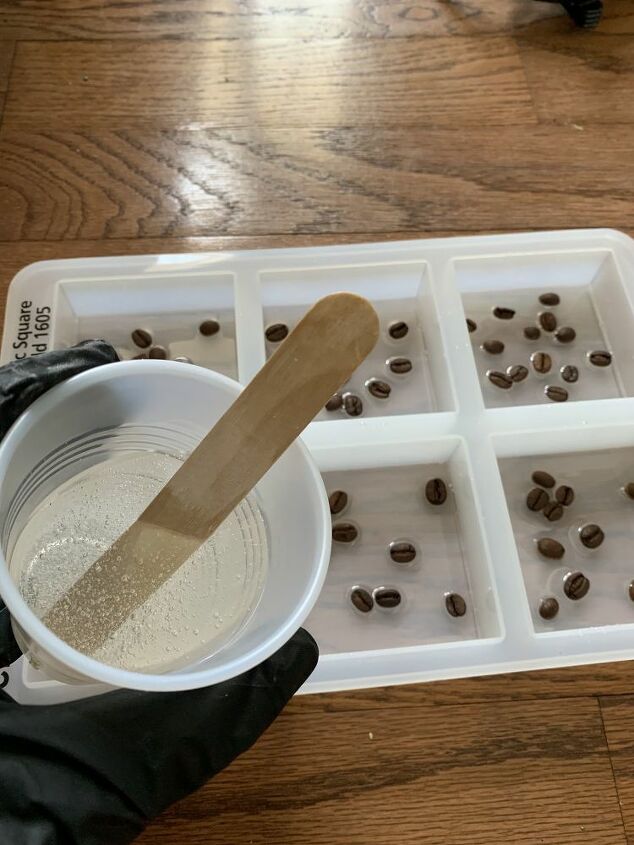
After you have mixed your second layer of resin you are ready to pour the resin into the coaster mold! Pour resin into each square mold. Now for the fun part! Add your coffee beans! You can arrange your coffee beans in any pattern you would like! Add as many or as few of coffee beans that fits your style.NOTE: Pop any bubbles in the resin as you go with the heat gun!
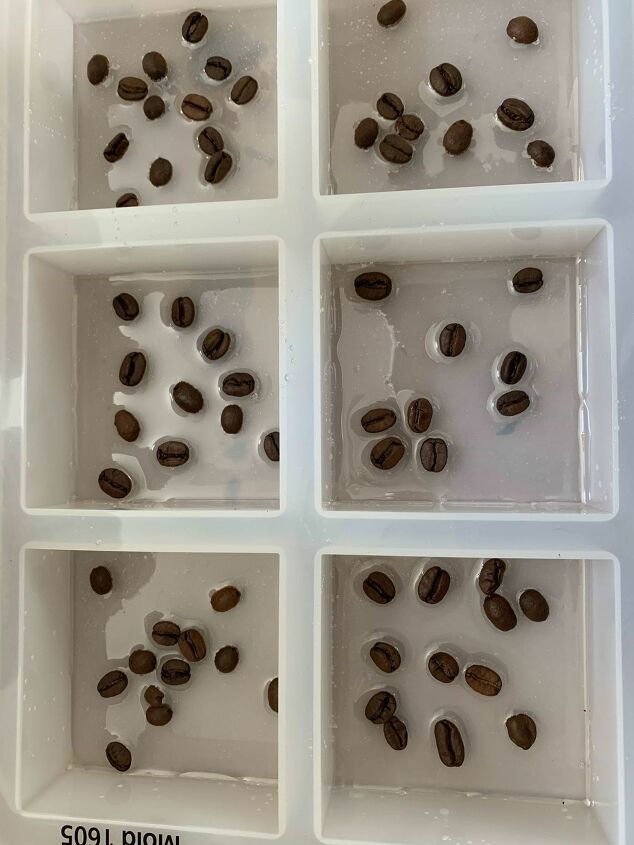
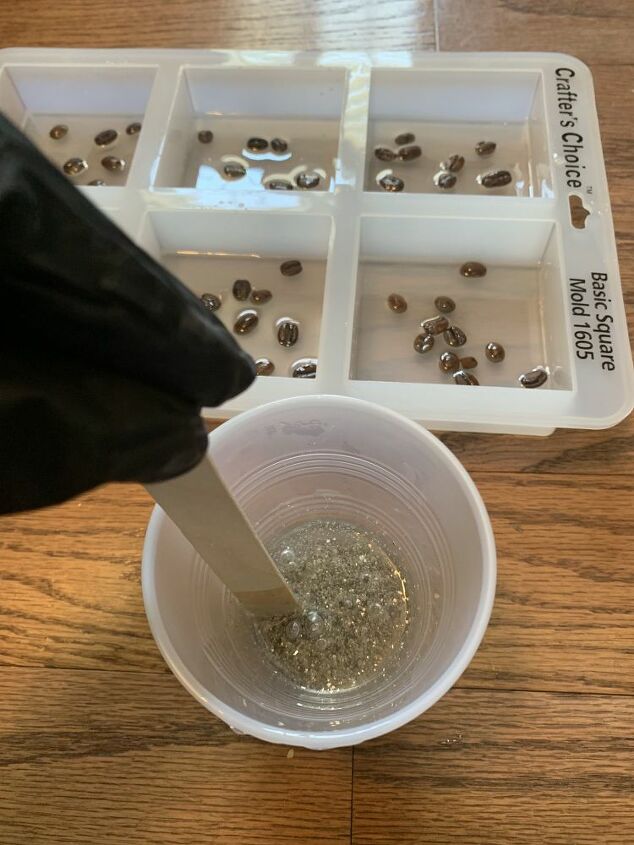
Let this new layer with the coffee beans fully cure. After the coffee bean layer has cured you are ready to add another clear coat of resin on top! You’ll want to mix your resin just as you have done in the before two steps. Mixing equal parts to equal parts. Once mixed pour this clear layer over the coffee beans and let cure.
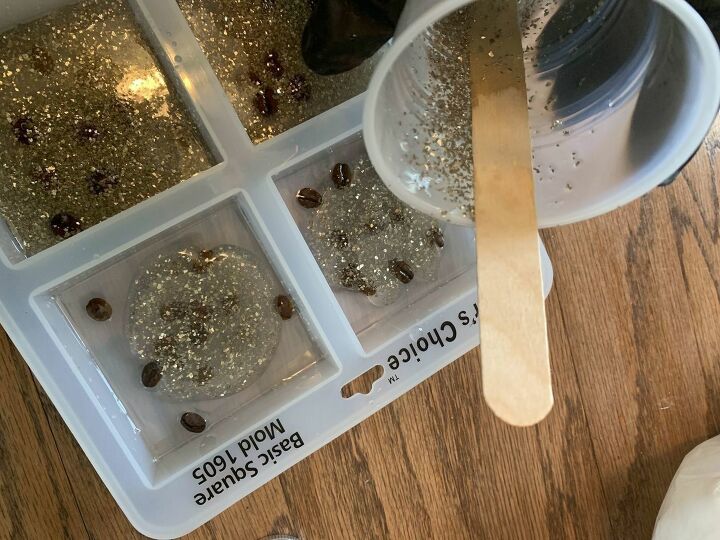
Once your clear coat of resin is cured you are ready for your final coat of resin! This coat is fun! It is where you get to add your glass glitter! You’ll need to mix resin just as you have done with your previous layers. Mixing equal parts of A into equal parts of B. After you have mixed the resin add about a heaping tablespoon of the glass glitter to the resin! Mix well and pour this layer over the coffee bean layer!
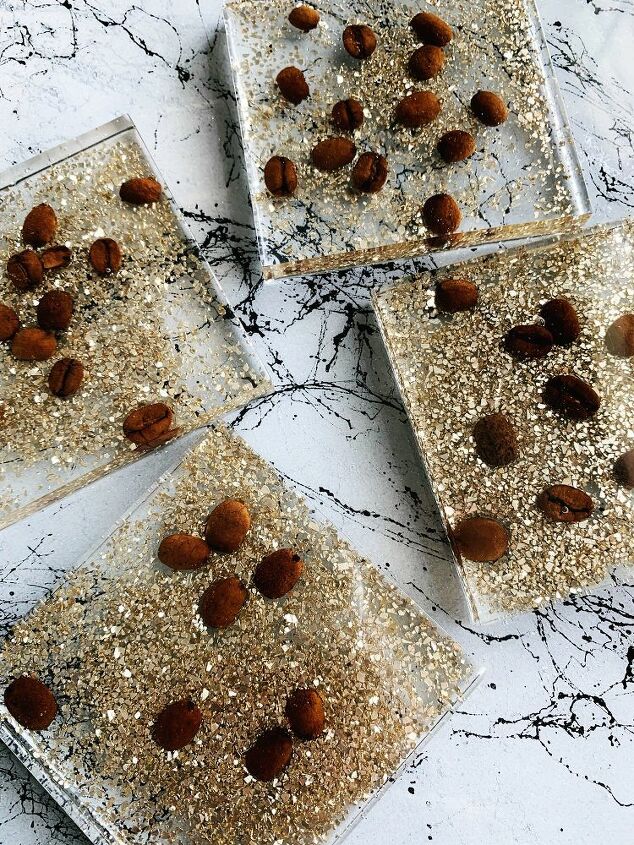
Great job on pouring all of these layers!! Let your final glitter coat fully cure and pop any bubbles with a heat gun! Remove from mold when the little layer is fully cured.Your final coasters should look something like the picture below! These are perfect gifts to make for the coffee lover in your life!
These coasters are also a great teacher gift!
Do you like the coffee bean resin coasters!?
Do you have a coffee lover in your life who you LOVE these coasters? Are you excited to give this tutorial a try?
Resources for this project:
See all materials


Comments
Join the conversation
-
Thank you for this idea!!! I am going to try and arrange the beans in a heart for my coffee loving BFF.
-
Thanks so much for the shout out! I really appreciate it. Your coasters look beautiful!


Frequently asked questions
Have a question about this project?
I'm confused.. so when u buy the Stone Coat, is it where u can't buy A without buying B ? I've never worked with resin before! I love these coasters ❤
if I made a larger version of this could it be used as a hot pad for a dish that has been cooked in the oven. ?