


A Wood Floor Face Lift WITHOUT Sanding, Stripping, or Priming!

Rust-Oleum RockSolid Home Floor Paint System is a two-step interior floor product meant to cover up unsightly wood, tile, and linoleum floors without sanding, stripping, priming, or other prepping measures (let me repeat - NO SANDING!).
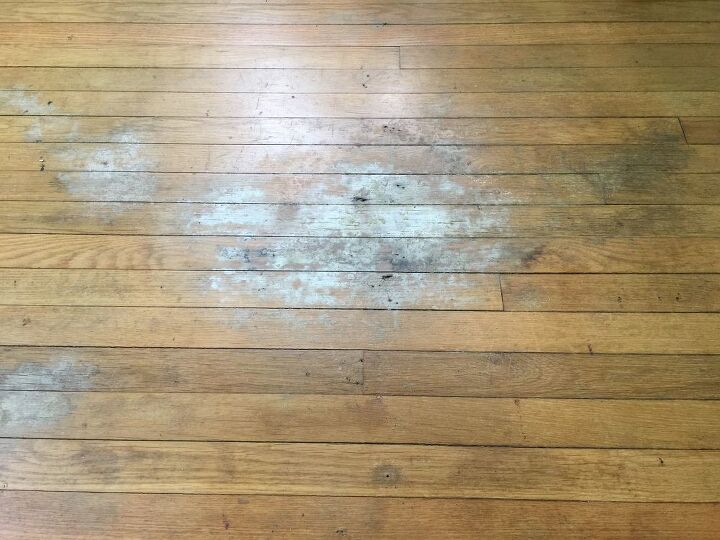
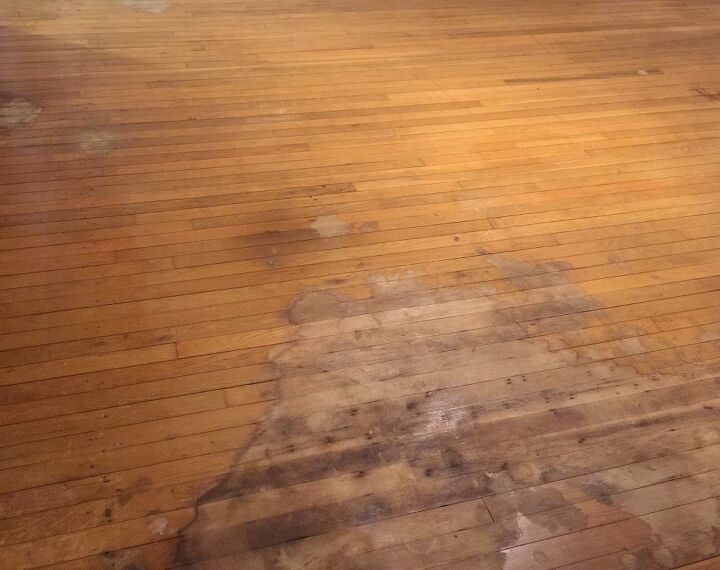
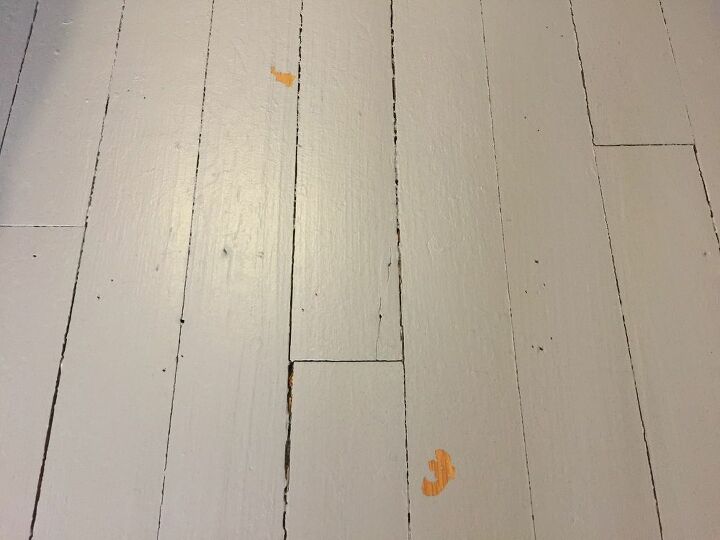
Last summer, we pulled up the ugly carpet in my boyfriend’s house to reveal the original hardwood floors, which were in desperate need of refinishing. The wood itself was in good shape but the finish definitely needed some love. And guess what I didn’t work on at all last summer? Yes, the hardwood floors… (I utterly ABHOR sanding).
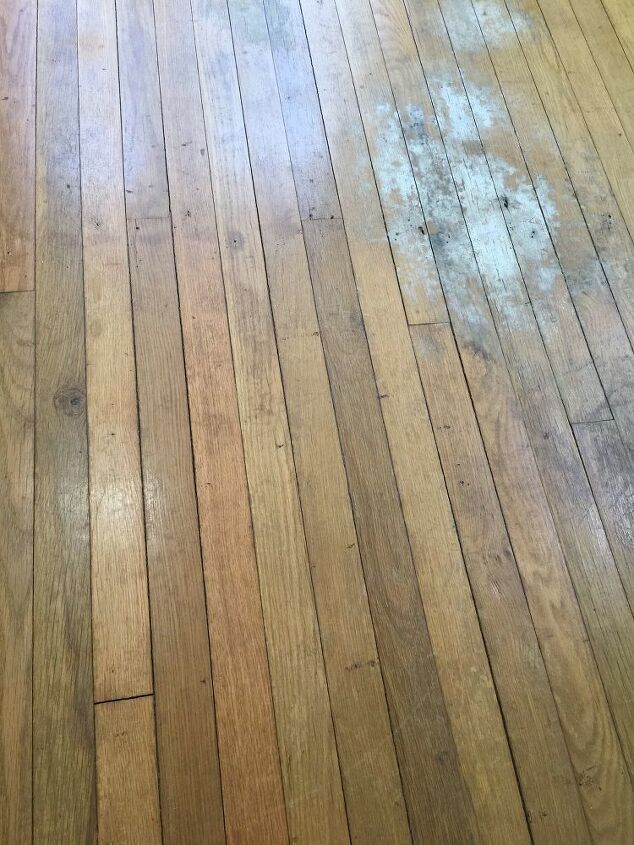
Fast forward to a month ago – hardwoods were still in desperate need of refinishing, I just married boyfriend, and it’s time to sell his house. As much as we wanted to continue ignoring this issue, we were concerned that the first thing potential buyers would see when they crossed the threshold was the water stained, discolored floors. We’d been pricing hiring someone to come in and sand the floors down (I hate sanding that much) but our research showed it would cost just as much to have them redone as it would to just refloor everything - between $2,000-$3,000. And that’s exactly what we didn’t want to do – drop a few thousand on something we may or may not recoup AND not even be around to enjoy it. So by some miraculous event, the RockSolid Home Floor Paint System came out as soon as we started to get panicky.
The process is simple – pick one of 18 colors for your base coat, decide on the sheen of the top coat, clean the floors, apply the base coat, and apply the top coat. Boom, a new look. It wasn’t quite as straight forward as that when we actually went through the process but the following is our experience as well as our lessons learned.
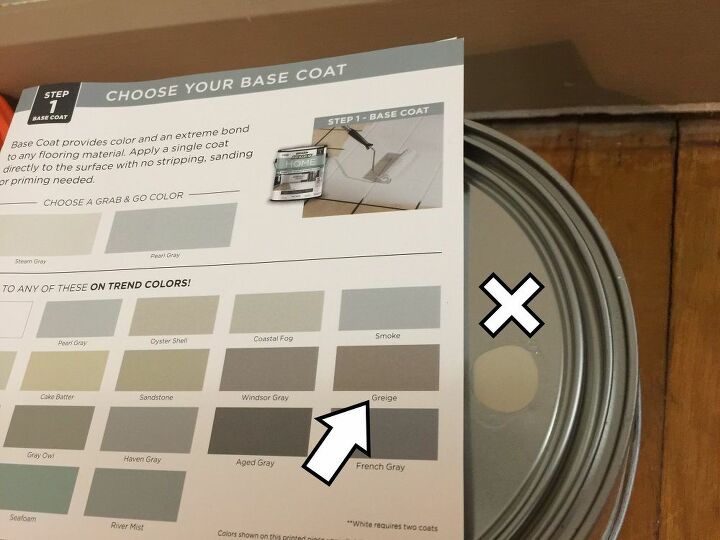
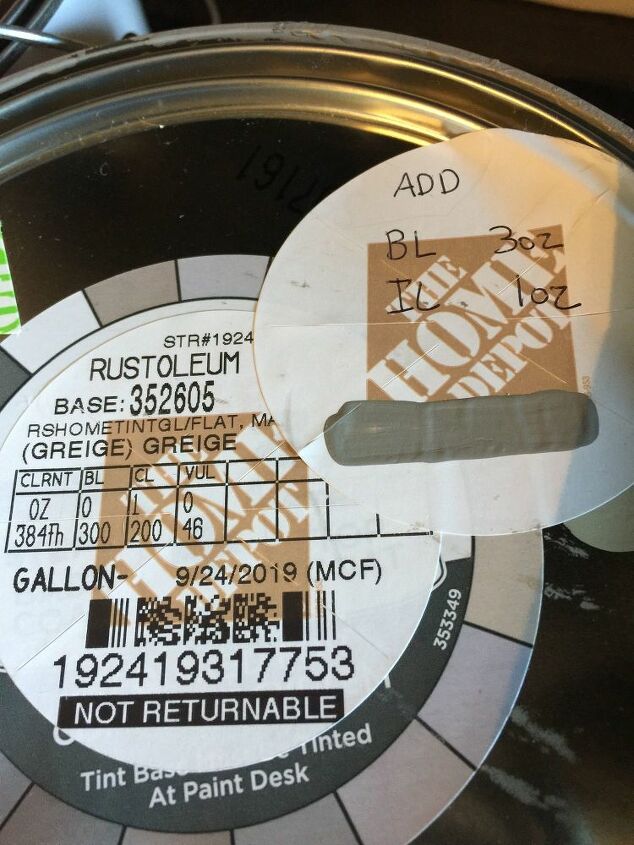
Step one: Pick your base coat color. Rust-Oleum has 18 colors to pick from ranging from grays, beiges, and some surprising blues and greens. There’s even a white. We chose ‘greige’ and went to the only store in the St. Louis area that had the system in stock – Home Depot. The paint staff didn’t know a lot about the product since it was so new but they were super helpful and asked that we return to let them know how the product performed and if we liked the results. We watched the tinting process and the associate pull up the ‘greige’ color in the computer but found that the final result didn’t look like the brochure’s color chart. The associate thought it might look different on the floor vs a metal lid so we agreed to try before trying any further tinting.
We also picked out our top coat sheen (step two). There are two options – matte and semi gloss. We went with the semi gloss as we thought it would give a cleaner, freshly mopped and waxed look when we were done with it.
Sadly, the color represented the same on the can lid and on the floor. Instead of ‘greige’ it looked more like the yellowy-beige ‘cake batter’ color.
Um, nope...

I called the Rust-Oleum customer service phone number to asked these questions:
- Had anyone else called in to report an issue with the tinting process?
- Can we take it back and have it manually tinted to the color we were hoping for?
- If so, does the added tint have to be one of the Rust-oleum colors? Clearly Greige isn't working properly so would adding more of the same work or should be try another?
- Would using a non-Rust-Oleum tint affect the paint’s adhesion integrity? Would I be screwing up the way the paint adhered to the floor by bringing in a foreign tint?
The extremely friendly phone rep didn’t know the answer to any of the questions and thought that as long as there was room in the can to add tint, we could try it. She did note that the tint amounts for each Rust-Oleum color were pre-portioned so there might not be enough room in the can for another dose of Greige or any other of the Floor Paint System's colors for that matter.
I also mentioned the issue on Rust-Oleum’s Facebook page. They quickly replied back and I was able to send them pictures via direct message so they could look into the issue further. Honestly, I think it was a miscalibration issue at the store. New product, new colors – totally understandable. I’ve used a LOT of Rust-Oleum products over the years and they’ve always been true to sample.
We did take the base coat back to Home Depot to manually tint to match. And to complicate things, because we didn’t trust the ‘Greige’ setting and didn’t want to make it worse, we went with matching ‘Aged Gray’. The color matching came out perfect – thank you, Home Depot!
Each can of base coat covers 400 square feet so we purchased two coats to cover a bedroom, hallway, and living room, about 550 square feet in total.
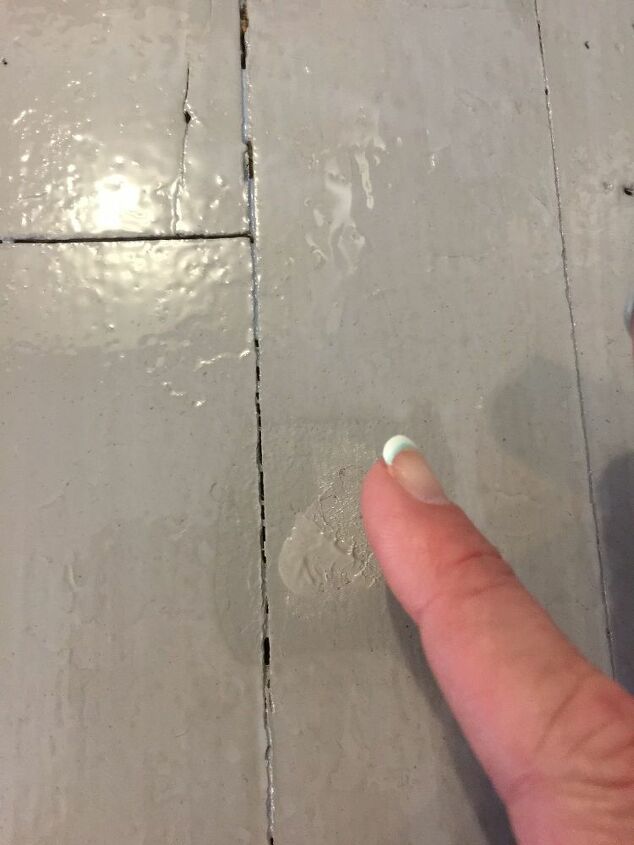
Step three: clean the floors. Since sanding, stripping, and priming are not a factor here, cleaning THROUGHLY is an absolute must. Vacuum, use a dry dusting cloth, and mop with a product that does not leave residue behind. Wipe over with clean water, just in case there is residue, though. While we used this system on porous wood floors, the product description notes that if you are using on tile or linoleum surfaces, clean with an abrasive cleaner to help with paint adhesion. Note: we did the vacuum, dry dusting, and mopping steps in the bedroom but forgot the mopping in the living room.
Step four: apply the base coat. Starting furthest from the door, I cut in around the edges while my husband did the rolling. Working together allowed the process to go extremely fast and ensured none of our edges dried before we were able to blend them into the next section.
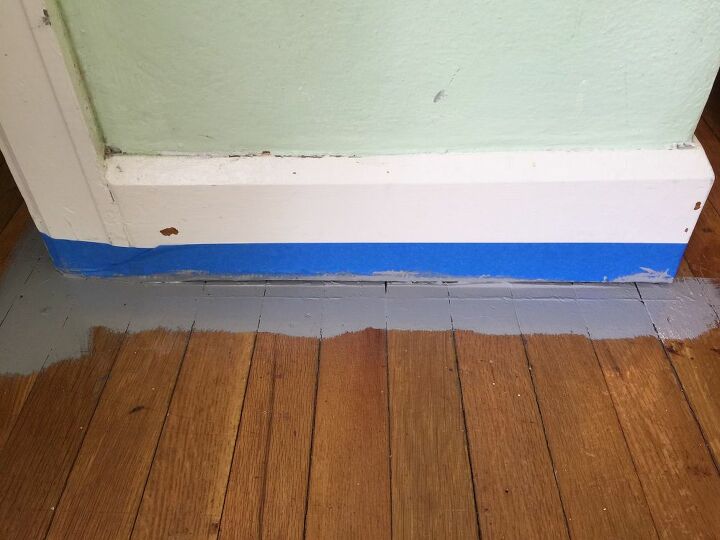
The paint dried to a matte finish and the areas of the floor that had water spots dried slightly darker. We waited the recommended one to two hours and went over the water spots again as well as any areas that we thought needed more coverage with a second coat. We let fully dry for 6 hours.
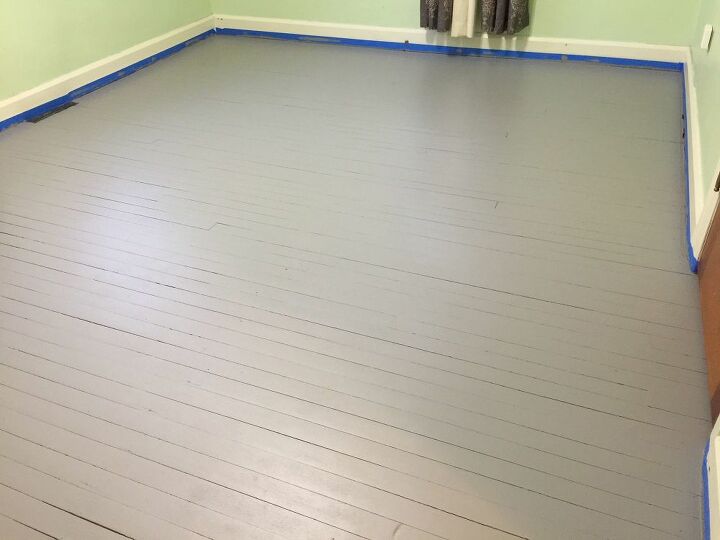
No brush strokes!
Also, when tinting the base coat, the Home Depot associate noted that the smell was very strong. However, when we opened the can and started painting, the smell was very minimal. I think the tint itself might have a strong odor but when fully mixed with the can of base, it’s not an issue.
Lesson learned: don’t walk on the base coat with bare feet! Wear socks instead. After the six hours of drying, we were ready to apply the top coat. However, we had two spots that unexpectedly stuck to our bare feet and pulled the base coat away.
I finger dabbed these two places with base coat and let dry the six hours while we worked around them as we worked on the top coat. The spots dried and blended in perfectly. After completing the floor, I was unable to find them later.
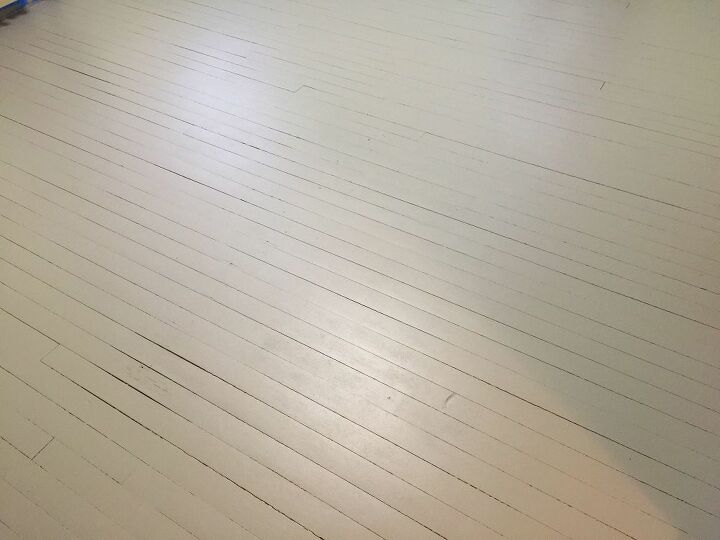
Step five: apply the top coat. This part went even faster. We tag teamed again with me painting the edging and husband doing the rolling. We could see the huge difference in sheen as we worked, covering up the matte base coat with the semi-gloss top coat.
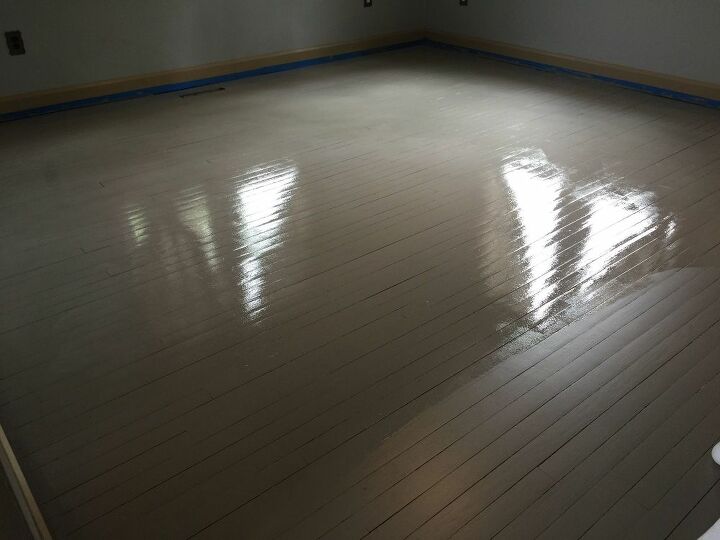
We waited the specified ‘full cure’ time frame of seven days before doing anything on these floors in order to give them as much time as possible to dry undisturbed. On day 8, we had a cleaning crew in to deep clean the house just prior to taking professional pictures to put the house up for sale. The cleaners used a bare floor vacuum and this left short, tiny scratches randomly through the living room. They were too small to see when standing and viewing the room but if you sat down on the floor and looked closely, you could spot them. There were no scratches in the bedroom, though but this was the room we’d remembered to mop. We aren’t sure if this was actually why the scratching occurred in the living room but it’s our best guess. That or housekeeping cheated and didn’t vacuum the bedroom at all…
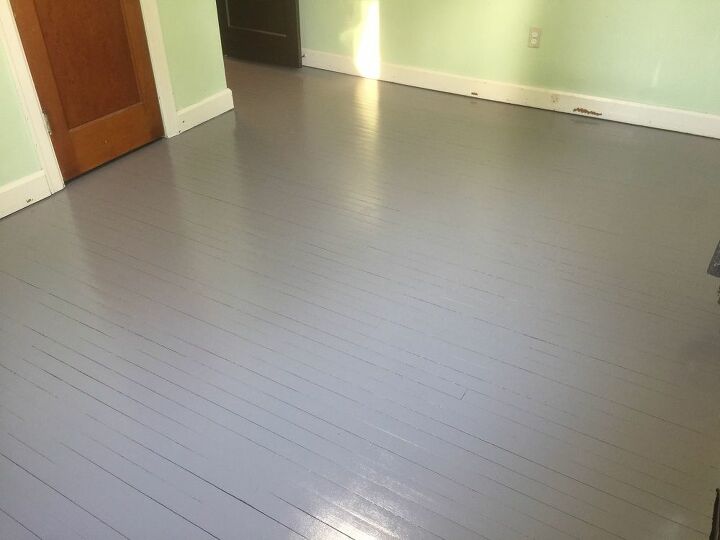
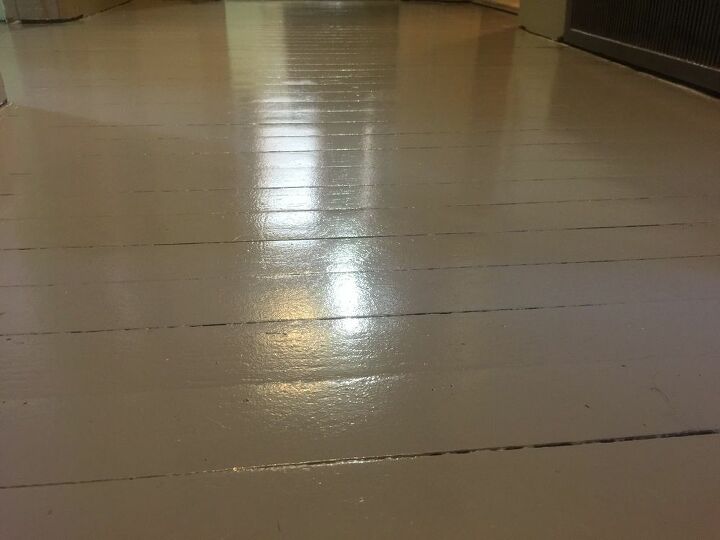
Living Room (can't tell where the tiny scratches are). Even the professional photographer's well-lit pictures look great.

Lesson learned: The can notes that only one coat of the top coat is needed but I would highly recommend applying two top coat layers for the added protection.
Lesson learned: We used 1.5 cans of base coat with a few areas of recoating to .5 cans of top coat. We returned the second can of top coat since it was unopened. The system requires both the base and the top coat but you won’t go through them at the same rate. Even if we’d done a second top coat, we would have only required one can for the 550-ish square foot area. This might be especially helpful if Rust-Oleum starts selling this system in quart sized cans.
After the vacuuming incident, we waited another week (a full 14 days since applying the top coat) to schedule the open house and give the floor even more time to cure. That seemed to do the trick. A busy open house, multiple additional showings, and two inspections later – we’ve seen no additional scratches and floor continues to shine beautifully.
Final thoughts – I’m extremely happy we went this route! The product is performing great, despite some minor setbacks with tinting and cure time. Knowing what I know now, I’d recommend:
- Clean as thoroughly as possible and in multiple ways. Vacuuming alone will not get the floor ready. Abrasive cleansers will help prep the floor but go over every inch again with clean water to ensure there is no residue.
- Start painting as soon as the floors have dried from cleaning. This will keep any dust, pet hair, your hair, weird things from blowing out of air vents and settling on the floor. We did paint in a few dog hairs here and there, even with all of the cleaning.
- Walk on the dried base coat with socks only.
- Damage and water spotting on wood floors will need a second layer of base coat to keep the color uniform throughout the room.
- Two cans of base coat will only require one can of top coat, even if you go my recommended route of two top coats.
- Apply two coats of top coat to ensure as much protection as possible.
- Allow to fully cure OVER seven days before doing anything that might otherwise scratch the floor. 14 days worked well in our case.
Beautiful! I love that the paint covers up the water spots and discoloration to give it new life but it still lets the charm of the wood floor planks come through!
Resources for this project:


Comments
Join the conversation
-
I want to know about how to refinish a Hardwood Floor to bring its beauty back.
-
A great decision to paint considering the damage to the flooring. Staining would have made the wood, and the stain, darker. And many don't like dark floors. Replacement is pricy, and a very personal choice. Best to leave that decision to the buyer. The house is beautiful and move in ready. . The colour choice brightens up the space.


Frequently asked questions
Have a question about this project?
We have seemingly the same flooring with the same problematic discolorations. I'm wondering what YOU used to clean them thoroughly? I've read it recommended to use a "degreasing cleanser." I fully intend on investing in this product, but I need my prep to be right!
I would like to stencil my floor also. Can I put down the base coat, stencil and then seal it?
We pulled up our carpet a few years ago in hopes of the revealing the original hardwoods to find out we had the same problem. Even had third generation refinishers say they could not sand the stains out. The problem is there are also a bunch of screws put in them too in an attempt to stop squeaking. Did you have to fix any blemishes or screw holes? If so, how did it look?