How To: Weathered Wood Finish Without Sanding or Staining

Have you ever wanted to "de-orange" your dated, wooden cabinets or furniture? Welcome to my step-by-step tutorial where I will teach you how to create a weathered wood finish WITHOUT sanding OR staining! Ready to learn how?
I don’t know about you, but the thought of stripping the varnish and stain from wood to get down to raw wood, then re-staining and sealing sounds like a lot of work. And it is. There is a lot of room for error as well. But, refinishing something you already own or have found affordably second hand is typically a better option than buying something brand new in a stain or finish you prefer. Follow the tutorial below to learn how to achieve a weathered wood finish with NO sanding and NO staining required! This is probably the simplest way to get that light, natural Pottery Barn/Restoration Hardware wood finish over an existing surface. You can get this weathered wood look over paint, stain, or varnish.
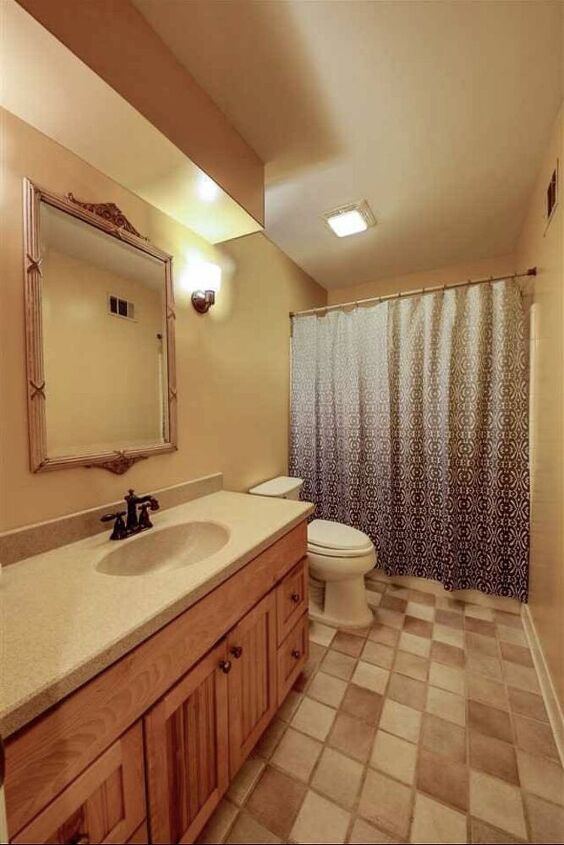
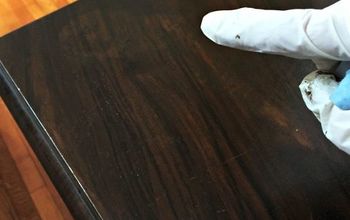
Here is the dated, orange vanity wood before.
STEP 1: Clean the surface
As far as prep work goes, all that is required is to clean the surface of the wood before applying the chalk style paint.
STEP 2: Chalk paint
I used my favorite chalk paint additive to create a custom chalk style paint.
I used painters Frog tape to tape off the borders of the vanity against the wall, floor and countertop. Next, begin painting. The chalk style paint is thicker and has more texture than typical interior latex paint. Brush strokes are visible when the paint is wet on the first coat. After the first coat has dried (dry time is much quicker than typical latex paint), I painted a second coat. After the second coat, my brush strokes disappeared and I got opaque coverage.
STEP 3: Antiquing Wax- the key to the weathered wood finish
I wrote about this product in other posts outlining how I refinished my dining room table with Liming and Antiquing Wax (see the HUGE transformation here!) and my vintage bar cart. The Antiquing Wax works so well over chalk paint and in my opinion can mimic a real wood finish over a painted surface.
To use this product, be aware that a little goes a long way. Using a chip brush, get a small amount of wax on the bristles of your brush and work it into the surface using long strokes. It dries in a minute or two, so it’s important to work in small sections. Work it in with the brush until you have a look and texture you like. I sometimes do a second coat in places once the first coat is fully dried.
STEP 5: Seal
Once you have painted and applied Antiquing Wax, allow dry time and seal. I prefer a finishing wax to seal my furniture. Note that a wax sealer does not provide the same “hard” finish as poly, but it still protects from scuffs, stains and scratches with a softer finish that feels smooth and resists water. To apply the finishing wax, place a small ball of wax inside a thin clean cloth (such as cheese cloth). As you start to work the product into the furniture, the wax warms up and will work through the cloth. This is the recommended technique and allows for a thin, even coat of wax to protect your piece.
For more details, see the full tutorial (and more projects!) on emilyronehome.com.
Enjoyed the project?
Suggested materials:
- Rag
- Vinegar and water solution
- Howard Chalktique Paint Additive (https://www.amazon.com/Chalk-Tique-Powder-Additive-Transforms-American)
- Interior white latex paint
- Liquid measuring cup
- Paint brush (https://www.amazon.com/gp/product/B000O3S72G/ref=ox_sc_act_title_2?smi)
- Chip brush
- Painters tape
- Vintage Antiquing wax (https://www.lowes.com/pd/Minwax-Furniture-Wax/999913689)
- Natural Paste Finishing Wax (https://www.lowes.com/pd/Krylon-Dark-Vintage-Antiquing-Wax-16-fl-oz/10)
Comments
Join the conversation
-
-
-
 Donna
on Dec 25, 2021
Your style is all yours and it is simply amazing! I love how it’s the same bathroom, yet with just some color change and shower curtain, you now have a designer bathroom. Thanks for sharing!! 🎄 Merry Christmas!
-
 Emily Rone Home
on Dec 25, 2021
That is so kind, thank you Donna!!! And Merry Christmas to you and yours as well!
-
-










Frequently asked questions
Have a question about this project?