


Mason Jar Candles

Okay, I've been obsessed with these candles when I saw Caitlin's from DIY with Caitlin's live. I had to make them myself!
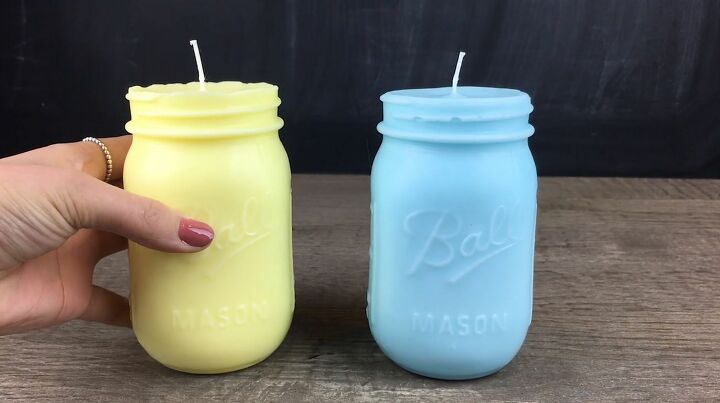
How cute are these?!
Materials:
- Smooth-On Silicone Mold Making, Liquid Rubber
- Candle wicks
- Paraffin wax
- Crayons
- X-acto knife
STEP 1: Make the box for your mold
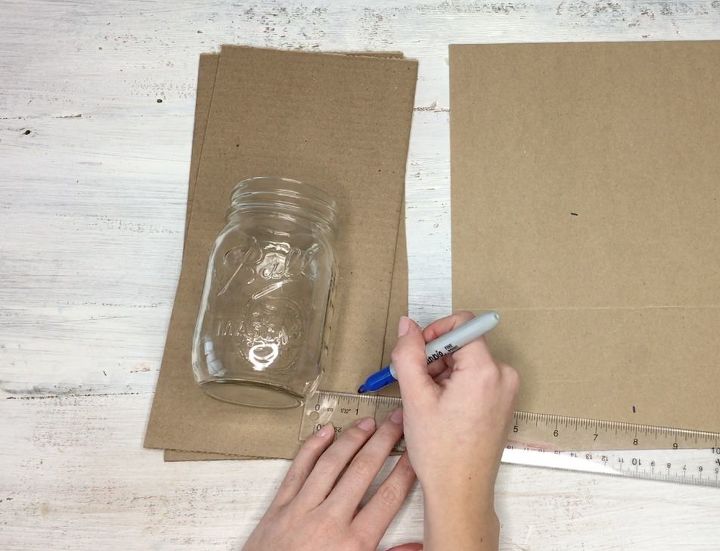
First thing is to make your box for your mold. Choose what jar you'd like to make a mold of and measure out 1/2 and inch from each side.
STEP 2: Glue your box together and glue in your jar
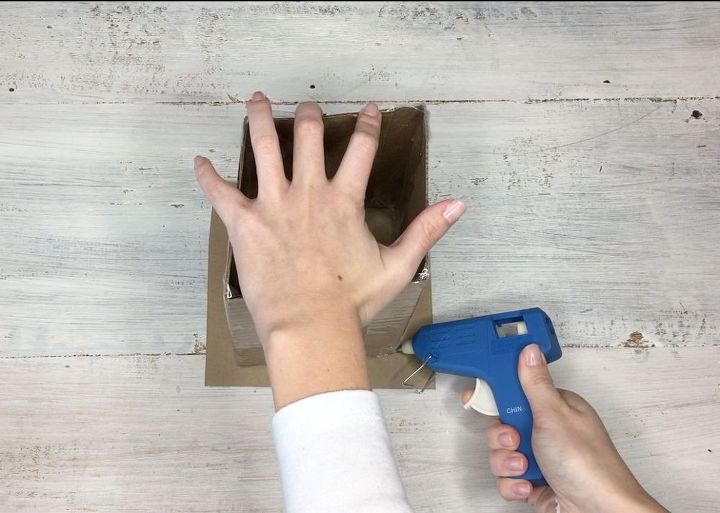
Next, cut and tape all the sides together. Make sure to use duct or packing tape for this part. Then hot glue the box to a base of cardboard. Make sure not to leave any holes open.
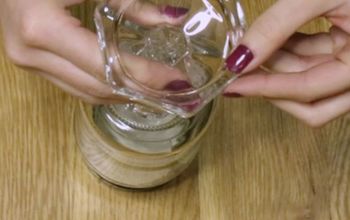
Next, you'll hot glue the lid onto you jar. This step is important so none of the mold gets inside your jar. After that, you can hot glue your jar upside down to the base of the box.
STEP 3: Mix the silicone parts together
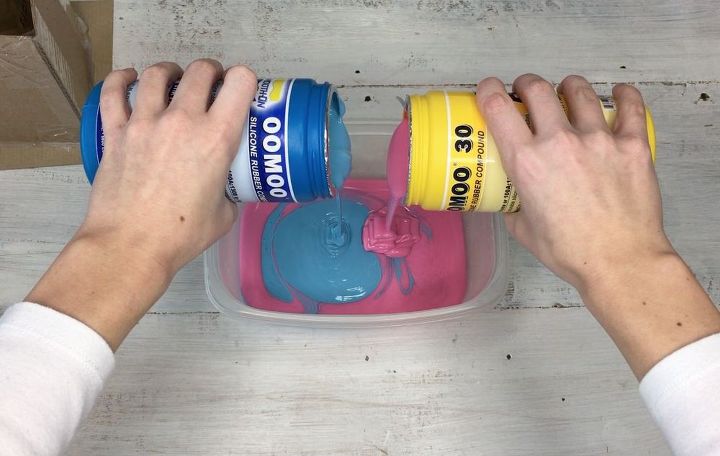
Here is the fun part! Mix together your silicone pack. I got mine off of Amazon for less than $30. Be sure to mix these two parts at the same time until they turn a shade of purple.
STEP 4: Pour silicone into your mold box
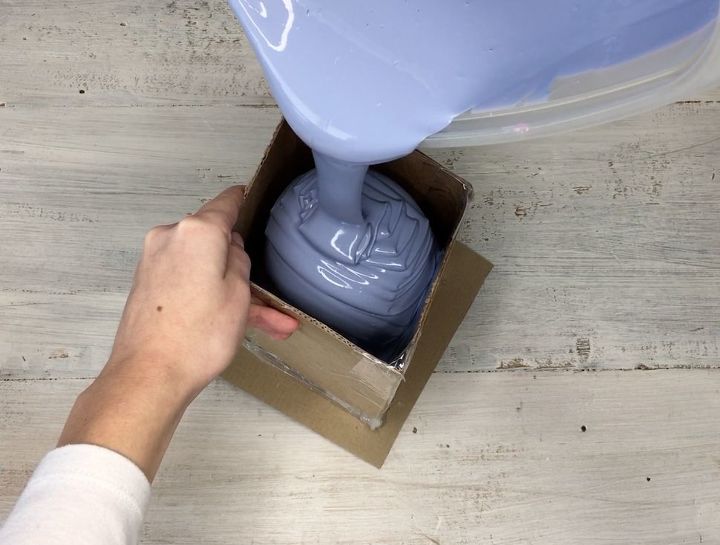
On an angle, pour the mixture into your box. Start pouring on an angle to avoid any air bubbles.
STEP 5: Wait for mold to harden
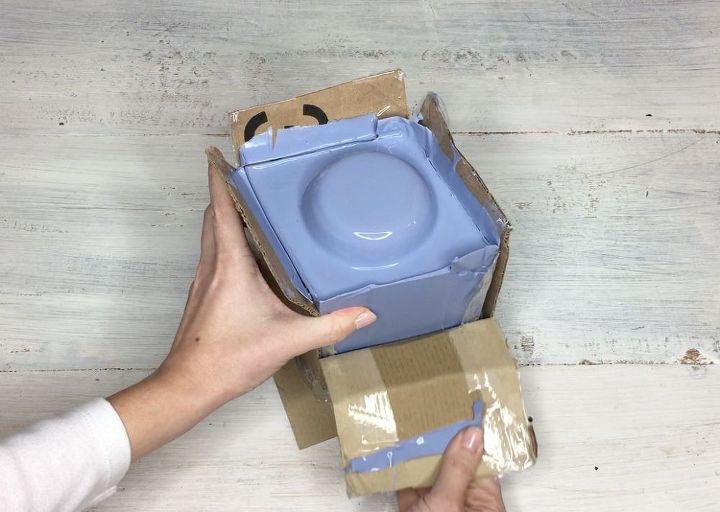
After waiting about 6 hours for your mold to dry, begin peeling off your cardboard.
STEP 6: Cut out your jar
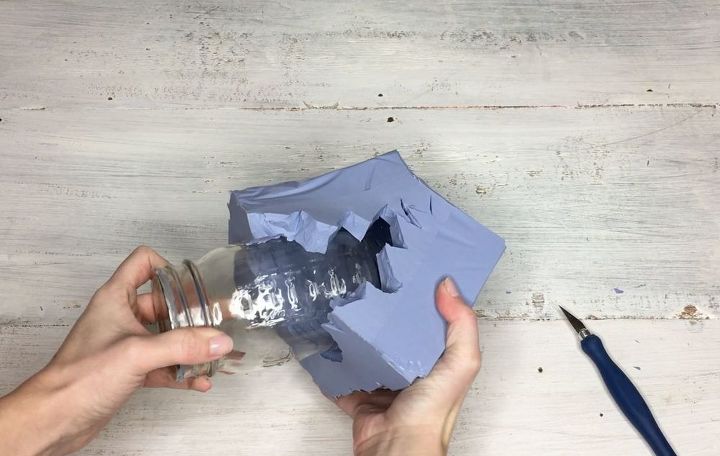
Once all the cardboard is off, cut a zigzag into the mold to release the jar. It's SUPER important to cut a zigzag not straight down so your wax can't escape.
STEP 7: Prepare your mold for pouring
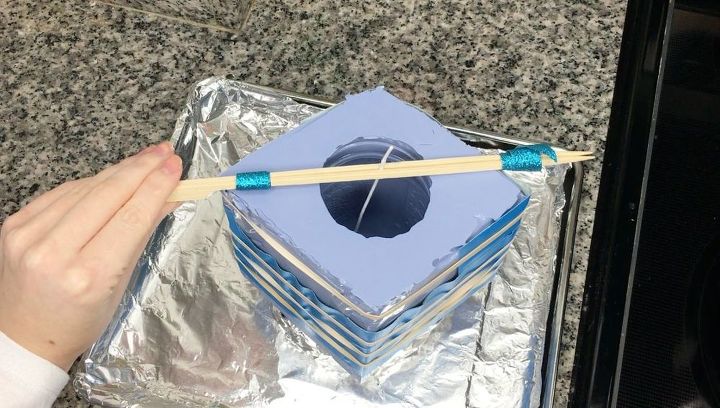
Next, you'll want to tape your mold back together. I used duct tape for a strong hold and rubber bands to ensure the cut was totally back together seamlessly.
You can then insert your wick. I kept it stable by placing it between two skewers.
STEP 8: Melt the wax
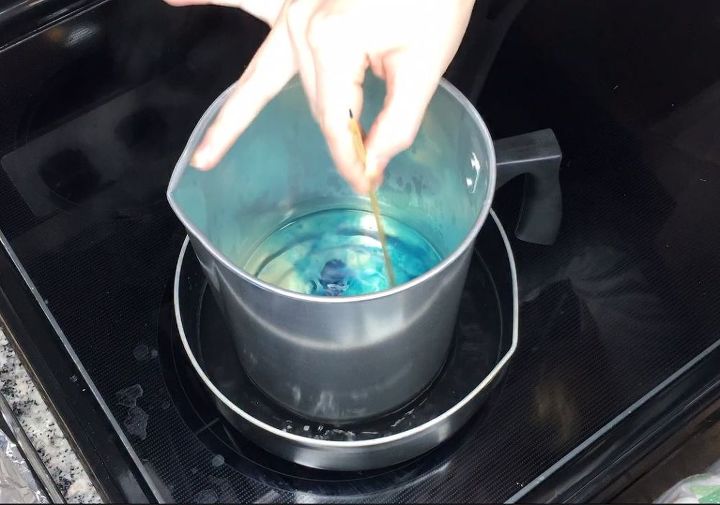
You can then melt you wax in your double boiler. I used paraffin wax because it hold color and scent well.
To dye my wax, I used a small piece of a crayon. Follow the instructions on your wax for what temperature to add in your scent and color.
STEP 9: Pour your wax into the mold
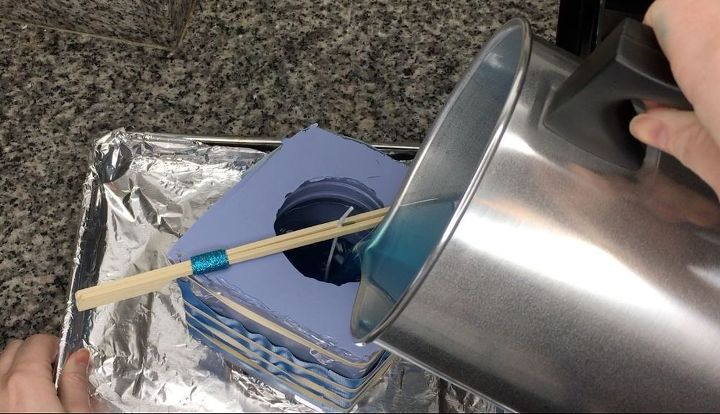
Once my wax was melted and the color was evenly distributed, I took it off the burner and carefully poured it into the mold.
STEP 10: Remove your candle from the mold
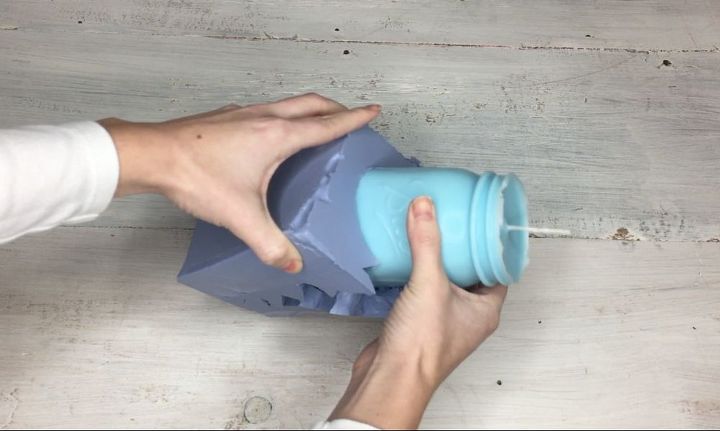
After letting your wax completely cool remove the tape and pull out your candle. This was the most satisfying moment of the project by far!
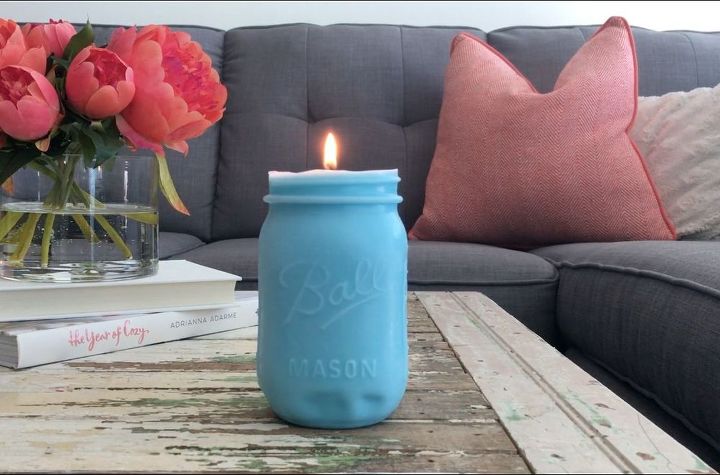
I am 100% totally IN LOVE with the way this came out. It looks amazing with my rustic-chic decor in my apartment. I've already received multiple request from my co-workers to make them one too! I think I've found my new hobby... 🤔
Resources for this project:
See all materials


Comments
Join the conversation
-
Very cute!!
-
Why not just put the candle wax in the Mason jar with a wick? When it burns the wax won't go everywhere.


Frequently asked questions
Have a question about this project?
How many times can you use a mold?
They indicate in the instructions to measure 1/2 inch from the jar on the cardboard. Yet, the picture shows they are marking it at 1". So which is it?
Where does the wax go as it melts??