


How To Make A Live Edge Wooden Dining Table

I found out through a friend that a sequoia tree had been removed by the city and taken to a local miller. I was able to get my hands on two book matched pieces of it and thought they would make a great live edge wooden dining table. I would have to join them together to create the proper width, but I was up to the challenge. While live edge furniture has always been in style, it’s very hot right now and I was excited by the idea of making my own. If you love the look, follow along and see how it’s done!
Supplies:
- Sequoia Wood Slabs
- Router
- Router Jig
- Clamps
- Sander
- Sandpaper
- Wooden Dominoes
- Domino Joiner
- Angle Grinder
- Silicone Kitchen Spatula
- Extra Board as Straightedge
- Circular Saw
- Level
- Chisel
- Wood Glue
- Two Part Epoxy
- Planer
- Foam Brush
- Steel Wool
- General Finishes Arm-R-Seal
- Table Legs
- Drill Screws
- Gloves
- Googles
- Mask
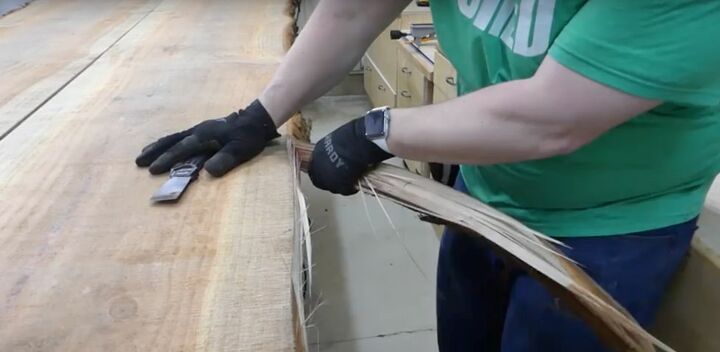
Step 1: Dry the Wood and Scrape The Bark
Since my slabs came from a tree that had been recently milled, I needed to let them dry out before I could work with them. Once they were fully dry, I used my chisel to scrape away as much of the bark as I could from the live edge sides.
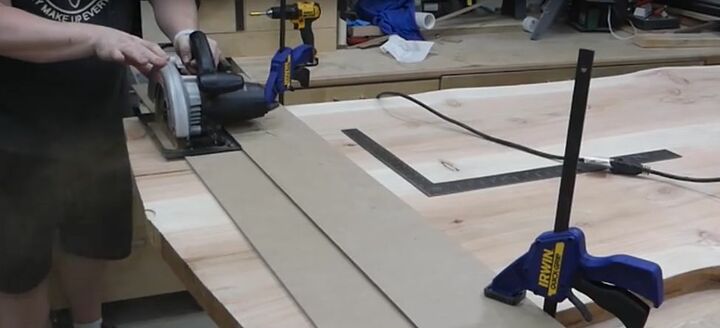
Step 2: Trim Board Center
In order to make the table a decent width, the two slabs or bookends, needed to be joined in the center. To create a perfect seam, I used my level and clamped a board in place on top of my slabs as a fence. Then I used my circular saw to trim the edges.
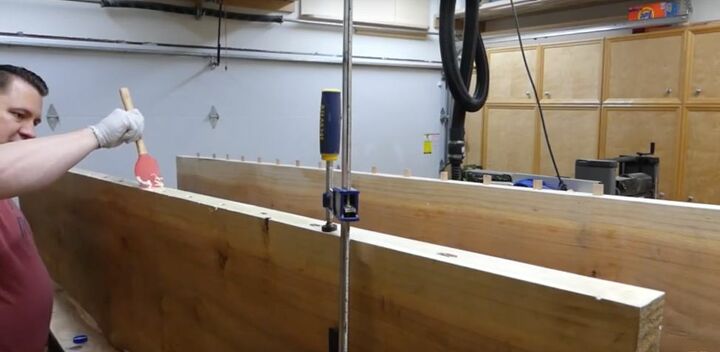
Step 3: Join the Boards
To join the boards, I used wooden dominoes or pegs. I marked the boards every 6 inches and made holes with my domino joiner. I put wood glue in the holes, using a silicone kitchen spatula to spread it around. Then I popped the wooden pegs in the holes. The kitchen spatula might seem like an odd choice, but it does a great job and wipes clean every time. I joined the boards and clamped them together to dry.
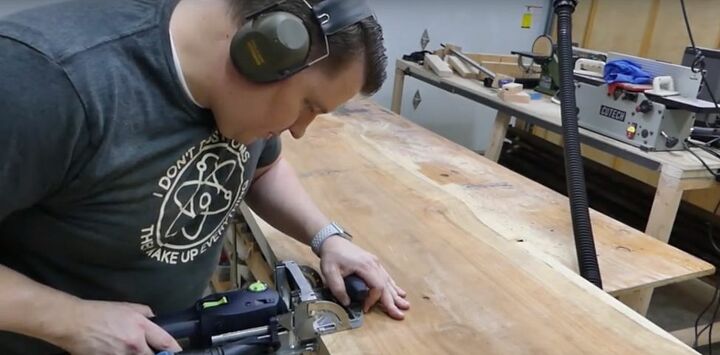
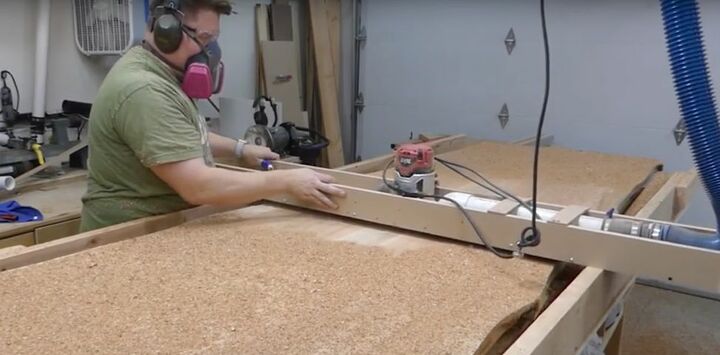
Step 4: Flatten and Sand the Board
I had to expand my router flattening jig a little since my table was so wide. I used it to completely level the top of the board, so it would be a functional surface. Once the tabletop was totally flat, I broke out my sander to give the wood a flawless surface.
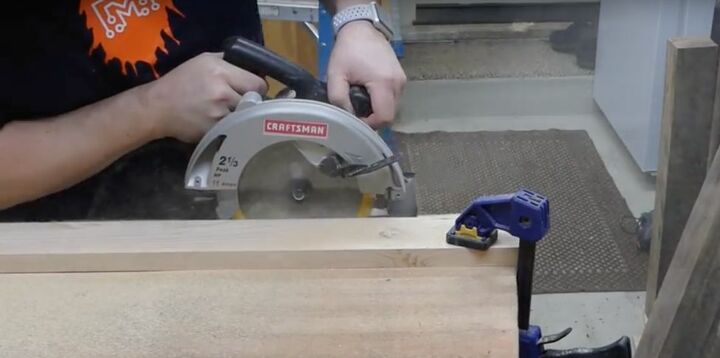
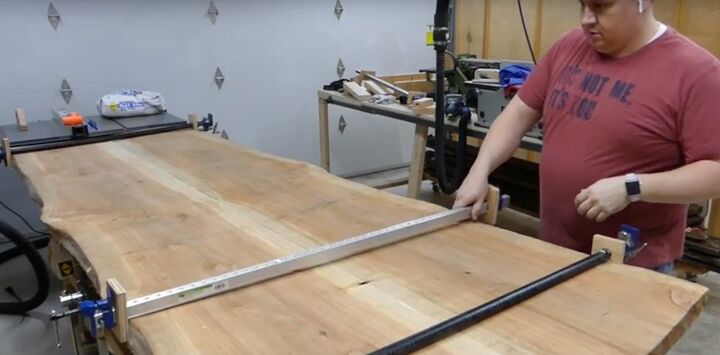
Step 5: Cut a Square End
While I was excited to leave sides of the table rough, the ends needed square cuts. I couldn’t use the sides to find a 90 angle, since they weren’t straight, so I used a metal square to find the center of the table. Then I took two boards, offset them, clamped them to the table and used them, as a fence, to help me cut my totally straight and square edge.
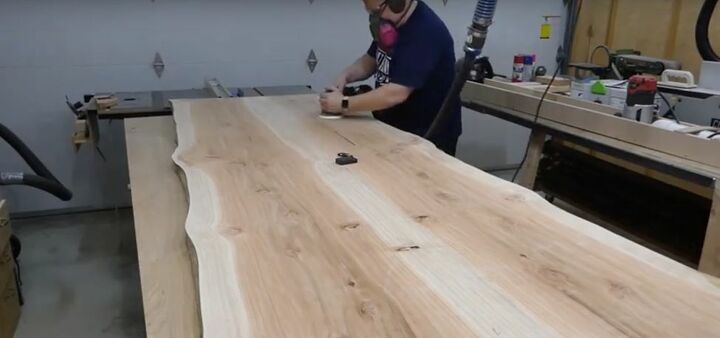
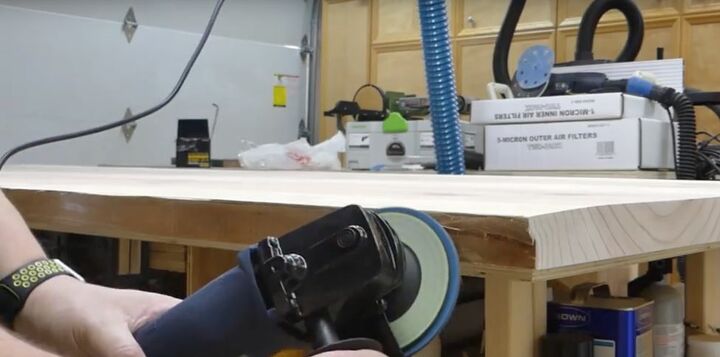
Step 6: Sand Away the Remaining Bark
To remove the excess bark and give the edges a little more character, I put a rough grit sandpaper disc on an angle grinder and sanded the edges. It was a little like carving. Then I went over the edges with my sander to smooth them out.
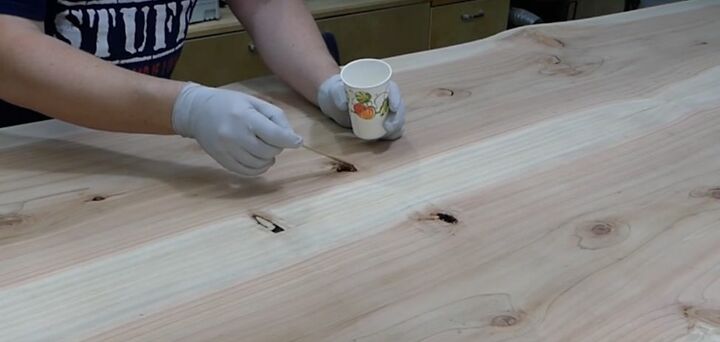
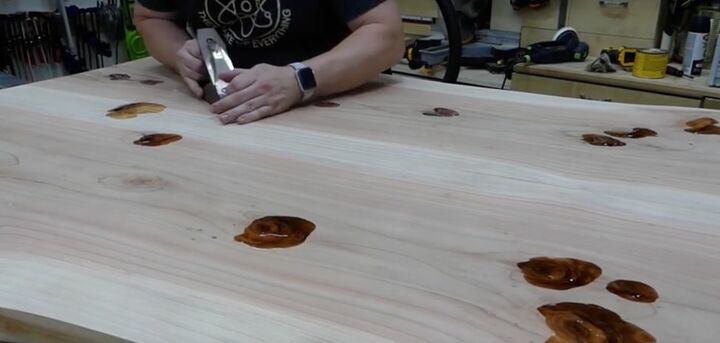
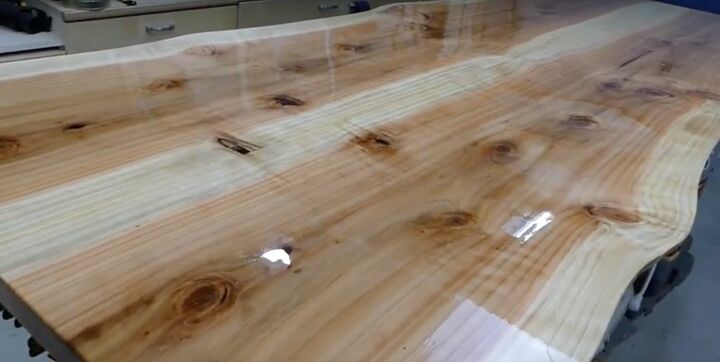
Step 7: Fill Holes with Epoxy
To stabilize the wood, I filled any knots, chips or cracks with a two-part epoxy. I mixed it in a paper cup and dropped it into the holes. Then I let it dry. When dealing with epoxy, you want to make sure you’re wearing eye protection, gloves, a mask and you have a well-ventilated area to work in. When it was dry, I removed the excess with a planer. I’ve found it to be the best tool for the job. It removes it cleanly and makes sanding much easier. Once most of it was gone, I did sand it one last time.

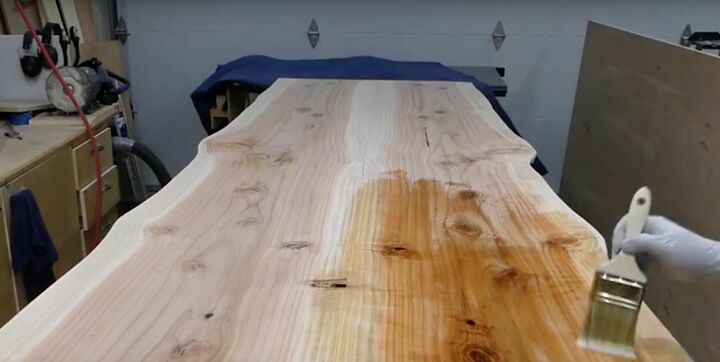
Step 8: Seal and Buff
I sealed the table with 4 coats of General Finishes Arm-R-Seal, I let each coat dry fully in between applications. I started out with a bristle brush, but quickly realized that a foam brush worked much better. I sanded lightly in between each coat, with 400 grit, but I used 500 grit after the last coat. Then I buffed it out with wax.
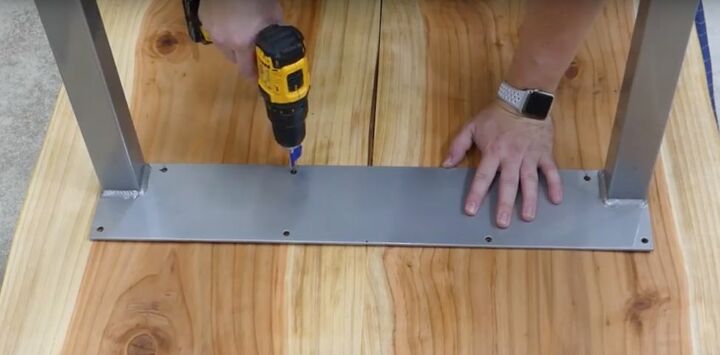
Step 9: Add Legs
You can’t have a table without legs, so my last step was to add them. I used legs from a local shop, but you can choose any legs that fit your particular design style. You just want to make sure that they are rated to support the weight of your tabletop. Installation will depend on your specific legs. I was able to attach mine with screws.
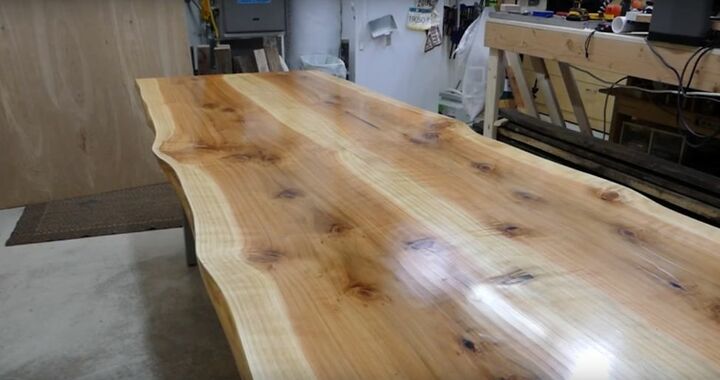
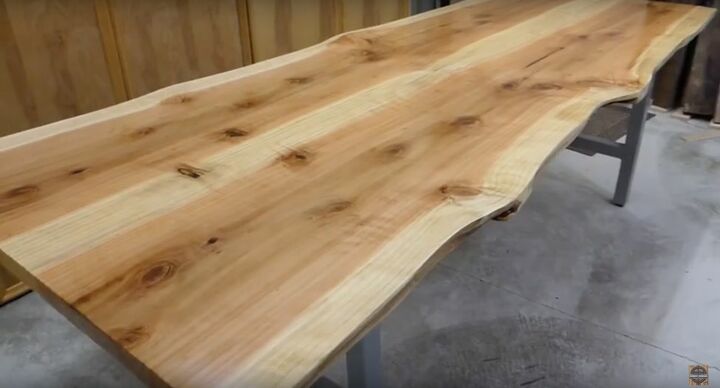
After a few days of dry time, my live edge wooden dining table was complete. I have to say it looks amazing, both modern and rustic at the same time. It wasn’t a difficult build; a few wooden dominoes joined the pieces easily. Live edge slabs are readily available and can often be leveled in the shop before you pick them up. If you’re looking for a truly unique piece of furniture to make, I highly recommend this DIY.
If you like furniture build projects and DIYs don’t forget to sign up for our newsletter so you don’t miss a single one!


Comments
Join the conversation
-
WOWZA, that is beautiful!
-
What an inspiration! Thank-you
Barb


Frequently asked questions
Have a question about this project?