


Dresser to Banquette Transformation

I bought this dresser from an unclaimed freight store- YEARS ago. It reminds me of a piece of dorm furniture. I always had the intention of adding a top because oddly enough, it didn't come with one. I saw potential because it is a very solid and very well made piece of furniture. After debating for quite some time I finally decided that I was going to create a banquette to sit at my kitchen table. In all my excitement to dig in I forgot to take a picture of the actual before, but in the BEFORE picture below you can get a basic idea of what I was working with.

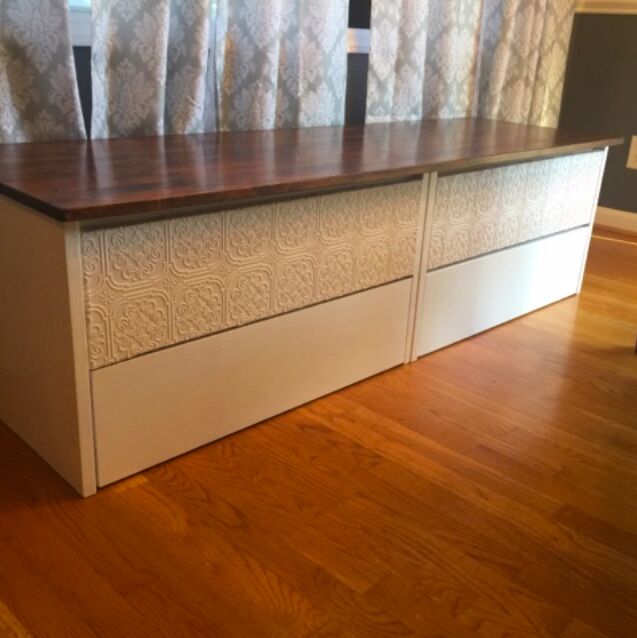
A very solid piece of furniture that just needed a new life. This piece was originally 4 drawers high (one unit was stacked on top of the other). I removed the large bolts holding the two units together. I then drilled 3/8" holes in the left side of one and the right side of the other and fed through bolts that would ensure that the banquette was one solid (horizontal) piece. After sanding and adding a coat of Valspar Ultra White paint, I was almost ready to start working on some of the decorative details.
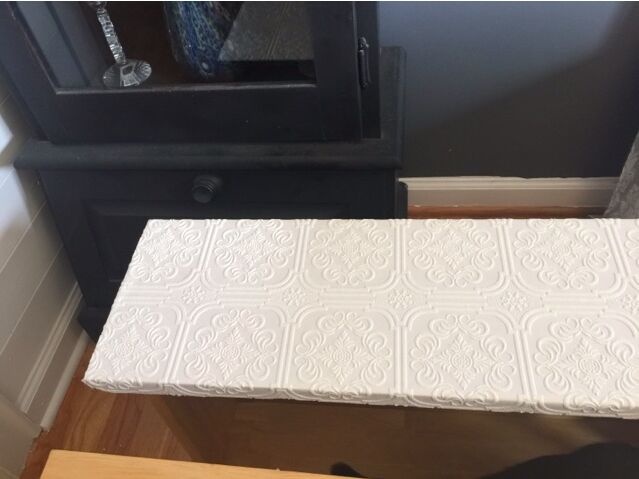
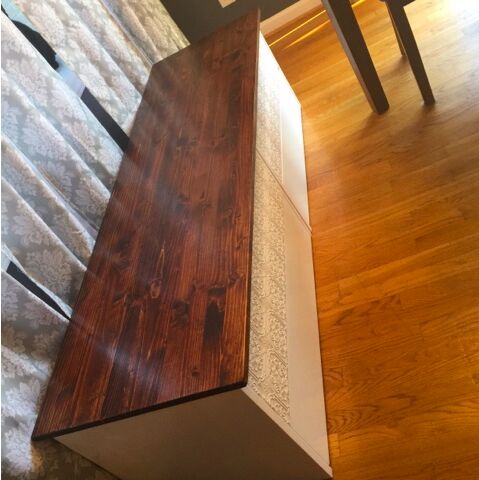
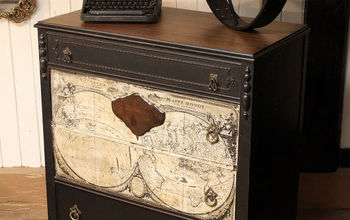
I decided to add a decorative detail to the front of the drawers. I had just enough paintable wallpaper left over from another project that I was able to cover the top two drawer fronts. An alternate idea would be using stencils or a complimentary accent paint color.
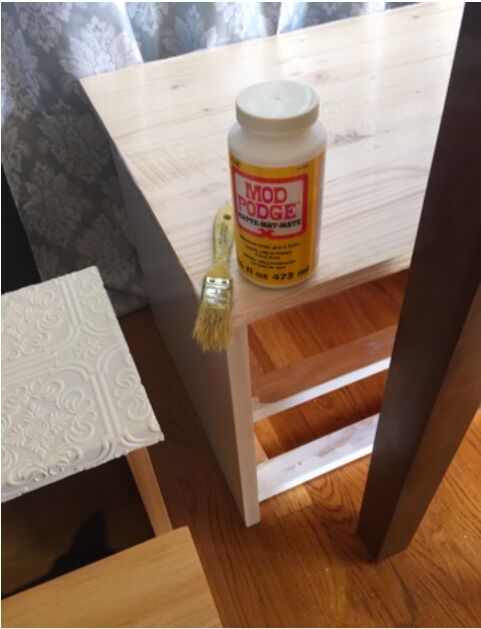
I used Mod Podge to adhere the wallpaper. I applied a layer over the front of the wall paper to seal it.
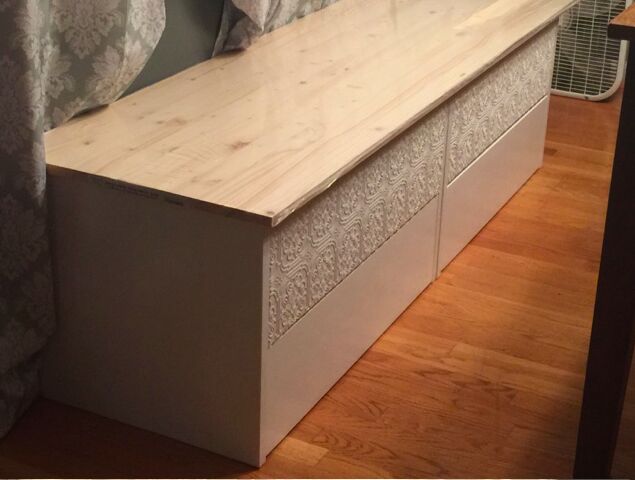
I purchased a 6' project panel from my local hardware store for the top. I secured this in place from underneath with screws. My project was finally starting to take form!!
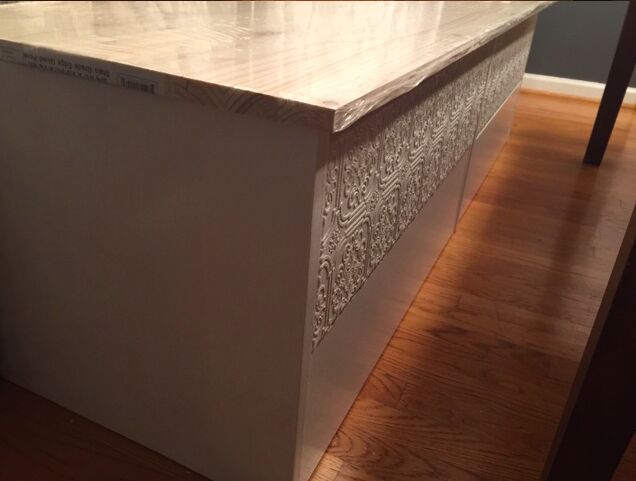
After adding a coat of stain and sealant to the top, this project was officially done!!!
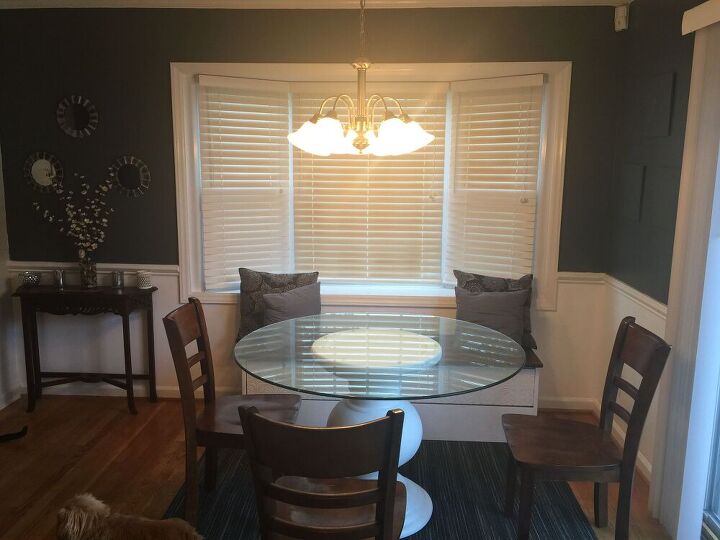
This picture shows the banquette in its final location, nicely tucked up against the wall. I put decorative pillows in place to add to the overall design.
Resources for this project:
See all materials


Comments
Join the conversation
-
Seating and storage so smart, beautiful.
-
Love it!!


Frequently asked questions
Have a question about this project?
Nicole, this is really beautiful.
How do those drawers open? Are they a touch front?
Hugs from Idaho