A Different Spin on Repurposing Dressers

by
Jasmin
(IC: homeowner)
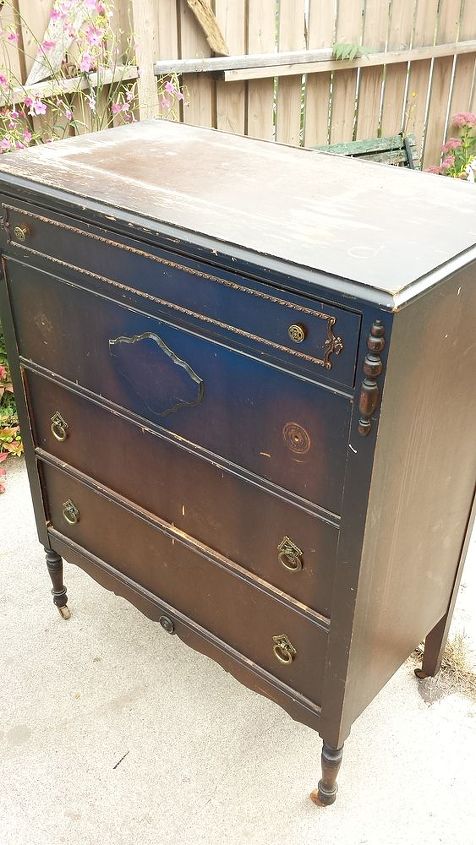
I was crossing my fingers one day I would find a dresser with beautiful bones, but so damaged I could justify trying something I had been wanting to for a while! I got the call about a dresser someone had sent to the curb and sure enough....it was exactly what I had been looking for! For my own personal needs, I need something beautiful, classic, sturdy, with drawers and a large open area to store my larger and bulkier items. I figured if I could find a dresser I loved the lines of, I might be able to somehow turn 2 drawers into one large door with a nice open concept storage area inside. Cross fingers! It WORKED! Now there were a LOT of steps involved and I will post as many as I can here, but for the full detailed blog, feel free to swing over to my ( not so fab skilled blog) and read a bit more on it!
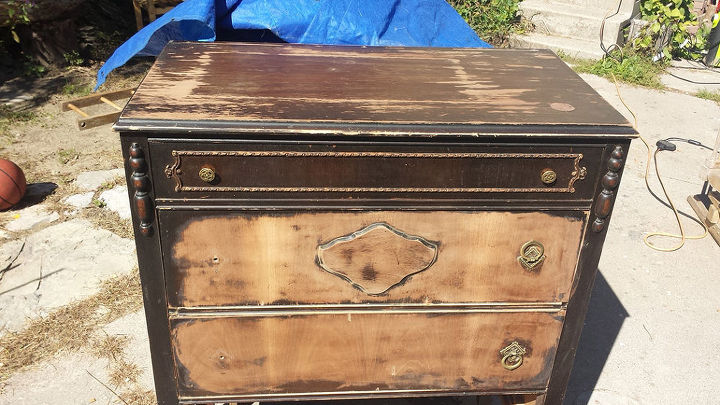
Ahhh yes. Those lines! Perfect. BUT, drawers won't open, top knobs are in holes far too large and they just sink right inside, missing hardware, deep scratches, pink paint blotches, and then... THEN... once I finally got the drawers out, oh my. This piece has clearly lived a interesting life. See next photo for drawer closeups.
Yes. Well. Points for effort. I suppose piecing together a bunch of random bits and just slamming a few nails into the broken drawers might be an "ok" temporary fix..... but after a lot of use, it had damaged the drawers to the point they were no longer functional or able to take more reconstruction. Sooooooo commence total overhaul Gypsy Barn style!!!
I took all the drawer backings off, used some adhesive on the drawer fronts and managed to find a way to secure these two drawers together as one large door. Then I stripped off the bubbly, flaking finish and wood filled the two holes left over from the old hardware on the left side there.
Then I added a matte beige paint. I had planned on creating a nice classic look with an image transfer of some sort and needed a base i could work with. Now, if you take a tip from the Graphics Fairy on image transfers, and find one that works for you, this stage could change a wee bit. however I wanted to use the gesso method. I also decided on a map. I thought - well, if it is going to look somewhat authentic as a map, I will have to age the beige a wee bit. I googled old maps for a while to see where they tend to age and darken the most and then set off on a total tea staining experiment!
it seems that most maps darken around the edges the most. I made LOTS of tea and let it steep for a few hours to really draw out the colouring properties. I also drank more than any human needs to consume for an afternoon of caffeine consumption, but let me tell you - I finished it a lot faster than I thought!
While the door front was prepping I set to work on the new open space inside the dresser. I cut a piece of wood and attached it inside as the new inner shelf and then stained it and the exposed inner areas to match. Then went back to the image transfer.
The last steps. I chose to refinish the top back to a natural state, and also opted to leave the nice little decor on the front au natural as well to pull that over all feeling into the piece. I clear coated everything and used European hinges to attache the door. I have very little desire to ever work with those hinges again, there were a lot of colorful words exchanged between those hinges and I!!! However, in the end, I learned a new skill. So it wasn't all bad I suppose.
And here she is "open" ready for all my big bulky mess to be stored away in a cute little space! And of course, pop by Facebook some time and say hi! www.facebook.com/gypsybarn
Enjoyed the project?
Published October 15th, 2014 12:14 PM











Frequently asked questions
Have a question about this project?
What color paint did you use on this piece and where did you find those drawer pulls? Thanks! Love, love LOVE!!!! You did an incredible job!!