


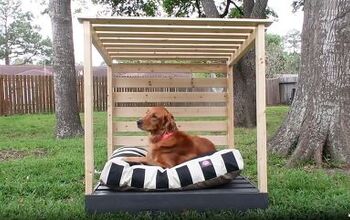
Backyard Cabana

12 Materials
$70
1 Day
Medium
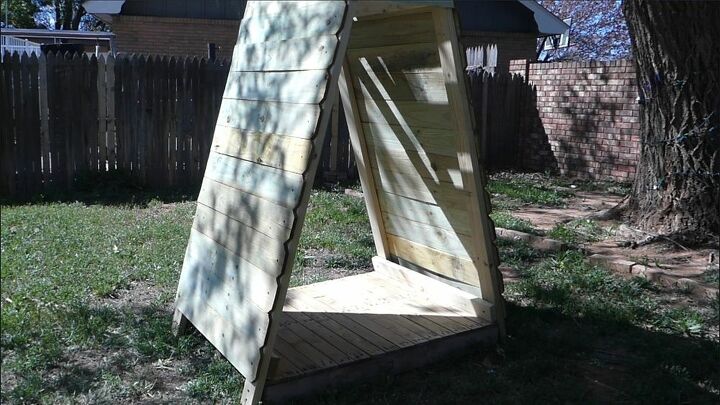
Stay-cations may not be what we were hoping for. Tight budgets and current events can put a damper on travel plans. Create an A-frame cabana and you can at least pretend your backyard is an exotic getaway.
You’ll need: (affiliate links on my blog earn proceeds which are donated to no-kill animal shelters and rescue organizations)
* Six pressure treated 2x4s and 30 1x6x6 dog eared fence pickets
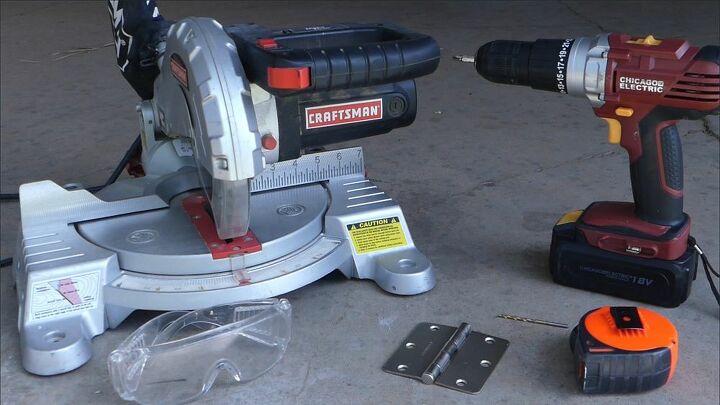
* Four inch, Three inch, and 1.5” screws – these should be rated for outdoor use
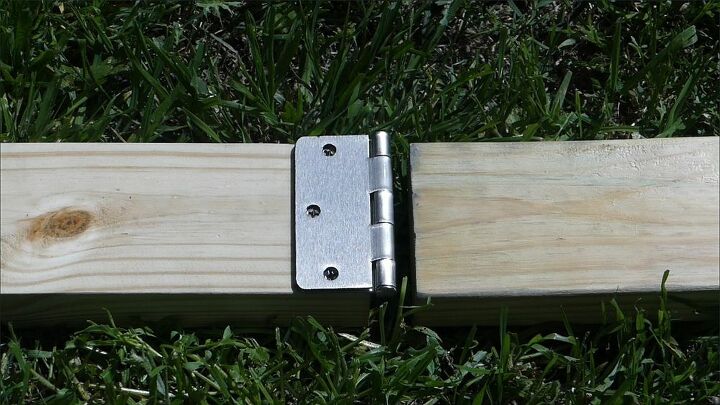
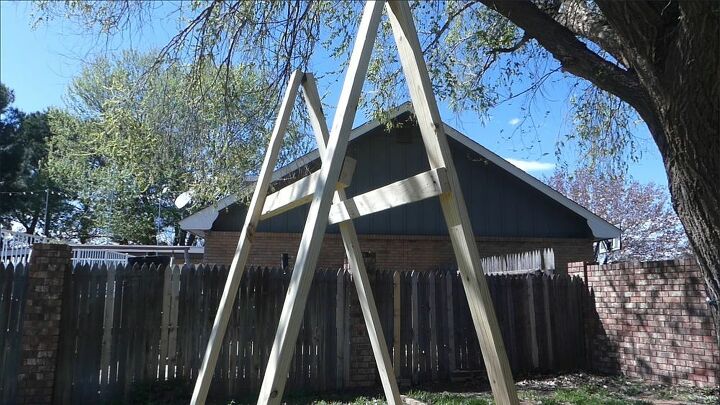
Attach one leaf of a hinge to one end of a two by four with the accompanying screws. Line a second two by four up straight and attach the other side of the hinge. Follow this process again for two more two by fours and the other hinge.
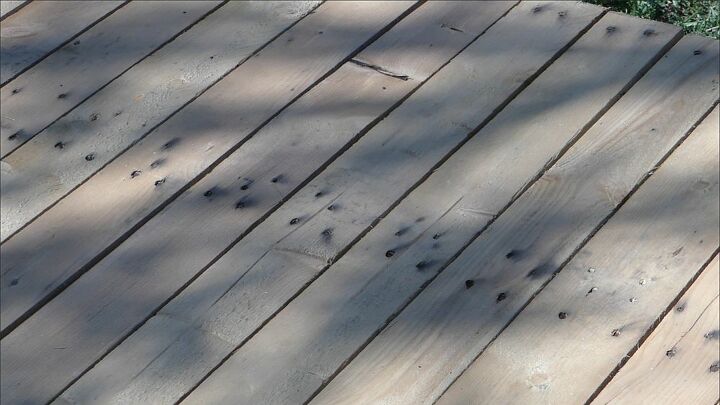
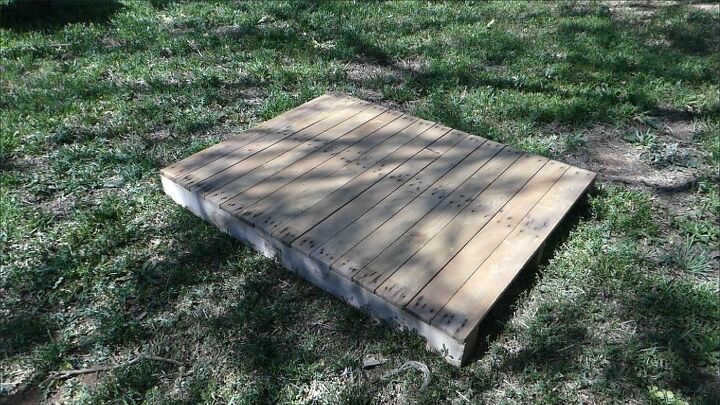
Measure the height of your pallet’s corner block – mine is about four inches. Make a mark on your 2x4’s base at the same height so you know where you can secure the A frame in with screws.
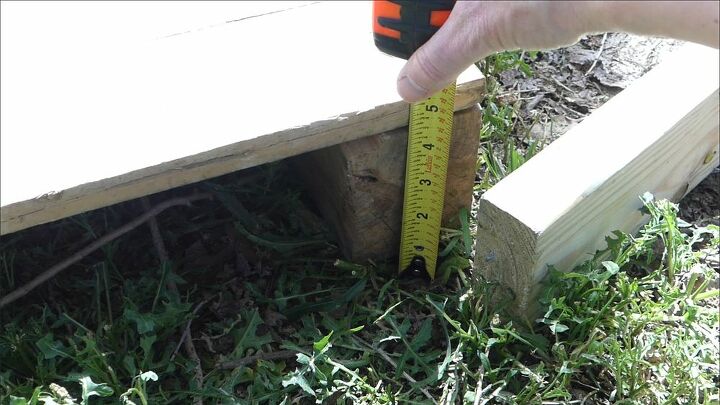
Drill two pilot holes into your 2x4 within that marking – I’m making one at about 1 and a half inches up and the other at about 3 inches up. Since the 2x4s will sit at a slight angle, make the pilot holes at an angle as well. Bailey didn’t want to hold the A frame upright so I bore these pilot holes while the 2x4s were on the ground. If you’ve got a more willing helper to hold the frame, it might be easier to gauge the angle as you drill.

Set the A frame upright and run two four-inch screws into each hole. Use a level to ensure the 2x4s are straight. Do this on all four legs of the A frame.
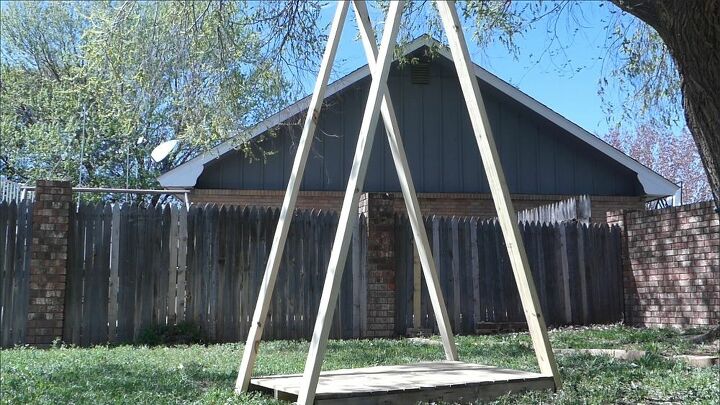
Cut four 2x4s to serve as braces between the A frame legs. These should be the same length as the shorter side of the pallet, 38.5” in my case. Two of these will be attached to the bottom inside. Drill pilot holes and screw in place on both sides with the 3 inch screws.
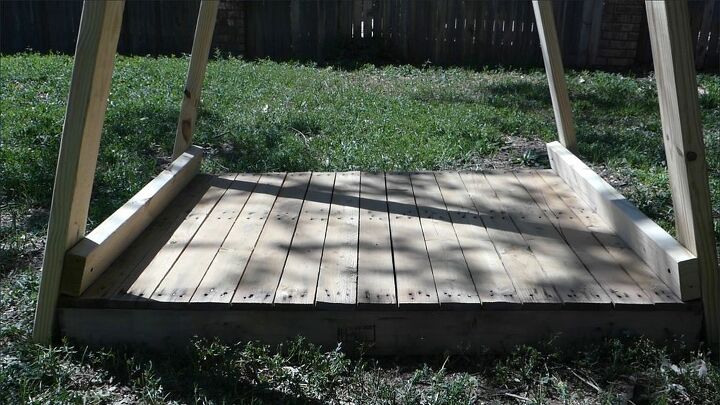
The remaining two will go about 2 thirds up on the A frame. Use a level to ensure these upper support boards are attached straight (mine are 57" above the pallet).
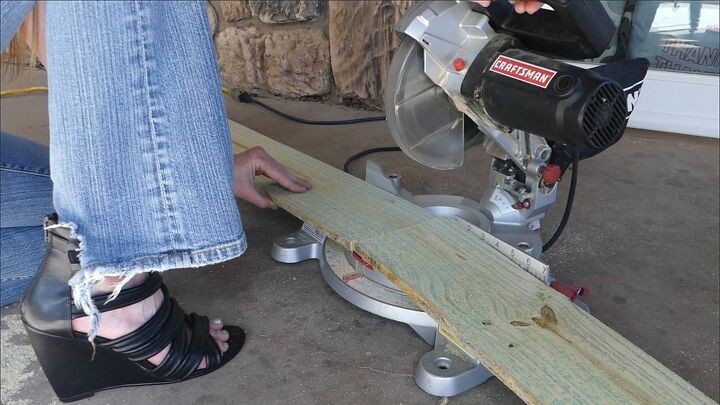
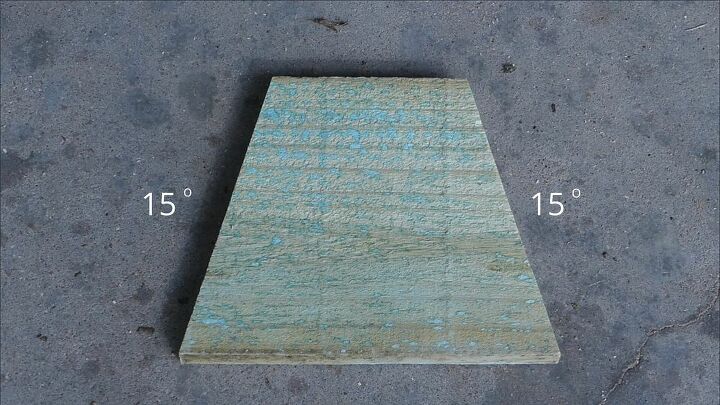
Next, cut your fence pickets. You can cut these either the same length as your shorter side or add an inch or so for a little extra border.
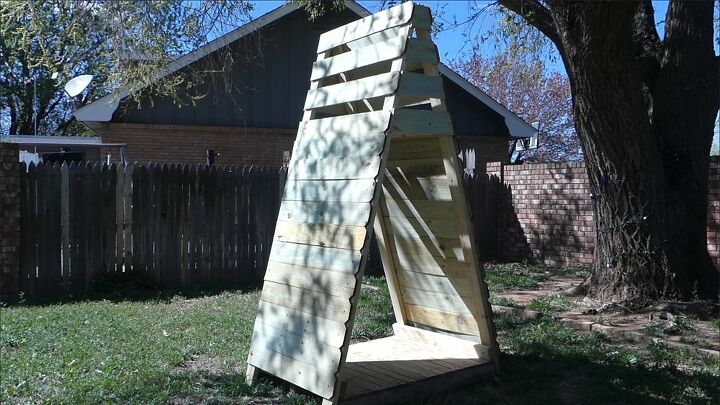
Secure a picket to the very top of one side of the A frame with 1.5” screws. Leave a little space and add another. Do this for two more pickets after that. These spaces will allow airflow from the top and for heat to escape. I attached these spaced pickets so that the 4th one would hide support board.
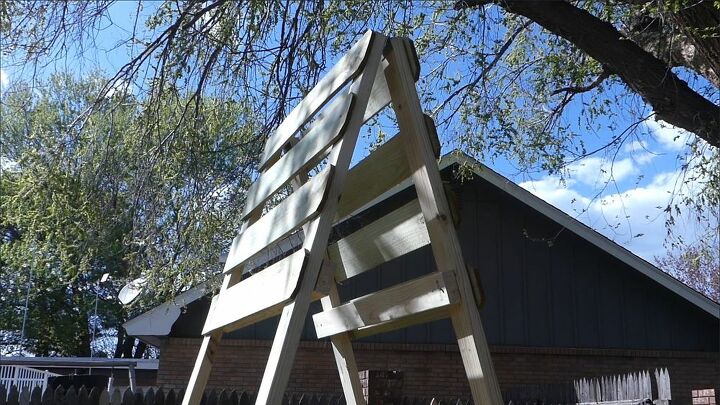
After that, secure the pickets right next to each other to enclose one full side.
Follow the same process for the opposite side.
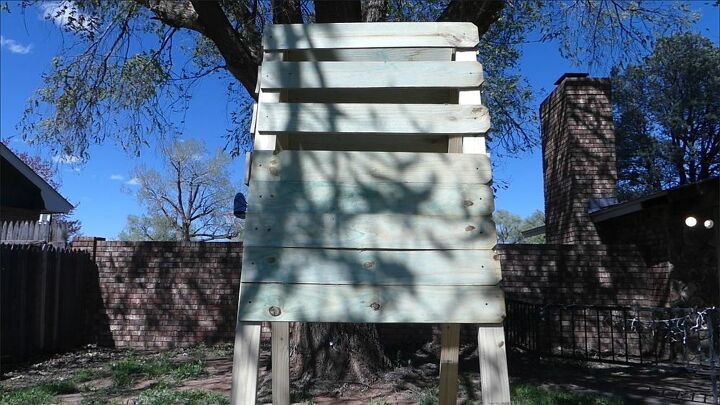
Use the extra wood from the pickets for the front and back of the cabana. Cut these at a 15 degree angle on each side and measure the width as you go.
Screw these in so they are at the same height as the surrounding pickets.

Do this only for the first four pickets on the front and back.
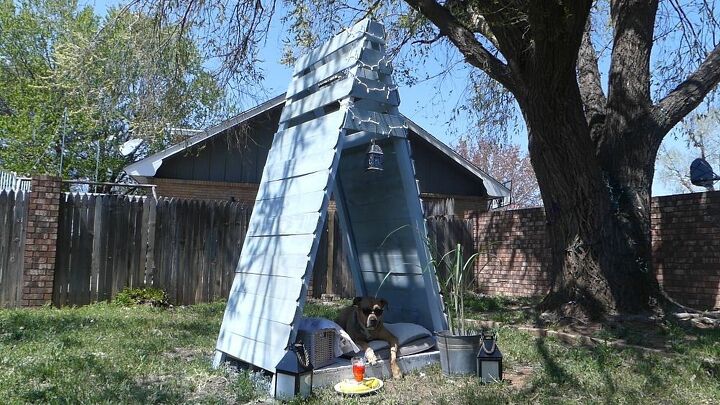
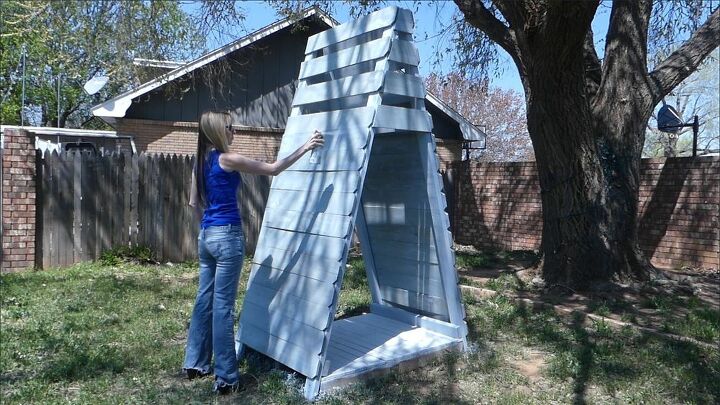
Paint your cabana. I’d originally planned on using a can of exterior paint but I didn’t have a roller and we are avoiding non-essential store trips right now. I had some Rust-Oleum Solstice Blue on-hand and I LOVE the way it turned out. The spray paint went on super fast and I was done painting the entire cabana in only minutes.
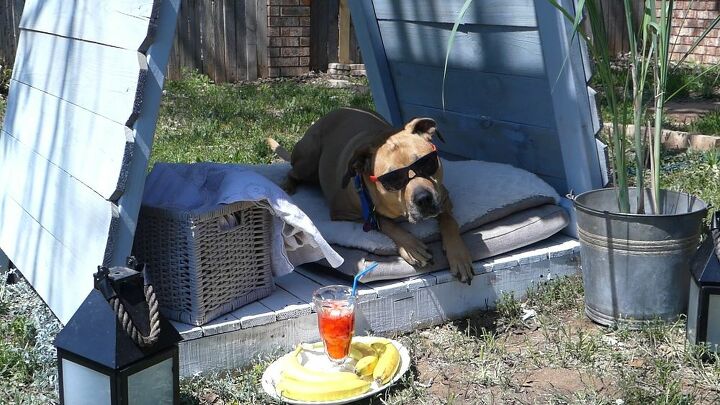
Finally, dress it up! Fairy lights, lanterns, container plants, grass baskets, throws, pillows, and a fruity sno cone treat are only a few ideas that will help create a beachy feel to your backyard cabana.
Watch the step-by-step video tutorial here:
{
"id": "6123570",
"alt": "",
"title": "",
"video_link": "https://www.youtube.com/embed/7hmD2uBltvI",
"youtube_video_id": "7hmD2uBltvI"
}
{
"width": 634,
"height": 357,
"showRelated": true
}
Resources for this project:
See all materials


Any price and availability information displayed on [relevant Amazon Site(s), as applicable] at the time of purchase will apply to the purchase of this product.
Hometalk may collect a small share of sales from the links on this page.More info
Comments
Join the conversation
3 of 11 comments
-
Daisy is the latest & biggest baby. Found her on March 25, 2021 & not one inquiry, so June 25th, she's home here officially. My seven tiny ones love & she loves them!

-
hmm bit ott for simple me - I got X3 pallets made triangle over top of one & nailed together - sweet. Vegez planted on sides & picnic spot inside. Yep I share with my puds too😼👍


Frequently asked questions
Have a question about this project?
Love to do this project for our new puppy, but will need work boots right? 😉