


Art Garland- Clothespin Picture Holder
My toddler and I have been making a ton of paper crafts lately. When preschool was in session, my son brought home paintings and other paper crafts every week. Some I would give to family, some I saved in a folder. There wasn't a dedicated place for all the artwork. I wanted to make a picture hanger where we could rotate some of the pictures and he could have a little showcase for his work.
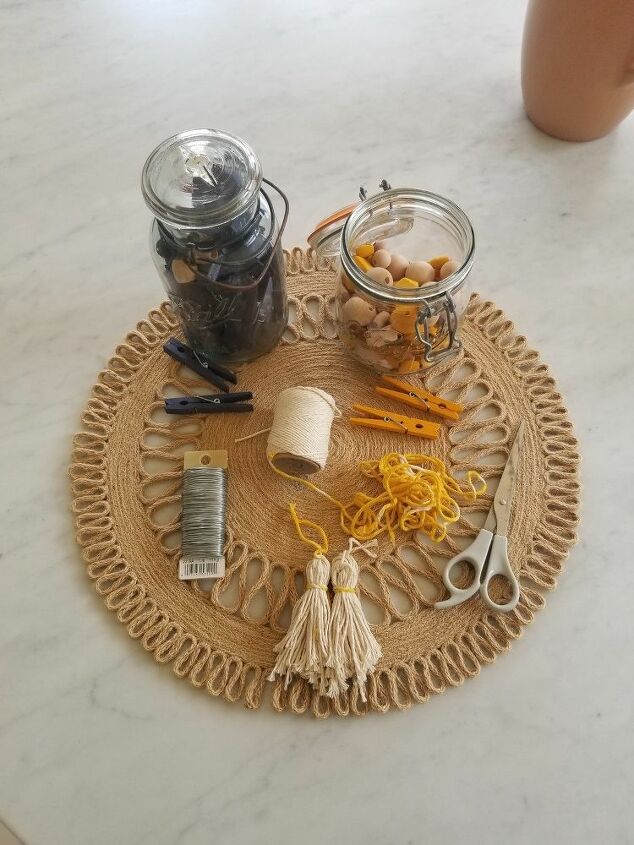
I had materials on hand from an Easter garland I made as part of a craft bin dump challenge, as well as clothespins from my Rit dye project. By taking apart my garland, I was able to reuse the wire, string and DIY tassels!
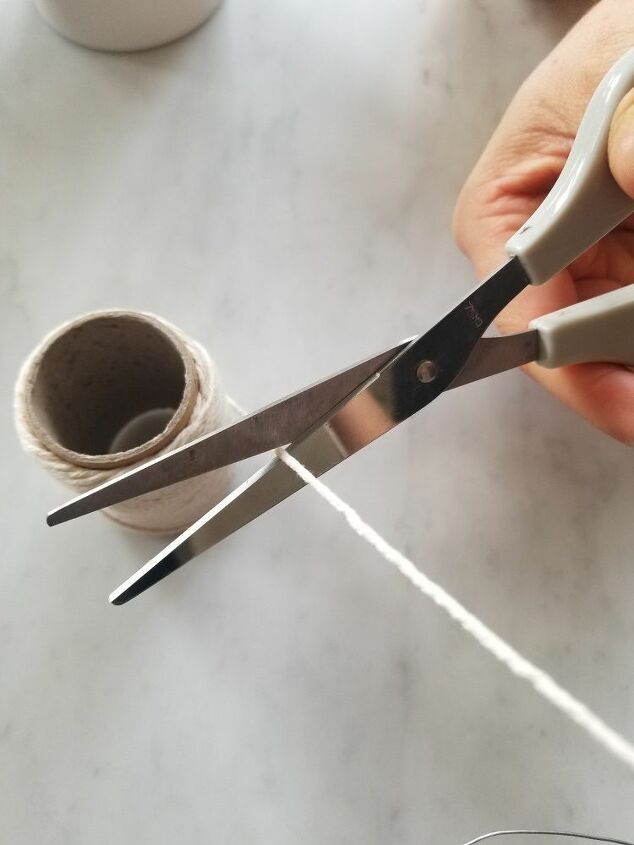
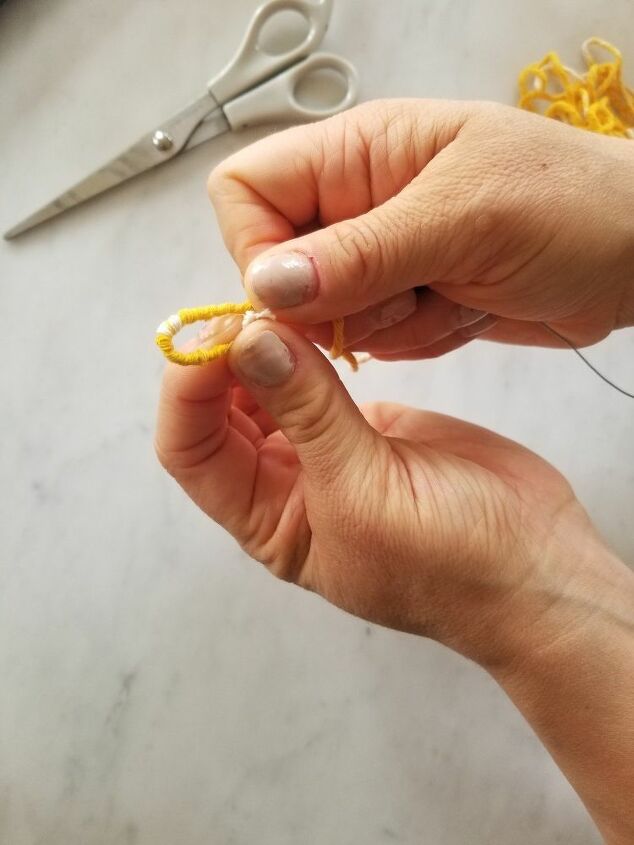
I found cutting about 24 inches at a time was good. I had tried to leave the string on the spool and do the wrapping, but it was awkward. When I cut a piece, it was easier to manage. Each time I added a new section, I would wrap over a small bit to blend.
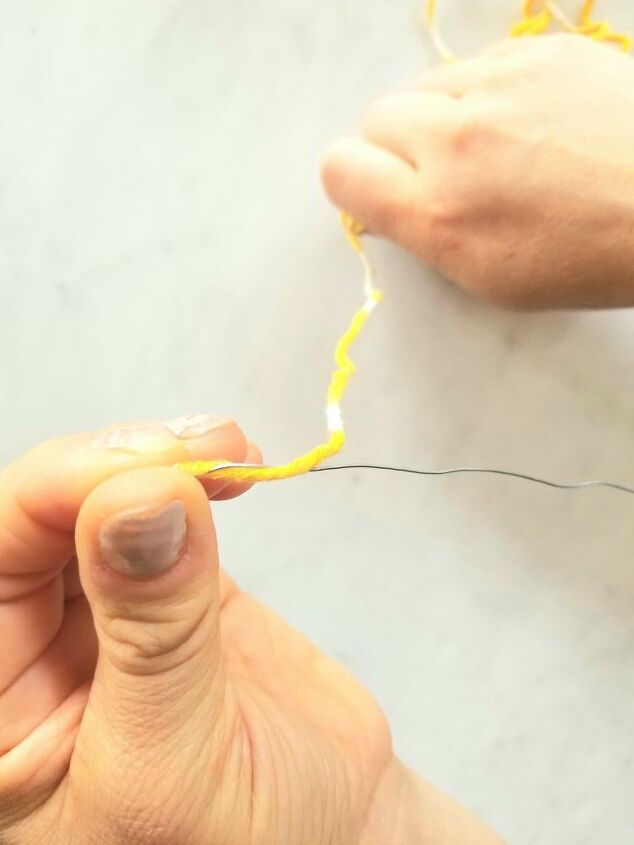
I hold the end of the wire and string with my left thumb and pointer finger, while using my right hand to wrap the string. I used two colors of string; both ends have a string that I had dyed yellow and the middle is the plain string.
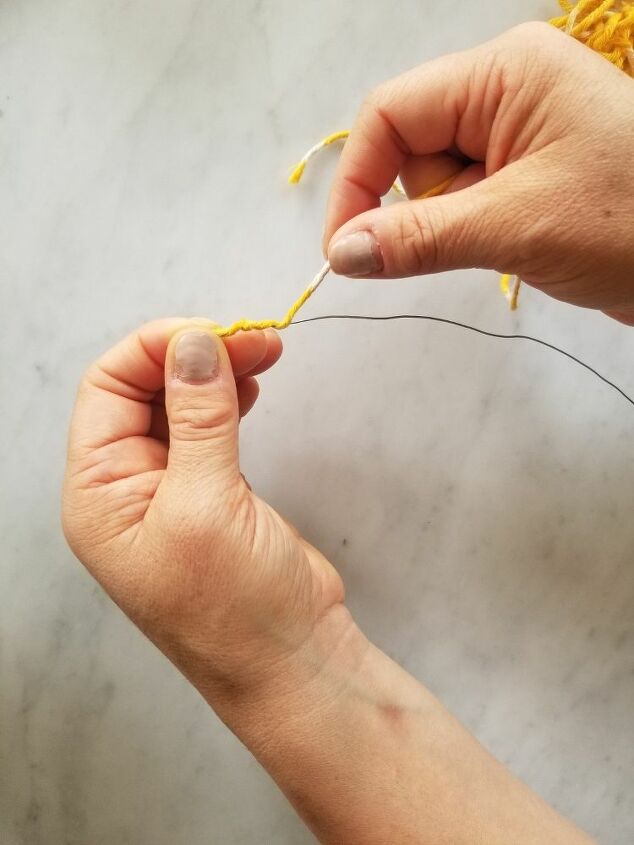
Every so often, I pull on the string to gauge how much more coverage is needed. Wind the string around the wire until you reach the opposite end.
The loops can be used to hang on hooks. They are also how I prevent unraveling. You could secure the loop with some hot glue too. I skipped glue because I change things up so often; I may repurpose these materials in a few weeks! You will complete this step again at the other end of the wire.

I decided to hang the picture wire from a shelf in my son's room. There are no hooks, so I just bent the wire around the edge. This shelf is high and my son won't be able to tug at it. If you are hanging this lower, within reach of kids, you would want to secure it more. If you like, you can tie on tassels too. Using some I made previously, I tied two on each of the end sections.
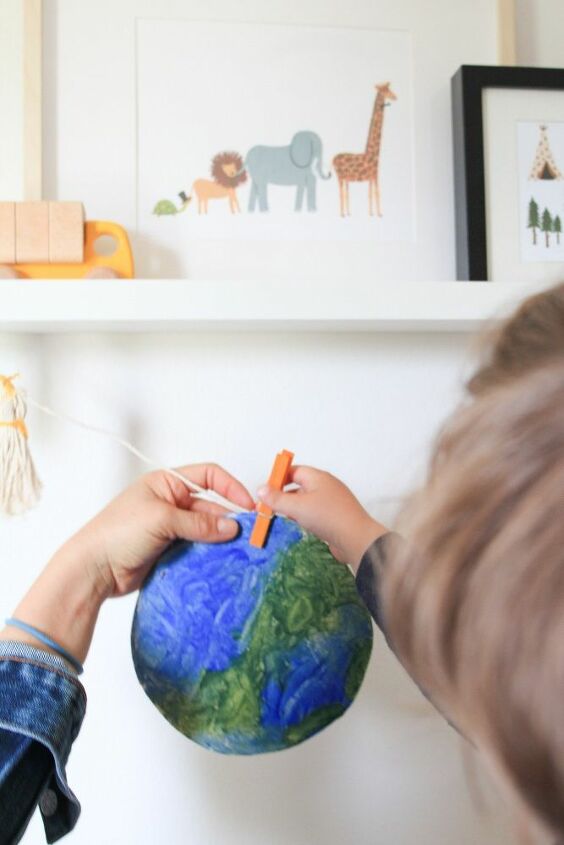
I started to hang the pictures and my son said "let me help!" I scooped him up and he joined in. He was really excited to see his work up!
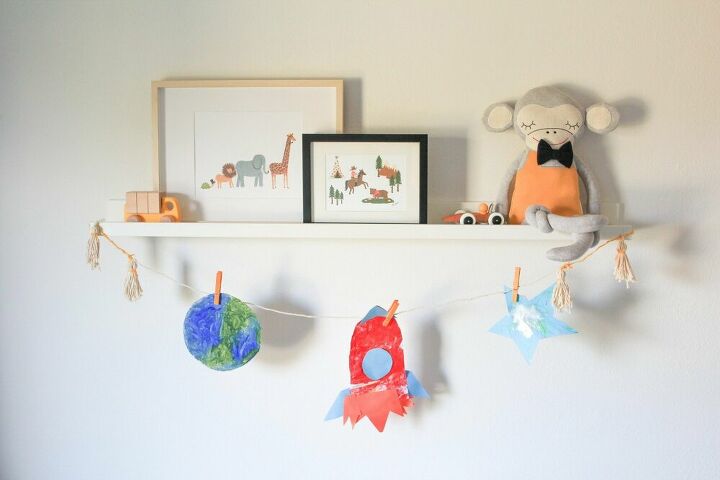
For this week, I chose to hang some of the outer space themed crafts. In the coming weeks we can switch it up and hang all of his animal projects, transportation crafts or let him pick! This was a fun way to let him decorate in his room using things he made.
Thanks for reading! Let me know if you have made an art garland like this. Was it for kids' work or adult work? What did you use?
Follow me in Instagram for more DIY and home decor!
Resources for this project:
See all materials


Frequently asked questions
Have a question about this project?